SeeTestAutomation- Connecting An iOS Device
Please note that this tool is classified as a Legacy tool. We recommend transitioning to our updated solutions to maintain optimal performance and security in your workflows. For more information on this matter, please reach out to technical support .
With SeeTest Automation you can fully control the iOS application being tested as well as the device's springboard. Controlling the device's springboard enables actions such as: Changing the device settings, Interaction with a non-instrumented application (like SMS, Contacts, Dialer…), Launch and kill application life-cycle.
Step 1: Prerequisites
-
Install iTunes onto your computer (while SeeTest Automationis closed so the USB drivers can update)
-
Connect the device via USB to your computer.
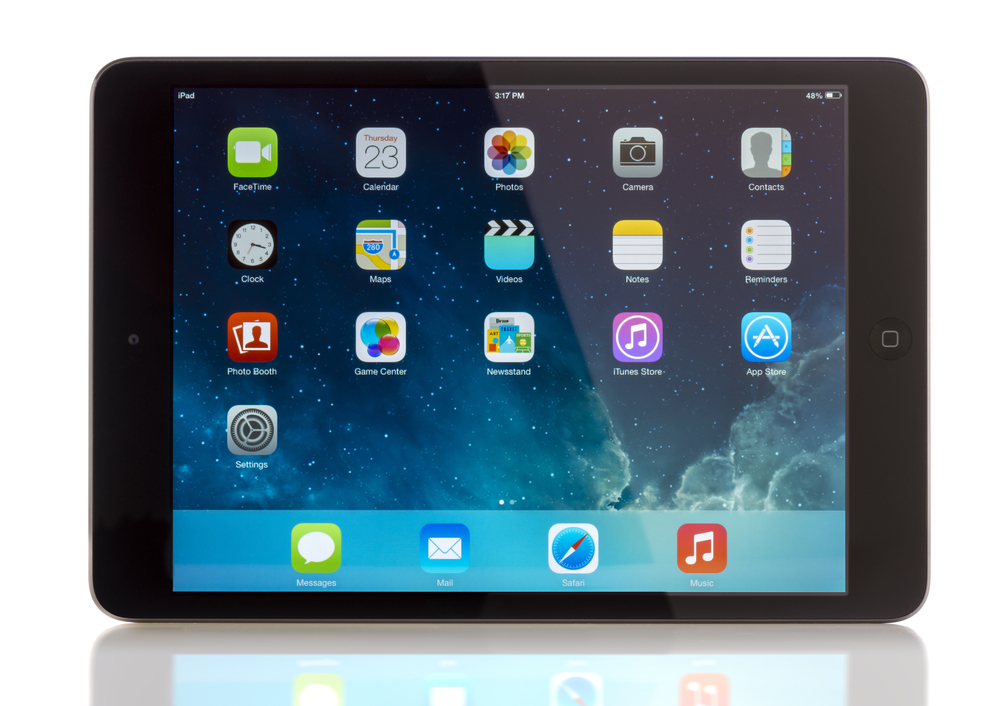
info*In order to work with an iOS device that is in landscape orientation, the device must be orientated to the right, not to the left (see image below). This means that the home button should be on the right side when the device is in landscape orientation.

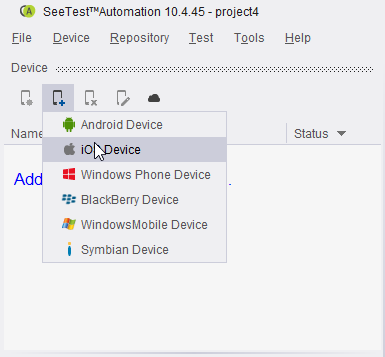
Step 2: In SeeTest Automation go to Device Manager and click the Add Device icon and select iOS Device.

Step 3: Choose to configure profile, or choose the method used to enable a device

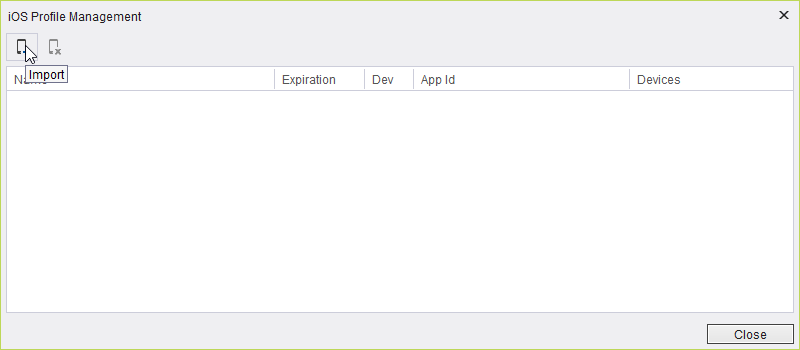
Step 4: Click on the 'Import' Button

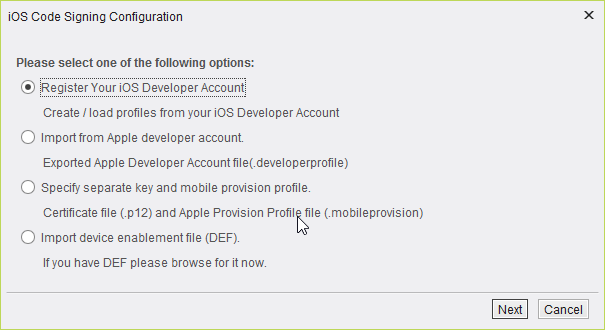
Step 5: Choose one of the following options to import a developer profile account certificates and mobile provision to SeeTest

From here you should continue for the next steps in the guide
- SeeTestAutomation - Register Apple Developer Account - Recommended Option! choose this option if you have an active membership as an iOS Developer
- SeeTestAutomation - Generate Device Enablement File (DEF) Using XDEF - Advanced users