SeeTestAutomation- Connecting Cloud Devices
Please note that this tool is classified as a Legacy tool. We recommend transitioning to our updated solutions to maintain optimal performance and security in your workflows. For more information on this matter, please reach out to technical support .
This guide will show how to connect to remote devices connected to the Cloud.
Note: Since version 12.0 SeetTest studio Is Compatible 4 sub-version to cloud e.g. SeeTest studio 11.7 is the maximum version that is compatible with SeeTestCloud 12.0
Prerequisites:
- Studio with a license that has the Cloud feature enabled.
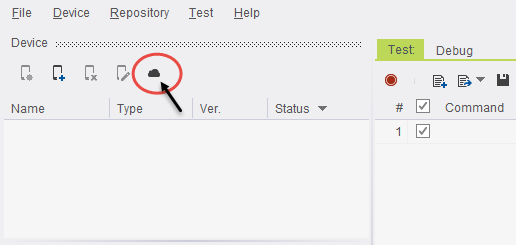
Step 1: In the studio, click on the Cloud icon to open the Cloud user module.
Step 2: Add the host IP and port to the Cloud Server machine.
Note: You can get the IP of the Server machine by typing 'ipconfig' at the command line. The default port that the Cloud server uses is the port specified during installation. If you did not override the default port, then this is port 80.
Step 3: Add the credentials given to you by the Cloud administrator.
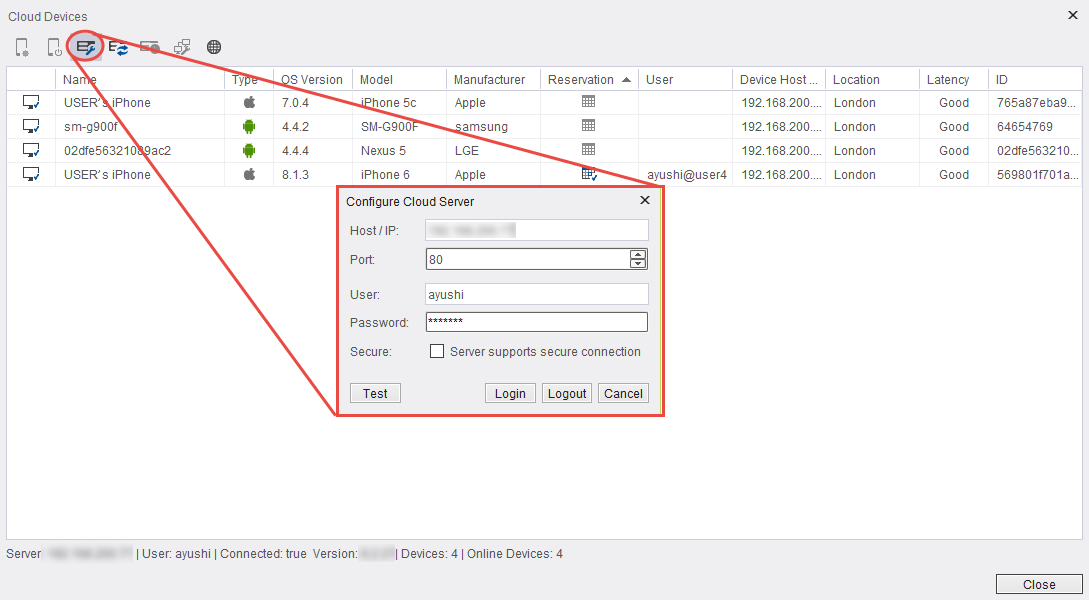
Step 4: Click on the 'Test' button to verify that the connection with the server is as expected.
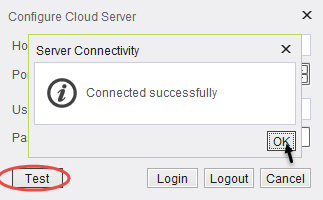
Step 5: If the connection is successful, click OK on both pop-ups ('Server Connectivity' and 'Cloud Server Connection'). If the connection failed - verify you entered the right IP and Port as well as Username and Password.
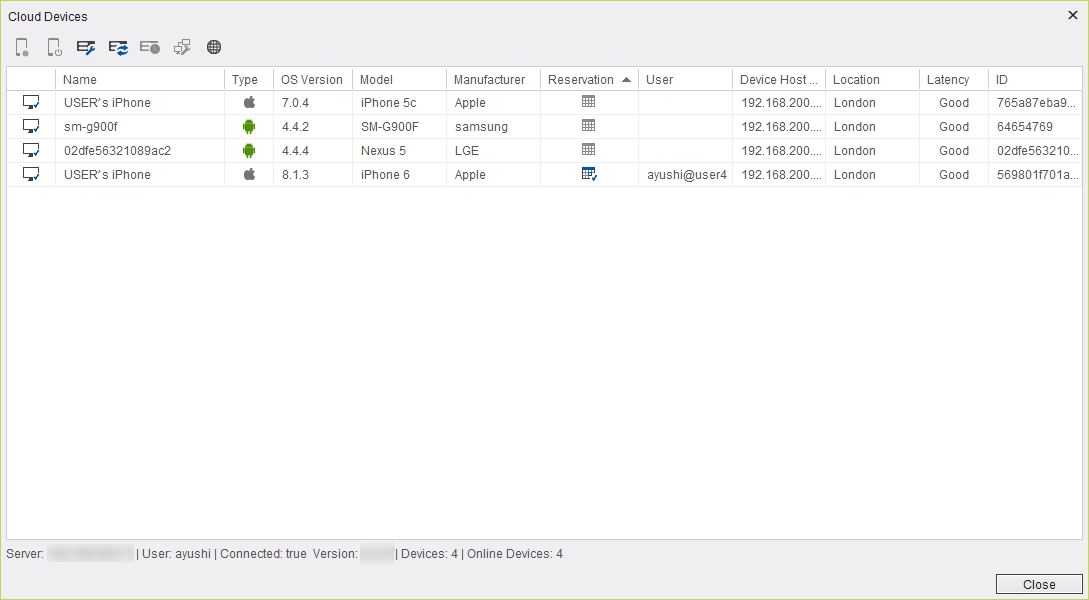
You will then see the available devices:
Further Possible Actions
- Reserve Device
- Release Device
- Configure Cloud Server
- Refresh Cloud Server
- Show Device Reservation
- Check Network Connectivity
- Open Cloud Web Portal in Browser
Reserve device
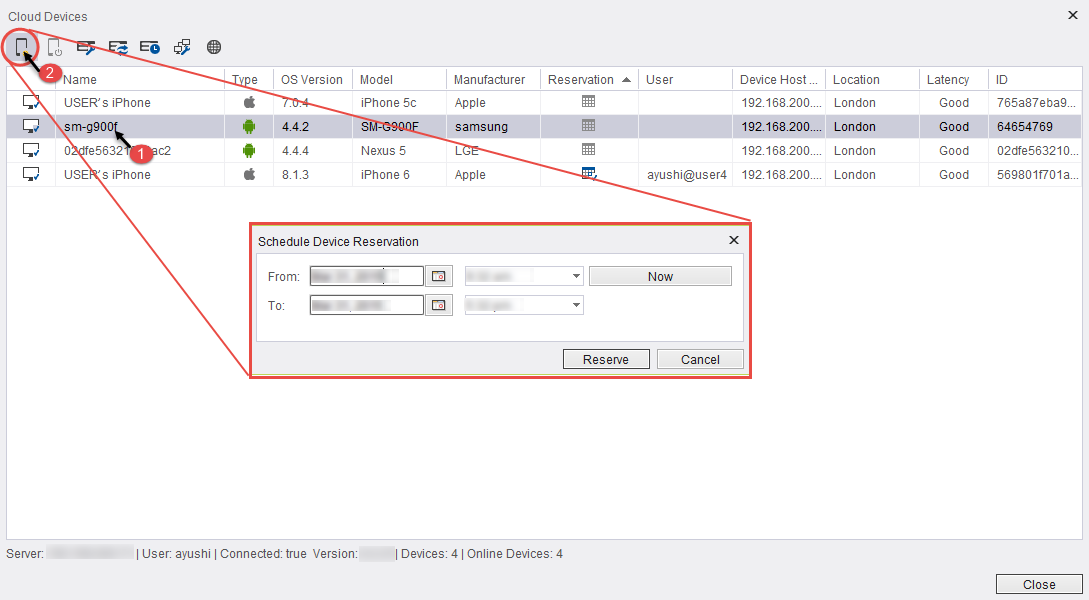
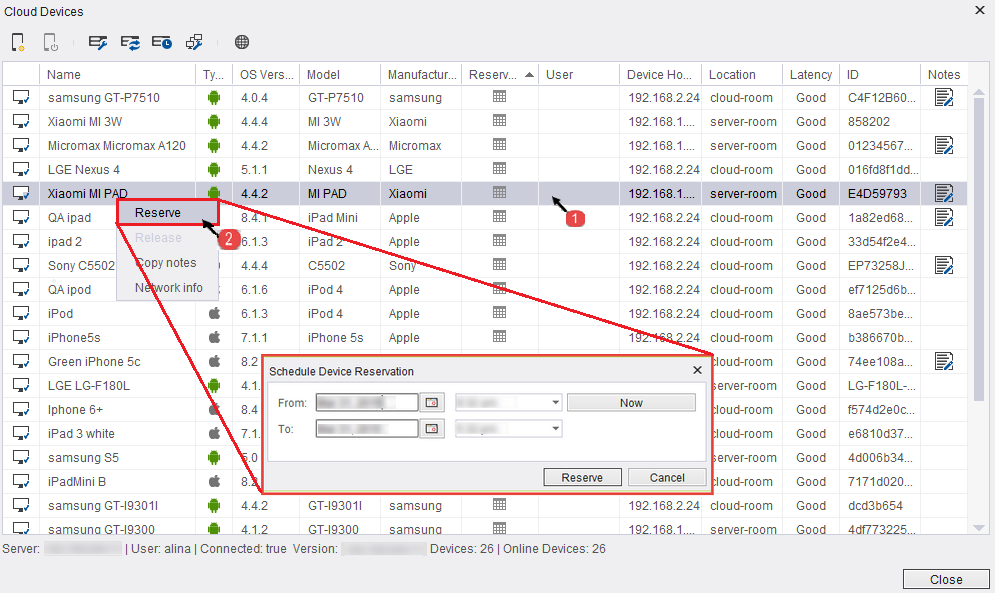
Steps 1 + 2: Select the device you want to reserve by one of the following ways:
- Click the row which corresponds to the device you would like to reserve in the "Cloud Devices" table (1) and then click "Reserve Device" button (2).
- Right-click the row which corresponds to the device you would like to reserve in the "Cloud Devices" table (1) and then select "Reserve Device" in the menu (2).
- Click the row which corresponds to the device you would like to reserve in the Device table (1) and then select "Reserve Device" in the menu (2).
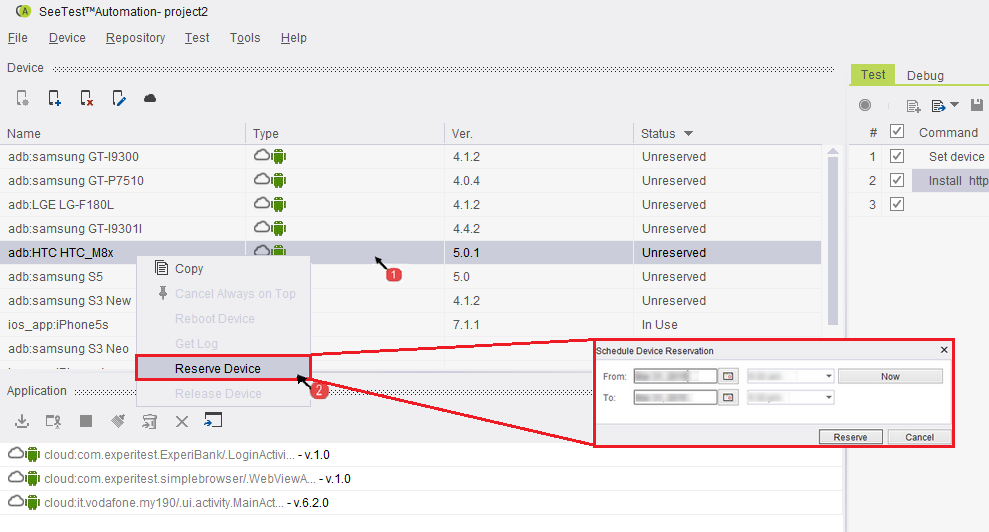
After the device is chosen, you will be prompted with a window to schedule the reservation.
You can reserve the device for any time in the future or immediately by clicking the 'Now button'.

Step 3: Click the reserve button to make the reservation.
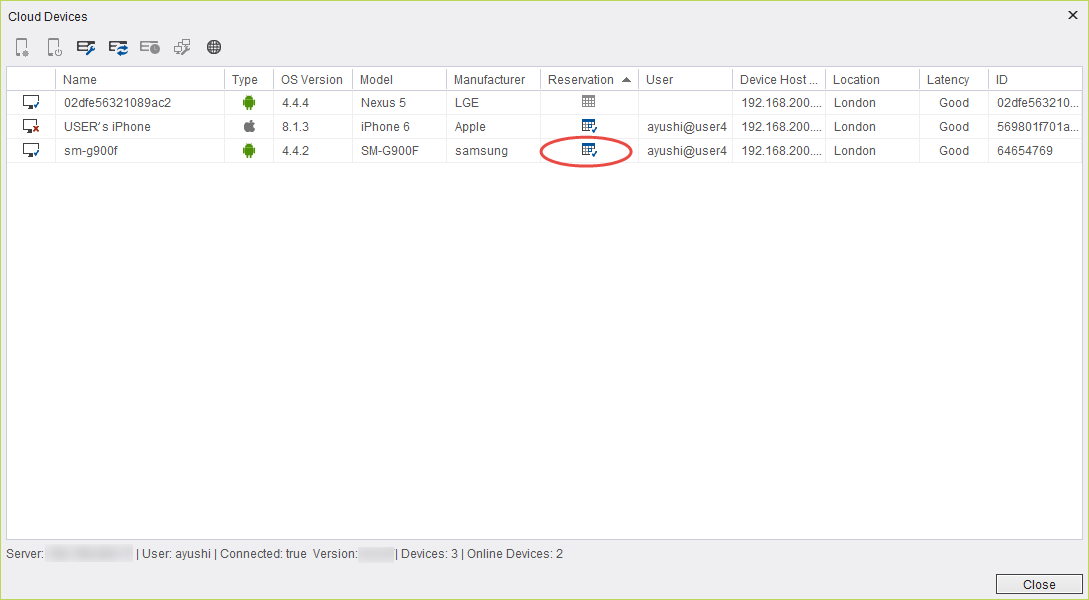
The device is now reserved.
The user will be promoted with the add device window.
After clicking OK, this device will be visible under the device tab.
Note: Notice the cloud sign near the device name, this way you can tell if the device is local or not.

Release device
After finishing working with the device, we would want to release it. We can do it from the "Cloud Devices" table or from the Device table.
- In "Cloud Devices" table:
Step 1: Mark the device you want to release.
Step 2: Click the Release Device button.
Step 3: Click Yes to confirm the action.
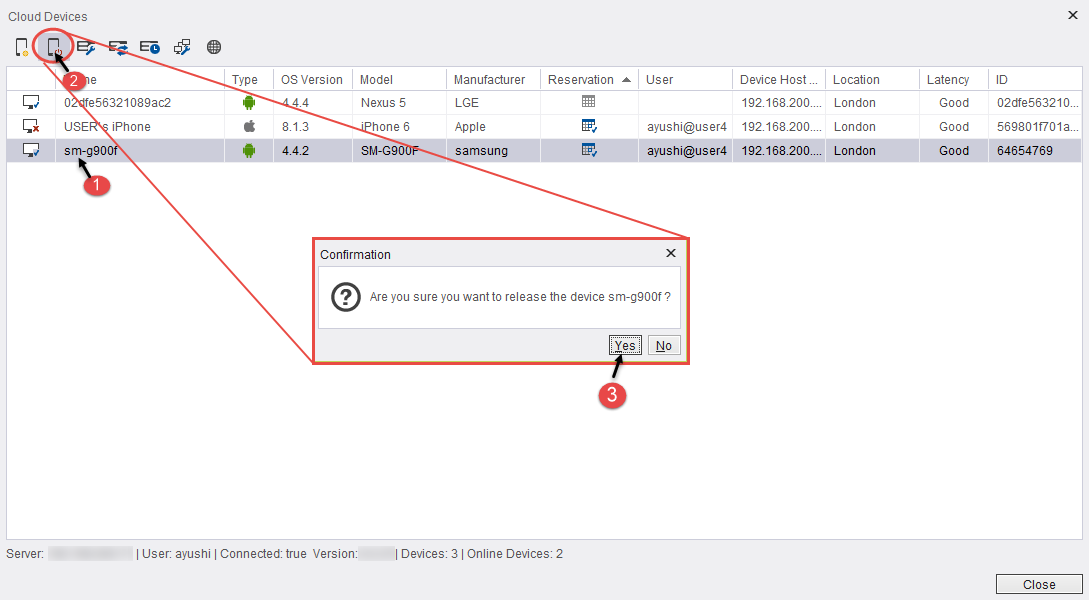
Or:
Step 1: Right-click the device you want to release.
Step 2: Select "Release Device" in the menu.
Step 3: Click Yes to confirm the action.
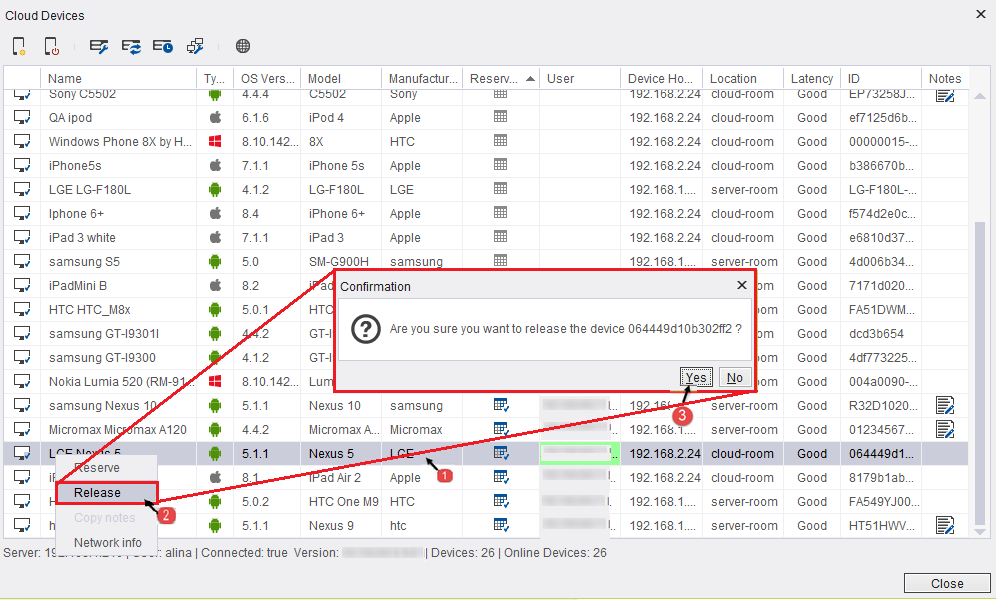
- In Device table:
Step 1: Mark the devices you want to release (you can select only cloud devices which you have reserved).
Step 2: Right-click on one of the corresponding rows.
Step 3: Select "Release Device" in the menu.
Step 4: Click Yes to confirm the action.
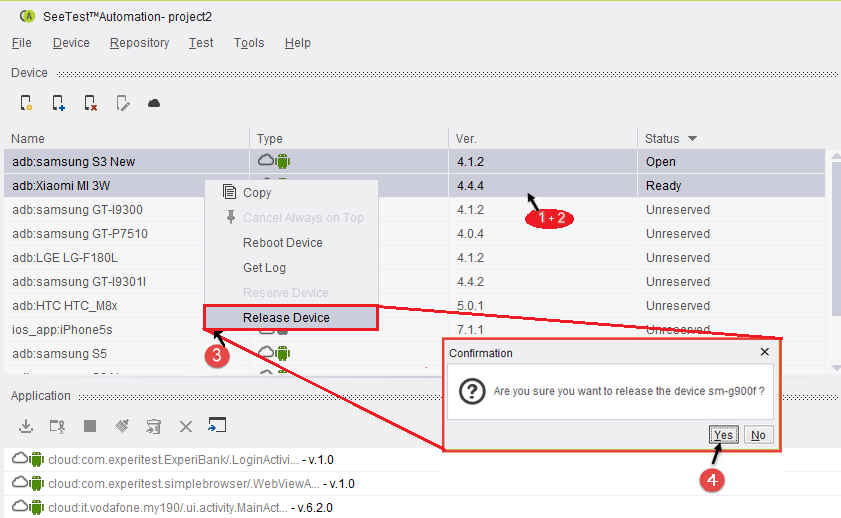
Show Device Reservations
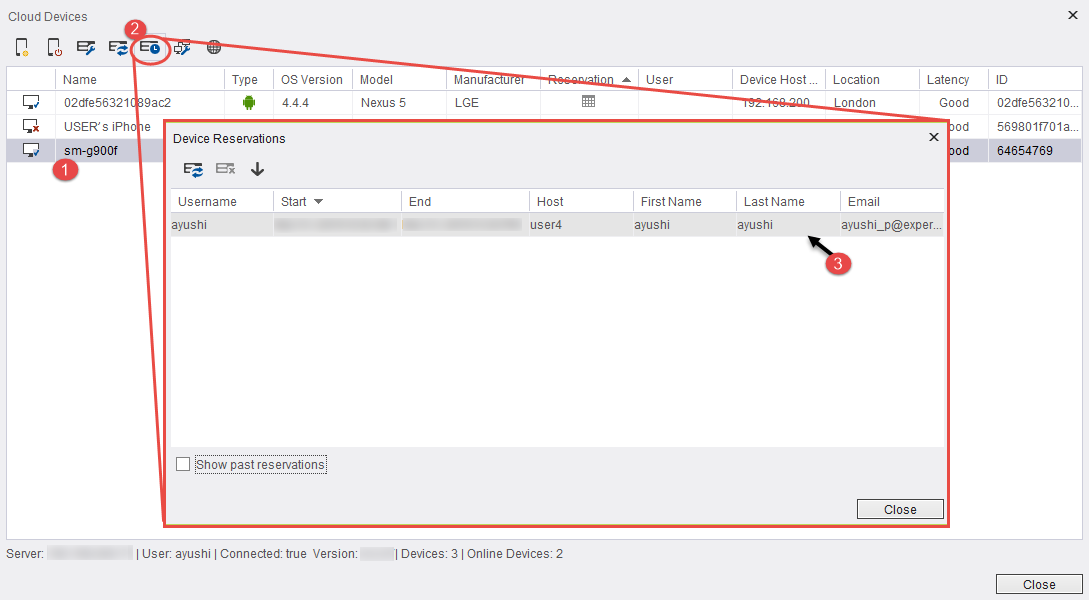
You can see device reservation in order to know when it is possible to reserve the device.
Step 1: Mark the device you want, in order to check its reservations.
Step 2: Click the show device reservations.
Step 3: A Window will be open with all device reservations.
Check network connectivity
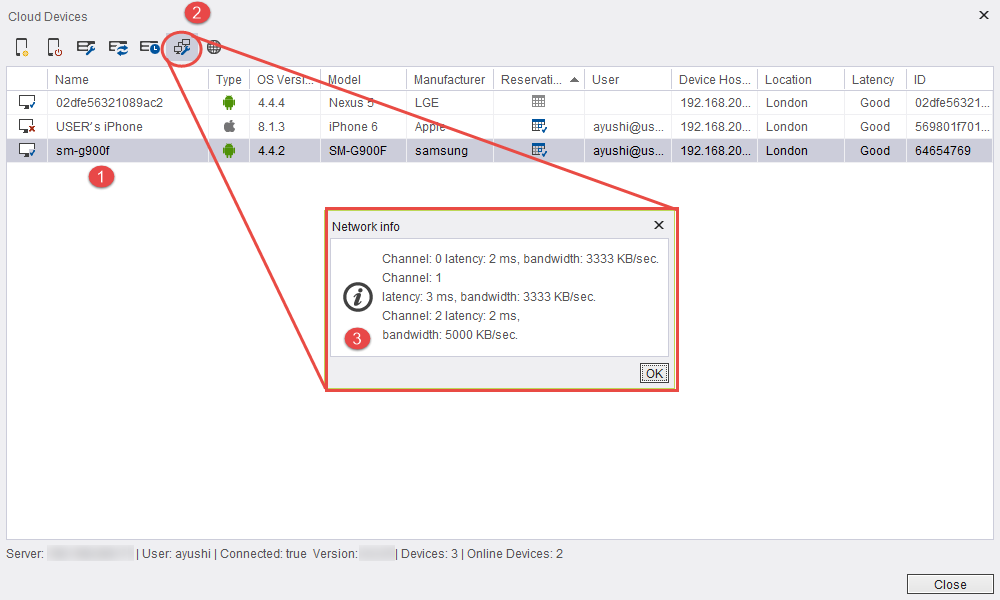
You can check network connectivity for any device in the cloud (latency, bandwidth).
Step 1: Mark the device you want to measure its network connectivity.
Step 2: Click the check network connectivity button
Step 3: A Window will open with the network info.
There are 3 channels checking the communication with the device.
Note: Bandwidth requirements are typically 100 Kbps per device. Some exceptionally high-resolution devices might require up to 320 Kbps.
Open Cloud Web Portal in the browser
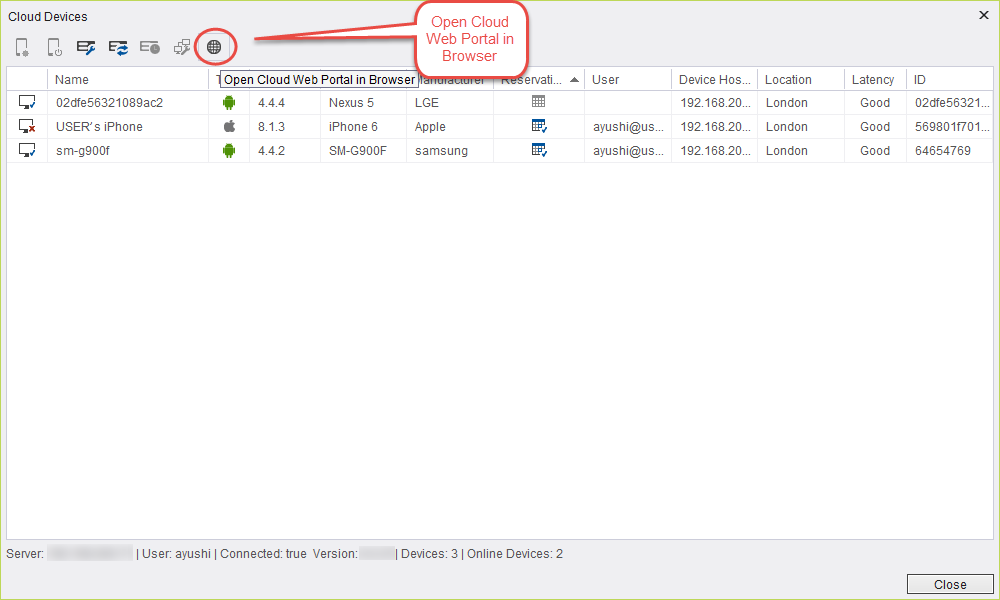
You can open the Cloud Web Portal in the default browser from the Cloud user module
Step 1: Click the Cloud web Portal button.
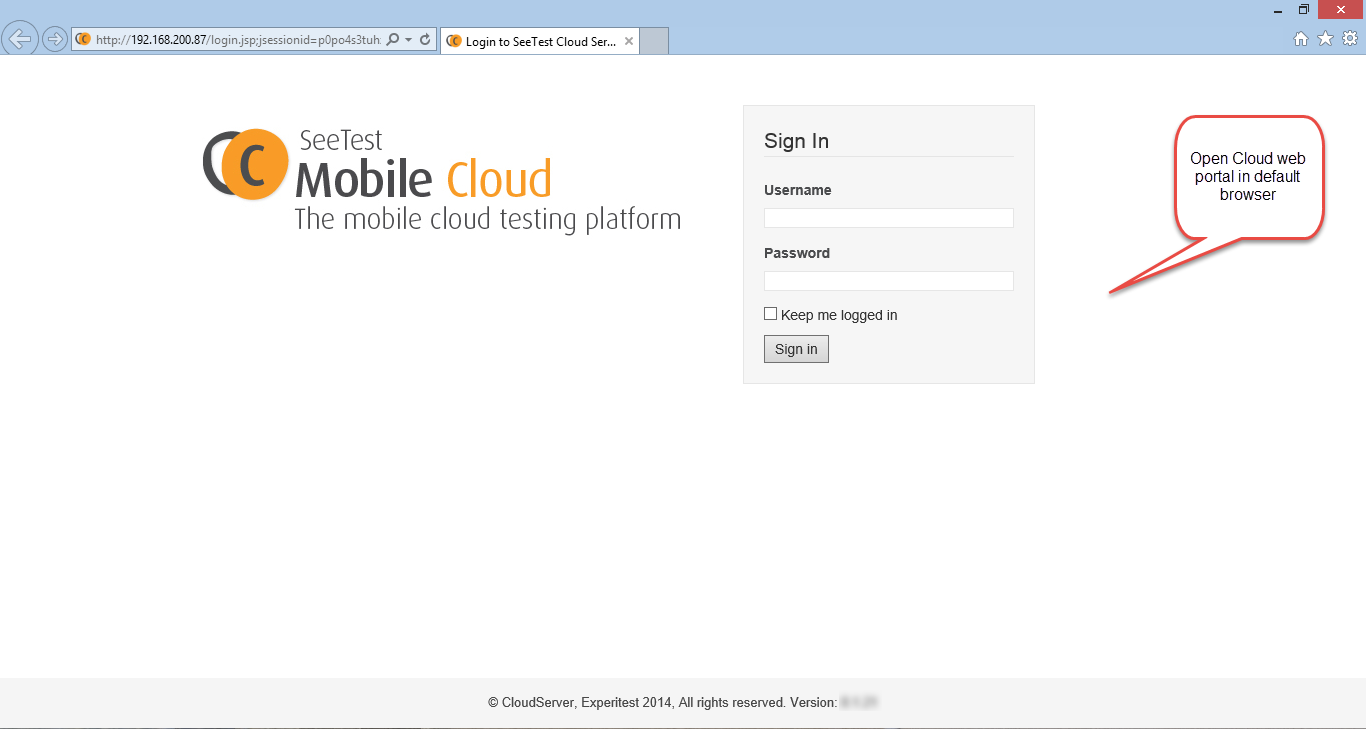
Step 2: Browser will be open with the login screen of the Cloud Web Portal.
Message when your device reservation is about to end
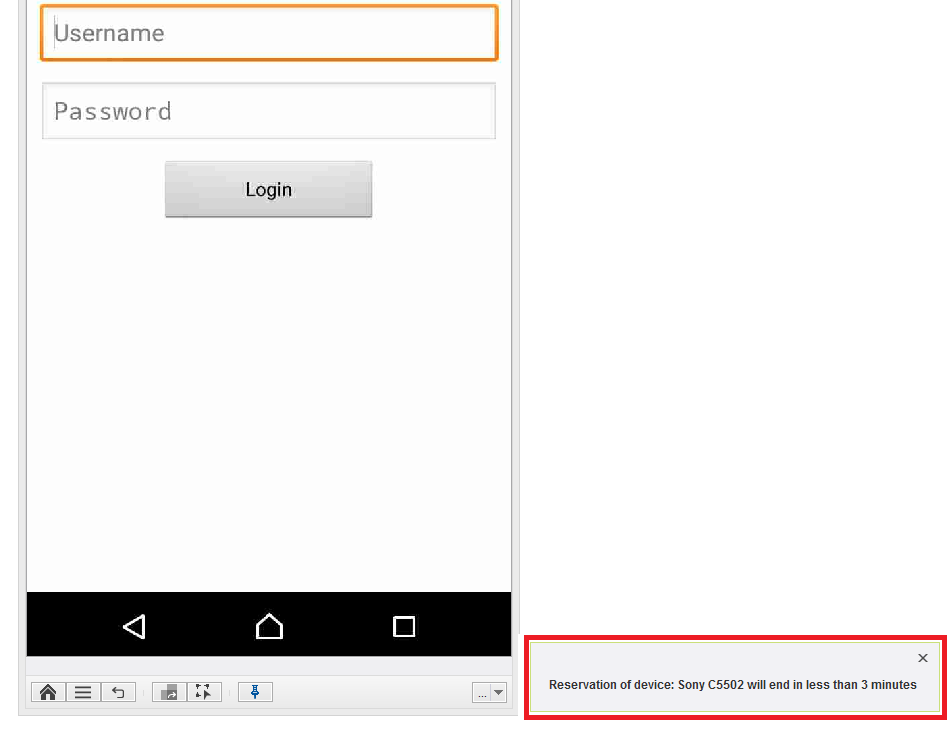
When the device screen is opened and your device reservation will end soon, 2 warnings are displayed:
The first warning is displayed 10 minutes before the device reservation will end.
The second warning is displayed 5 minutes before the device reservation will end.
Number of minutes before reservation ends can be configured in app.properties file, with following properties:
device.reservation.ends.soon.time.before.first.warning.in.minutes (default 10 minutes)
device.reservation.ends.soon.time.before.second.warning.in.minutes (default 5 minutes)
