SeeTestAutomation- Report Of Executed Test
Please note that this tool is classified as a Legacy tool. We recommend transitioning to our updated solutions to maintain optimal performance and security in your workflows. For more information on this matter, please reach out to technical support .
For every test run with SeeTestAutomation there is an option to get a report that summarizes the test.
Structure of report
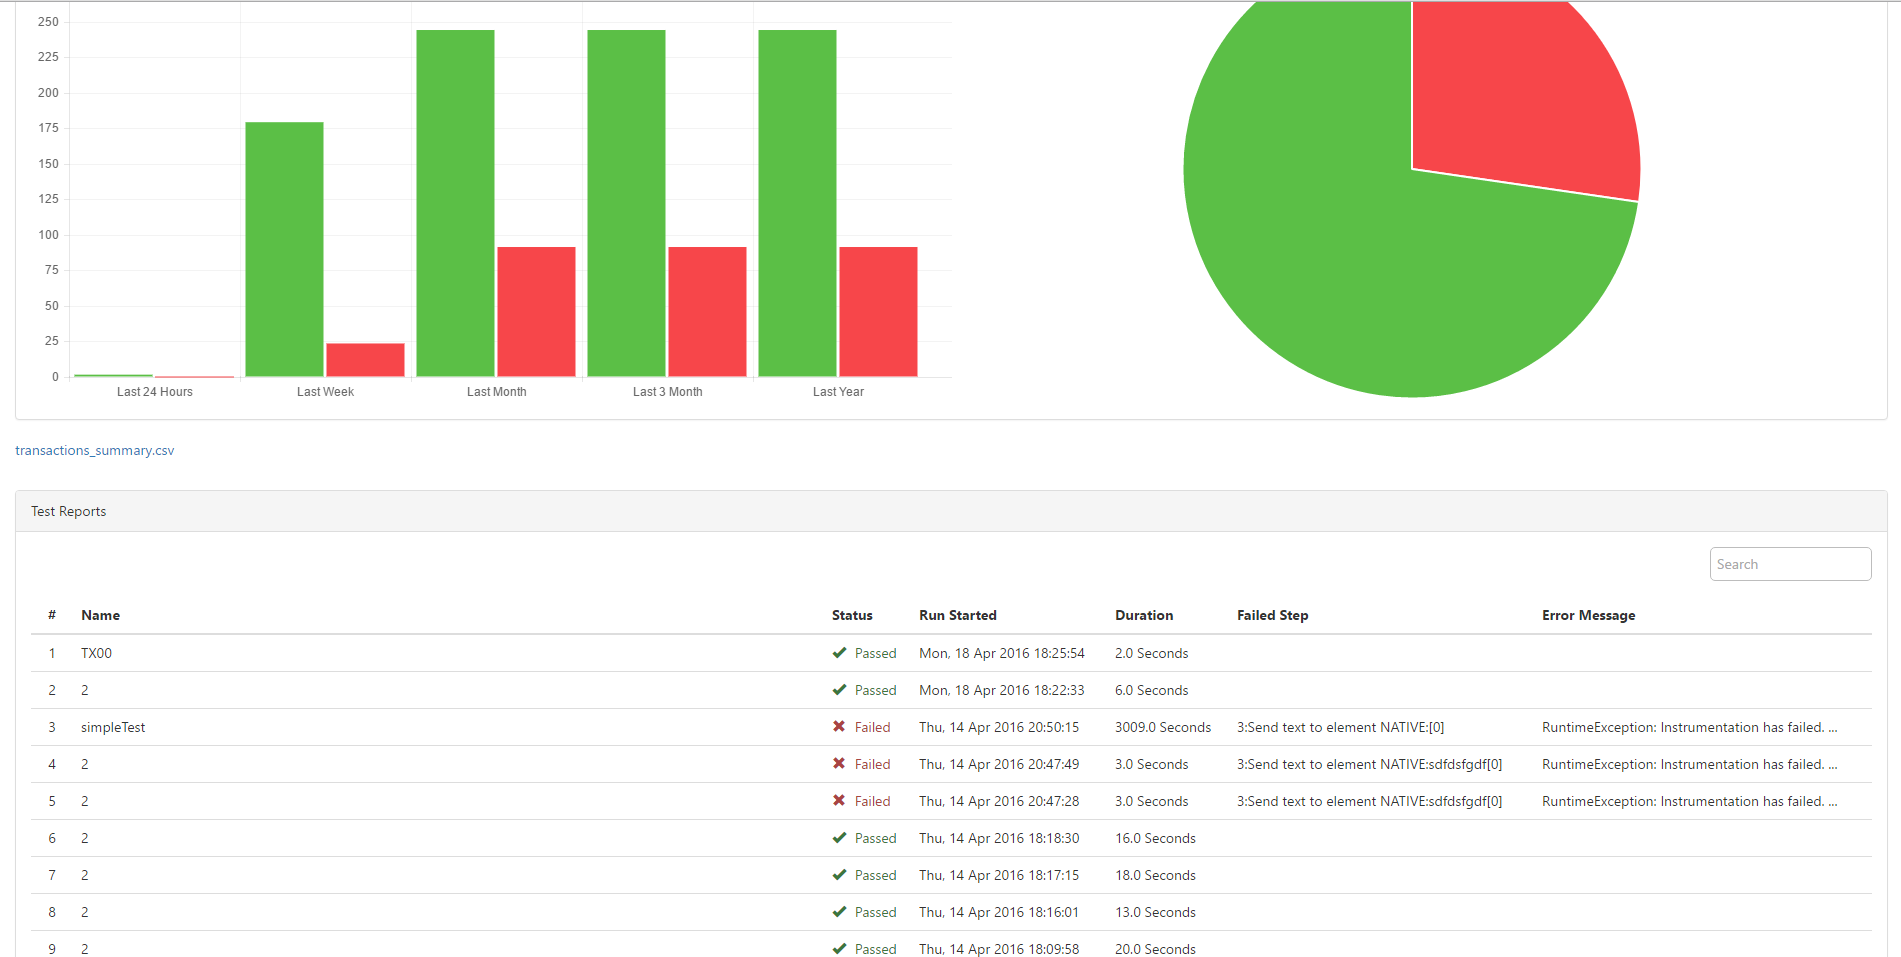
1. Summary Report: A consolidated report that gives you a diagrammatic representation of all recent test runs with passed tests and failed tests in the form of graphs and pie-charts.
-
-
For every test that failed there is summary about the reason it failed:
In the column: "Failed Step" is the step that caused the failure of that step
In the column: "Error Message" is the reason for the step is failure
If the the string in these column overflows the column, you can view the entire
-

-
-
Transaction summary:
Under the Charts section in the summary report there is a link to the "transaction_summary.csv" file.
In the "transaction_summary file you can see detailed information about the transactions executed
You can read more about transactions Here
-
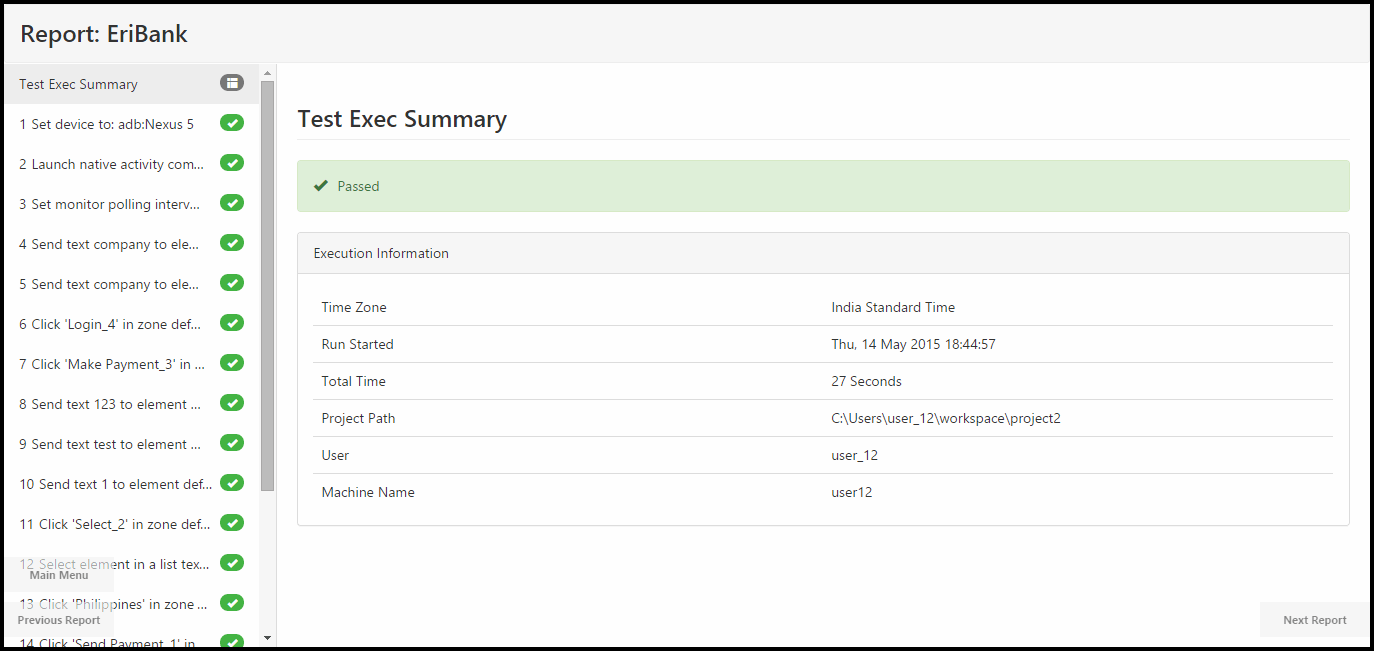
2. Test Execution Summary: The main page of each report, where all the main test data appears.
3. Test Steps Results
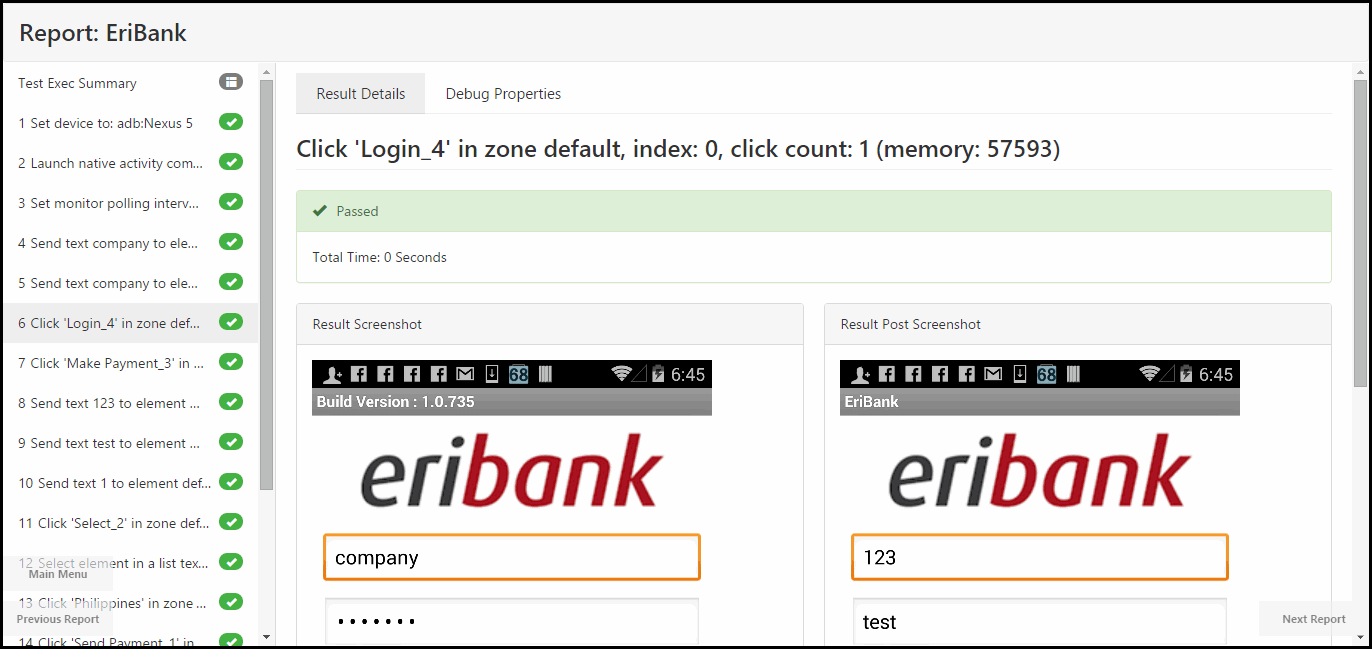
o Result Details tab: For each step you can see the step status and a short description of it along with a screenshot of the device during the command’s execution.
For commands Click, LongClick, ClickIn, ClickCoordinate, ClickTableCell, ElementListPick, ElementListSelect, HybridSelect, ElementScrollToTableRow, ElementSwipe, Swipe, SwipeWhileNotFound, ElementSwipeWhileNotFound, Drag, DragCoordinates, DragDrop, Flick, Pinch, Shake, ElementSendText, SendText, SendWhileNotFound, SetLocation, and ClearLocation, two screenshots will be available: taken before and after the corresponding action. Accuracy of the latter screenshot can be tuned by setting property screen.latency. The screenshot taken after the action can be hidden by setting the property "disable.post.images.in.report=true" in the app.properties file.
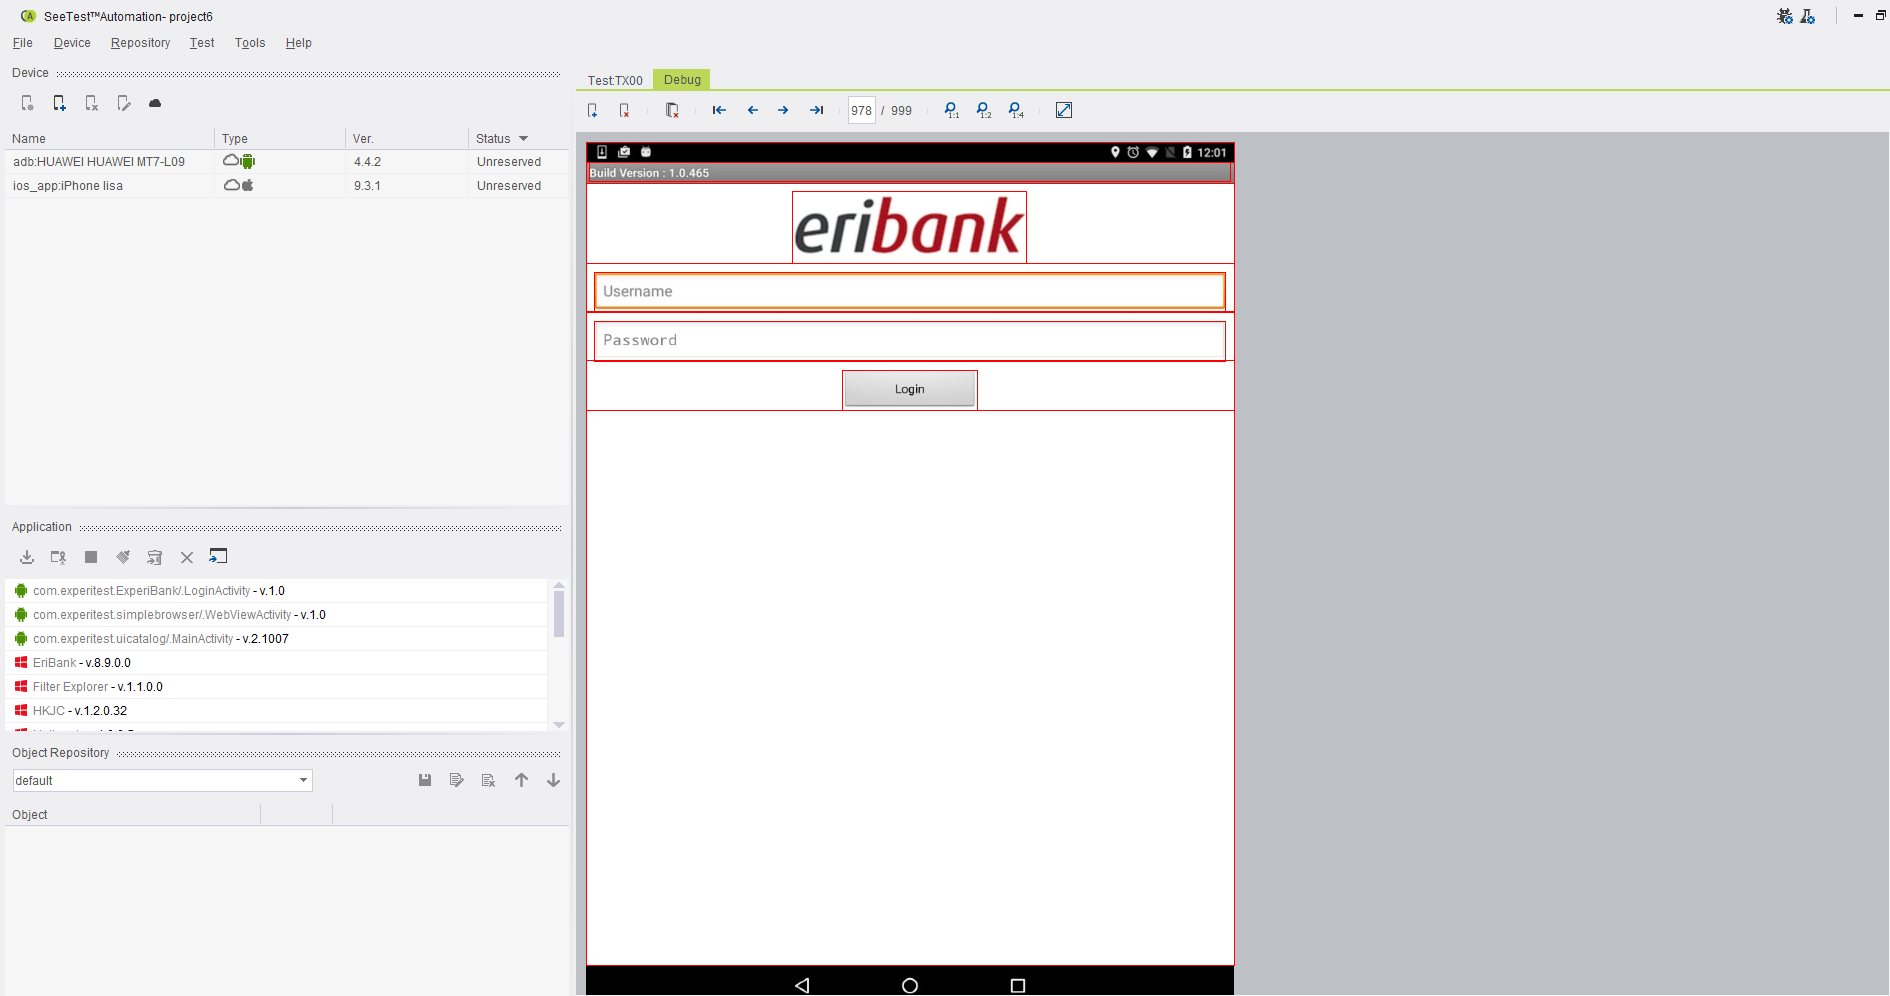
If a step has failed because of an error in identifying an element or in layout testing, a scene corresponding to the moment of the step execution-start is available. You can open it by clicking button ‘open’, as shown in the following figure:
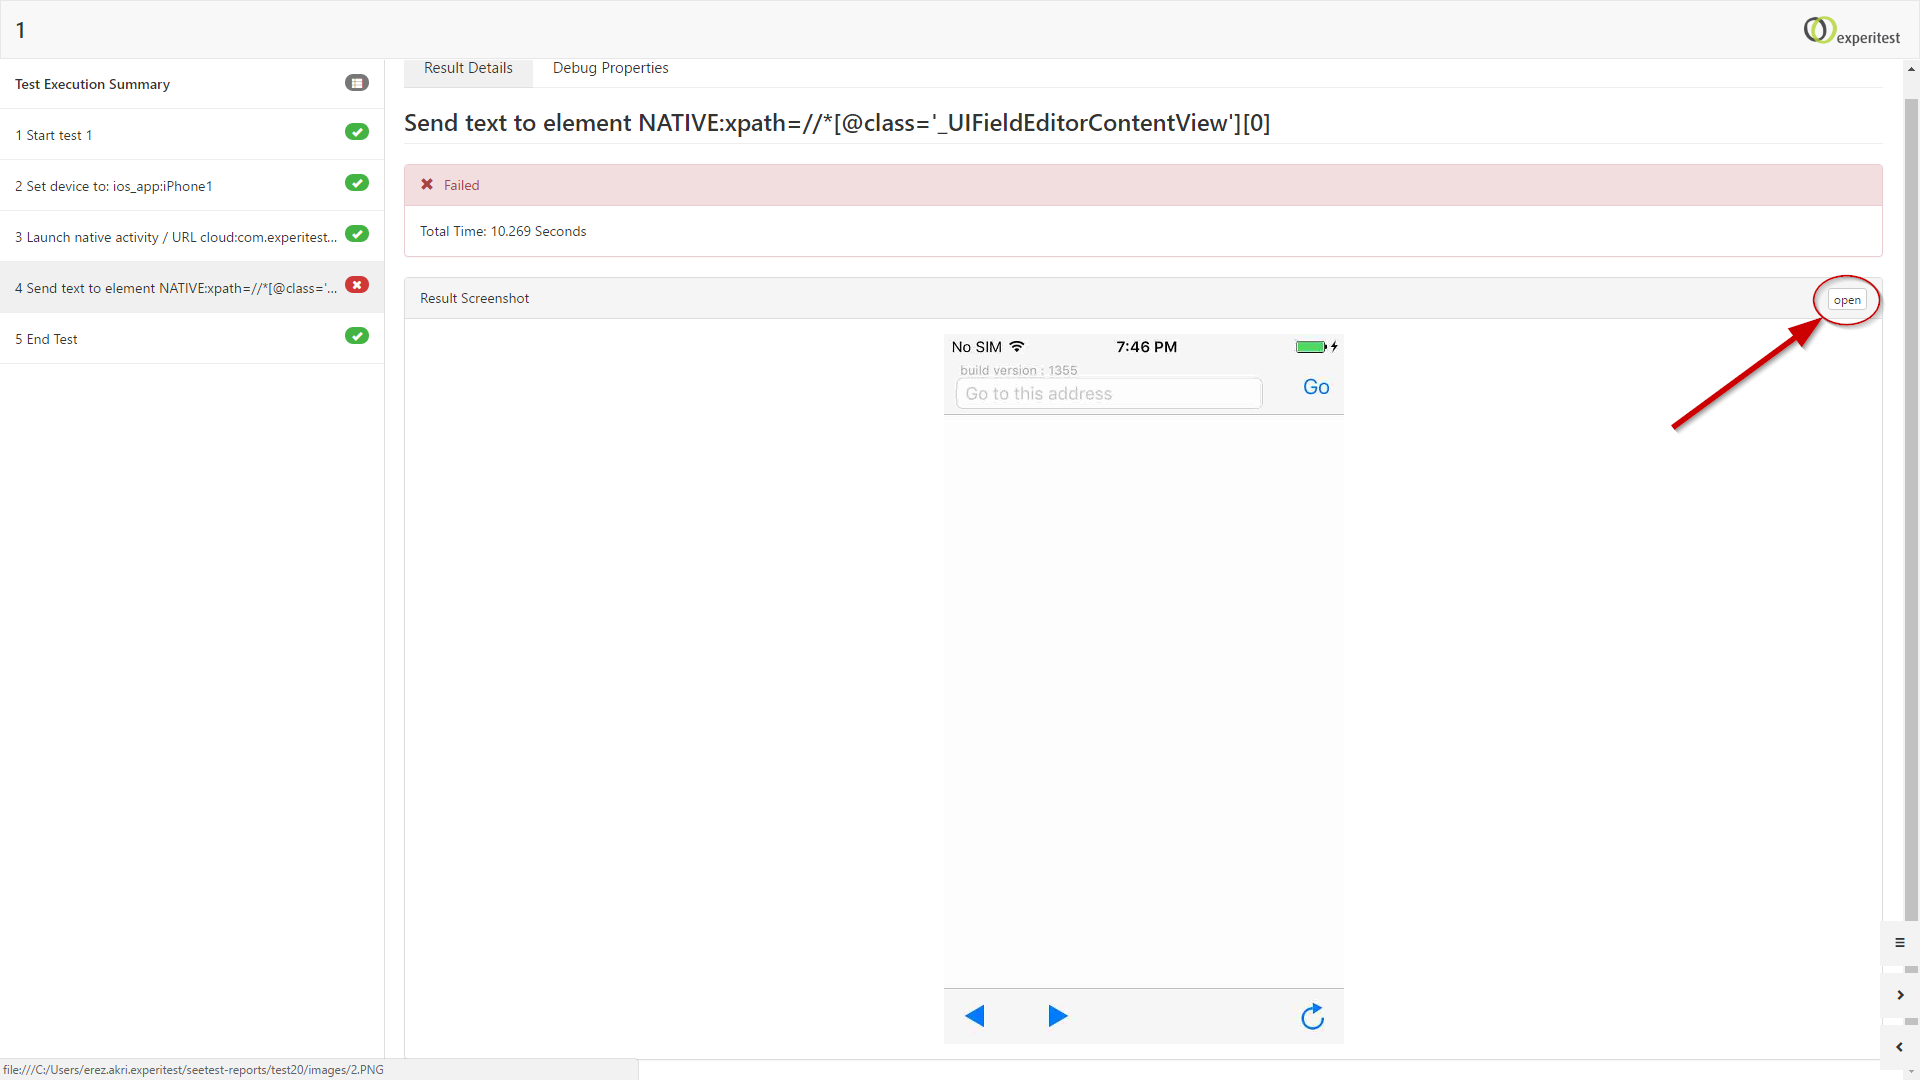
Clicking it will result in displaying the scene and the properties of its elements in ‘Debug’ tab of SeeTestAutomation UI:
o Data tab: Returns the extracted data of commands that are creating data .csv files, commands such as setDevice, getText, monitoring etc.
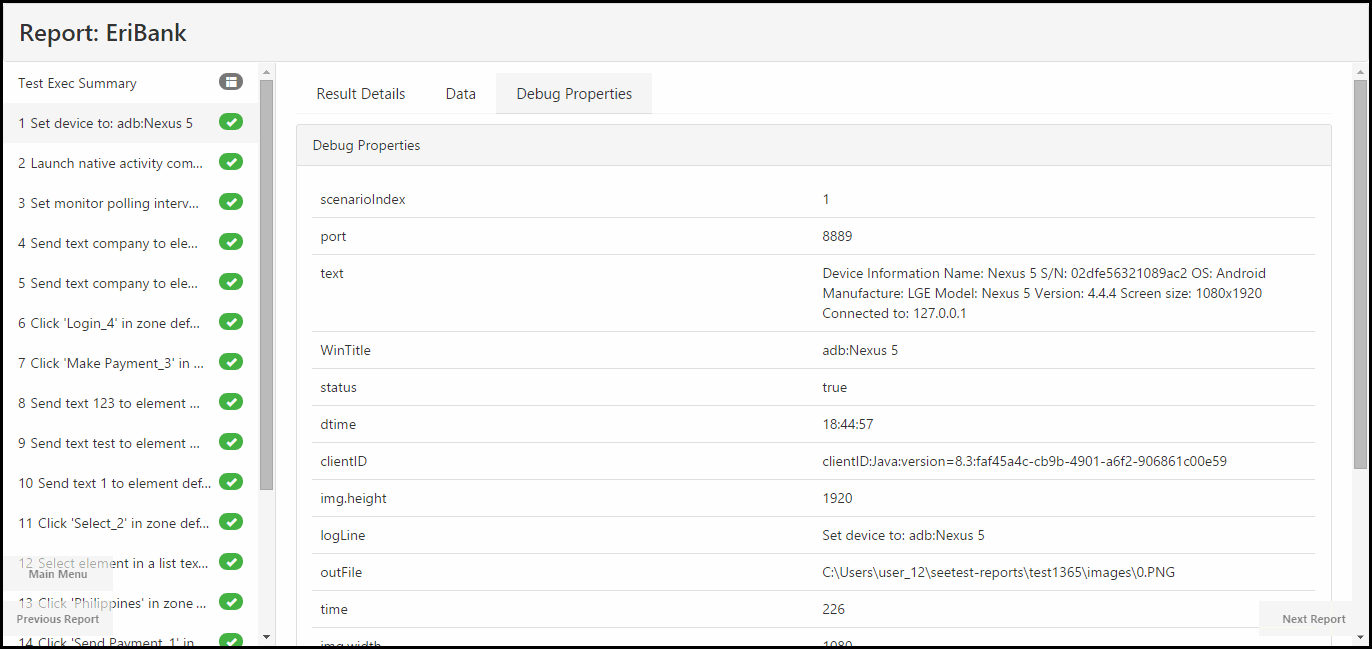
o Debug Properties tab: Show additional data that you can get from the GetLastCommandResultMap command. The data is not constant and varies according to device type, OS and command type.
Note: The generated report can be viewed in all browsers except Internet Explorer version 6 and below.
How to create the report
UI
For tests executed from the GUI, the report is created and generated automatically in html format.
To open the test, click the report button.
Also a menu will be available for all reports of recent test runs.
Checking the Launch Report box on the Tools menu will trigger the opening of the report on the browser once test execution is completed.
External testing framework report related methods
For tests executed from any of the supported code frameworks, need to configure the report to be created and generated.
-
setReporter: This method will be called on the test set up section. The method's parameters will define the report name, type (XML or PDF) and the path the report will be generated to.
-
generateReport: This method will be called on the tearDown of the test.
Additional capabilities on report configuration
Changing default behavior of Test Steps Results section
- report: Customization of the test step
- setShowImageInReport: Boolean command which determines if steps will have screenshots for the command.
- setShowPassImageInReport: Boolean command which determines if successfull steps will have screenshots for the command.
- SeeTestAutomation- SetShowReport: Boolean command which determines if steps will be displayed in the report
Adding videos and more screenshots to the report
-
SeeTestAutomation- Capture: Captures the current screen of the active device and adds it to the report in the specific step.
-
Capture A Scene: Captures the current screen of the active device and adds it to the report in the specific step with the given name.
-
SeeTestAutomation- StartVideoRecord: Command to record part of the test execution. Video will attached on the report.
A user can change the quality and the duration of the recorded video by setting the following properties in file app.properties : -
VideoBuilder.timeScalePerSecond=<FPS>
which sets how many frames are to be taken per second, i.e., the quality of the video. By default, the quality is four frames per second. For example, in order to set the video quality to seven frames per second, you can add the following entry to file app.properties:
VideoBuilder.timeScalePerSecond=7VideoBuilder.videoMaxSize=<SIZE_LIMIT_IN_BYTES>
which limits the size of the produced video file. The actual limit is slightly above<SIZE_LIMIT_IN_BYTES>bytes. For example, in order to limit the recorded video by approximately 1GB, you can add the following entry to file app.properties:
VideoBuilder.videoMaxSize=1000000000
When this property is not set, the video-file size is limited by nearly 100MB.
Monitoring
Values of the monitoring commands will be added to report
- SeeTestAutomation- GetCounter
- SeeTestAutomation- StartMonitor
- getMonitorsData: Link to the CSV file will be on the report
Summary Report
In order to edit the maximum number of reports that will be displayed in the "Summary Report", the following property can be added to the app.properties file (Can be located via Help >> Open Logs folder):
'reports.q.size = MAX_SIZE' - The maximum number of reports that will be displayed in the "Summary Report".
The default value 500 reports but it is configurable.
Note: In order for this change to affect, it should be set before the test runs (e.g. - If 1000 tests were executed and only afterwards the 'MAX_SIZE' value was set then only the last 500 reports will be shown and all additional tests from that point and on).
In order for this change to take effect, it is also necessary to restart SeeTest Automation.
PDF and XML Reporting
The user can change the default report format type. The default file type is "xml". To change the report type to PDF add to the app.properties file - " default.reporter.type=pdf "