SeeTestAutomation- Text Recognition Properties
Please note that this tool is classified as a Legacy tool. We recommend transitioning to our updated solutions to maintain optimal performance and security in your workflows. For more information on this matter, please reach out to technical support .
You can set the Object/Element's properties to be identified by Text Recognition. This is an image based recognition that uses the OCR (Optical Character recognition) algorithm to extract text from an image.
As this is an image based recognition, it is not recommended and should only be used only as backup.
To enable text recognition for an element on the Object Repository:
Step 1: Extract the element to the repository.
Step 2: Edit the element in the repository.
Example:
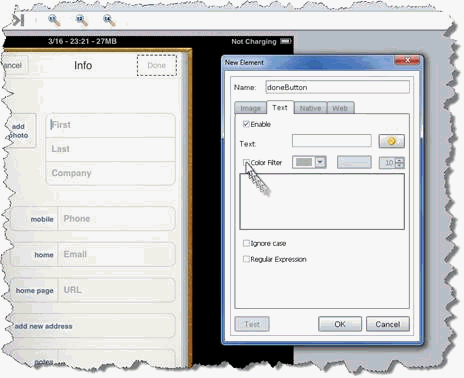
We will enable the text recognition properties for the 'Username' Text Field. The element is already in the Object Repository.
-
Right click on the 'Username' Object and click on 'Edit Element'.

-
Click on the "Text" tab and check the 'Enable' checkbox.
-
Click on the 'Refresh' button to automatically get the text from the object's image.
In some cases, the use of a color filter will be needed to get the text from the element.
SeeTestAutomation- Color Filter
This feature allows you to improve the Text Recognition option while setting the Element's Text properties.
When to use?
-
Case I: When the Text's color is very similar to the background color. For example:

-
Case II: When you want to read only part of the text, which has a different color. For example: !

Case I:
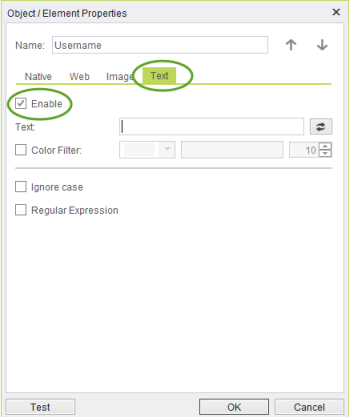
After you have extracted an Element, go to its properties, and select the 'Text' tab. Then click on "Enable".
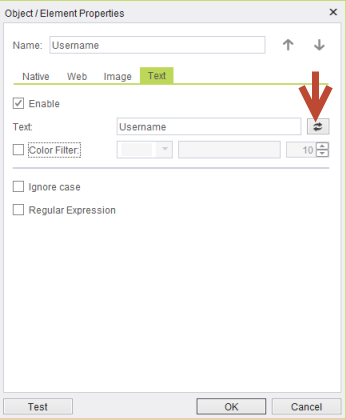
When you click on the orange 'Refresh' button, the text written in the Element should appear in the Text box near it. In some cases, like in this example, the color of the text is very similar to the background's color, and for that reason, SeeTestAutomation can't read it. In such a case you can use the "color filter" option.
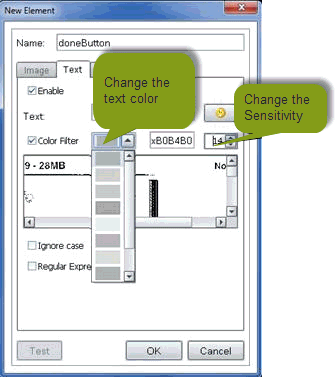
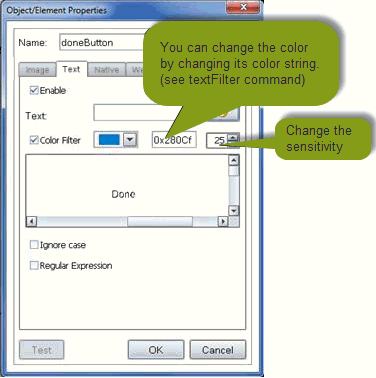
Step 1: Tick the 'Color Filter' box
!
Step 2: You will then see the scene where the Element was taken from, only it's filtered by the color of the text. You will then have to navigate to the Element.
!
Step 3: Choose the color you think will be more suitable for the text, and the sensitivity (between "0"-"100", when "0" is not sensitive at all), which is the range of colors that will not be filtered along with the color you chose.
Change these parameters until you think that the text is clear enough for SeeTestAutomation to identify it.
!
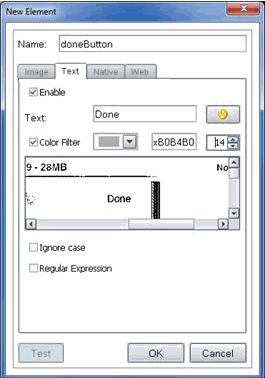
Step 4: When the text is clear enough, click on the orange 'Refresh' button, andSeeTestAutomation should then identify the text
!
Case II:
After you have extracted an Element, go to its properties, and select the 'Text' tab. Then click on "Enable".
When you click on the orange 'Refresh' button, the text written in the Element should appear on the Text box near it. In some cases, like in this example, you would like SeeTestAutomation to read only part of the text, that is written in a different color. In such a case, you can use the "Color Filter" option.
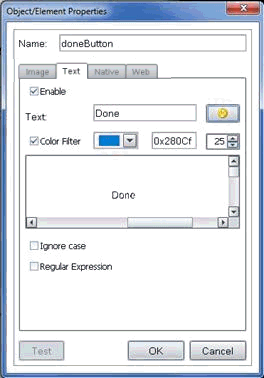
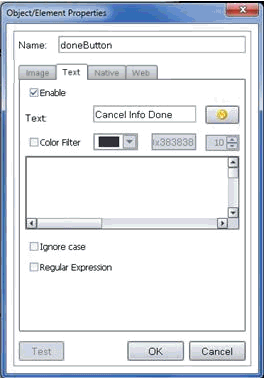
In this case, if you use the Text Recognition, SeeTestAutomation would return "Cancel Info Done" as seen below
!
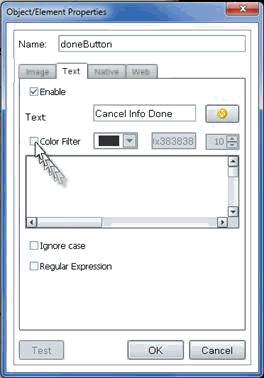
If you want it to only read the blue text only, do the following
Step 1: Tick the 'Color Filter' box
!
Step 2: Change the color to the text's color, and change the sensitivity if you think it's not clear enough
! Step 3: Click on the orange 'Refresh' button, and SeeTestAutomation should then identify the blue text.
!