SeeTestAutomation- Native Recognition Properties
Please note that this tool is classified as a Legacy tool. We recommend transitioning to our updated solutions to maintain optimal performance and security in your workflows. For more information on this matter, please reach out to technical support .
Users can use this recognition method in the following ways:
- After application preparation: Preparing Native/Hybrid Applications for Testing
- Using non instrumented mode
- Using the object spy mode: Using the Reflection's Control Buttons
Users can get the native properties of all objects on the screen.
Example
We will show how to use native recognition while using the Eri-bank Instrumented demo application.
Step 1: After logging into the application, you will see the Hybrid page in the application.
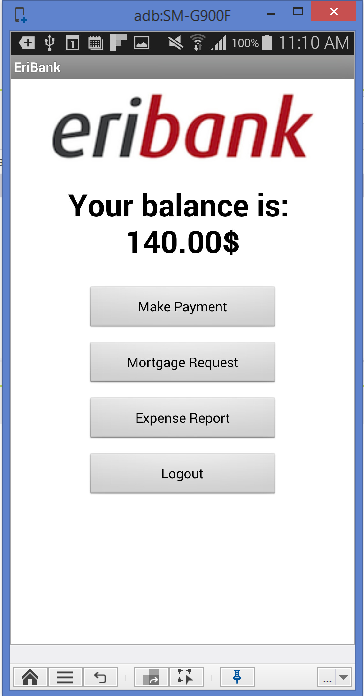
Step 2: Click on the 'object spy' button at the bottom of the device reflection.
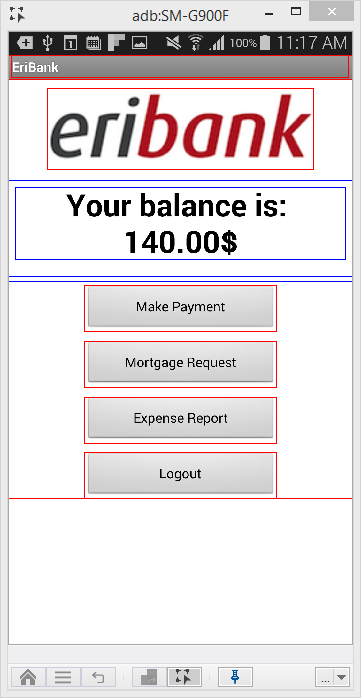
Step 3: Native elements are identified a red border in object spy mode.
By marking one such element, you can get its native properties.
- Click the 'Make Payment' button.
- Right Click on the 'Make Payment' element.
- Click on 'Extract Object'.
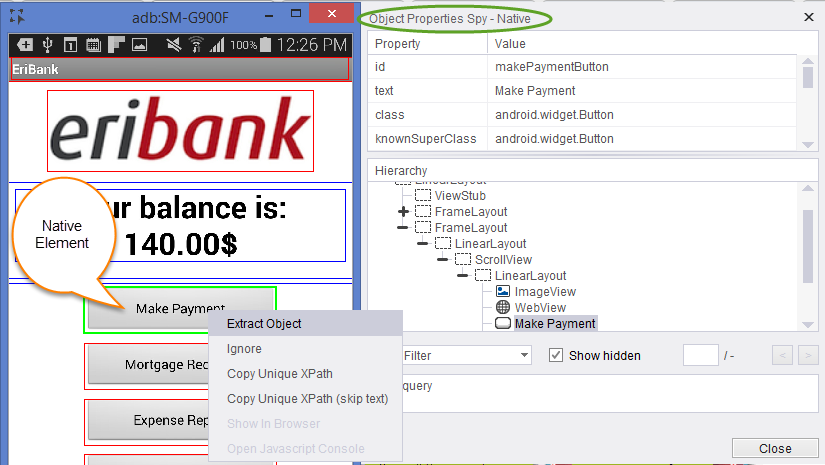
This will generate a pop-up in which you will need to choose from the following values:
- Create New Object: Regular extraction.
- Add to Existing: Add the element's property to an existing element.
In the element property, you will see 4 tabs, click on the Native tab, you will see 'Enable' checkbox ticked and the element's native properties will be written in the field below:
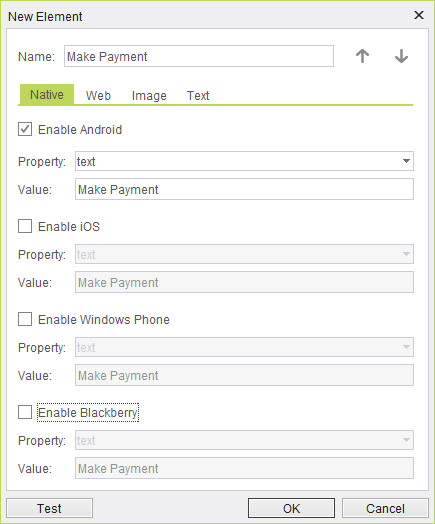
You can also add other OS Native properties for the same element in order to identify it on more than one OS.
SeeTestAutomation- Non-Instrumented Native Recognition
SeeTestAutomation can also recognize some Native elements in non-instrumented applications/screens on devices running under either:
-
iOS 7 or above
-
Android version 4.1 or above
For This capability is particularly useful when creating automated test scripts which involved the settings of the devices.
-
In iOS, to be able to take advantage of SeeTestAutomation's non-instrumented Native Recognition capability, you must first set the non-instrumented mode on the device (which requires iOS sign configuration.) Please refer to Connecting an iOS Device.
-
In Android, SeeTest supports dumping UI elements that have accessibilityNodeProvider. Custom views do not provide the accessibility to elements nodes by default. Therefore, if they don't have accessibilityNodeProvider implemented for them, SeeTest will not be able to retrieve non-instrumented dump from them. For example, Samsung/LG devices' system-keyboards do not provide this accessibility. In this case, if you wish to retrieve dump from keyboard, you will need to download another keyboard from playStore that is accessible - such as Google's Keyboard and set it as your default keyboard on these devices. As for non-system apps, you can retrieve instrumented dump, instead, for native recognition, after you instrument the app.
When using non-instrumented Native Recognition, SeeTestAutomation's Object Spy will highlight the application's elements by placing them in yellow rectangles, as can be seen below.
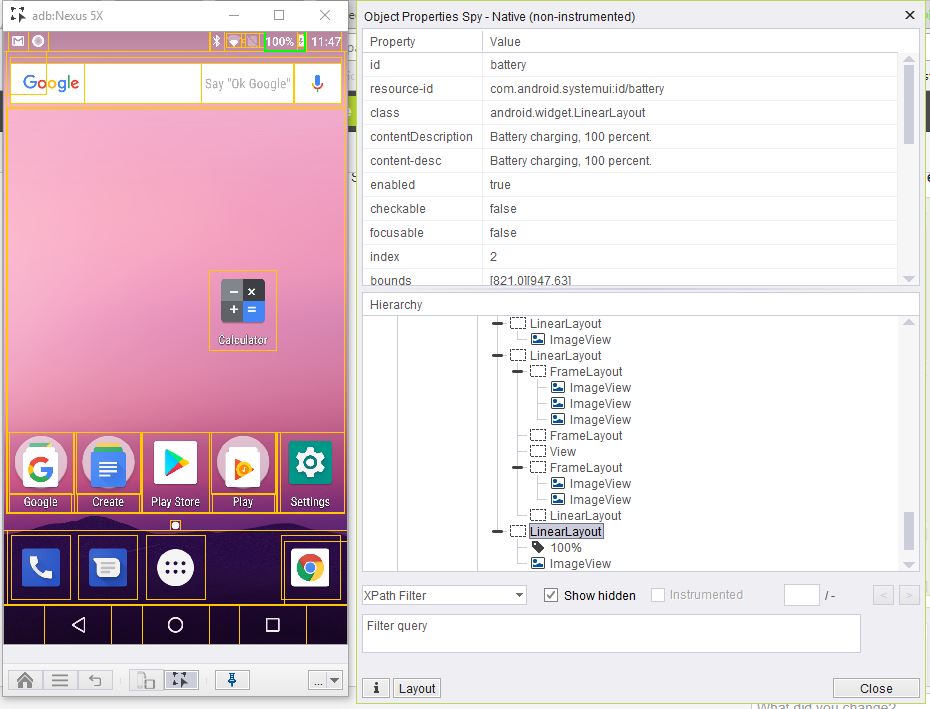


You can utilize such non-instrumented Native elements just as Native elements are defined for instrumented applications, meaning that you can use them to test the application by either:
- Dynamically defining them during the recording of a test script, by assigning each such property the value "NATIVE" for its Zone, or
- Refining their definition later on through SeeTestAutomation's Repository by making them properties of different types and for different devices under the Native tab of the Object/Element Properties dialog box.