Managing Sprint Execution in Rooms2
The Sprint Execution view serves as the central, dynamic workspace for development teams to monitor and manage all the in-progress work items within a sprint. This visual interface is designed to provide immediate clarity on the status of Stories, Defects, and Tasks, fostering transparency and efficient workflow management.
Key Features and Functionality
Visual Workspace The view presents a highly intuitive and interactive board, offering a real-time snapshot of the sprint's progress. It transforms the often-complex dynamics of a sprint into an easily digestible visual format.
Columns are used to visualize workflow status Work items are organized into distinct swimlanes, each corresponding to a specific workflow state. For instance, you might see swimlanes titled New, In Progress, In Review, Blocked, and Done. This clear categorization allows team members and stakeholders to quickly identify where each story and defect stands in its development lifecycle.
Easy status tracking When you observe which swimlane a story or defect resides in, you can track the current status. As work progresses, work items are moved across these swimlanes, which provides a tangible representation of workflow progression. This mechanism helps teams:
-
Identify Bottlenecks: Easily spot where work is accumulating, indicating potential impediments.
-
Maintain Transparency: Provide instant updates on sprint health to all team members and relevant stakeholders.
How to Access Sprint Execution in Rooms 2
- Click the hamburger menu
 > Rooms > All Team Rooms.
 - Select a Team Room name and click Try Rooms 2 button
 on the right side of the selected Team Room.
 - In the Sprint Views page, click Sprint Execution (SE).
You can click the Expand Q or Collapse Q icon at the bottom of the screen to see the full form or abbreviation of the Sprint Views. The available views are:
- Sprint Planning (SP)
- Sprint Execution (SE)
- Sprint Retrospective (RE)
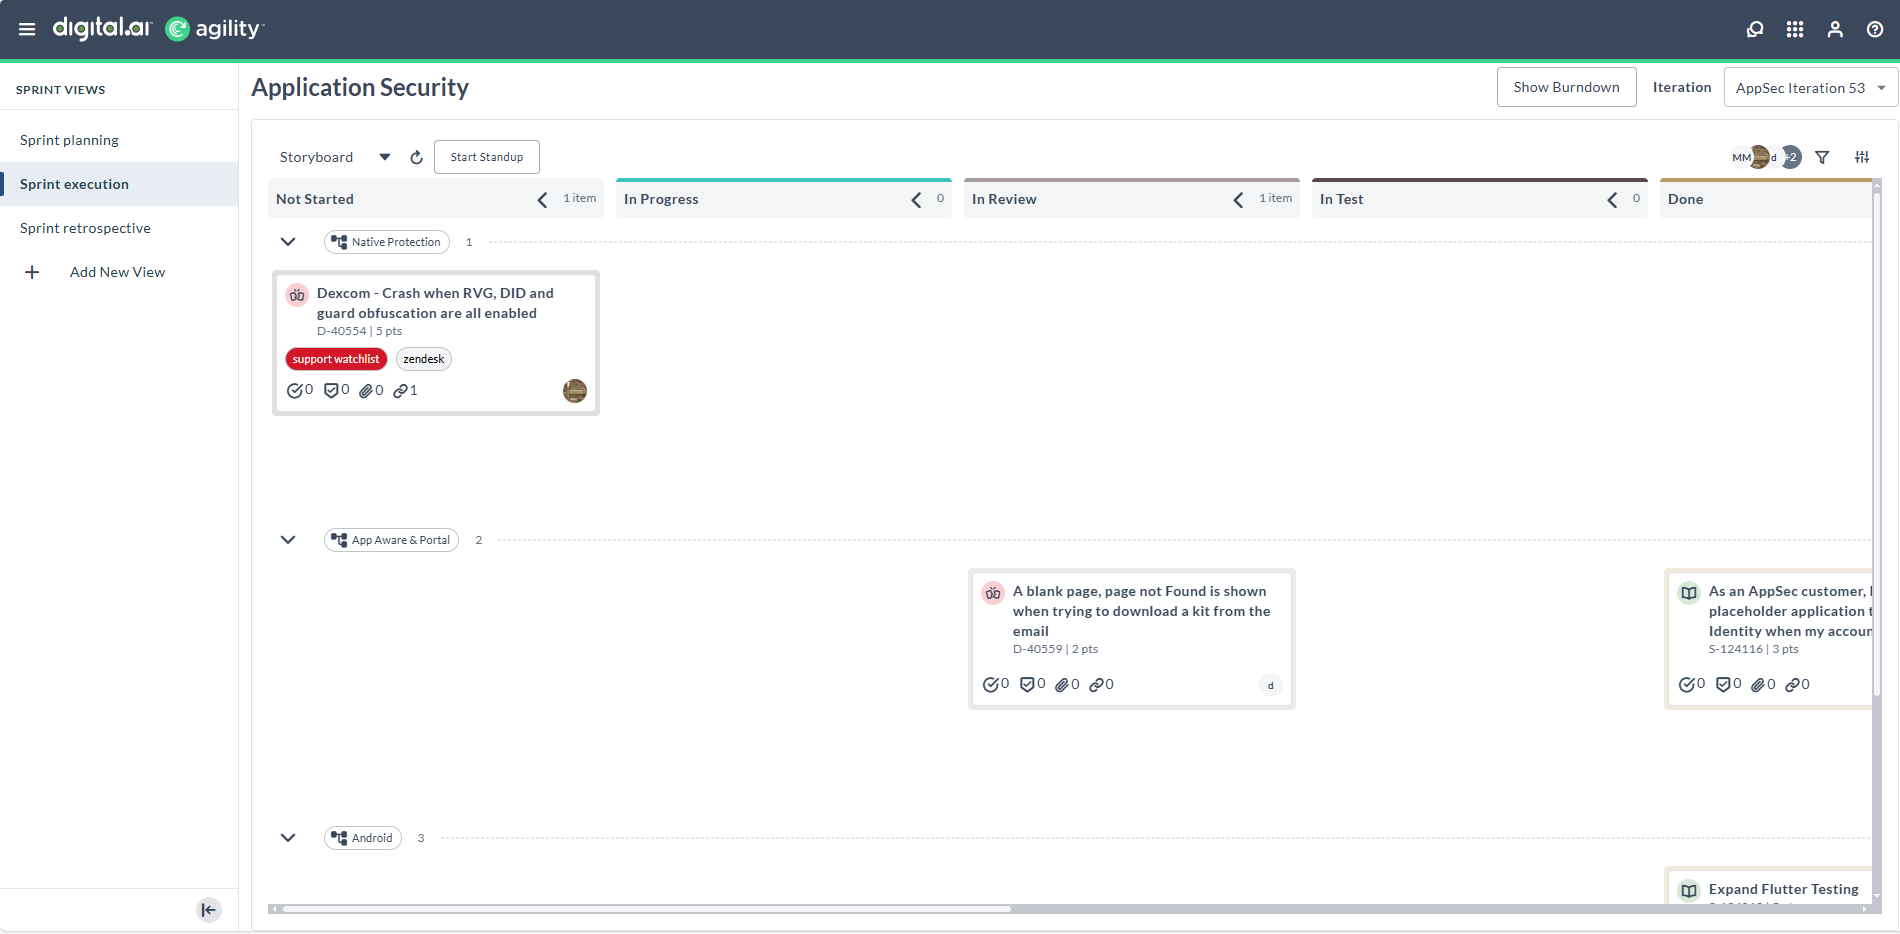
Visual Elements of Sprint Execution Screen
| Visual Element | Description |
|---|---|
| Sprint Views Sidebar | Located on the left, allows quick navigation between Sprint Planning, Execution, and Retrospective views. |
| Board Title | Displays the name of the current team or board being viewed. |
| Storyboard Dropdown and Refresh Icon | A dropdown menu that allows users to select different boards, while a separate refresh button is available to update the current view. |
| Start Standup Button | Launches the standup assistant to facilitate daily sync-ups. |
| Iteration Dropdown | Displays the current and future sprints. |
| Show Burndown | Opens the sprint burndown chart for tracking progress. |
| Filters and Member Avatars | Allows filtering work items and viewing assignments by team member. |
| Columns (Not Started, Future, In Progress, Done) | Displays columns representing different workflow states of the user stories and defects. |
| Work items | Represent individual Stories or Defects, displaying ID, points, type, activity icons (comments, tasks, attachments, and so on), and card aging indicator. |
| Card Aging Icon | Clock icon on story and defect cards indicating aging status. Hover to view days in column, days in cycle, and threshold status. Gray indicates below threshold; orange/red indicates exceeding threshold. |
| Add Story / Add Defect Buttons | Present below each swimlane to quickly add new Stories or Defects to a specific column. |
Sprint Execution Card Menu Options
The Sprint Execution Card Menu Options offers quick actions to manage Stories and Defects directly on the Sprint Planning Board. To access it, hover over a work item (Story/Defect), then click the three-dot icon (⋮) on the card.

Sprint Execution Card Menu Options and Descriptions
| Option | Description |
|---|---|
| Edit | Opens the work item in edit mode for modifying details like title, estimate, or owner. |
| Quick Close | Closes the work item quickly, changing its status to Closed. |
| Convert to Defect/Story | Converts the Story into a Defect, or Defect into a Story. This is helpful if the work item is better tracked as a bug or story. |
| Copy | Copies the work item so it can be duplicated or referenced elsewhere. |
| Move Card to Top | Moves the card to the top of the sprint as per priority. |
| Delete | Deletes the work item from the board. A confirmation is typically prompted. |
| Sign me up/Remove me | Assigns the work item to the logged-in user or removes the user's ownership from it. |
| Add Test | Adds a test case linked to this item. |
| Add Task | Adds a child task to the work item. |
Sprint Execution Card Icons
The Sprint Execution Card icons are located at the bottom of the Sprint Planning Card. These inline icons navigate users directly to the corresponding sections of Stories or Defects. The available options are:
- Task - Takes the user to the Task section in a Story or Defect
- Test - Takes the user to the Task section in a Story or Defect
- Attachment - Takes the user to the Attachments section in a Story or Defect
- Link - Takes the user to the Links section in a Story or Defect
- Upstream Dependencies - Takes the user to the Upstream Dependencies section in a Story or Defect
- Downstream Dependencies - Takes the user to the Downstream Dependencies section in a Story or Defect
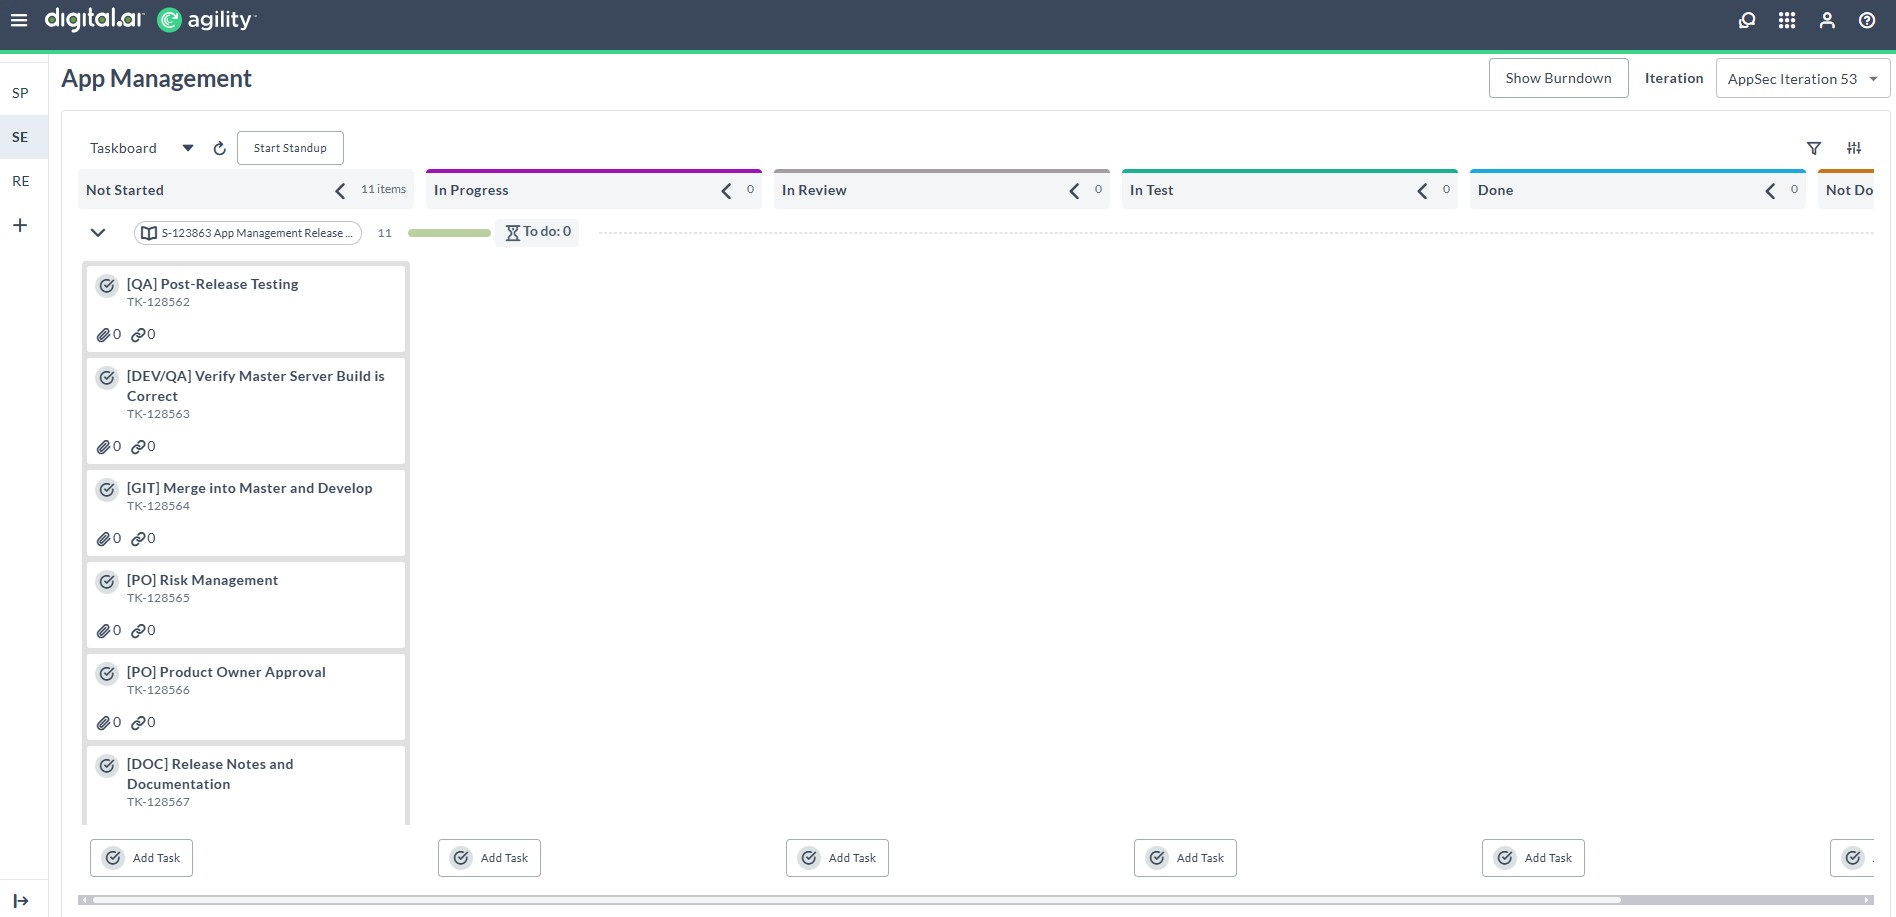
Sprint Execution Taskboard
The Sprint Execution Taskboard view provides a task-centric view within a sprint, allowing users to monitor the progress of individual tasks under each story or defect, as work item can be Story, Defect, Task, Test, Epic, and others. As of now, Tasks can be added only for Story or Defect.
To view the Sprint Execution Taskboard, click the Storyboard drop-down and select Taskboard
When to Use the Taskboard View
Use the Taskboard view when:
- You need to track progress at a granular level.
- You want to verify team contributions to stories.
- You are preparing for a daily standup and need to see task statuses quickly.
- You want to balance work by seeing how many tasks are assigned to each person.
- You need quick access to parent Story or Defect details while managing tasks.
Access parent work item details from Swimlane header
If a room is configured to use Group By, or you are accessing Taskboard or Testboard view, you can access parent Story or Defect information directly from the swimlane headers:
- Swimlane headers display the parent Story or Defect number and title.
- To view additional details, hover over a swimlane header. A tooltip appears with the work item description and a copy URL option.
- To open the parent work item, click the swimlane header. The Asset detail drawer opens, where you can view and edit the parent Story or Defect details.
Visual Elements of Taskboard Screen
| Visual Element | Description |
|---|---|
| Taskboard Dropdown | Switches between Storyboard, Taskboard and Testboard views. Taskboard focuses on task progress under each work item. Testboard focuses on test progress under each work item. |
| Start Standup Button | Launches the standup assistant to facilitate daily check-ins. |
| Burndown and Iteration | Allows you to view progress metrics and select the current sprint. |
| Filters (top right) | Filter view by team members or attributes such as tags, status, or assignees. |
| Column (Not Started, In Progress, Completed) | Columns representing the task-level progress state. |
| Story Rows (Expandable/Collapsible) | Each collapsible row represents a Story or Defect Container. Click the chevron (▾) to expand/collapse and view tasks inside. |
| Swimlane Headers | In Taskboard view, headers display the parent Story or Defect number and title. Hover over a header to view additional details. Click a header to open the Asset detail drawer for the parent work item. |
| Task Bars | Show individual tasks with status indicators (for example, To Do count, progress bar). |
| Member Avatars | Show which team member is assigned to a task. |
| Task Cards (right side) | Display task details like task title and ID with quick access to more info. |
Conduct Daily Standup
The Daily Standup feature in Rooms 2 provides a standup dialog to manage participant order during team meetings.
How to Access
- In the Sprint Execution view (Storyboard, Taskboard, or Testboard), click the Start Standup button.
- The Standup dialog opens showing the participants list.
Dialog Options
| Element | Description |
|---|---|
| Participants List | Displays team members with their avatars |
| Shuffle Button | Manually randomizes the participants list order |
| Begin Button | Starts the standup meeting |
| Auto shuffle participants on Begin | Checkbox to automatically shuffle the list when clicking Begin |
| Auto collapse empty columns | Checkbox to hide columns with no work items |
Use Daily Standup
- Click Start Standup in the Sprint Execution view.
- (Optional) Enable the Auto shuffle participants on Begin checkbox.
- Click Shuffle to manually randomize the participants list, or click Begin to start the standup.
- If Auto shuffle participants on Begin is enabled, the list automatically shuffles when you click Begin.
The Auto shuffle participants on Begin setting is saved in local storage and persists for future standup sessions until you disable it.