SeeTestAutomation - Manually Instrumenting iOS Applications
Please note that this tool is classified as a Legacy tool. We recommend transitioning to our updated solutions to maintain optimal performance and security in your workflows. For more information on this matter, please reach out to technical support .
Note:
- Use this process only if you cannot use the
- iOS Application Instrumentation because you don't have an iOS certificate or provisioning profile.
We provide three instrumented iOS demo applications (the links, below, can be opened only from iOS devices):
-
EriBank can also be found under installation folder:
<install_dir>\bin\ipas(activity name: com.experitest.ExperiBank) -
QuickContactsTest (activity name: com.experitest.QuickContacts)
-
UICatalogTest (activity name: com.experitest.UICatalogTest)
We also provide an instrumented browser application, SimpleBrowser, for web testing using the Web identification method (activity name: com.experitest.browser)
Instructions for Your Developers
These instructions should be used for both Objective-C apps and Swift apps alike.
The following instructions should be transmitted to your developer, working with a MAC station and an iOS device, so that the application can be prepared for testing. This preparation needs to be performed only once for the application.
Step 1: Open your project in Xcode.
Step 2: Duplicate the target (note: if asked about the new Duplicate Target choose "Duplicate Only")

Step 3: Rename duplicated target (optional). You can achieve this by double-clicking on the name of the duplicated target.

Step 4: Select duplicated target -> Go to build phases -> Select + in Link Binary With Libraries section.

Step 5: In this step, we list all the libraries that we need to add to our project, and explain the process to which a library is added. We will start by listing all the libraries to be added, and we will finish this step by explaining, through an example, how a library is added.
H****ere are all the libraries that must be added to the project by the end of this step:
- CFNetwork.framework
- QuartzCore.framework
- UIKit.framework
- Foundation.framework
- CoreGraphics.framework
For Simulate Capture Feature also add :
- CoreFoundation.framework****
- AVFoundation.framework****
- CoreMedia.framework****
- CoreVideo.framework****
- CoreImage.framework********
For the Mock Authentication Feature also add :
- LocalAuthentication.framework********
- Security.framework****
In order to add a library, simply enter the name of the library into the search bar and click the 'add' button in the right bottom corner. Here we entered CoreGraphics.framework into the search bar. After the frameworks appear in the list, click on it. Now the add button on the bottom right side of the panel is enabled. Now, all that is left to do is to click the add button.

To verify the library was indeed added to the Link Binary With Libraries list, simply check the list for the framework that you just added. It should appear there as shown in the following screenshot.

Step 6: Press Add Other

Step 7: Locate Experitest.framework (Located in the installation folder, under "/bin/native". Alternatively, the latest version can be downloaded from here) -> Press Open to link it.
-
For the Simulate Capture Feature, add the CameraControl .framework.
-
For the Mock Authentication Feature, add the MockAuth.framework.
Note: Open the .zip file only on a Mac machine. Opening it using Windows and then copying it to a Mac machine will result in problems with instrumentation. Note 2: After unzipping the file, attach the *.framework located within the folder, and not the folder itself.

- In case the linker fails to find Experitest.framework, locate the framework file and drag it manually into Xcode's project navigator,
- If the issue persists, locate the "Framework Search Paths" option in "Build Settings" and manually add Experitest.framework directory.
Step 8: Final View :
Build Phase -> Link Binary With Libraries
Note: When updating the Experitest framework, make sure the framework is not removed from the linked libraries. Also, please make sure all the aforementioned libraries have been added to the project. As it is in the following screenshot.

Step 9: Go to Build Settings -> Search "other linker flag" -> Add following linker flags:
-
- -all_load
- -ObjC
Step 10: Final View: Build Settings -> Other Linker Flags
Note: When updating the Experitest framework, please make sure the linker flags do not change for the duplicated build settings.

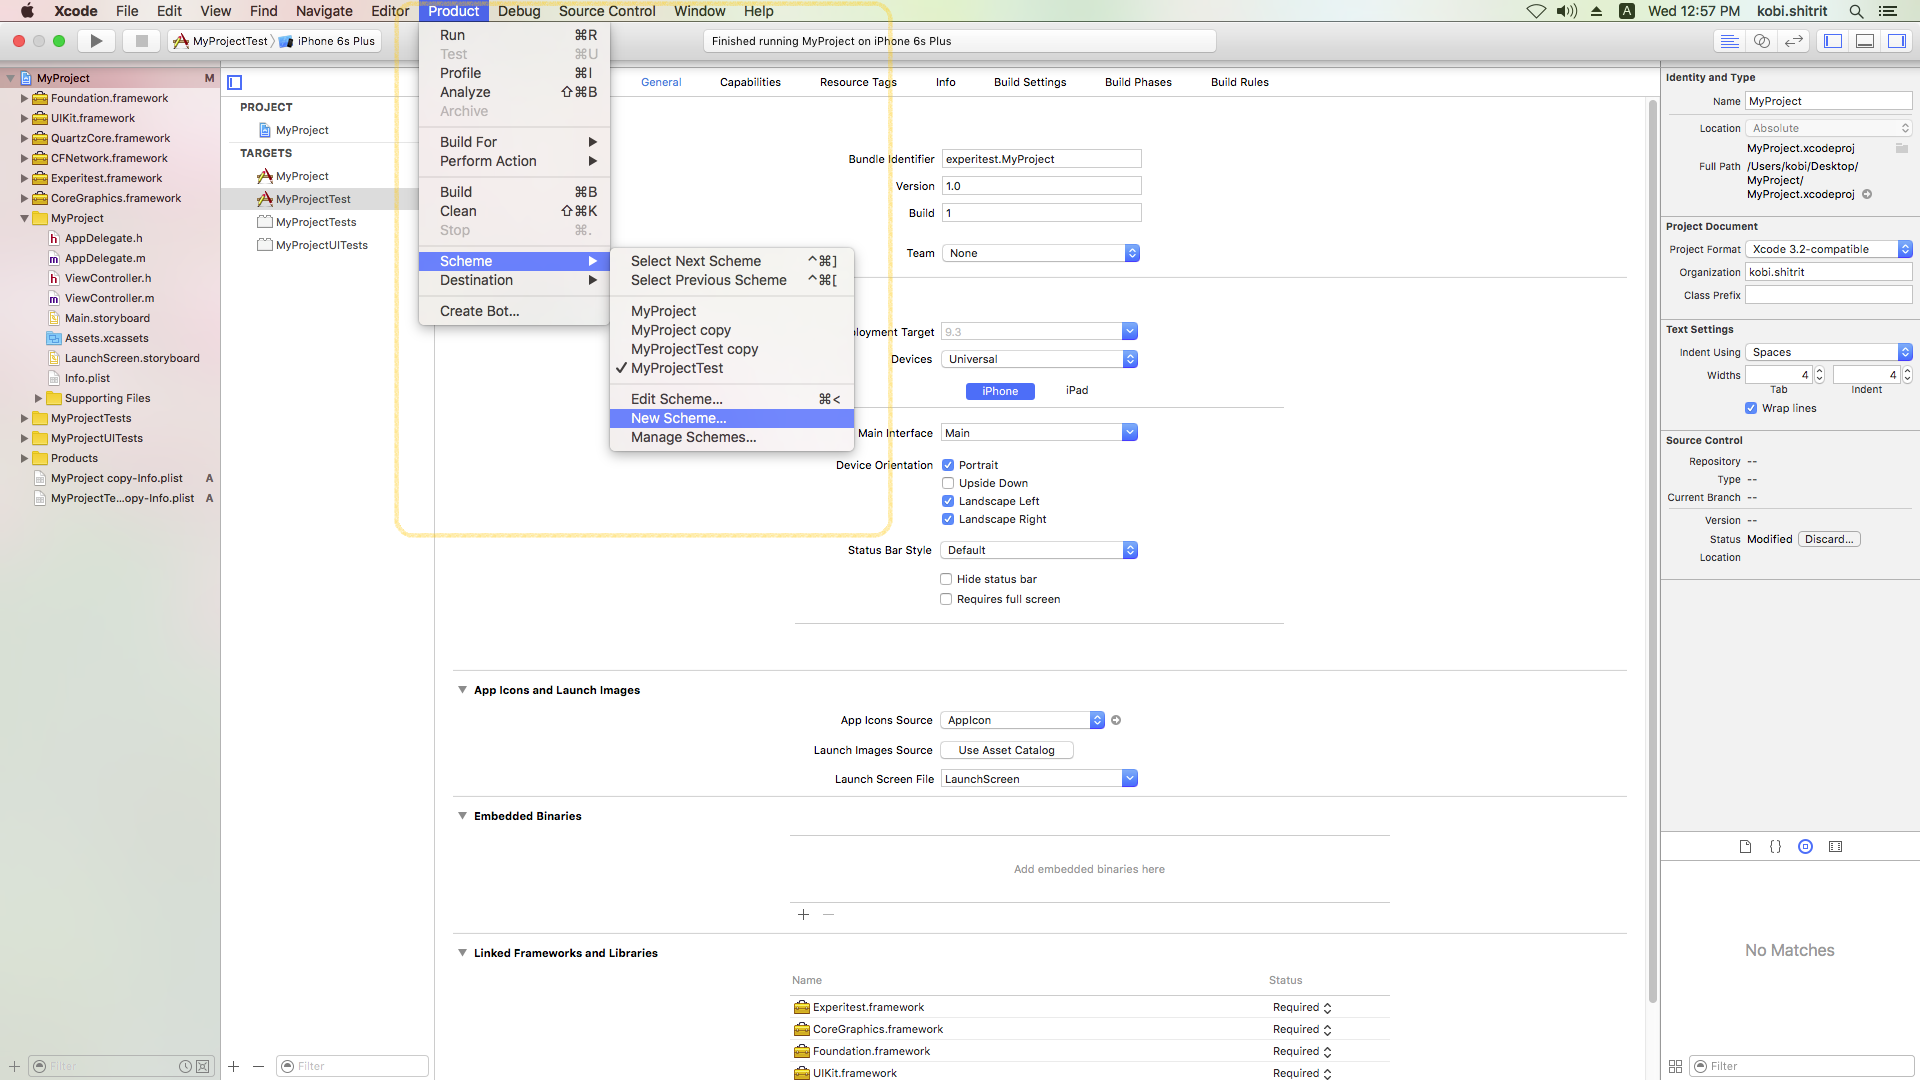
Step 11: Click product -> Scheme -> New Scheme.

Step 12: Add the new target (the duplicated target we made in the steps prior to this one).

Step 13: Click on the duplicated target and deploy the application onto the device.

Step 14: Switch between the targets to run with and without the Experitest server.
Step 15: Verify that the instrumentation is working correctly.
Launch the application in a simulator. There are two signs that the instrumentation was successful:
-
In the simulator log you should be able to identify the following line:
<Warning>:ExperitestServer: waiting for clients