SeeTestAutomation - Instrumenting Android Applications
Please note that this tool is classified as a Legacy tool. We recommend transitioning to our updated solutions to maintain optimal performance and security in your workflows. For more information on this matter, please reach out to technical support .
Notes:
-
Version downgrade is allowed on debuggable packages only.
-
In some cases, a manual instrumentation is required, if the 'automatic' process won't work.
-
Instrumenting Android Watch applications instrumentation is not supported.
Prerequisites:
- Verify that the application has network access permission. If it doesn't, please, add the following permission to your application manifest file:
-
DO not obfuscate Android's third-party libraries, particularly, the following commonly used third-party libraries:
- Android support libraries; such as RecyclerView.
- Chromium Webview
- Cordova WebviewSeeTest automation uses these libraries for you to build your automation testing in instrumented mode. If you obfuscate these libraries, you will not be able to enjoy all the automation features and support that SeeTest offers working with these libraries; such as retrieving web dump from chromium or cordova webviews, or scrolling a Recyclerview.
,
Configure the signing keystore for your instrumented application:
- Similar to any Android application, instrumented applications undergo a signing process. The SeeTestAutomation tool provides you with two options to sign the instrumented version of your application: One is to sign it with SeeTest debug keystore, which is used by default. The other is to sign it with your customized keystore. In some cases, especially if your application is guarded against security issues, the second is preferable since it is more resistant to security limitations.
Step 1: Go to 'Tools' > 'APK Sign Configuration':
Step 2: Choose 'Configure your customized keystore', and fill in the data needed for the application signing process.
By default, SeeTest keystore will be used to sign instrumented applications.
The Instrumentation Process:
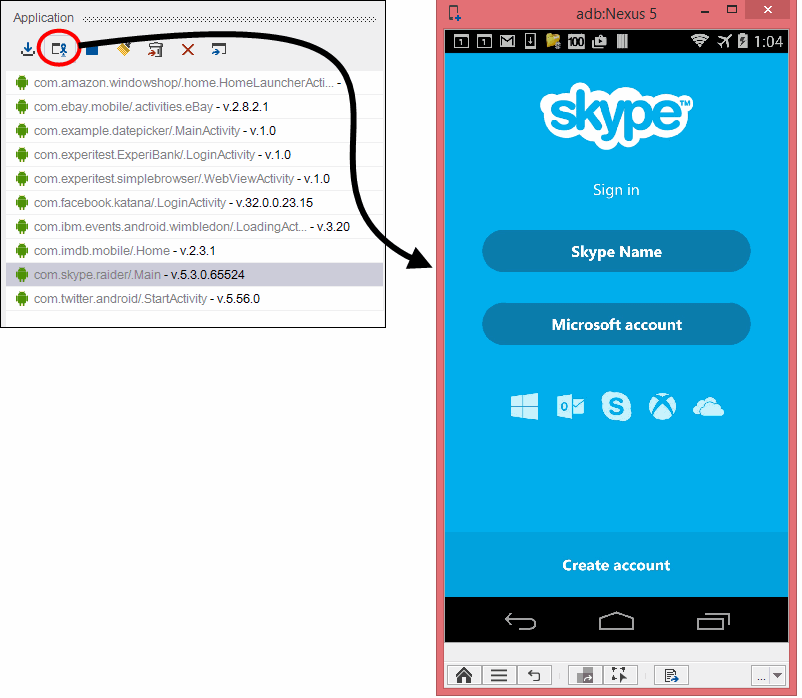
Step 1: In the Application Manager now displayed, select the application to be imported and click the Import Application icon.
Step 2: In the dialog box now displayed, choose whether to import the application to be instrumented from the:
-
local disk as an apk file
-
directly from the Android device itself
If you are importing the application from your local disk, navigate to the folder in which the apk file is stored. Select it, and click Import.

If you are importing the application directly from the Android device, choose the application from the displayed list and click Import.
Step 3: The process should take between 1-3 minutes depends on the application size. When completed, it will be available on the application manager list.
Step 4: Install the application. You can do this by simply clicking Yes when asked whether to install the application.
Alternatively, choose the application identifier on the application manager list and click the 'Install' icon.
Step 5: When you have completed installation, you will be asked to launch it

Alternatively, choose the application identifier on the application manager list and click the 'Launch' icon.

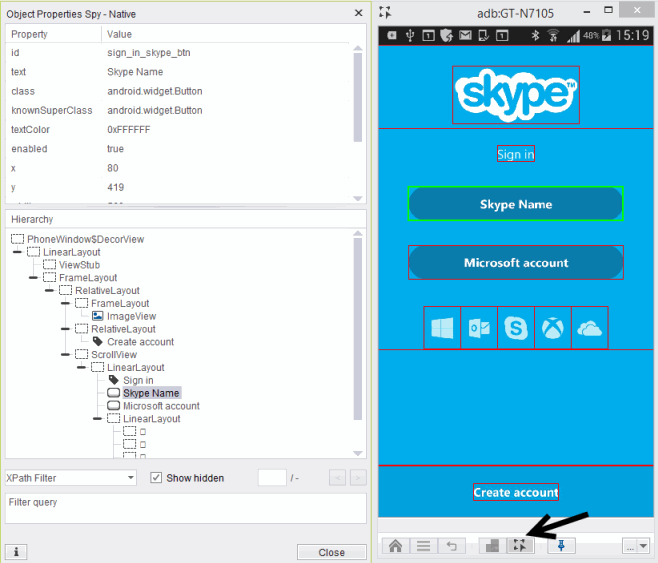
After launching the instrumented application, click the Spy button to identify the application's Native objects.
