Use the Project Timeline
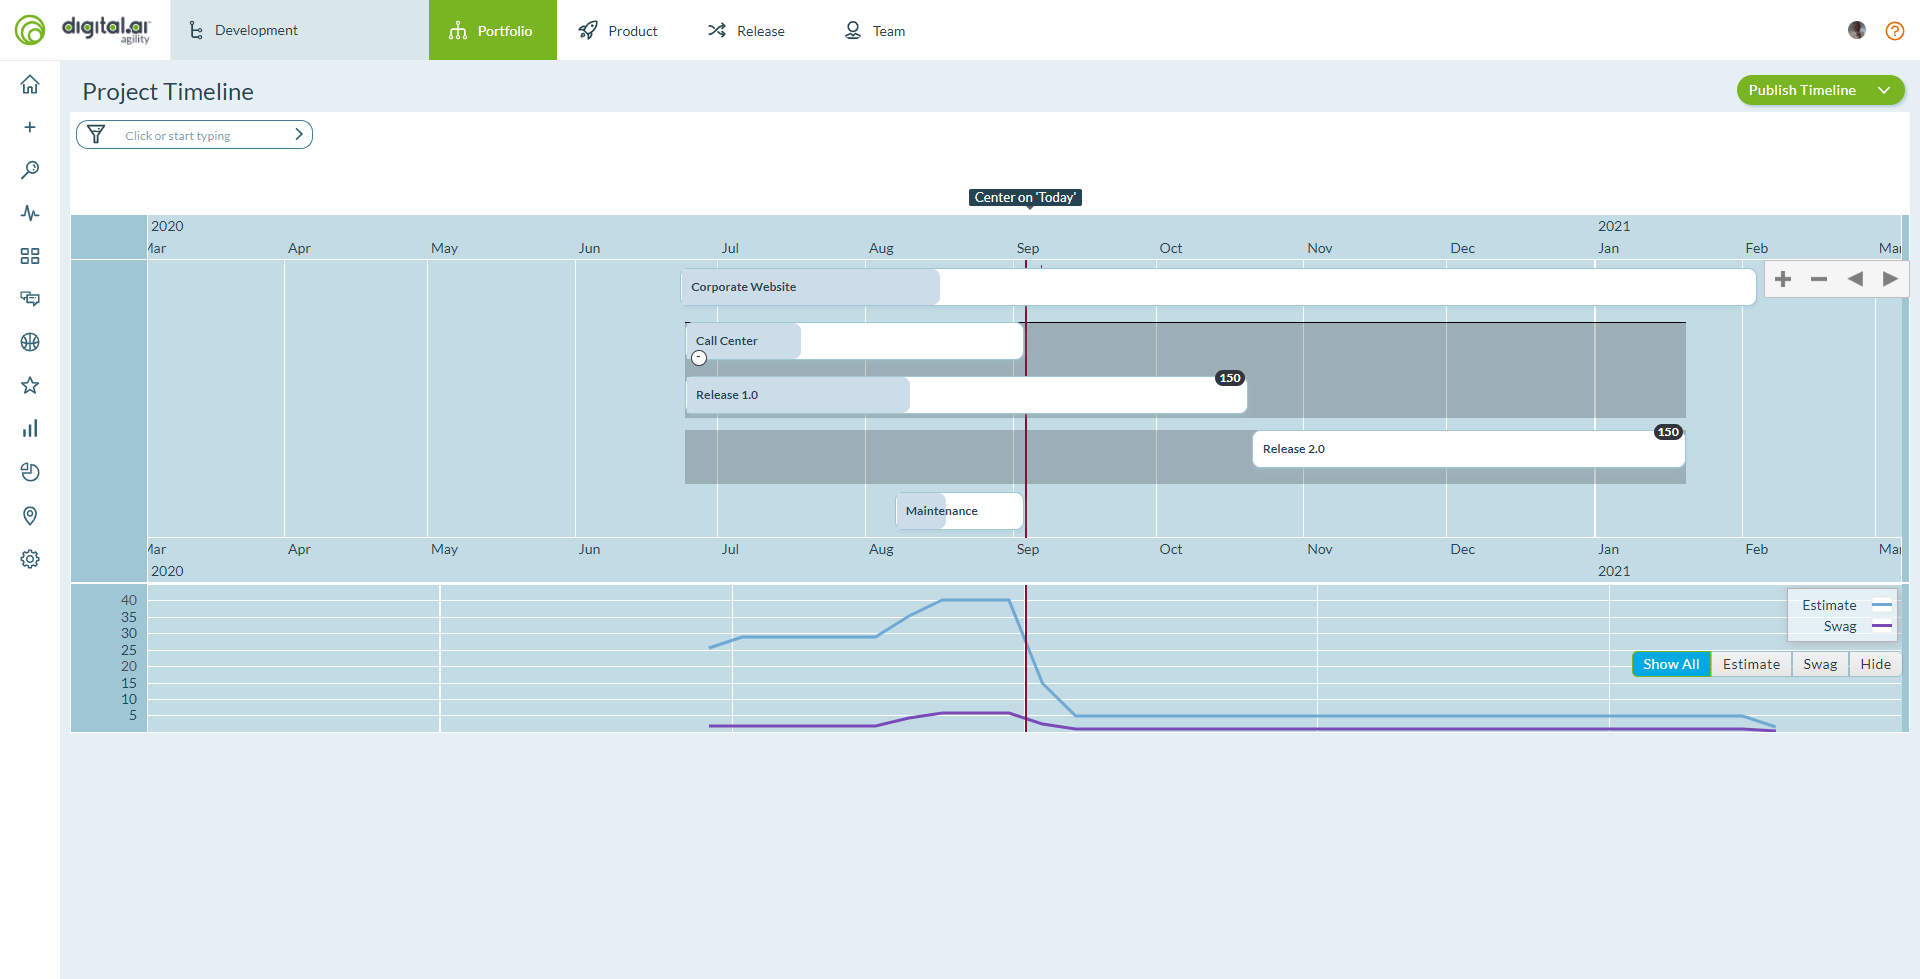
The Project Timeline provides a graphical view of planned and historical projects over a specified time range. This timeline shows how projects relate to scheduling and delivery of work initiatives, features, and sub-features.
Who uses the Project Timeline: Portfolio managers assess organizational capacity and balance workload, program managers identify scheduling conflicts, executives review high-level delivery plans, stakeholders view published timeline snapshots.
Permission requirement: All users with project access can view the Project Timeline. Publishing timeline snapshots requires Project Admin permissions.
The timeline presents a unique roll-up graph that shows your organization's past delivery and future plans from a project perspective. Use it to ensure future plans are relatively smooth and reasonable given past delivery. The Project Timeline provides a useful planning supplement to the Portfolio Tree, Portfolio Kanban, and Roadmap Timeline views.
You can use the timeline to:
- Plan and communicate current and future project delivery
- View historical delivery of projects
- Drill down to see the next level of detail, priorities, and progress from a single view
- Understand the organizational velocity achieved in delivering past projects
- Use the organizational velocity as a guide in planning future high-level work
- Identify peaks or valleys in expected organizational workload given the current plans
The Project Timeline is not a replacement for the Project or Program Summary. That report is still available.
Access the Project Timeline
To access the Project Timeline, click the hamburger icon ![]() > Portfolio > Project Timeline.
> Portfolio > Project Timeline.
Navigate and Zoom the Timeline
Pan and zoom the timeline to focus on specific time periods or projects.
Pan the Timeline��
Click and drag the timeline to move left or right through time. This allows you to view different time periods without changing the zoom level.
Zoom the Timeline
Use these methods to zoom in or out:
- Mouse wheel: Scroll up to zoom in, scroll down to zoom out
- Zoom controls: Click the + button to zoom in, the - button to zoom out
- Pinch gesture: On touch-enabled devices, pinch to zoom in or out
View Period Estimates and SWAGs
The Project Timeline displays two types of work estimates:
- Period Estimates: Shows the planned work capacity for each time period based on team velocity and sprint/iteration cadence
- SWAGs (Scientific Wild-Ass Guesses): High-level estimates for portfolio items that haven't been fully planned yet
These estimates appear as overlays on the timeline, helping you assess whether your plans are realistic given your organization's capacity.
Apply Filters
Apply filters to focus on specific projects or portfolio items in the timeline. This helps you create targeted views for different stakeholders or planning sessions.
Filter Options
You can filter the Project Timeline by:
- Project: Show only specific projects
- Portfolio Item Type: Filter by Themes, Initiatives, Features, or Sub-Features
- Status: Show items in specific workflow states
- Owner: View items owned by specific team members
- Tags: Filter by assigned tags
- Custom Fields: Filter by any custom attributes defined in your workspace
Apply a Filter
- Click the hamburger icon
 > Portfolio > Project Timeline.
 - Click the Filter icon in the toolbar.
- Select your filter criteria from the available options.
- Click Apply.
The timeline refreshes to show only items matching your filter criteria.
Clear Filters
To remove all applied filters and return to the full timeline view:
- Click the Filter icon in the toolbar.
- Click Clear All or Reset.
- The timeline displays all projects and portfolio items again.
Save Filter Views
Save frequently used filter combinations for quick access:
- Apply your desired filters.
- Click the Save View button.
- Enter a name for your saved view.
- Click Save.
Access saved views from the Views dropdown menu in the toolbar.
Set Project Dates
Define start and end dates for projects to establish the timeline boundaries for planning and tracking.
Set a Project Start Date
- Click the hamburger icon > Portfolio > Project Timeline.
- Locate the project on the timeline.
- Click on the project bar to select it.
- Drag the left edge of the project bar to adjust the start date, or right-click the project and select Edit Dates.
- In the dialog box, enter the desired Start Date.
- Click Save.
Set a Project End Date
- Follow steps 1-4 above to access the project.
- Drag the right edge of the project bar to adjust the end date, or use the Edit Dates dialog.
- In the dialog box, enter the desired End Date.
- Click Save.
Note: Setting project dates helps with capacity planning and resource allocation. These dates establish the timeframe for scheduling iterations, sprints, and deliverables.
Publish and Share Timelines
Create snapshot publications of the Project Timeline to share with stakeholders or archive for historical comparison. Published timelines are read-only views that capture the state of your projects at a specific point in time.
Publish a Timeline
- Click the hamburger icon > Portfolio > Project Timeline.
- Apply any filters to focus the timeline on specific content you want to share.
- Click the Publish button in the toolbar.
- In the Publish Timeline dialog box:
- Enter a Title for the publication (for example, "Q1 2025 Project Portfolio")
- Add an optional Description to provide context
- Select visibility settings (if available in your workspace)
- Click Publish.
A notification confirms the timeline has been published. The system generates a unique URL for accessing the published view.
Share a Published Timeline
After publishing a timeline, share it with stakeholders:
- Click the hamburger icon > Portfolio > Publications.
- Locate your published timeline in the list.
- Click the Copy Link icon next to the publication.
- Share the URL via email, chat, or your preferred communication channel.
Recipients can view the published timeline without logging into Digital.ai Agility (depending on your workspace security settings).
View Published Timelines
Access all published timelines from the Publications page:
- Click the hamburger icon > Portfolio > Publications.
- Click on any published timeline to open the read-only snapshot view.
- Use the filters and zoom controls to navigate the published view.
Published timelines show the project state at the time of publication, allowing you to compare historical snapshots with current plans.
Best Practices
Zoom out for strategic planning: View long-term trends and capacity patterns across quarters or years to inform portfolio prioritization decisions.
Apply filters before publishing: Create targeted stakeholder views by filtering to relevant projects or portfolio items before generating publications.
Set realistic project dates: Base project start and end dates on historical velocity and actual capacity rather than aspirational targets.
Publish timelines regularly: Generate monthly or quarterly timeline publications to track how plans evolve and communicate progress to stakeholders.
Use SWAGs strategically: Employ high-level Swag estimates for early-stage planning, then refine estimates as projects mature and work is decomposed.
Compare historical snapshots: Review published timelines from past quarters to understand how project timelines shift and improve future estimation accuracy.
Troubleshooting
Why don't I see any projects on my Project Timeline?
The Project Timeline displays projects within the context you've selected in the Project Navigator. If the timeline is empty, verify you've selected the correct project scope. Also check if filters are applied - click the Filter icon and clear all filters to see all projects. If projects still don't appear, ensure the projects have defined start or end dates and contain portfolio items with work scheduled into iterations.
Why can't I publish timeline snapshots?
Publishing timeline snapshots requires Project Admin permissions. If you don't see the Publish option, contact your Project Admin or Site Admin to request the necessary permissions. Also verify you're viewing the timeline in the correct project context - publications are project-specific.
Why do some portfolio items appear in multiple places on the timeline?
Portfolio items appear multiple times when work is spread across different teams or planning levels with different schedules. For example, if a Feature has backlog items planned by both Team A and Team B in different iterations, the timeline shows the feature in both planning contexts. This visualization helps identify work distribution and coordination needs across organizational boundaries.
Why doesn't the Project Timeline match what I see on the Portfolio Kanban?
The Project Timeline displays work from a time and project perspective, while the Portfolio Kanban shows work by status. An item can be "In Progress" on the Kanban but scheduled weeks or months out on the Project Timeline. Additionally, the Project Timeline bases positioning on iteration planning (when backlog items are scheduled), while the Kanban bases positioning on portfolio item status. Both views are correct - they just show different dimensions of your work.
Related Topics
- Portfolio Tracking - Overview of portfolio tracking capabilities
- Portfolio Kanban Board - Track portfolio items through workflow states
- Using the Portfolio Tree - Organize and manage portfolio items hierarchically
- Roadmapping - View roadmaps in timeline and board layouts
- Portfolio Item Overview - Understand portfolio items and their structure