Create, View, Edit, and Close Backlog Items
Create, view, edit, and close backlog items using multiple methods to match your workflow. Choose from inline grid editing, detail pages, sidebar options, spreadsheet imports, or templates.
Who creates and manages backlog items: Product owners create and prioritize backlog items to deliver business value. Team members add tasks, update estimates, and close stories as work completes. Scrum masters facilitate backlog refinement sessions and coordinate story management across sprints.
Permission requirement: Viewing backlog items requires project member access. Creating and editing backlog items requires Team Member role or higher. Closing backlog items typically requires Team Member role. Deleting backlog items requires elevated permissions (typically Project Admin role). Specific permissions depend on your organization's role configuration.
What Is a Backlog Item
Stories (also called Backlog Items) are the primary Agile planning and tracking assets that are related to virtually all other system assets. Stories or Backlog Items represent discrete pieces of functionality that deliver business value. They can include requirements, additions or changes to existing functionality, or provide details about activities the project team must perform to deliver the product.
Stories are managed in the backlog and belong to a project. They can be scheduled for work in a sprint or iteration. All stories can be comprised of:
- Acceptance Tests (or Tests) to define acceptance criteria for the functionality
- Tasks to define discrete work units for the team to complete to deliver the story
Stories are often derived from larger-grained features called portfolio items. In addition, stories can be grouped into flexible backlog groups, which can form a hierarchy above stories, and backlog goals or objectives, which allow for a many-to-many mapping to stories.
Create Backlog Items
You can add backlog items using several methods. Choose the option that works best for your workflow.
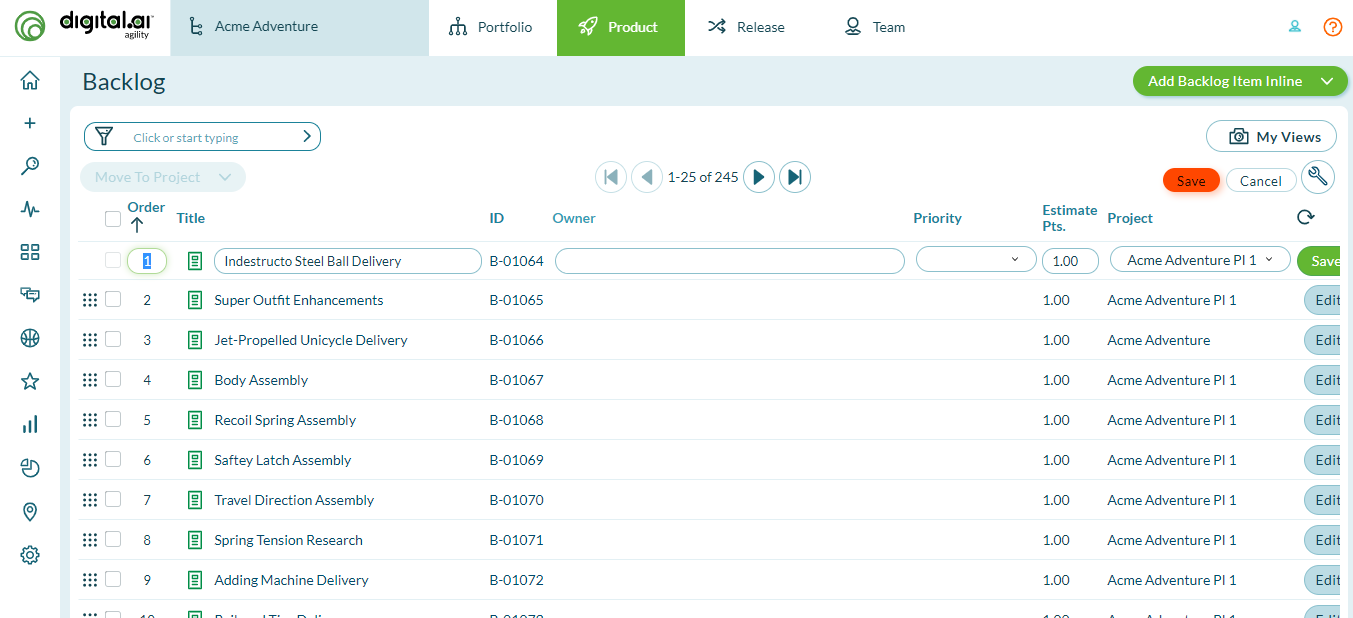
Option 1: Inline in Any Grid
Use this option to quickly add empty rows to any grid.
- Click the hamburger icon
 > Product > Backlog.
 - Click Add Backlog Item Inline to the right of the grid.
- When the new row displays, type the details in the available fields.
- Click Save.

Option 2: Using the Backlog Item Details Page
The backlog item details page provides additional fields and allows you to enter more detailed information.
- Click the hamburger icon > Product > Backlog.
- Click Add Backlog Item to the right of the grid.
- When the Backlog Item Details window opens, type in the appropriate fields.
- Click Save.
Option 3: In the Sidebar
- Click the hamburger icon > Product > Backlog.
- Click on the + icon in the sidebar.
- Select Backlog Item from the drop-down list.
- Enter the asset details.
- Click Save.
You can also add defects, requests, issues, portfolio items, backlog items from templates, and regression tests using the same sidebar method.
Option 4: Import from a Spreadsheet
If your backlog items are in a Microsoft Excel spreadsheet or if you have a large number of backlog items to add, you can import them using the Import feature. For instructions, refer to the Microsoft Excel Import documentation.
Option 5: Generate from a Template
If you have created story or backlog item templates, which are reusable assets that contain pre-defined backlog item details, you can use them as a starting point to create a new backlog item with pre-populated fields.
View Backlog Item Details
From a backlog item's details page, you can view and manage all of the attributes associated with the backlog item.
Access Backlog Item Details
To access the Backlog Item Details page, click on a backlog item title or ID anywhere within the application.
Available Actions from Details Page
From the Backlog Item Details page, you can perform these high-level functions:
| If you want to... | Do this... |
|---|---|
| View or update backlog item details | Click the Details tab. |
| View the change history for a backlog item | Click the History tab. |
| View a graphical representation of the backlog item's relationships to other assets | Click the Visualize tab. |
| View ideas submitted by the team for possible integration into project work | Click the Ideas tab. From there, you can view additional details and assign ideas to team members. |
| Edit backlog item details | Click on the Pencil icon next to the field you want to change. Make the appropriate changes (changes are highlighted in yellow), and then press Enter on your keyboard. |
| Perform advanced actions | Click the Edit button and select options from the drop-down menu: Plan Backlog Item, Add Task, Add Test, Generate Parent Epic, Copy, Sign Me Up, Block, Split, Quick Close, Close, Convert to Defect, Delete, and Watch Backlog Item. |
| Generate a new idea from the backlog item | Select Generate Idea from the Edit menu. |
Manage Backlog Item Relationships
From the Show Relationships section at the bottom of the Backlog Item Details page, you can manage relationships by clicking the Add or Assign buttons. For any items you add or assign, you can click Remove in the grid to remove them.
| If you want to... | Do this... |
|---|---|
| Add a new task | Go to Tasks and click Add Inline. |
| Add a new test | Go to Tests and click Add Inline. |
| Assign upstream dependencies from available backlog | Go to Upstream Dependencies and click Assign. |
| Assign downstream dependencies from available backlog | Go to Downstream Dependencies and click Assign. |
| Identify issues that have been resolved | Go to Issues Resolved and click Assign. |
| Select an existing issue to assign as a blocking issue | Go to Blocking Issues and click Assign. |
| Select existing backlog items that are affected by the defect | Go to Breaks Workitems and click Assign. |
| Select an existing request | Go to Requests and click Assign. |
| Select an existing defect that breaks the selected backlog item | Go to Broken By Defects and click Assign. |
| Designate the most current build(s) affected by the defect | Go to Last Affected Pipeline Runs and click Assign. |
| Add a new link to remote documentation | Go to Links and click Add. |
| Add a new file attachment | Go to Attachments and click Add. |
Edit Backlog Items
There are three ways to edit a story or backlog item. Choose the one that works best for you.
Option 1: Inline Edits in the Grid
Recommended for quick edits to basic story details, such as title, backlog item points, or project assignments.
- Click the hamburger icon > Product > Backlog.
- Double-click on a row to make the columns editable.
- Change the details as appropriate.
- Click Save.
Option 2: Edit from Grid
- Click the hamburger icon > Product > Backlog.
- Click Edit next to the item you want to change.
- On the details page, modify the item as appropriate.
- Click Save.
Option 3: Edit in Backlog Item Details
- Click the hamburger icon > Product > Backlog.
- On the Backlog Item Details page, click on the Pencil icon next to the field you want to change.
- Make the appropriate changes (note that your changes are highlighted in yellow).
- Press Enter or Return on your keyboard.
Close Backlog Items
Closing an item indicates that all work is complete and changes the status to Done so no further planning or tracking activities can take place against the item.
- After an item is closed, you can re-open it if additional changes need to be made
- Quick Close updates the status of the item and closes it in a single action
Option 1: In Any Grid
- Click the hamburger icon > Product > Backlog.
- In any grid, click Close (or Quick Close) from the Edit drop-down button.
- Select a Status.
- Click the Close button.
Option 2: On the Backlog Item Details Page
- Click the hamburger icon > Product > Backlog.
- On the Details page, select Close (or Quick Close) from the Edit drop-down button.
- Select a Status.
- Click Close.
Best Practices
- Use Inline Add for Speed: When adding multiple simple backlog items, use the inline grid method to quickly create stories with minimal information.
- Use Details Page for Complexity: For backlog items requiring detailed descriptions, acceptance criteria, or multiple fields, use the details page creation method.
- Import for Bulk Creation: When migrating from spreadsheets or adding many items at once, use the Excel import feature to save time.
- Use Templates for Consistency: Create and use templates for recurring story types to ensure consistent field population and save time.
- View Details Before Editing: Access the details page to see the full context before making changes to ensure you understand all relationships.
- Use Inline Edits for Quick Changes: For simple field updates like status or points, use inline editing to save time navigating.
- Track Relationships Early: As soon as you create a backlog item, add relevant tasks, tests, and dependencies to provide complete context for the team.
- Close vs Delete: Always close backlog items that were actually worked on instead of deleting them to preserve historical reporting data.
- Use Quick Close Appropriately: Use Quick Close when the default Done status is appropriate; use regular Close when you need to select a specific status.
- Monitor History Tab: Review the History tab periodically to understand what changed and who made changes, especially for long-running stories.
Troubleshooting
Why can't I create a backlog item using the inline grid method?
Verify you have Team Member or higher role permissions. If the Add Backlog Item Inline button is missing or grayed out, you may be viewing a closed project or filtered view that prevents creation. Check your Project Navigator selection - ensure you're viewing an active project. If the project is closed, reopen it or select a different active project. Also verify you're not in a read-only report view - navigate to Product > Backlog to access the editable grid.
Why don't I see all fields when viewing a backlog item's details?
Field visibility depends on your project workspace configuration. Project Admins control which fields display on backlog item detail pages through Admin > Project Workspace Assets > Backlog Item. Some fields may be hidden if they're not relevant to your workflow. Additionally, custom fields defined at the system level may not be enabled for your specific project workspace. Contact your Project Admin to request additional fields be made visible.
Why does closing a backlog item require selecting a status?
Using the standard Close option (not Quick Close) requires selecting a status to provide specific context about how the story completed. Different close statuses track important outcome data: "Done" indicates successful delivery, "Cancelled" shows abandoned work, "Duplicate" marks redundant items. This status data supports accurate metrics and reporting. If you want to close items with the default "Done" status quickly, use the Quick Close option instead.
Why can't I edit a backlog item I created?
Several factors prevent editing: (1) The item may be closed - reopen it before editing. (2) The item may be in a closed sprint or project - reopen the container first. (3) Your role may lack edit permissions for this specific backlog item type - some organizations restrict editing based on item status or type. (4) Another user may have the item open for editing - wait for them to finish. Check the item's status indicator and your project role to identify the restriction. See Troubleshoot Backlog Item Access for detailed resolution steps.
Related Topics
- Managing Stories and Backlog Items - Overview of story management concepts and capabilities
- Use the Backlog Page - Learn how to navigate, filter, and organize the backlog
- Delete and Recover Backlog Items - Delete backlog items and recover deleted items
- Move Backlog Items Between Projects - Transfer backlog items to different projects
- Split Backlog Items - Divide partially completed stories across sprints
- Troubleshoot Backlog Item Access - Resolve permissions and visibility issues