Installing Analytics (On-Premise)
This artilce explains how to install Analytics (On-Premise) in Agility.
The content in this article applies to On-premise Digital.ai Agility instances only. If you are an On-Demand (V1 Hosted) customer, see On-Demand (V1 Hosted) System Maintenance.
Installing or managing an instance of Analytics involves creating or updating the Analytics meta-data database schema and the Analytics web application.
Prerequisites
To perform the steps below, you need to run the setup program as Administrator. On newer versions of Windows, this involves more than just logging in as Administrator, or a user with Administrative privileges. The best way to ensure that you run setup with the appropriate privileges is to right-click on the Setup executable and select "Run As Administrator".
Steps
Step 1. What action do you want to take?
You can "Install a New Instance", Upgrade an existing instance, or Uninstall an existing instance.
If an existing instance of Analytics is detected on the machine, you are presented with a panel that requires you to choose an action before proceeding. The default action is to upgrade the existing instance. You may also remove an instance or install a new instance.
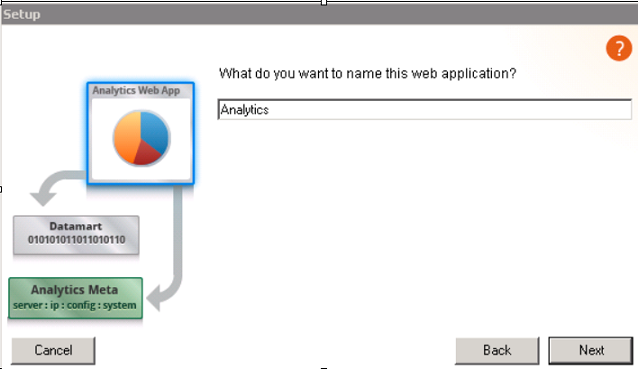
a) Installing a new instance - you will be asked to provide a name for the instance. Each application on a website is required to have a unique name. This name becomes part of the URL used to access the specific application. When installing a new instance, the default application name is "Analytics", and we recommend using this name unless it's already taken. If you need to change the name, there are specific rules for naming websites. A brief explanation of these rules can be found on Wikipedia or on the W3C website.
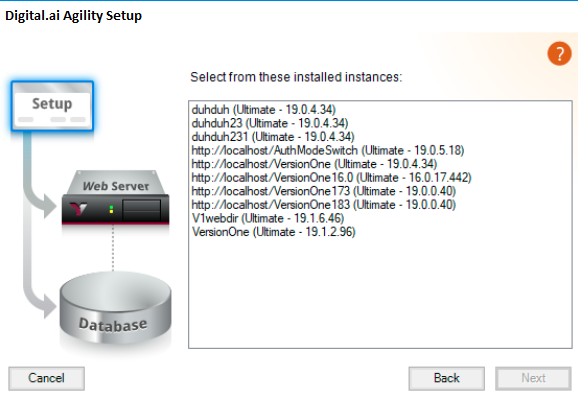
b) When upgrading an existing instance, or uninstalling an existing instance, you will see a screen asking you to select the instance you want to upgrade or uninstall.
When installing a new instance you must agree to the terms of the license agreement before proceeding. There is a link on this panel to access the appropriate license agreement.
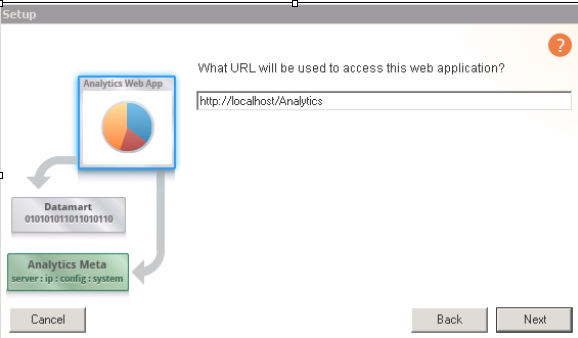
Step 2. What URL will be used to access this web application?
This is the URL used to access Analytics from a browser. The default URL is http://localhost/\[Instance Name]. At a minimum you need to replace "localhost" with the proper machine name for accessing this website. You may also need to replace http with https if the site will be secure.
Step 3. Integration with Digital.ai Agility
Each instance of Analytics is paired with a single instance of Digital.ai Agility. This panel allows you to specify the instance you intend to pair with the Analytics instance being installed.
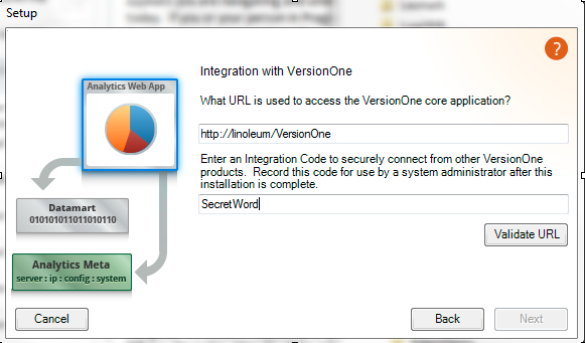
Step 4. Digital.ai Agility URL
This URL is used when creating links back to Digital.ai Agility. Therefore, it needs to be the URL used by the browser, to connect to the desired instance. This URL needs to be in the form "http[s]://[machine name]/[VersionOne instance name]. For example, http://v1webserver/VersionOne. We recommend that you not use "localhost" as the machine name even if Analytics and Digital.ai Agility are installed on the same machine. Doing so will prevent remote users from accessing Analytics.
Step 5. Integration Code
The integration code is used to ensure that Analytics is communicating with a known instance of Digital.ai Agility. This code can be any sequence of letters, numbers, and characters. The value provided here must also be provided to the Digital.ai Agility instance when Analytics is enabled. We recommend that you refrain from using simple words.
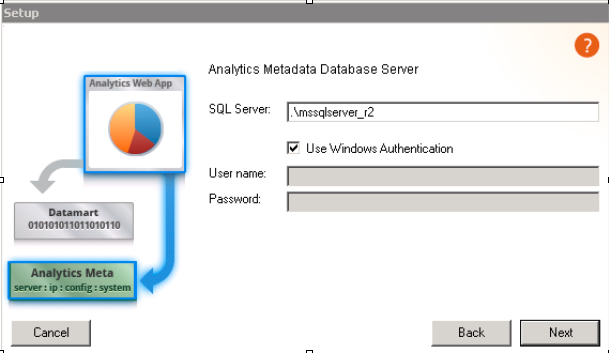
Step 6. Analytics Metadata Database server
The Analytics application has a small database for persisting the Custom Reporting meta data and your custom report definitions. This database was created during the Data Mart Setup process. The Analytics setup program needs to know this information in order to configure the Analytics application and to create the default metadata.
On this panel you select the database server hosting the Analytics metadata database and provide credential that Setup will use to connect to that server. It's important to note that the credentials provided here are only used by Setup; these are not the credentials used by the Analytics application.
- How do I resolve the "Cannot Connect to Database" error message? This error indicates that Setup cannot connect to the database server you specified. A common cause for this error is specifying only the machine name and omitting the SQL Server instance name. To include the instance name, use the format "[machine_name]\instance_name]" - for example, if you're installing on a local server in which both IIS & SQL are running, and the instance name is SQLEXPRESS (the name that express uses when installing), you would use "(local)\SQLEXPRESS". If the server is a remote server, you'd use the actual machine name.
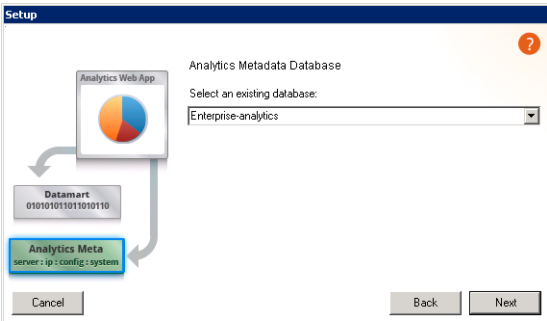
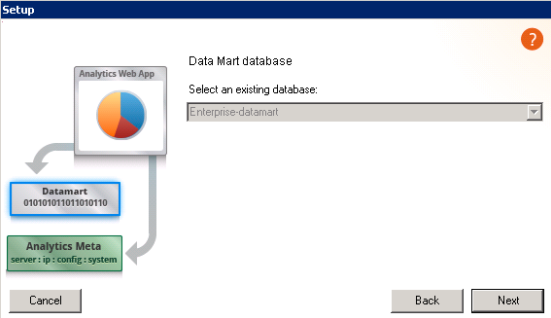
Step 7. Analytics Metadata Database
As mentioned above, the Analytics metadata database was created by the Data Mart Setup process. The default name for this database is "[VersionOne Database Name]-analytics"; for example VersionOne-analytics.
On this panel you select the Analytics metadata database that will be used with this instance of Analytics. If you do not see the database name listed in the dropdown box, you have most likely selected the wrong database server.
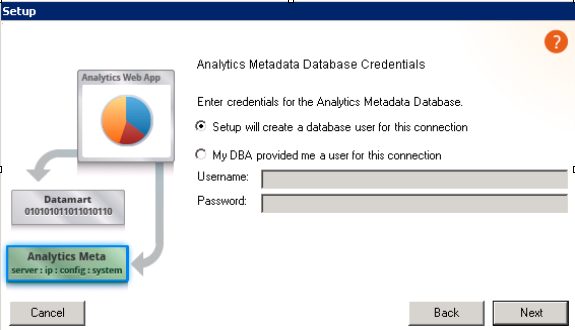
Step 8. Analytics Database Credentials
How you answer this question determines which credentials are used by the Analytics web application when connecting to the Analytics metadata database. Your options are:
| Option | Description |
|---|---|
| Let setup create a user | With this option Setup will create a new user on the database server and assign that user to the Analytics metadata database. The username and password are randomly generated. Additionally, when the instance is upgraded, new credentials are created. |
| My DBA Provided Credentials | In some environments, access to databases is controlled. If your DBA provided you credentials, choose this option and enter the credentials you were given. |
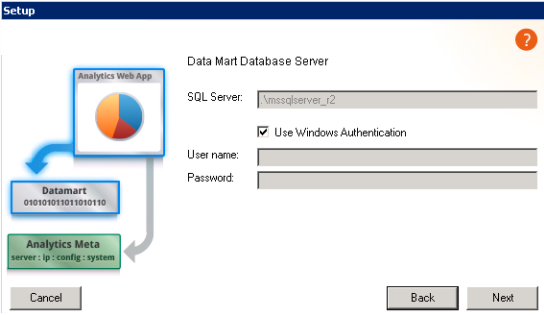
Step 9. Data Mart Database server
The Data Mart database is used to generate all reports in Analytics. This database was created by the Data Mart setup program and is paired with the instance of Analytics being installed. Analytics Setup will read the database server and database name information from the Analytics database.
On this panel you provide credential that Setup will use to connect to the Data Mart database server. It's important to note that the credentials provided here are only used by Setup; these are not the credentials used by the Analytics application.
How do I resolve the "Cannot Connect to Database" error message? This error indicates that Setup cannot connect to the database server you specified. A common cause for this error is specifying only the machine name and omitting the SQL Server instance name. To include the instance name, use the format "[machine_name]\instance_name]" - for example, if you're installing on a local server in which both IIS & SQL are running, and the instance name is SQLEXPRESS (the name that express uses when installing), you would use "(local)\SQLEXPRESS". If the server is a remote server, you'd use the actual machine name.
Step 10. Data Mart Database
The Data Mart database information is read from the Analytics metadata database. This panel is here to inform you of the database being used for this instance of Analytics.
Step 11. Data Mart Database Credentials
How you answer this question determines which credentials are used by the Analytics web application when connecting to the Data Mart database. Your options are:
| Option | Description |
|---|---|
| Let setup create a user | With this option Setup will create a new user on the database server and assign that user to the Data Mart database. The username and password are randomly generated. Additionally, when the instance is upgraded, new credentials are created. |
| My DBA Provided Credentials | In some environments, access to databases is controlled. If your DBA provided you credentials, choose this option and enter the credentials you were given. |
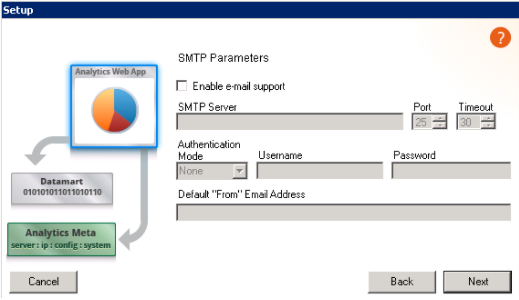
Step 12. SMTP Parameters
Reports in Analytics can be emailed to people within, or outside, of your organization. This panel allows you to enable the email feature and provide details for connecting to your SMTP server.
Step 13. Should the Analytics database be preserved or deleted?
When removing an instance of the Analytics, you need to decide if you want the metadata database destroyed. If you choose delete, the database is removed and cannot be recovered, unless you have a backup.
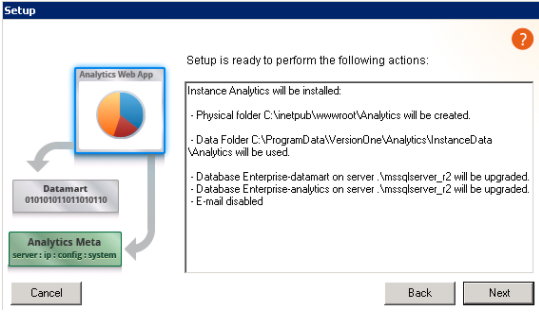
Step 14. Setup is ready to perform the following actions
This panel allows you to review the changes that setup is about to make. Click Next to apply the changes.
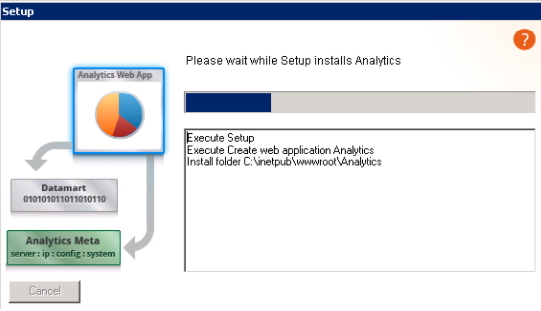
Step 15. Please wait while Setup installs ....
This panel allows you to view the progress of the changes being made.
Step 16. Success
When setup is successful you receive a small window indicating this fact. Click OK to close setup.
You are now ready to enable Analytics in your Digital.ai Agility instance. To do this:
- Log into Digital.ai Agility as a user with an Admin Privileges role of "System Administrator" (admin for example).
- Click Admin in the main menu, and then click on the Analytics tab.
- Click the Enabled check box, and then enter the URL used to access Analytics.
- Enter the integration code, and then click Save.
- (Optional) Click Test Connection to make sure the set up is working properly.

Error Messages
When setup fails, you are presented with a window that indicates the failure and provides an option to open the log file. In most cases the error message clearly indicate what failed (i.e. Insufficient rights to create database), however there are situations when Microsoft Windows returns a cryptic error code. In these situations, please email Support and include the setup log file.