SeeTestAutomation- HP LoadRunner - VUGen
Please note that this tool is classified as a Legacy tool. We recommend transitioning to our updated solutions to maintain optimal performance and security in your workflows. For more information on this matter, please reach out to technical support .
Integrate SeeTestAutomation and HP LoadRunner
When installing or updating SeeTestAutomation on a machine with HP Virtual User Generator, a few sub-folders of HP Virtual User Generator are being updated.
To make sure the integration was done successfully, check that the following files were added to the <LoadRunner_Installation_directory>/bin:
- CookComputing.XmlRpcV2.dll
- imageClient.dll
- Ionic.Zip.Reduced.dll
- RestSharp.dll
If they have not, you should manually copy them from <SeeTestAutomation_installation_directory>/clients/vugen/
Exporting code for VUGen
To export a code to HP Virtual User Generator (VUGen), you need:
- Obtain the test code in VUGen language;
- Integrate SeeTestAutomation and HP Virtual User Generator.
The following is a step-by-step description of how to do it.
Step 1: In SeeTestAutomation, create your script and go to the "Code" tab.
Step 2: From the code tab, select VUGen language from the drop-down list.

Step 3: Code in VUGen language will be generated for the script. You can copy it into clipboard using button
:

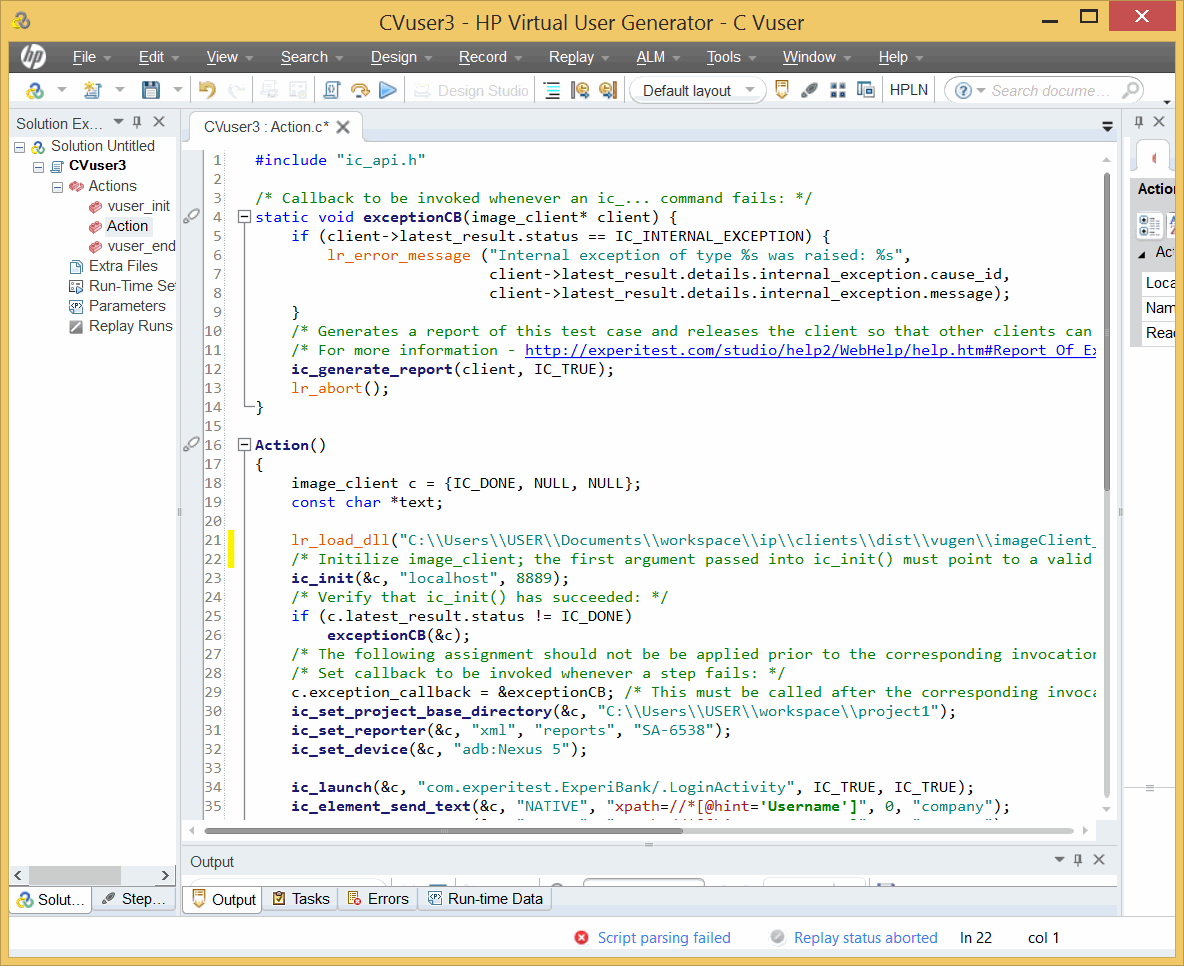
Step 4: Now you can paste the copied code into a C-Vuser project in HP Virtual User Generator as displayed in the following screenshot.
The next section describes how to create such a project.
Creating a C-Vuser project
In the previous section, you created and copied C-code for a VUGen client. This section describes how to create an HP Virtual User-Generator project which can run that code.
Step 1: Open HP Virtual User-Generator.
Step 2: File -> New Script and Solution (or merely press Ctrl+N buttons).
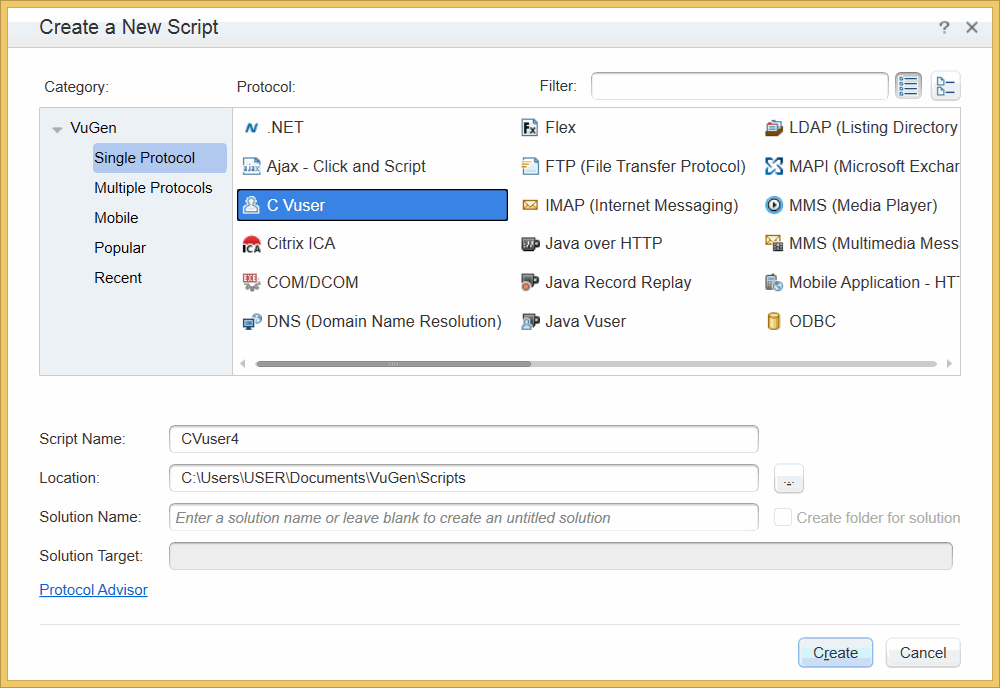
Step 3: Under category ‘VuGen’ select subcategory ‘Single Protocol’ and choose protocol ‘C Vuser’:

Step 4: Give a name to your project and click on ‘Create’. In this example, we named our project ‘CVuser4’.
Step 5: Open action ‘Action.c’ (by double-clicking on item ‘Action’ in the solution explorer of the created project):

Step 6: Erase the content of file Action.c and paste there the code you copied in the previous section:

Step 7: Make sure that the code is compilable using button
:

If the compilation fails because the header file ic_api.h or some identifier starting with prefix ic_ could not be found, then you need to include file ic_api.h as an extra file of your project. For that purpose, you can click RMB above
in the solution explorer and select the pop-up option "Add Files to Script...". The location of file ic_api.h is <SeeTestAutomation_installation_directory>/clients/vugen/ic_api.h .
Step 8: Now you can connect all the necessary devices / launch the necessary emulators, and run your test from HP Virtual User-Generator. Button
starts the test:

When the test stops running, you can see its status:

If the test has failed, a corresponding message will be displayed in the output:

That has happened because the test contains a callback function which is activated upon a failure in a step. This page will elaborate on the callback.
