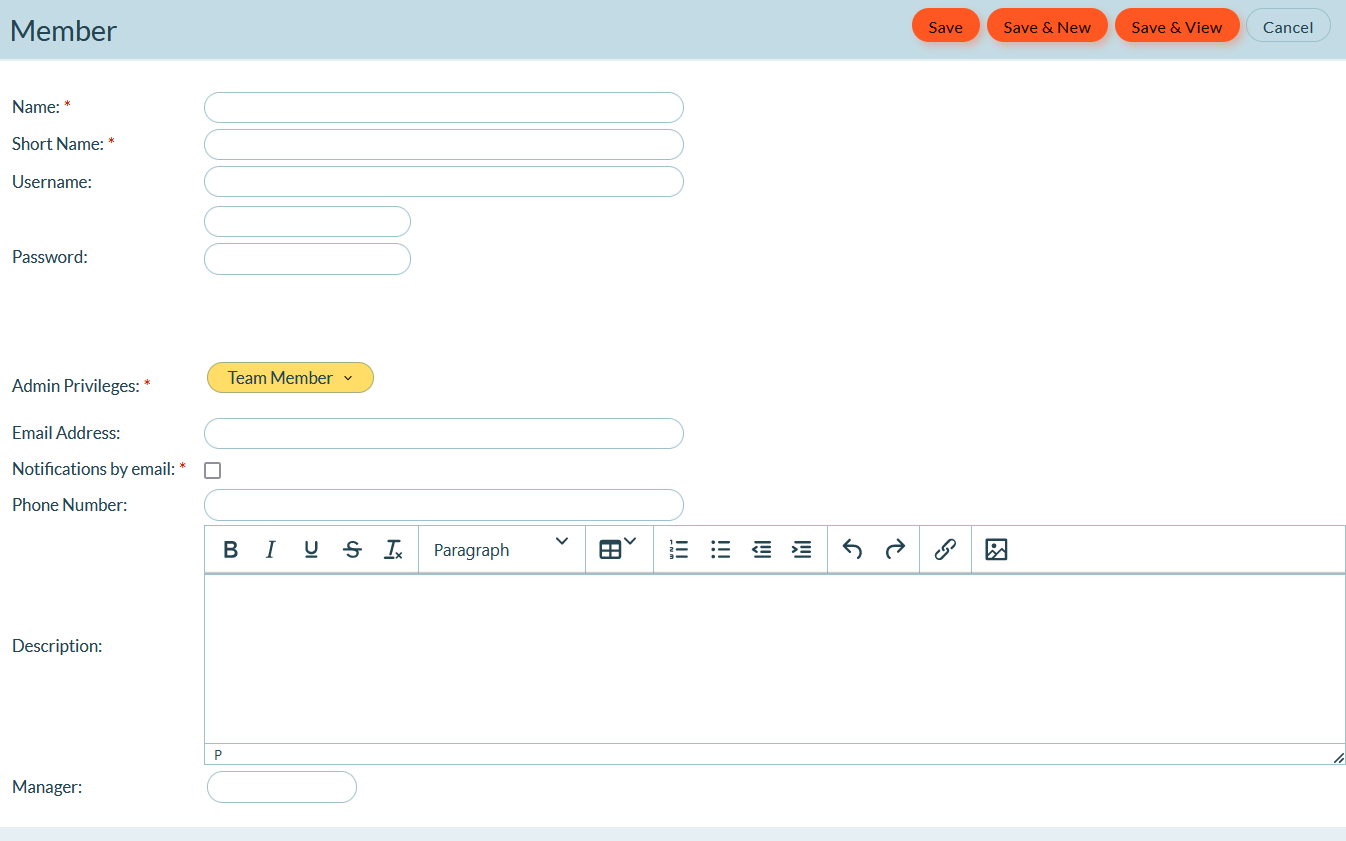
Adding a New Member or User
This article explains how to add a new member or a user in Agility.
Follow the instructions below to create a new member account and assigning system configuration and project access levels.
***Users are called members.*** This article is intended for administrators and provides step-by-step instructions for creating a new member account.
Steps
Your ability to create a new member account depends on your Admin Privileges or Project Role.
- Click the hamburger menu
> Admin > Members.
- In the Members page, click Invite Members > Add Member.
- In the resulting Members window, enter the required information, and click Save.

| Field | Description |
|---|---|
| Name | The member's full name. |
| Avatar | The image that identifies the member in the system. The file size must be less than 2 MB and in .jpg or .png format. It will be automatically resized to 96x96 pixels. See Adding, Changing or Removing Member Avatars. |
| Short Name | Similar to a nickname, this is an abbreviated version of the member's name. |
| Username | The username the member uses to login to Digital.ai Agility. |
| Password | The member's password. |
| Admin Privileges (Previously Default Role) | The role that establishes the base set of system access privileges and determines if a member can make system configuration changes, manage sprint schedules and sprints, and manage member accounts. See Admin Privileges topic for details. Note that this role does not automatically grant project access. See Project Roles topic for details. |
| Email Address | The member's email address. |
| Notifications by email | Select this check box to allow the member to receive notifications by email. |
| Phone Number | The member's phone number. |
| Description | A free-form field that allows you enter additional text. |
| User License | (Not editable) Indicates if the member is a licensed user. |
| Ideas Role | (Not editable) Indicates the member's permissions in Ideas. |
| Last Access | (Not editable) The last date the member logged in. |
| Change Comment | (Optional) Enter a brief description about why the account was created or changed. |