Azure Container Plugin
The Azure container plugin allows you to interact with the Azure services or resources in a more seamless and automated manner. It's often used for tasks such as configuration management, troubleshooting, and automation.
important
You must set up a connection to the Azure server before adding Azure tasks. For more information, see Set up Connection to Azure Server.
note
In the release flow editor, Container tasks have a blue border.
Azure provides the following features:
- Run Command (Container)
Prerequisites
For Azure integration, you need the following:
- Azure server running and accessible via HTTP(s)
- Digital.ai Release Runner setup to run the container tasks
Set up Connection to Azure Server
- From the navigation pane, under CONFIGURATION, click Connections.
- Under HTTP Server connections, next to Azure Configuration (Container), click
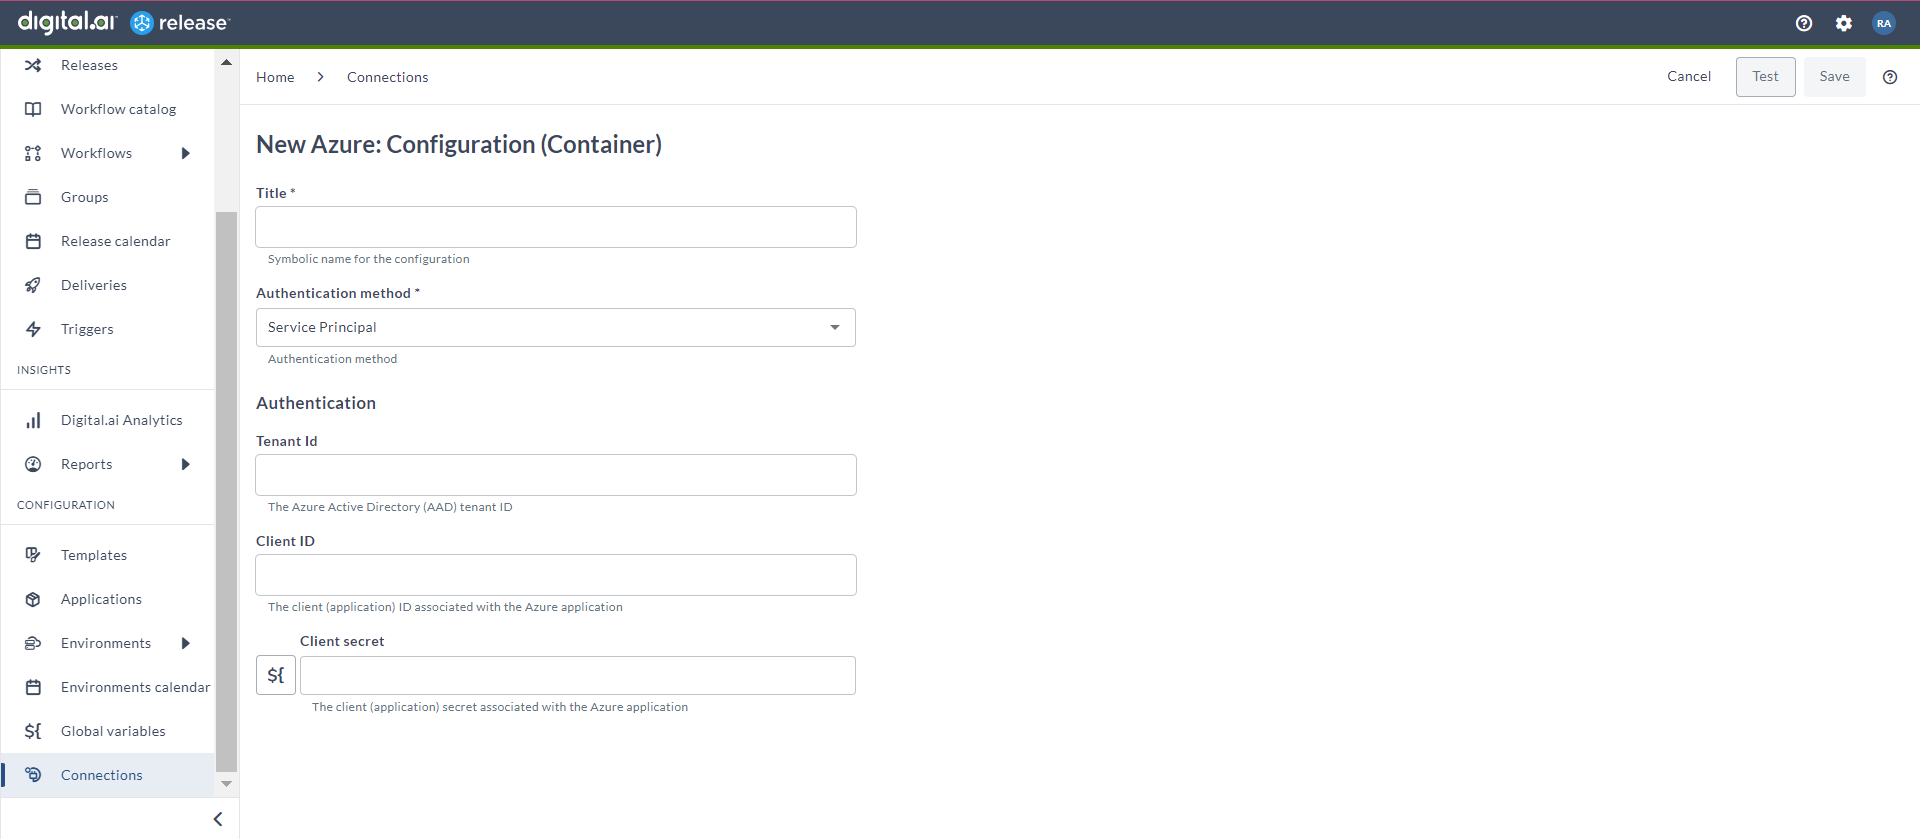
. The New Azure: Configuration (Container) page opens.
- In the Title field, enter the name of the configuration. This name will display in Azure tasks.
- In the Authentication method field, select your relevant authentication type from the drop-down list.
- Server Principal
- User Principal
- For Server Principal*, you can enter Tenant Id, Client ID, and Client secret.
- For User Principal*, you can enter Username and Password.
- In Capabilities, define routing rules for Release Runners. Add one or more capability labels to direct tasks to appropriate runners.
- To test the connection, click Test.
- To save the configuration, click Save.

Run Command (Container)
The Run Command (Container) task is to use the Azure CLI to run a command.
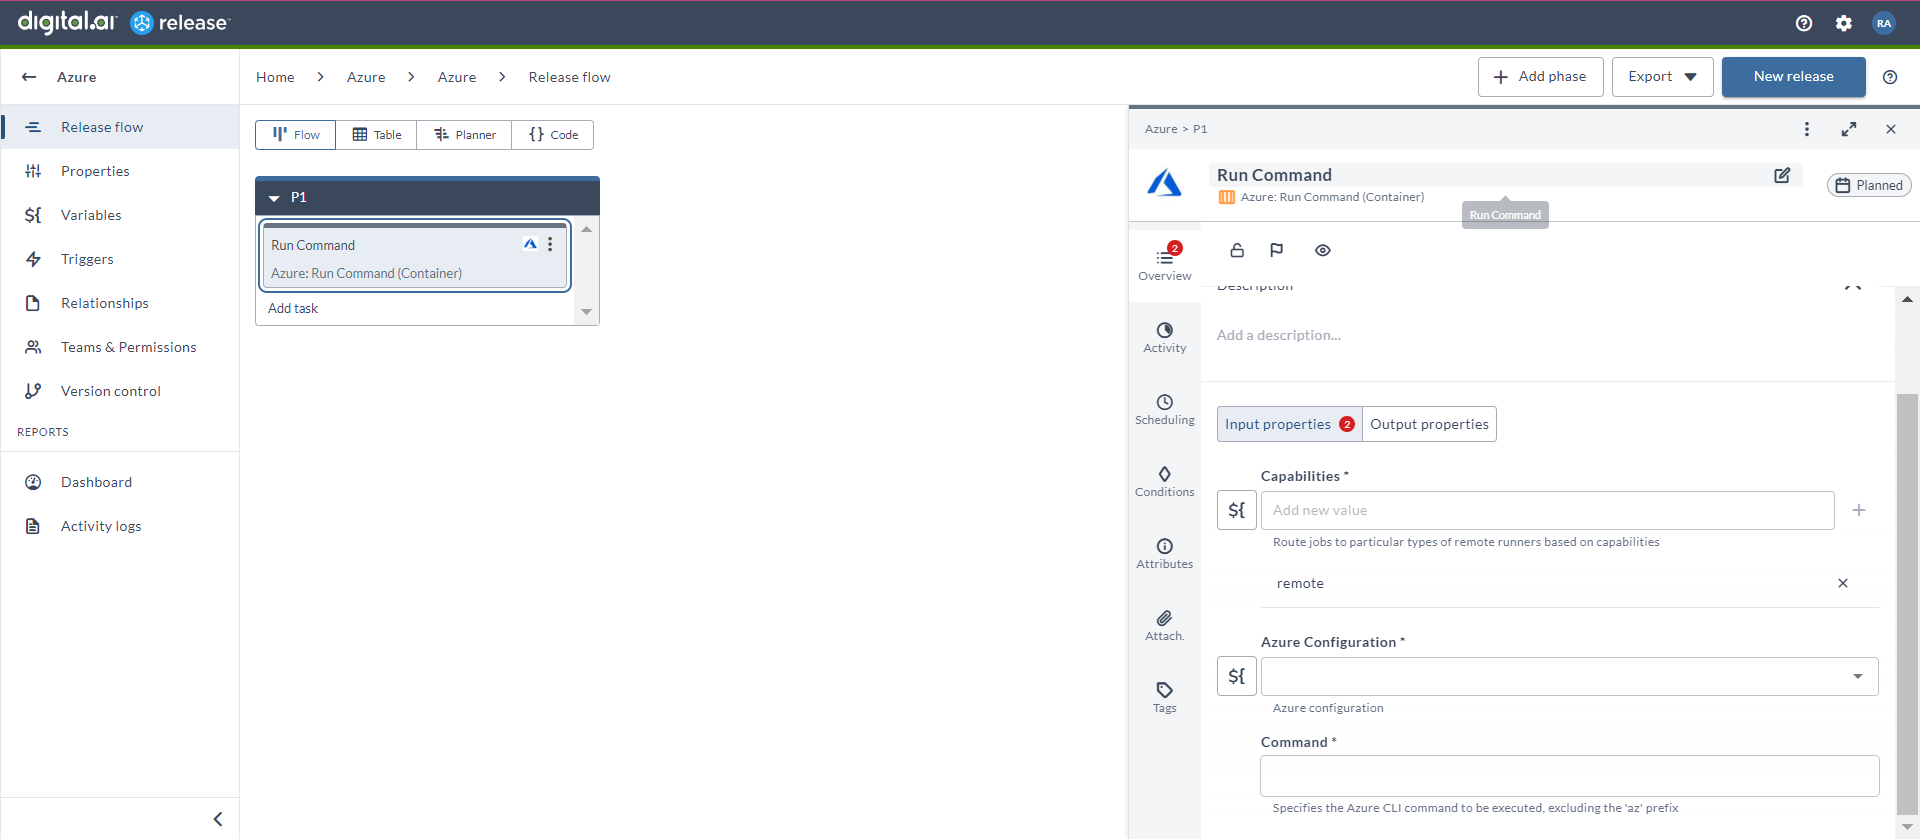
- In the release flow tab of a Release template, add a task of type Azure > Run Command (Container).
- Click the added task to open it.
- In the Capabilities field, enter a value that matches the capability set for your Runner. This will help you to route jobs to that particular Runner.
- In the Azure Configuration field, select the Azure configuration.
- In the Command field, enter the Azure CLI command (excluding the 'az' prefix) that needs to be executed.
