Jenkins Container Plugin
The Jenkins container plugin allows you to run a Jenkins job from Release.
important
You must set up a connection to the Jenkins server before adding Jenkins task. For more information, see Set up Connection to Jenkins Server.
note
In the release flow editor, Container tasks have a blue border.
Prerequisites
For Jenkins integration, you need the following:
- Jenkins server running and accessible via HTTP(s)
- Digital.ai Release Runner setup to run the container tasks
Set up Connection to Jenkins Server
- From the navigation pane, under CONFIGURATION, click Connections.
- Under HTTP Server connections, next to Jenkins: Server (Container), click
. The New Jenkins: Server (Container) page opens.
- In the Title field, enter the name of the Jenkins server. This name will display in Jenkins tasks.
- In the URL field, enter the URL of the Jenkins server.
- Two authentication methods available, do one of the following:
- Enter the server login Username and Password.
- Enter the server login Username and API token.
- If required, enter proxy details.
- Additional Authentication: OIDC Token Headers (Optional) – Use this option for Jenkins servers protected by OIDC-based identity providers. When you check Enable OIDC token header, the following fields are available:
- Issuer URL – Required. Specifies the public URL of your identity provider used to discover supported grant types and token endpoints.
- Client ID or Email – Required. Specifies the OAuth client ID. For JWT grants, enter the service account email instead.
- Client Secret – Specifies the OAuth client secret used for client secret authentication. Leave this field blank when using a private key JWT.
- Refresh Token – Uses the refresh token grant to obtain a new ID token. This value takes precedence if provided.
- Private Key – Provides a PEM-formatted private key required for a JWT grant or client assertion when no refresh token is configured.
- Private Key ID – Optional. Defines the key ID (
kid) used in the JWT header. Required only if enforced by the identity provider. - Scope – Specifies the scope for the token request. Defaults to
openid profile emailif not specified. - ID Token Header Name – Defines the HTTP header name used to inject the generated ID token.
- Access Token Header Name – Defines the HTTP header name used to inject the generated access token.
- In Capabilities, define routing rules for Release Runners. Add one or more capability labels to direct tasks to appropriate runners.
- To test the connection, click Test.
- To save the configuration, click Save.

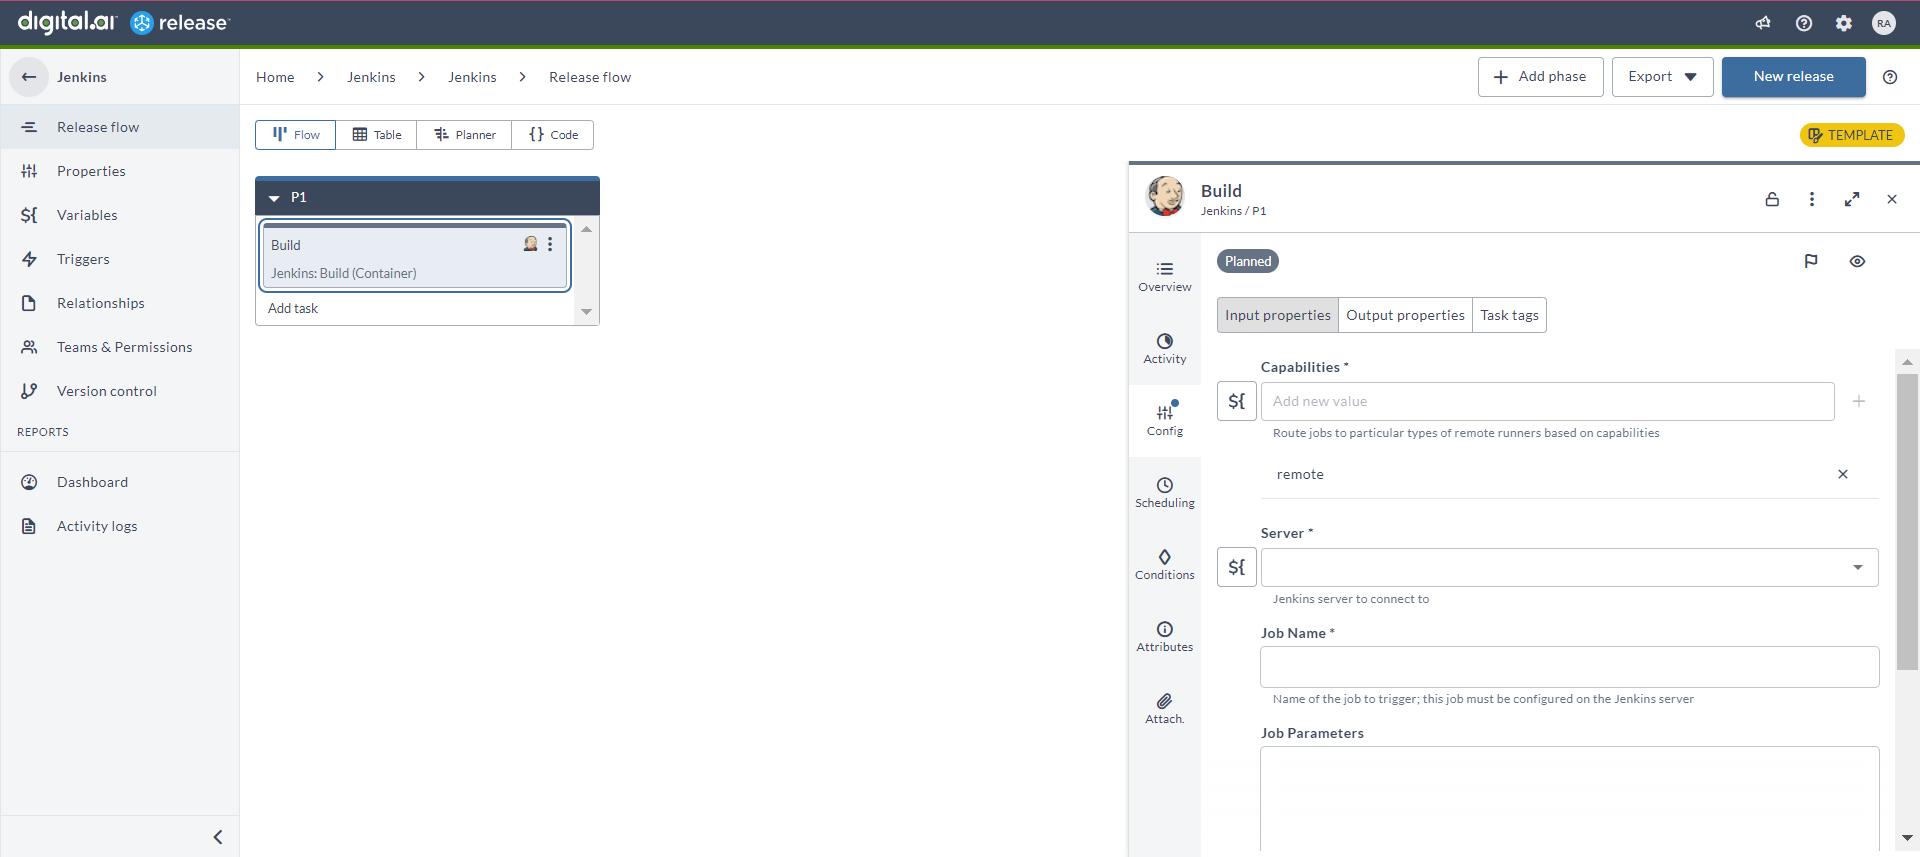
Build (Container)
The Build (Container) task is used to run a Jenkins job that is configured on the Jenkins server.
- In the release flow tab of a Release template, add a task of type Jenkins > Build (Container).
- Click the added task to open it.
- In the Capabilities field, enter a value that matches the capability set for your Runner. This will help you to route jobs to that particular Runner.
- In the Server field, select the Jenkins server where Release connects.
- In the Job Name field, enter the name of the job that will be triggered.
- In the Job Parameters field, enter the Jenkins job's required parameters. You can provide them as delimited by ~~ (for example, paramName1=value1~~paramName2=value2).
- In the Branch field, enter the branch name. Note that, this is mandatory for multibranch pipelines and ignored for others.
