OpenShift Container Plugin
The OpenShift container plugin allows you to automate the deployment and management of containerized applications on OpenShift.
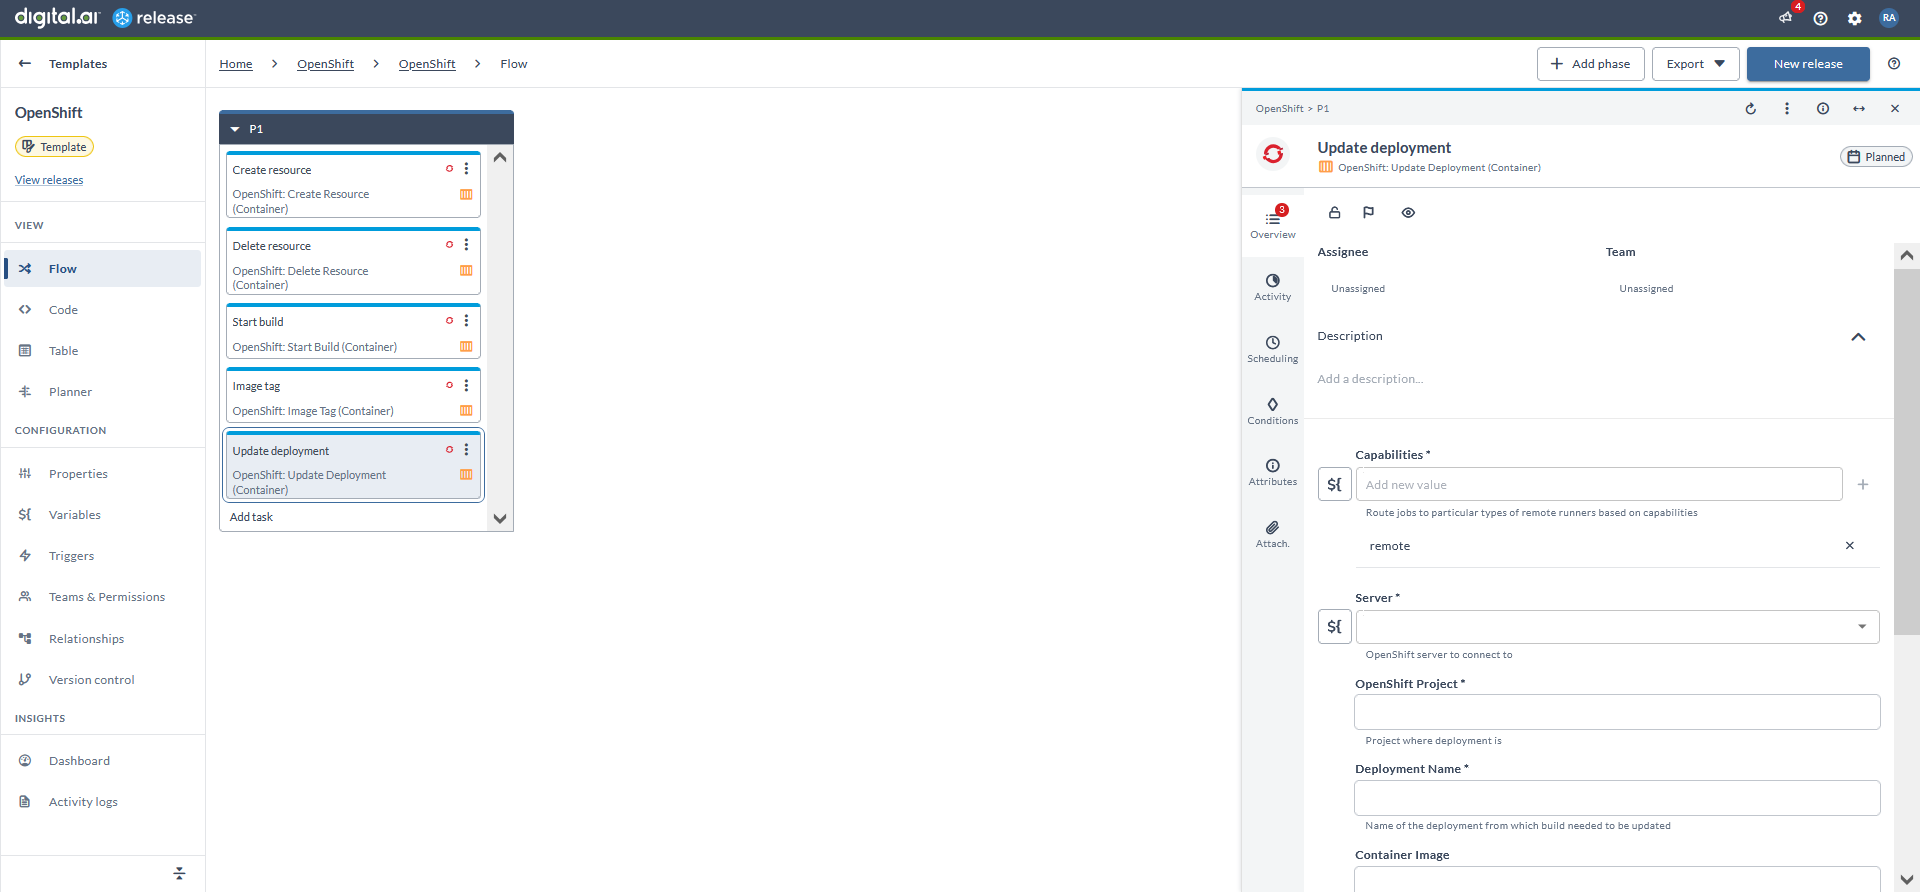
In the release flow editor, container tasks have a blue border.
Prerequisites
- OpenShift server running and accessible via HTTP(s)
- Remote runner setup to run the container tasks
Set up Connection to OpenShift Server
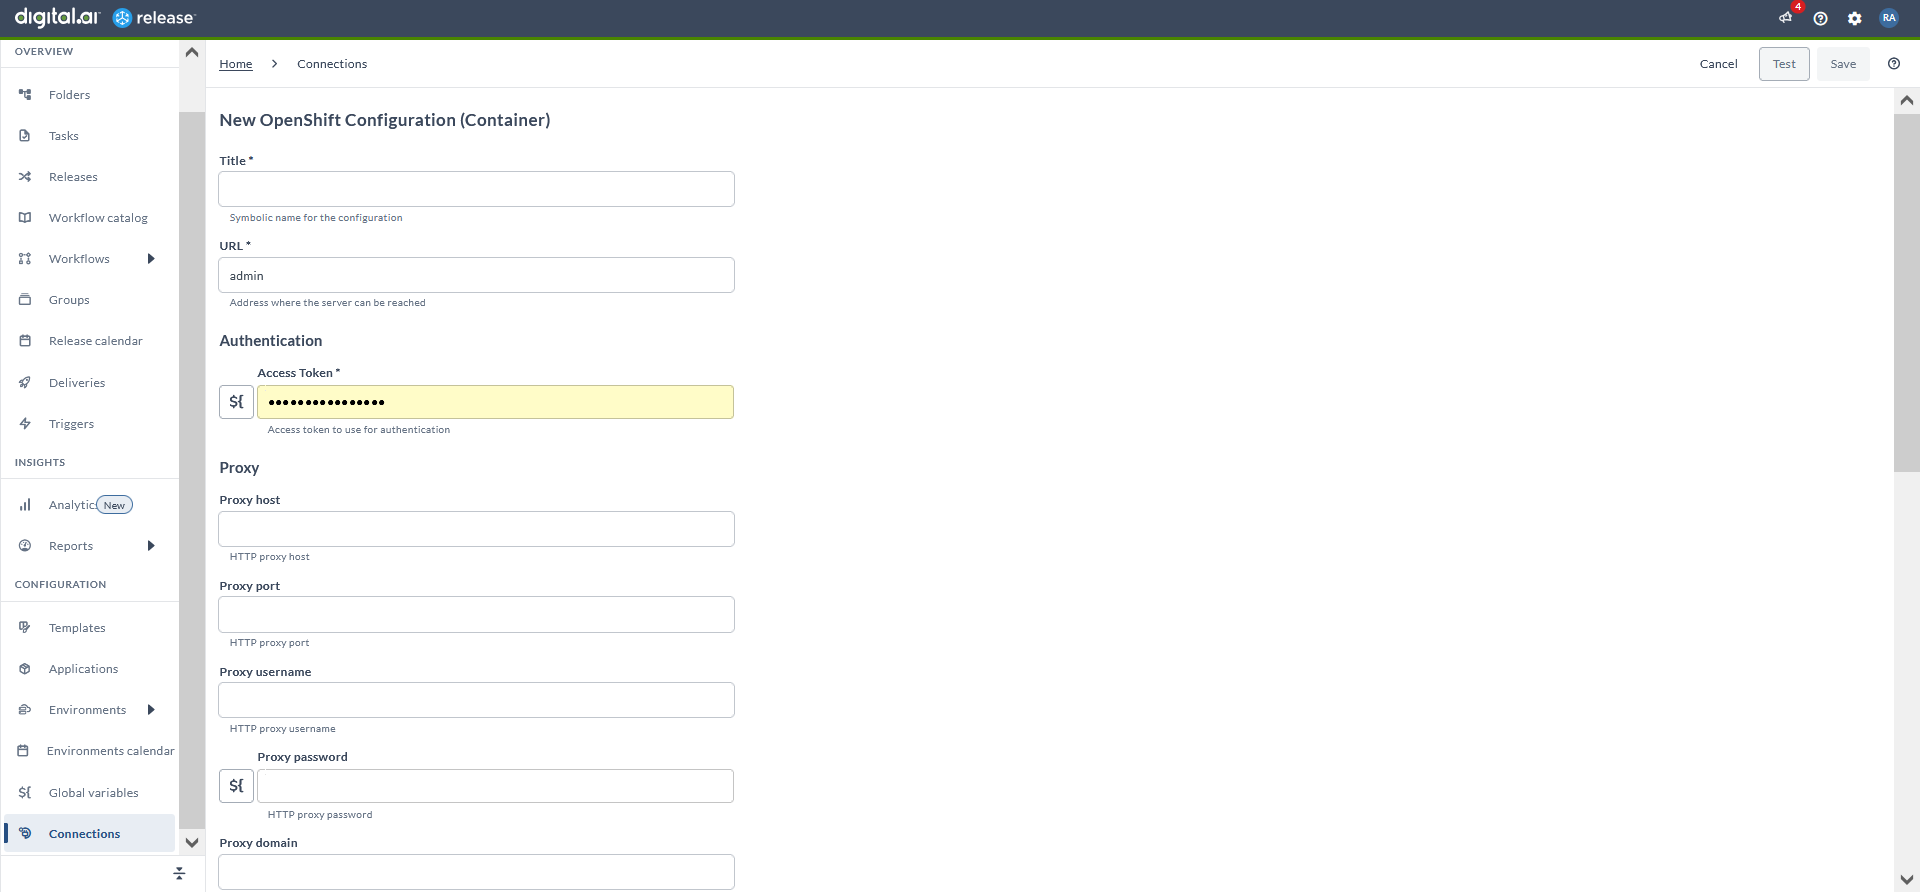
- From the navigation pane, under CONFIGURATION, click Connections.
- Under HTTP server connections, next to OpenShift Configuration (Container), click
. The New OpenShift Configuration (Container) page opens.
- In the Title field, enter the name of the configuration. This name will display in OpenShift tasks.
- In the URL field, enter the URL to access the server.
- In the Access Token field, enter the user token.
- If required, enter the proxy details.
- To test the connection, click Test.
- To save the configuration, click Save.
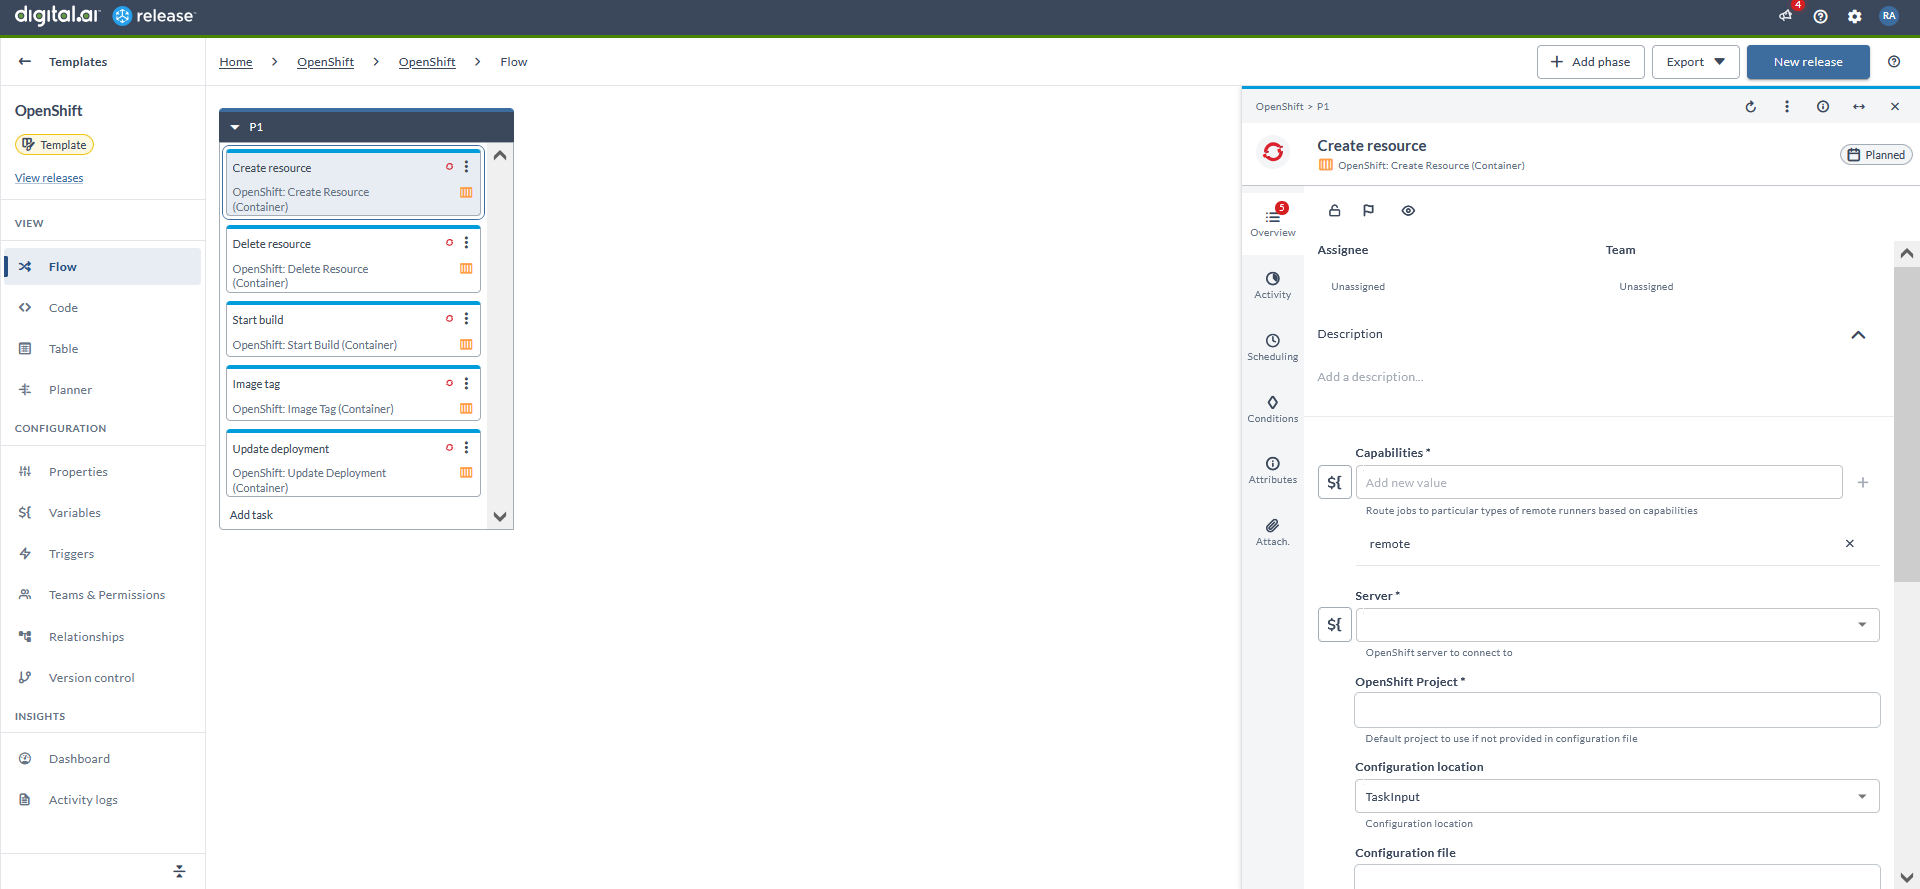
Create Resource (Container)
The Create Resource task automates the creation of OpenShift resources, such as pods, services, deployments, and other Kubernetes objects, to support the deployment and management of applications.
- In the release flow tab of a Release template, add a task of type OpenShift > Create Resource (Container).
- Click the added task to open it.
- In the Capabilities field, enter a value that matches the capability set for your Runner. This helps you to route jobs to that particular Runner.
- In the Server field, select the configured server.
- In the OpenShift Project field, enter the project name. It uses the default project if it's not mentioned in the configuration file.
- In the Configuration location dropdown, select the location. The possible values are TaskInput or Git. The other fields are populated based on the selected location.
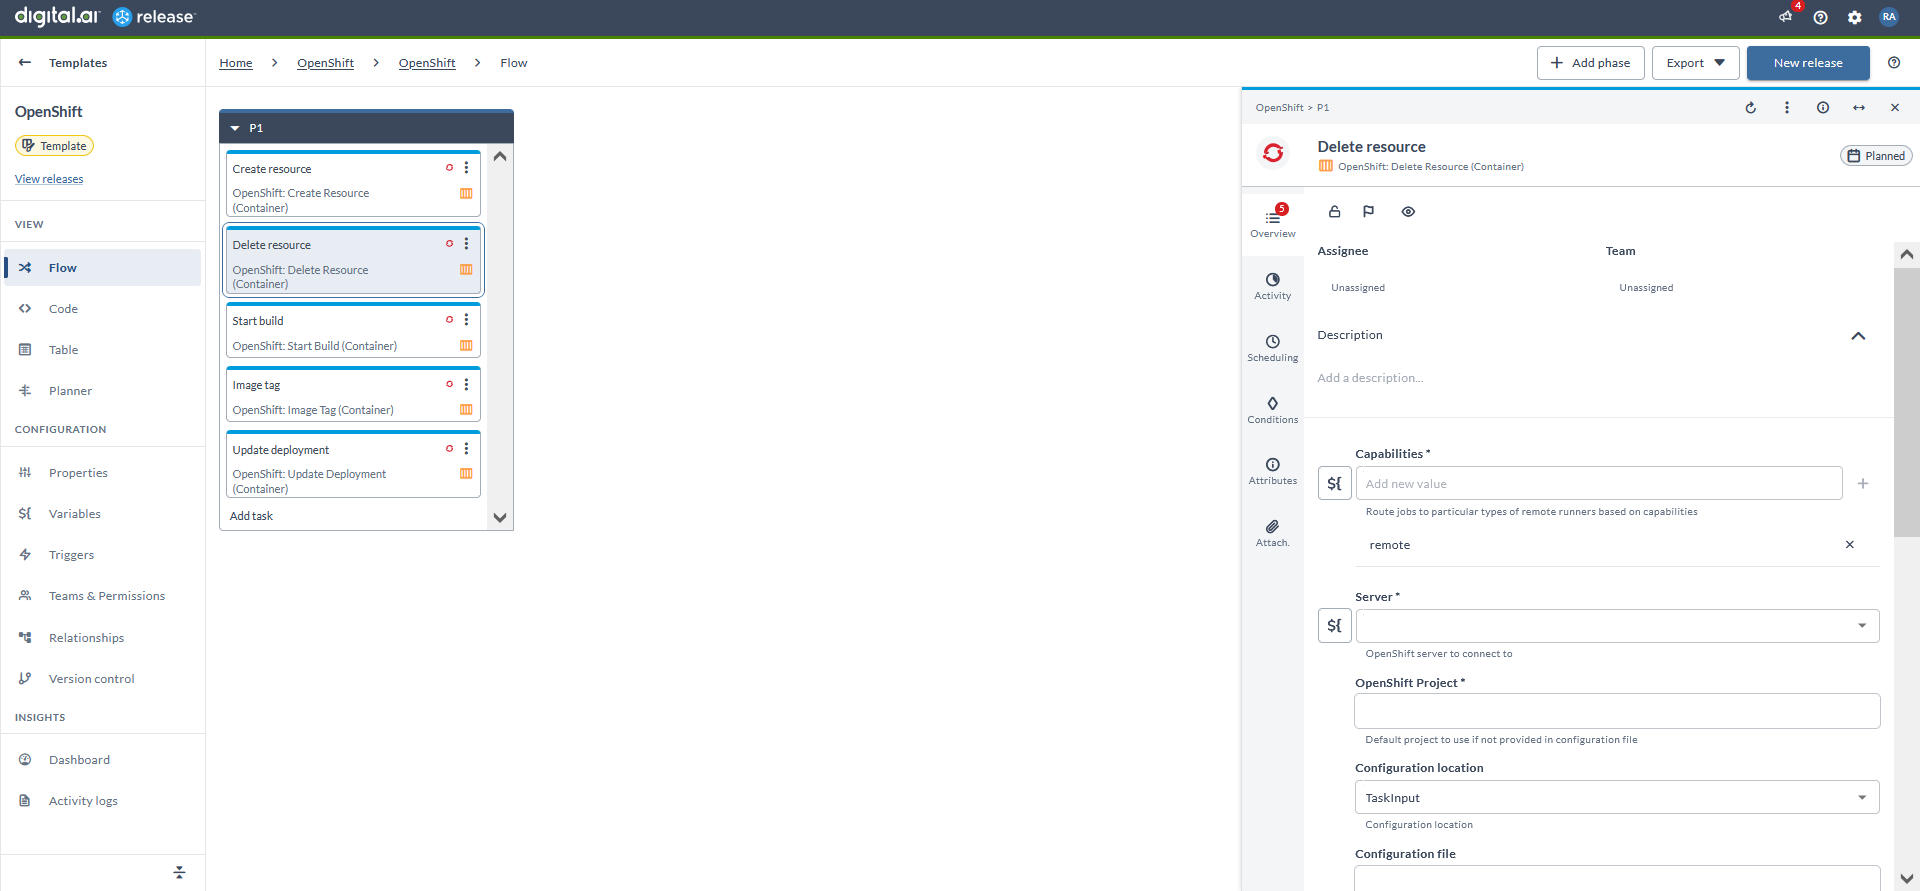
Delete Resource (Container)
The Delete Resource task automates the deletion of OpenShift resources, such as pods, services, deployments, and other Kubernetes objects that are already created.
- In the release flow tab of a Release template, add a task of type OpenShift > Delete Resource (Container).
- Click the added task to open it.
- In the Capabilities field, enter a value that matches the capability set for your Runner. This helps you to route jobs to that particular Runner.
- In the Server field, select the configured server.
- In the OpenShift Project field, enter the project name. It uses the default project if it's not mentioned in the configuration file.
- In the Configuration location dropdown, select the location. The possible values are TaskInput or Git. The other fields are populated based on the selected location.
Start Build (Container)
The Start Build task triggers a new build process for a specified application, compiling the source code and creating container images to be deployed on OpenShift.
- In the release flow tab of a Release template, add a task of type OpenShift > Start Build (Container).
- Click the added task to open it.
- In the Capabilities field, enter a value that matches the capability set for your Runner. This helps you to route jobs to that particular Runner.
- In the Server field, select the configured server.
- In the OpenShift Project field, enter the project that is in the build configuration.
- In the Build config name field, enter the name of the build config from which the build needed to be started.
- In the Wait Timeout field, enter or select the maximum duration to wait in seconds for the build to complete. If the build does not finish within this time frame, it will abort with an error.
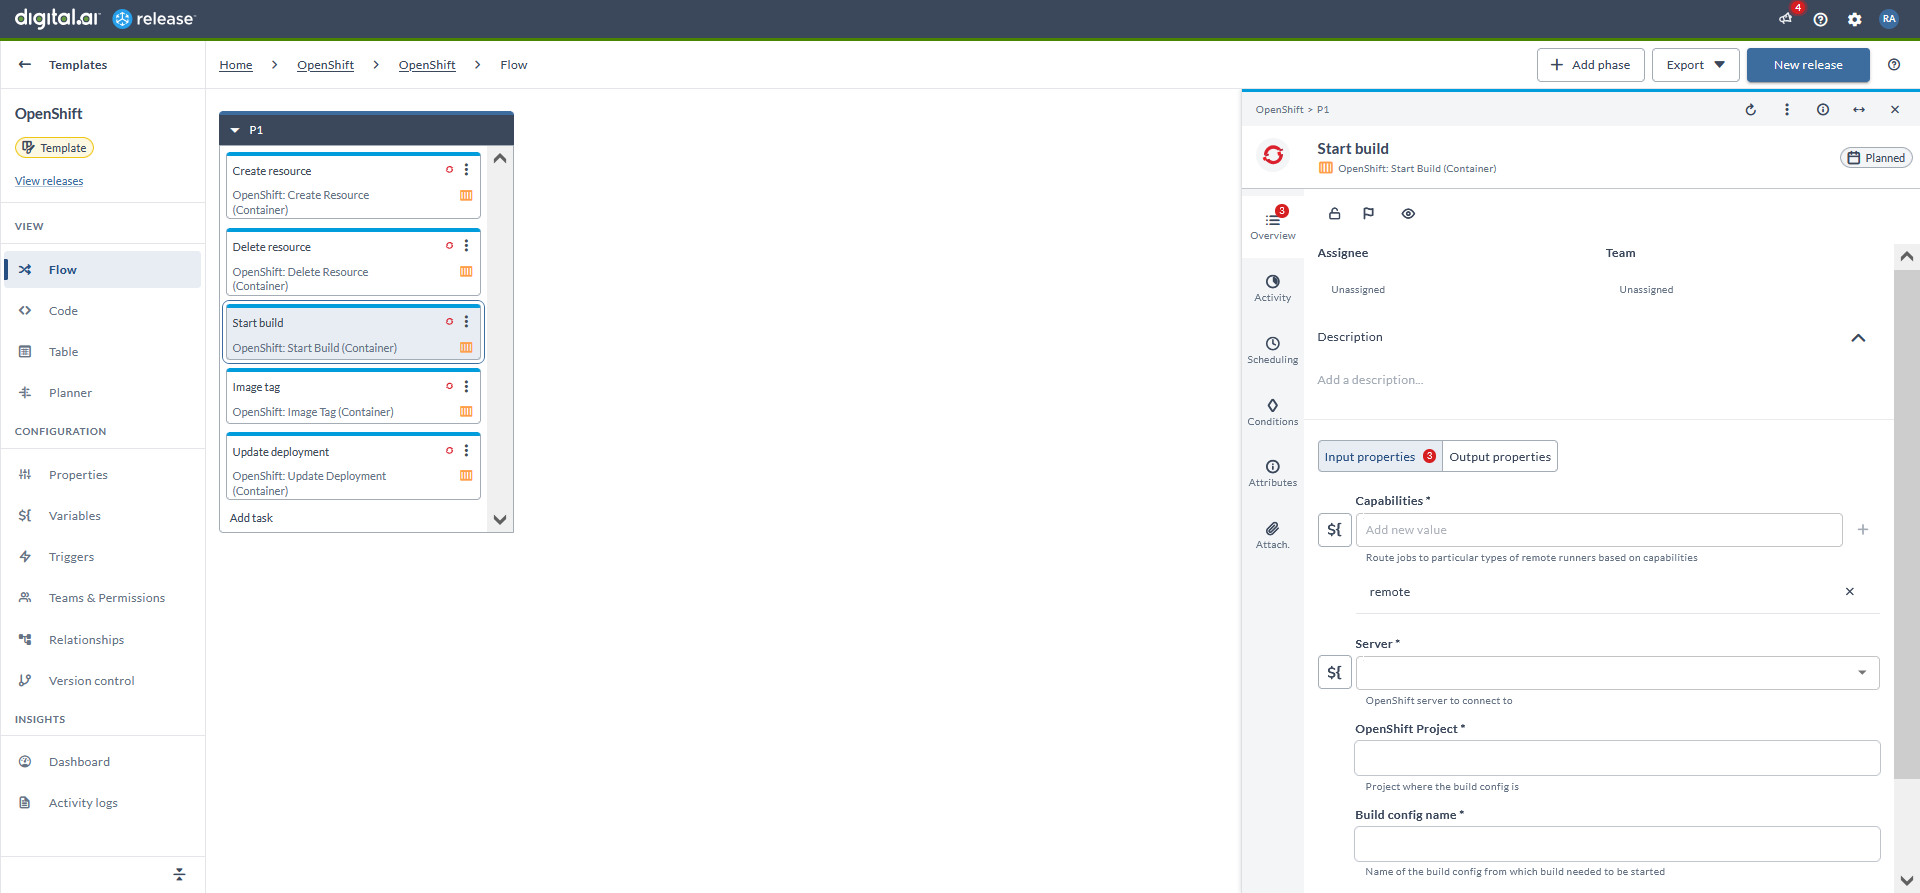
Image Tag (Container)
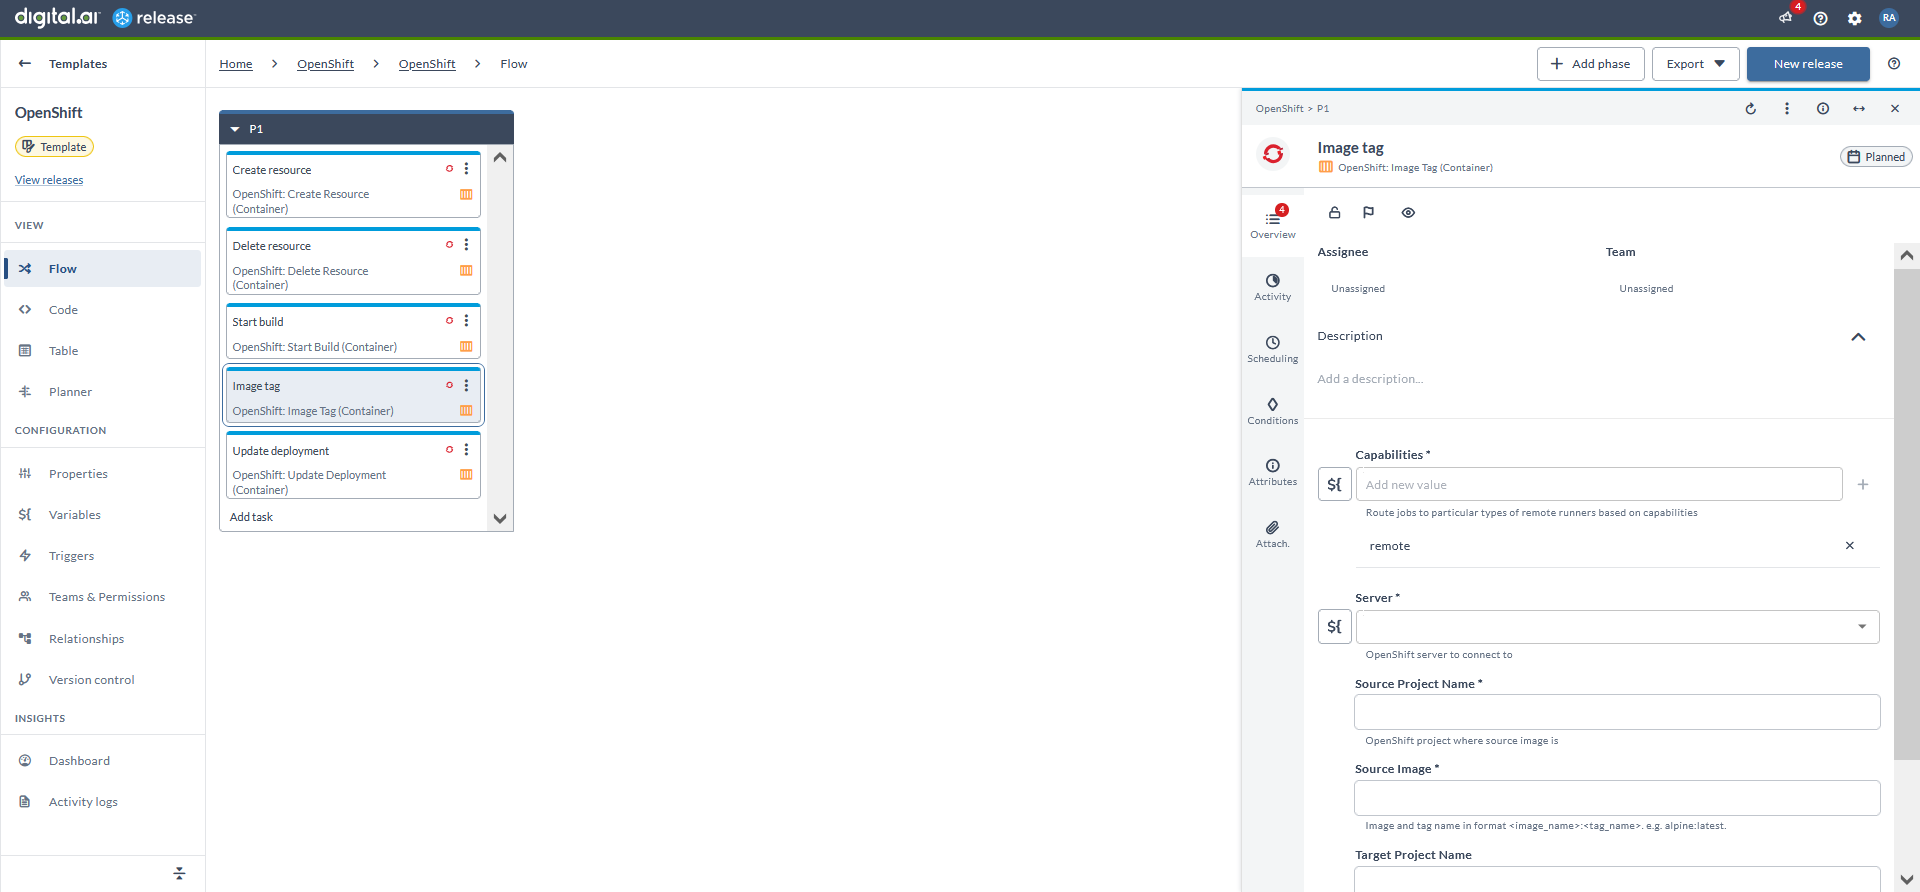
The Image Tag tags a specific container image with a new version or identifier, making it easier to manage and deploy different versions of the application on OpenShift.
- In the release flow tab of a Release template, add a task of type OpenShift > Image Tag (Container).
- Click the added task to open it.
- In the Capabilities field, enter a value that matches the capability set for your Runner. This helps you to route jobs to that particular Runner.
- In the Server field, select the configured server.
- In the Source Project Name field, enter the project where the source image is.
- In the Source Image field, enter the image and tag name in the format
<image_name>:<tag_name>. For example,alpine:latest. - In the Target Project Name field, enter the project where the target image will be created. If you leave this field empty, the source project will be used.
- In the Target Image field, enter the image and tag name in the format
<image_name>:<tag_name>. For example,alpine:latest.
Update Deployment (Container)
The Update Deployment task modifies an existing deployment configuration, enabling updates to the application's container images, environment variables, and other settings, ensuring the deployment reflects the latest changes.
- In the release flow tab of a Release template, add a task of type OpenShift > Update Deployment (Container).
- Click the added task to open it.
- In the Capabilities field, enter a value that matches the capability set for your Runner. This helps you to route jobs to that particular Runner.
- In the Server field, select the configured server.
- In the OpenShift Project field, enter the project where the deployment is.
- In the Deployment Name field, enter the name of the deployment from which build needed to be updated.
- In the Wait Timeout field, enter or select the maximum duration to wait in seconds for the build to complete. If the build does not finish within this time frame, it will abort with an error.
