SeeTestAutomation - Web Recording
Please note that this tool is classified as a Legacy tool. We recommend transitioning to our updated solutions to maintain optimal performance and security in your workflows. For more information on this matter, please reach out to technical support .
Web Recording is used to record scenarios on Web browsers (SeeTestAutomation - Mobile Web Testing)
To record a script in the Web mode:
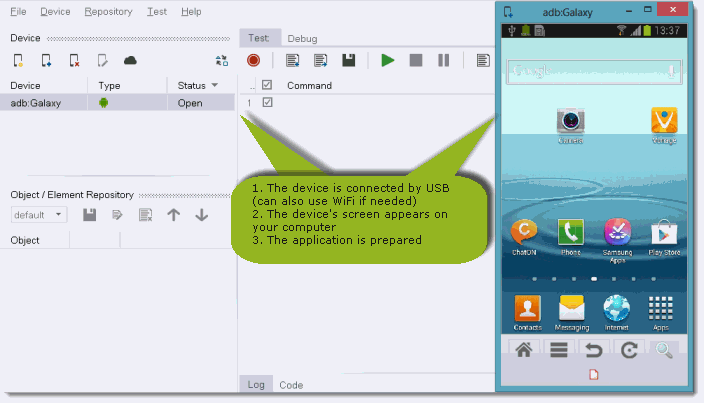
Step 1: Get ready for the recording.
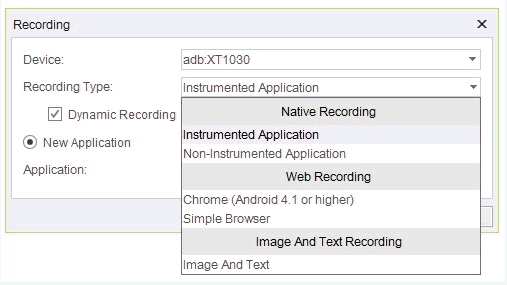
Step 2: On the Recording dialog box now displayed, set the following parameters:
- Device to be recorded.
- Recording Type: for Web recording, select one of the following, as appropriate:
-
Chrome: To record a test script with the Chrome application (works with Android 4.1 and above).
-
Safari: To record a test script with the Safari application (works with iOS 7 and above).
-
Simple Browser: To begin recording a new test script with the provided Simple Browser application.

-
- URL**:** valid URL in the structure [http://...]
Step 3: Choose if you want to continue the current web session or to start a new Web Session by setting the radio button.
Step 4: Click the start button.
The testing Browser will then be launched on your device.
Step 5: Perform the actions to be recorded on the reflection of the device.
Some recommendations regarding the recording:
-
- Click the center of the image/icon/link
- Record slowly
Step 6: Once a recording is completed, click the stop record button.

Step 7: You will see a progress bar indicating that the record data is being analyzed, and the test script will then appear in the Script area.
Note: The script you recorded can be edited later on. (For instructions on how to edit, see the "Edit Test Commands" & "Edit Test Objects" section in the guide).
**
**
Note: The second step (after setting the device under test) is launching the Testing Browser, and it was automatically added.
Step 8: Click the Play button to run the script.