Agility Sync Single Sign On Configuration
This article provides instuctions for configuring SSO with Agility Sync.
Overview
Agility Sync 19.1 and later versions support integration with SAML compliant external user authentication tools such as Okta, Centrify,OneLogin, and Ping Identity.
SAML is an XML-based open standard developed by OASIS Security Services Technical Committee. It defines a framework to perform web browser SSO using secure tokens for exchanging security information between web applications. For more information about SAML, its concepts and components, see https://www.oasis-open.org/.
Setup SAML Authentication for Agility Sync Users
Setting up Agility Sync to use SAML compliant external authentication is a two-step process:
- Set upAgility Sync as a Service Provider (SP) with the SAML compliant IdP such as Okta,Centrify, OneLogin or Ping Identity.
- Enable SSO in Agility Sync and configureAgility Sync to use the SAML compliant IDP for authentication.
Of these two steps, setting up Agility Sync as a Service Provider with the IDP is out of scope of this topic. However, this topic includes instructions on how to get the Agility Syncmetadata that's required to configure Agility Sync as a Service Provider with the IdP.
Get the Agility Sync Metadata
- Once you have Agility Sync installed, log on to Agility Sync
- Click the Administration icon (
 ) at the top right and select System > Settings from the menu.
 - Select the SSO tab.
- Click Get Metadata.
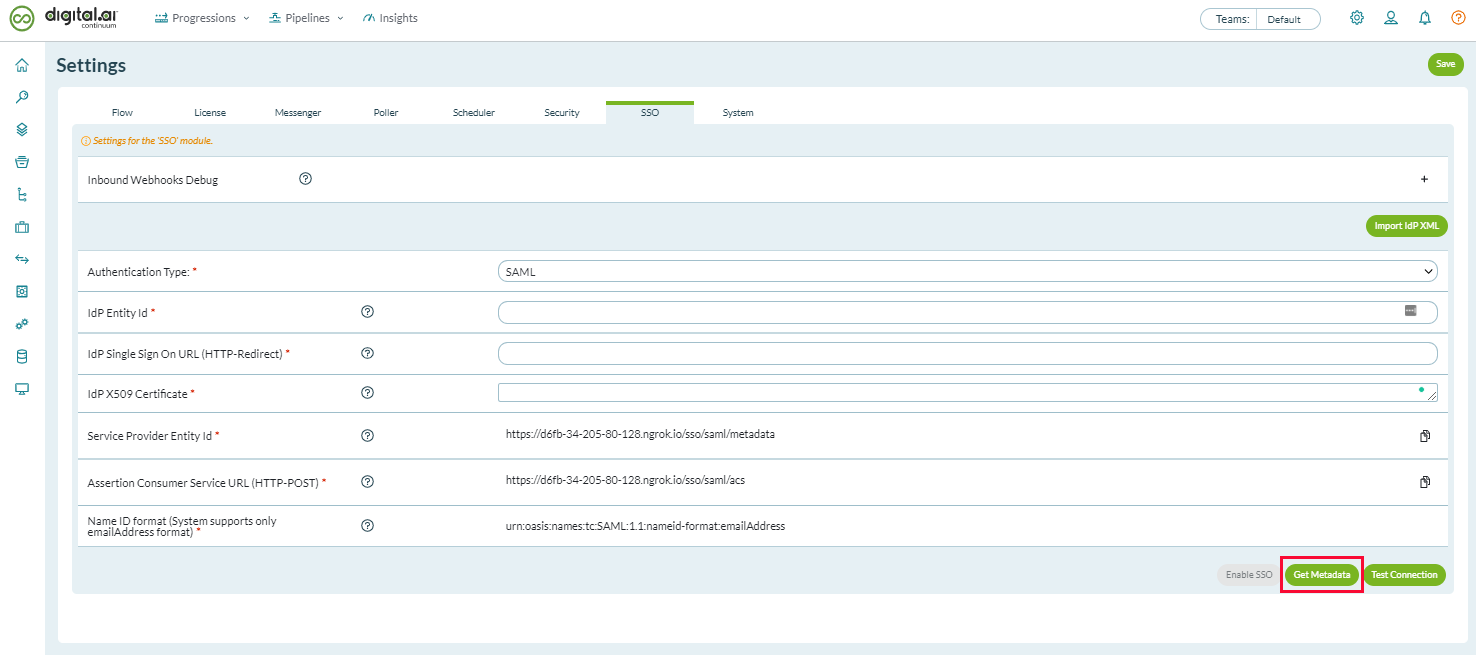
- Save the XML file for later use when you register Agility Sync as a Service Provider with the SAML IdP.

Enable and Configure SSO in Agility Sync
- With the Agility Sync metadata at hand, make sure you have configured Agility Sync as a Service Provider with the SAML IdP.
- Log on to Agility Sync as an Administrator.
- Click the Administration icon () at the top right and selectSystem > Settingsfrom the menu.
- Select the SSO tab.
- If you have the IdP metadata XML file, you can import the same by clicking Import IdPXML.Otherwise, you can fill in the fields manually.
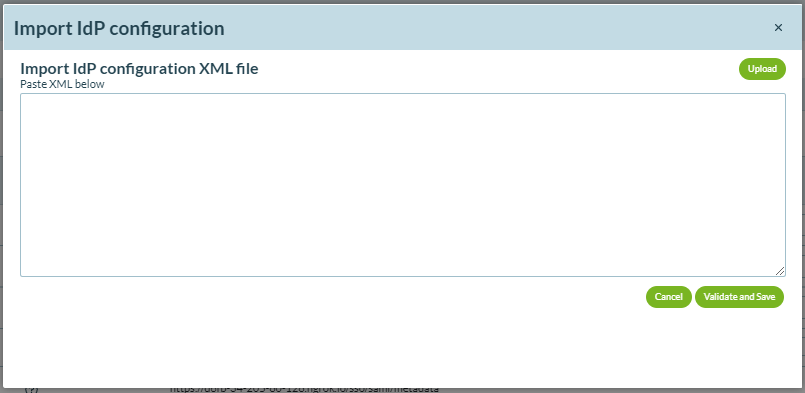
Click Upload, browse and select the IdP XML file to import the IdP's metadata.
You can also copy and paste the configuration XML codein the text box.
When done, click Validate and Save.
-
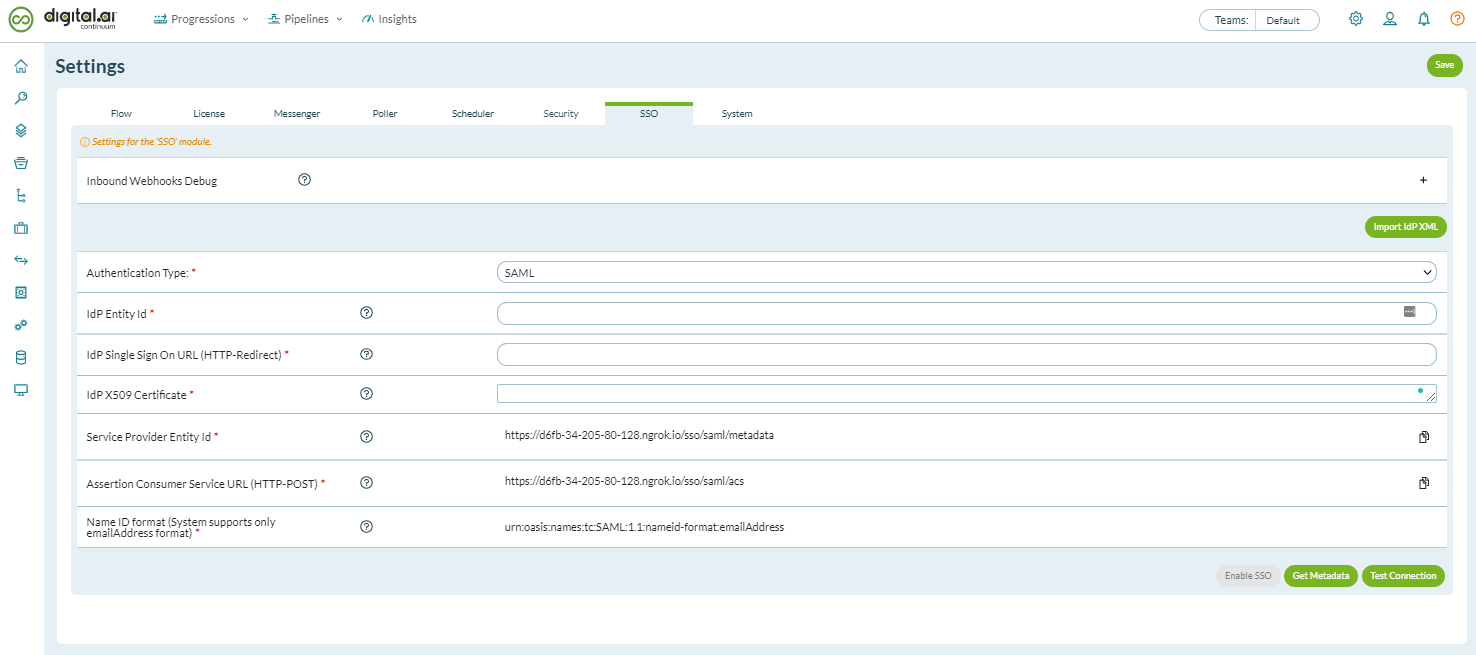
If you do not have the IdPconfiguration XML file, enter the details for the fields such as the IdPEntity ID, IdP SSO URL, and IdP X509 Certificate.The Service Provider Entity Id,Assertion Consumer Service URL (HTTP-POST) andName ID format fields are auto-filled.
-
Click Enable SSO.
-
Click Test Connectionand make sure the connection is successful.
-
Click Save.
This concludes the SSO configuration.
From this point, clicking Sign-in from the Agility Sync log-on page takes the users to the organization's SSO page.
Configure the IdP's Directory Service Field to Supply the Username
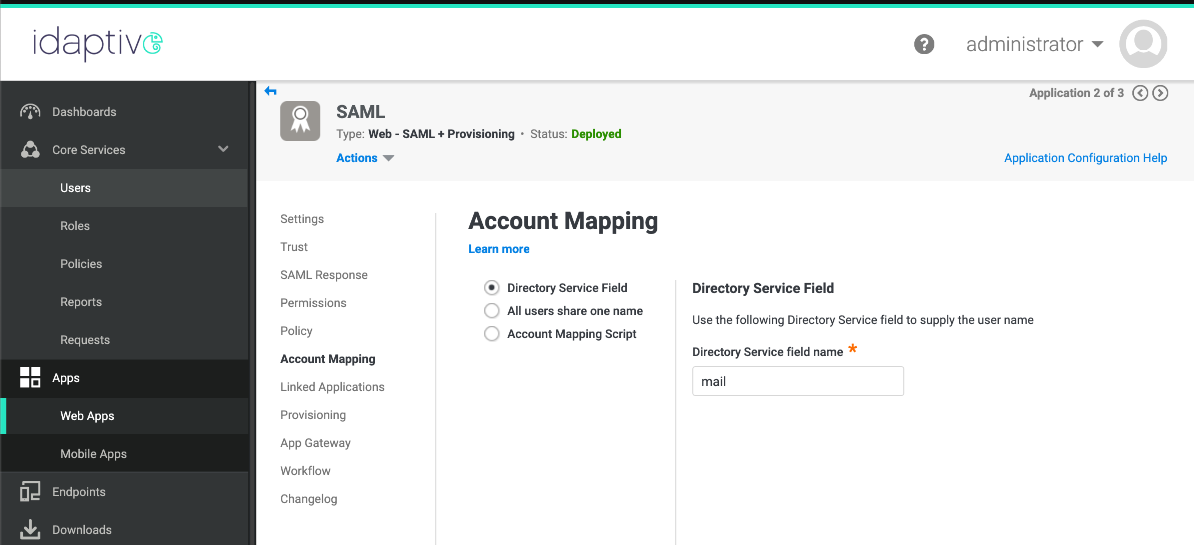
Agility Sync uses email ID as the key to identifying user accounts. As a result, user authentication may fail if your IdP does not include the email ID in its SAML response. In such cases, you must make sure that your IdP's response includes the email ID (by mapping the Directory Service Field appropriately).
For example, you must map "mail" as the Directory Service Field to supply the username in Idaptive's Centrify.
Disable SSO
To disable SSO:
- Click the Administration icon () at the top right and click System > Settingsfrom the menu.
- Select the SSO tab.
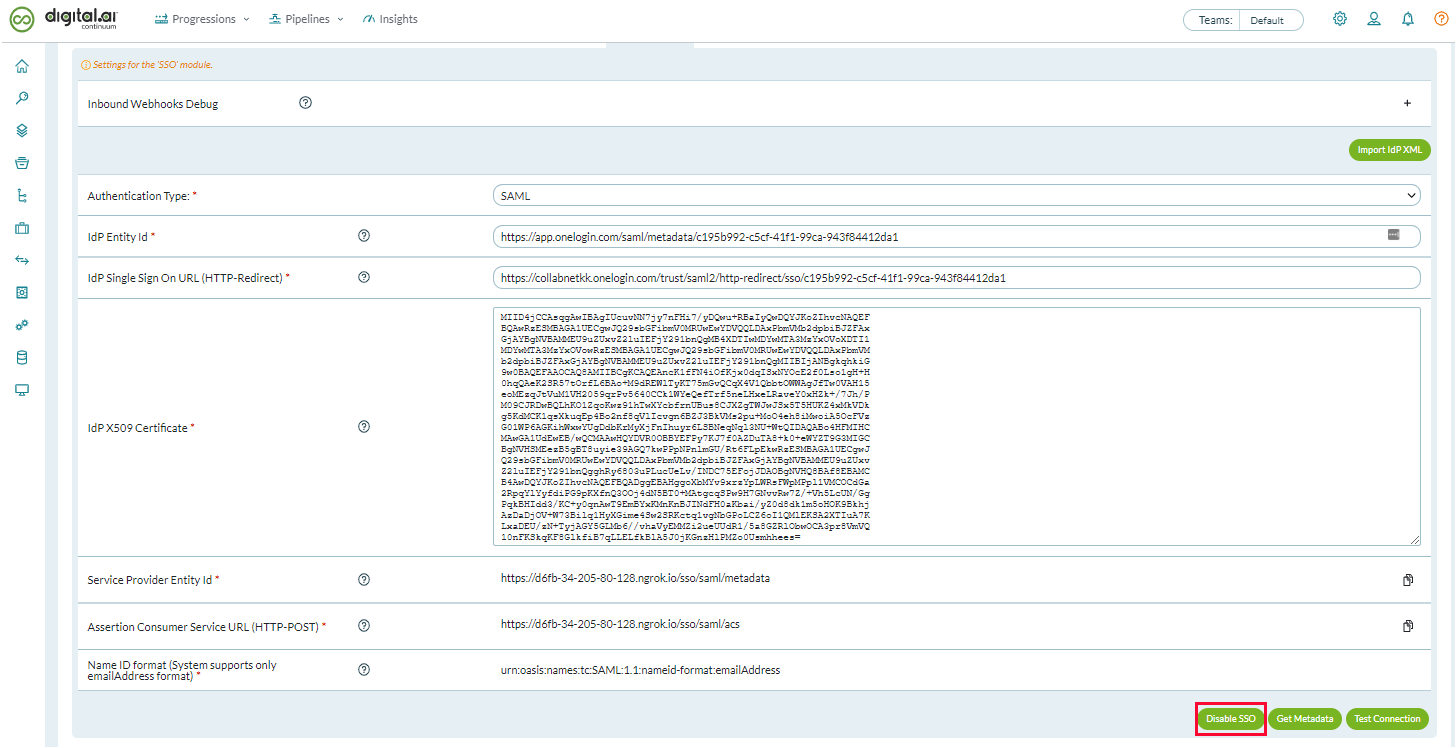
3. Click Disable SSO.
A confirmation message appears.

4. Click Continue.
If you are not able to log onto Agility Sync after enabling SSO, log on via a shell to the Agility Sync server and run the following command to disable SSO.
$CONTINUUM_HOME/common/disable_sso.py