Offline Instrumenting iOS Applications
Offline instrumentation allows you to prepare your iOS application for testing with Digital.ai Continuous Testing without requiring runtime integration.
Before You Begin
To ensure a successful instrumentation process, please verify the following requirements:
-
Obfuscation: Instrumentation must be performed before any application obfuscation. We do not support manual or offline instrumentation for applications that have already been obfuscated.
-
Resources: If you do not have the required framework files for this process, please contact Digital.ai Technical Support.
-
Compatibility: Use this manual process only if the standard iOS Application Instrumentation is not compatible with your environment.
Prerequisites
- macOS system with Xcode installed
- Access to the iOS application source code
- Apple Developer account with valid provisioning profiles
- Digital.ai iOS instrumentation package
- Download the latest version of the iOS instrumentation package from the installers page. You can find the download link for Experitest.Framework in the iOS table under Instrumentation.
Instrument the Application in Xcode
This preparation needs to be performed only once per application.
1. Open Your Project
- Open your project in Xcode (
.xcodeprojor.xcworkspace)
2. Duplicate the Target
- Select your project in the Project Navigator
- Select the app target
- Right-click and choose Duplicate
- When prompted, select Duplicate Only

3. Rename the Target (Optional)
- Rename the duplicated target (for example,
AppName-Instrumented)

4. Select the Duplicated Target
- Click the duplicated target to begin configuration
5. Link Binary With Libraries
- Go to Build Phases → Link Binary With Libraries
- Click the "+" button to add frameworks

Add Required Libraries
- Search for each required framework
- Click Add

Repeat for all required libraries.
Required Libraries
The following libraries must be added:
CFNetwork.frameworkQuartzCore.frameworkUIKit.frameworkFoundation.frameworkCoreGraphics.framework
If using Simulate Capture feature, also add:
CoreFoundation.frameworkAVFoundation.frameworkCoreMedia.frameworkCoreVideo.frameworkCoreImage.frameworkVision.framework
If using Mock Authentication feature, also add:
LocalAuthentication.frameworkSecurity.framework
Verify Libraries
Ensure each library appears in the list.

6. Add Experitest Framework
- Click Add Other

- Locate and add
Experitest.framework- Found under:
/bin/nativein the installation folder - If missing, download the latest version of the iOS instrumentation package from the installers page. You can find the download link for Experitest.Framework in the iOS table under Instrumentation
- Found under:

- Click Open
Optional Frameworks
- Add
CameraControl.framework(for Simulate Capture) - Add
MockAuth.framework(for Mock Authentication)
- Always unzip the framework on a Mac machine
- Attach the actual framework file, not the containing folder
- Recent packages may not clearly show
.frameworkextensions—verify carefully
If the linker fails to find Experitest.framework:
- Drag the framework manually into Xcode
- Or update Framework Search Paths in Build Settings
7. Configure Linker Flags
-
Go to Build Settings
-
Search for Other Linker Flags
-
Add:
-all_load-ObjC

When updating the Experitest framework, ensure linker flags remain unchanged.
8. Verify Compiled Sources
- Go to Build Phases → Compile Sources
- Ensure all required files are present
Some files may not be automatically included after duplicating the target.
Manually add any missing files.
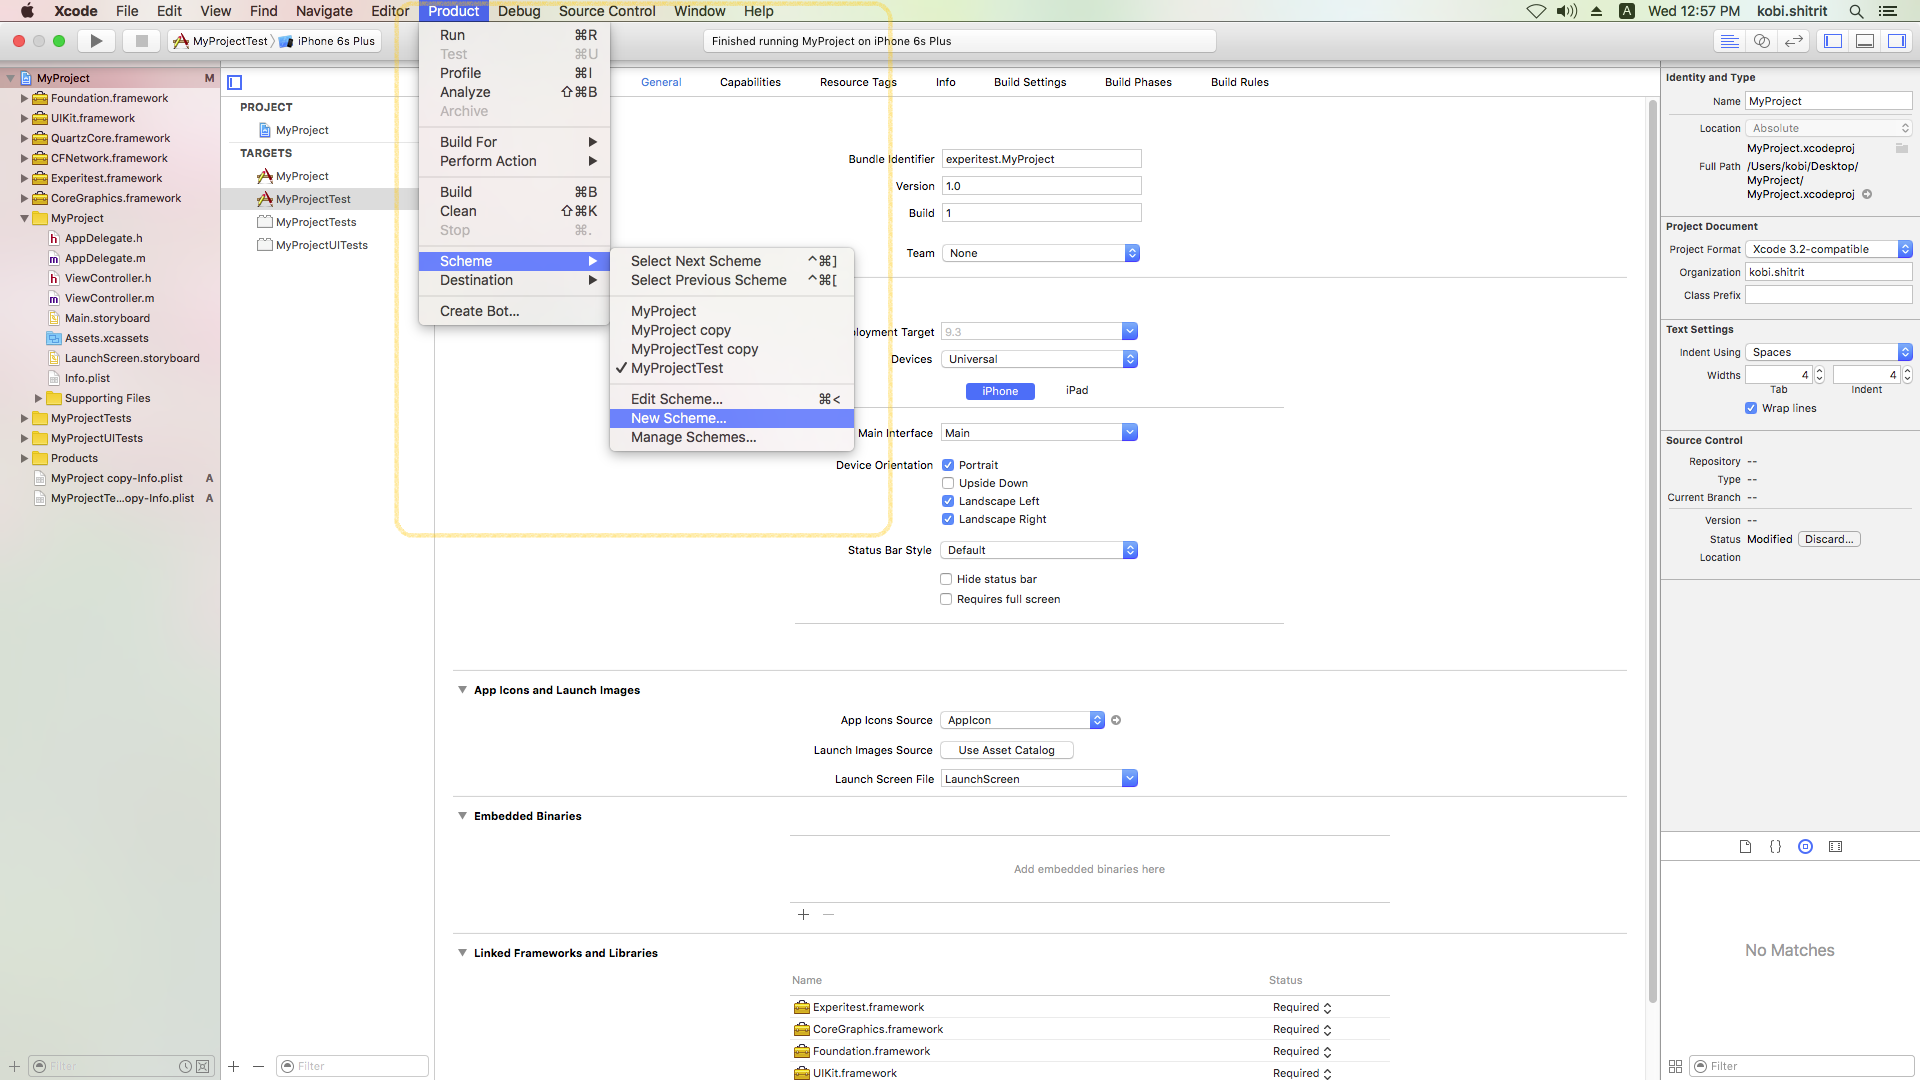
9. Create a New Scheme
- Go to Product → Scheme → New Scheme
10. Add Target to Scheme
- Select the duplicated target in the scheme

11. Build and Deploy the Application
- Select the duplicated target
- Deploy the application to a device

12. Switch Between Targets
- Switch between instrumented and non-instrumented targets as needed
13. Configure Instrumentation in Info Settings
Modern Xcode versions may not expose a standalone Info.plist.
To configure:
- Select your project
- Open the Info tab
- Add the following keys
In order for the application to advertise itself as instrumented in cloud UI, add the following structure to the applications's Info.plist.
<key>ExperiInstrumentationInfo</key>
<dict>
<key>InstrumentationCapabilities</key>
   <dict>
<key>MockCamera</key>
<true/> <!-- or false if the CameraControl.framework was not added -->
<key>MockAuthentication</key>
<true/> <!-- or false if the MockAuth.framework was not added -->
</dict>
</dict>
Verify Instrumentation
-
Launch the app in the cloud
-
Verify capabilities such as:
- Object Spy
- Image Upload
- Other instrumentation features