Integrate Tools Using Post-submit Webhooks
For information about post-submit webhooks, see Post-submit Webhooks.
It's not uncommon for enterprises to have TeamForge and other tools like Jira running alongside each other. For example, you may be using Jira for issue tracking and TeamForge for overall project management, creating baselines, and so on and so forth. In such cases, having these tools integrated is critical to have issues created or updated in either TeamForge or Jira always in sync with each other.
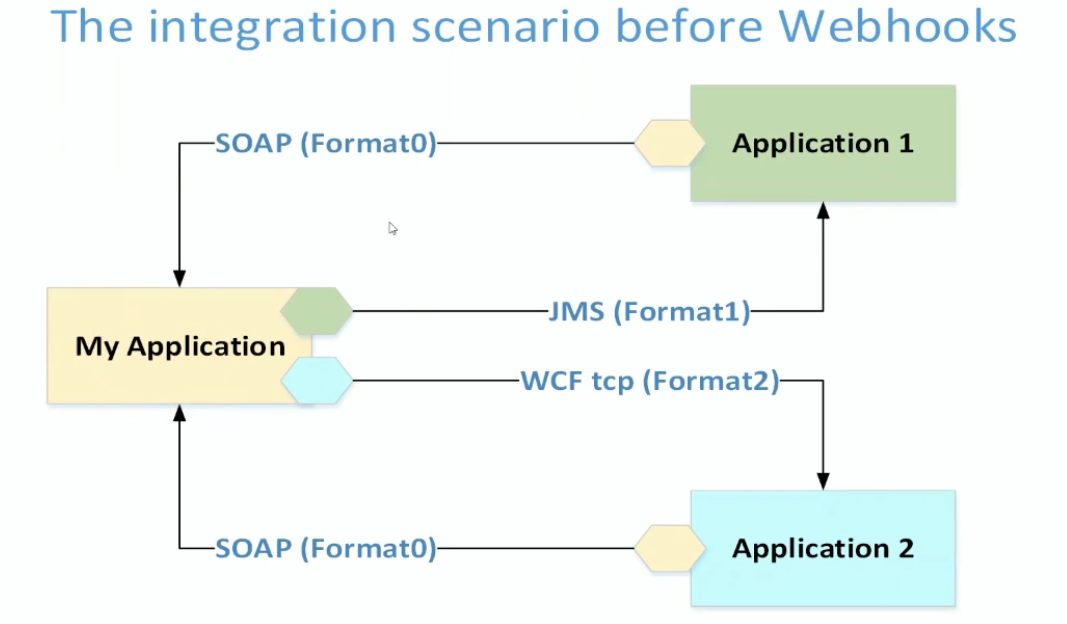
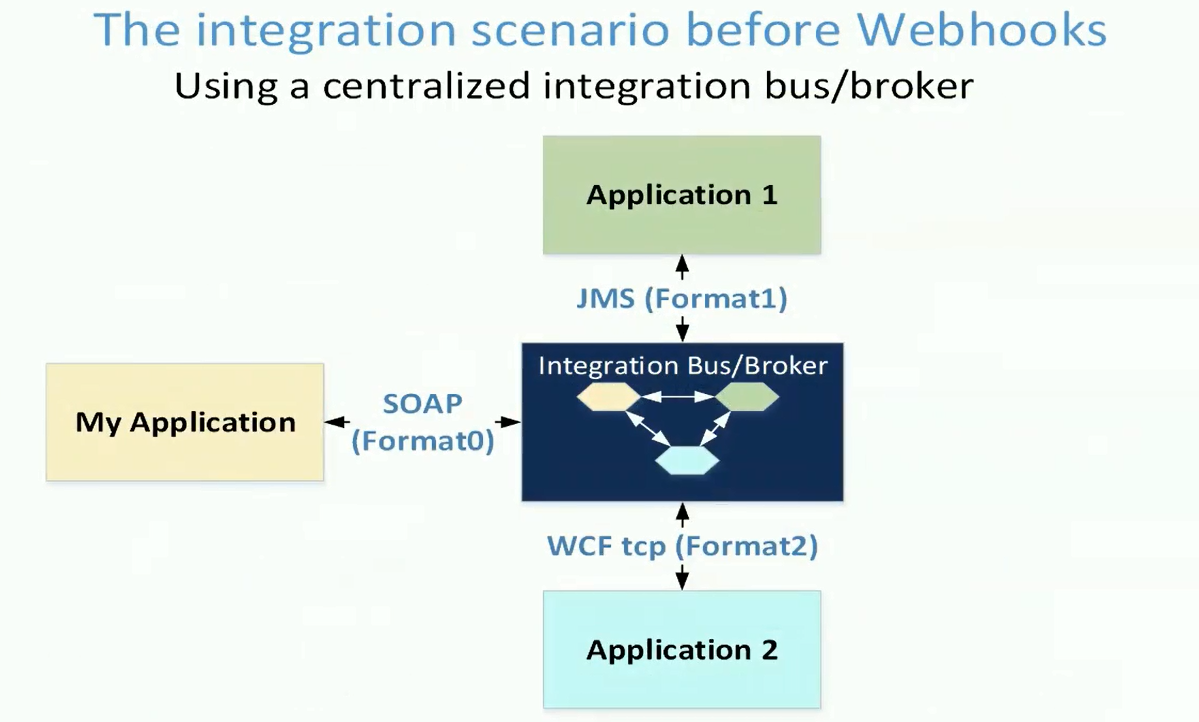
Integrating heterogeneous applications is often challenging as these tools have dissimilar message formats. For example, you may want to integrate an enterprise Java application that supports SOAP format with a .Net application that supports WCF format. This typically necessitates building custom plugins/adapters/integration brokers to facilitate the conversion and exchange of compatible messages between these applications.


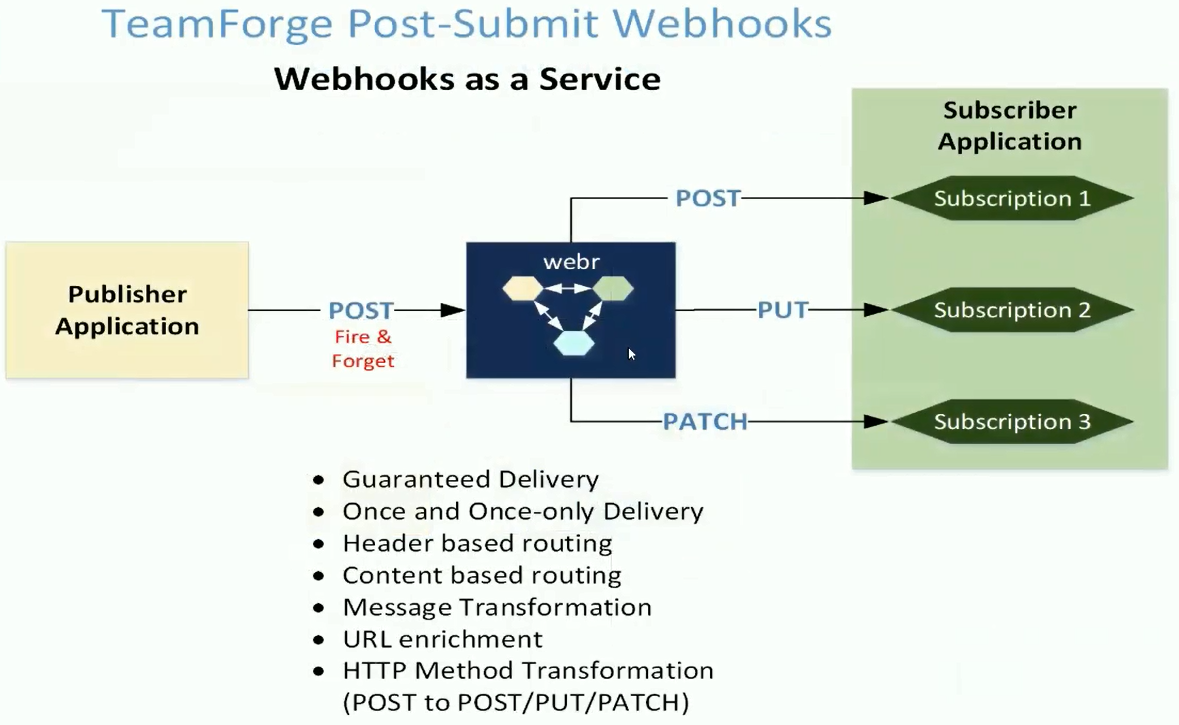
While Webhooks and Web APIs addressed this issue via REST HTTP method conventions such as POST/PUT/PATCH/DELETE and with the promise of a universal JSON message delivery, the JSON messages from different applications were still structured in many different ways, which again necessitates building integration brokers. In addition, an HTTP POST JSON message, delivered by an application, may have to be transformed to a HTTP PUT or PATCH, before it can be consumed by the application at the receiving end.
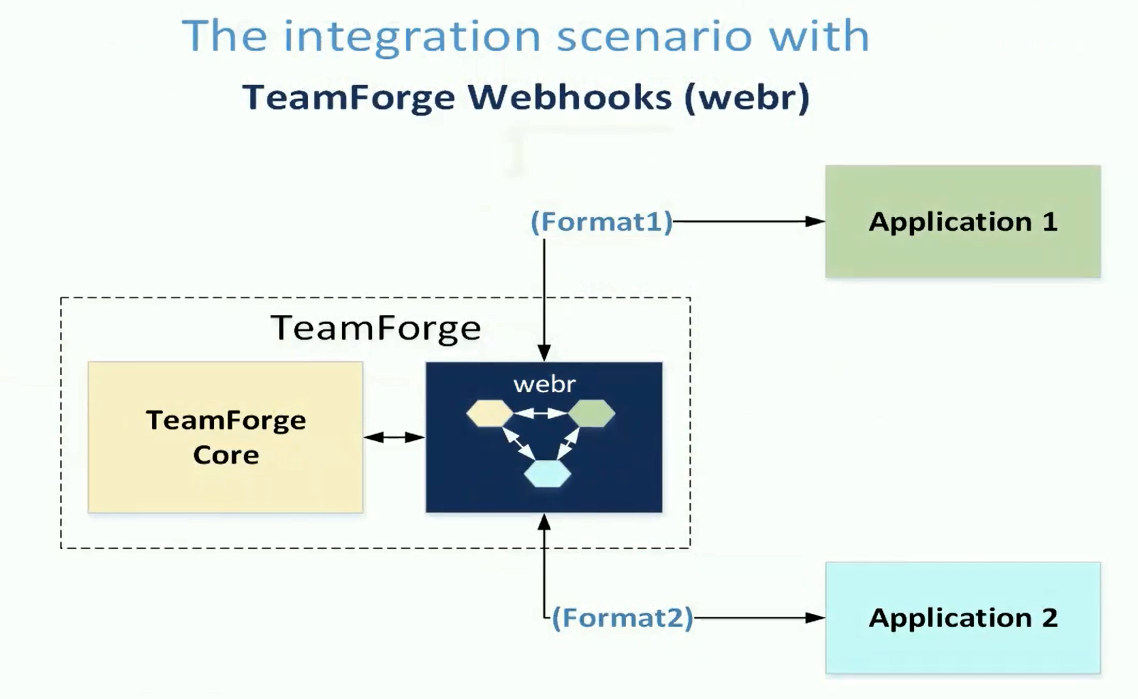
This is where TeamForge WEBR's post-submit webhooks come in handy with its message and method transformation capabilities. TeamForge WEBR's message and method transformation capabilities are the key to enable webhooks-based integrations between TeamForge and other tools such as Jira.


With WEBR, you can integrate TeamForge with any tool that supports webhooks. This topic deals with Jira for illustrative purposes.
Here's an example use case to illustrate how this post-submit webhooks-based integration between TeamForge and Jira can work.
- TeamForge to Jira: Creating a defect (Defect T) in TeamForge creates a bug (Bug J) in Jira.
- Jira to TeamForge: Any subsequent updates to the bug (Bug J) in Jira is synced with the defect (Defect T) in TeamForge.
It's assumed that you have both TeamForge and Jira installed and WEBR configured to broker messages between them. For more information, see TeamForge install/upgrade instructions and WEBR documentation.
Step 1: Create Custom Fields
When you create a TeamForge defect, a JIRA bug is created. In this process, the newly created TeamForge artifact's ID is stored in JIRA, typically in a custom field, so that JIRA knows the TeamForge artifact that needs to be synced when you update the newly created JIRA bug at a later point in time.
Create a custom field in the target JIRA tracker (Bugs tracker) and note down its field ID, for example customfield_10007.
Step 2: Creating the TeamForge to Jira Integration
The objective is that creating or updating a defect (Defect T) in TeamForge creates or updates a bug (Bug J) in Jira respectively.
-
Set up the creation of a JIRA bug for every new TeamForge defect you create.
Create a post-submit webhook for the
Teamforge.Artifact.Createevent in TeamForge to have messages posted to WEBR whenever a new artifact is created. This message is then delivered to JIRA, which is one of the subscribers to the artifact create event (Teamforge.Artifact.Createevent) in TeamForge.See Post-Submit Webhooks Tutorial to know more about how to create a post-submit webhook with a custom transform script.
Here's an example WEBR subscription to have a JIRA bug created whenever a TeamForge artifact is created.
{
"EventName": "Teamforge.Artifact.Create",
"Description": "Create JIRA bug for every TF defect",
"HeaderFilterString": "proj1011",
"SubsFilter": "$$->'Body'->'original'->'tracker'->>'title'='Defects'",
"CustomScript": "v =$inmessage;\npriority=v.original.fields.priority;\npriority1='Medium';\nif(priority===1)\n{\npriority1='Highest';\n}\nif(priority===2)\n{\npriority1='High';\n}\nif(priority===3)\n{\npriority1='Medium';\n}\nif(priority===4)\n{\npriority1='Low';\n}\nif(priority===5)\n{\npriority1='Lowest';\n}\n$outmessage={\n\tfields:  {\nproject:\n       {\n       key: \"TEST\"\n       },\n       summary: $inmessage.original.fields.title,\n       description:   $inmessage.original.fields.description,\n       customfield_10007:$inmessage.id,\n   issuetype: {\n       name: \"Bug\"\n       }\n       priority: {\n       name: priority1\n   }\n   }\n};",
"WebhookEndpoint": "http://cu493.cloud.maa.collab.net:8080/rest/api/2/issue/",
}
Step 3: Creating the Jira to TeamForge Integration:
-
Create a Jira publisher in WEBR using the Create Publisher WEBR API. The Create Publisher API gives you the webhook endpoint URL.
-
Create a Jira webhook where Jira messages are posted when you update the Jira issue.
-
Create a Jira event, for example
Jira.Bug.Update1, in WEBR, using the Create Event WEBR API. -
Create a WEBR subscription using the Create Subscription WEBR API. You must use a custom subscription script.
Here's an example WEBR subscription to have a TeamForge defect updated whenever a JIRA bug is updated.
{
"EventName": "Jira.Bug.Update1",
"Description": "Update tf defect artifacts for every jira bug update",
"HeaderFilterString": "",
"SubsFilter": "$$->'Body'->'issue'->'fields'->>'customfield_10210' is not null ",
"CustomScript": "v =$inmessage;\r\nstatus=v.issue.fields.status.name;\r\nstatus1='Open';\r\nif(status==='To-Do'){\r\nstatus1='Open';\r\n}\r\nif(status==='In Progress'){\r\nstatus1='Pending';\r\n}\r\nif(status==='Done'){\r\nstatus1='Closed';\r\n}\r\n$outmessage = {\r\ntitle: $inmessage.issue.fields.summary,\r\ndescription: $inmessage.issue.fields.description,\r\nstatus: status1\r\n};\r\n$param=v.issue.fields.customfield_10007;",
"WebhookEndpoint": "PATCH:https://cu220.cloud.maa.collab.net/ctfrest/tracker/v1/artifacts",
}
This concludes the integration.