Microsoft Teams Plugin
The Microsoft Teams plugin for Digital.ai Release enables you to send notifications through Microsoft Teams as part of your release process. Using this plugin, you can:
- Send notifications to specific Teams channels
- Send notifications to individual users
- Send notifications to Teams groups
Prerequisites
- Digital.ai Release 25.1 or later.
- The Microsoft Teams plugin requires the following Microsoft Graph API permissions. All are delegated permissions, except
User.Read.All, which is an optional application permission.- Channel.ReadBasic.All (optional) – Read basic channel info
- ChannelMessage.Send – Send messages to channels
- Chat.Create – Create chats
- Chat.Read (optional) – Read chat messages
- ChatMessage.Send – Send chat messages
- Team.ReadBasic.All (optional) – Read basic team info
- User.Read – Read signed-in user profile
- User.Read.All (optional, application) – Read all user profiles. For more information, see Extend your app with Microsoft Graph permissions and scopes
- Appropriate Microsoft Teams permissions and roles.
Install the Digital.ai Microsoft Teams Plugin
Install the Microsoft Teams plugin using the Plugin Manager.
Connect Release to the Microsoft Teams Server
-
Log in to Digital.ai Release.
-
Select Connections from the sidebar.
-
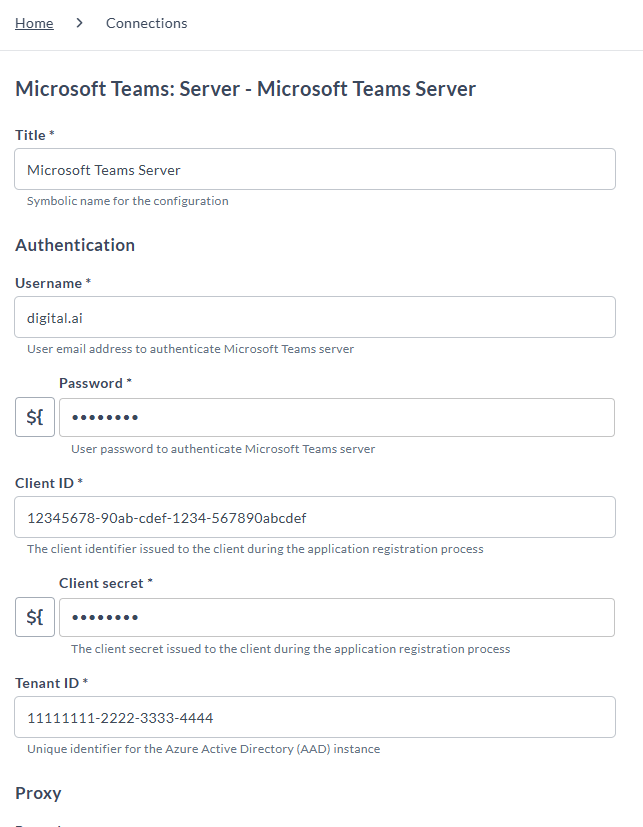
Under HTTP server connections, find Microsoft Teams: Server and click the + icon to add a new one. The Microsoft Teams Server setup page appears.

-
Enter the following details:
- Title: Symbolic name for the configuration.
- Username: Microsoft account username.
- Password: Microsoft account password.
- Client ID: The client ID you received when registering your app in Azure.
- Client secret: The secret key generated during the app registration.
- Tenant ID: The unique ID of Azure Active Directory (AAD) tenant.
-
If your Digital.ai Release server is using a proxy, specify the necessary values.
-
Click Test to verify your connection to the Microsoft Teams server.
-
Click Save.
The following tasks are available for sending notifications through Microsoft Teams:
Messages can include only plain text.
Send Message to User
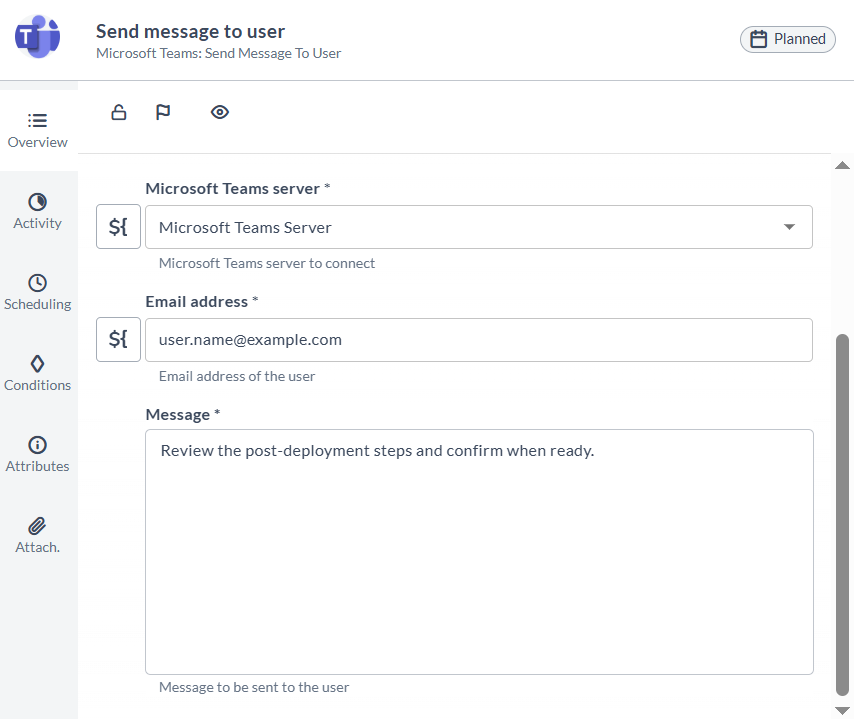
This task sends a notification as a direct message to a specific Microsoft Teams user.
- In the release or template, click Add task.
- Click All types and select MICROSOFT TEAMS > Send Message To User.
- Open the added task.
- Enter the following details:
- Microsoft Teams server: Select the Microsoft Teams server connection.
- Email address: Enter the recipient's email address.
- Message: Enter the notification text to be sent.

After the notification is sent, the task stores the Message ID as an output property.
Send Message to Channel
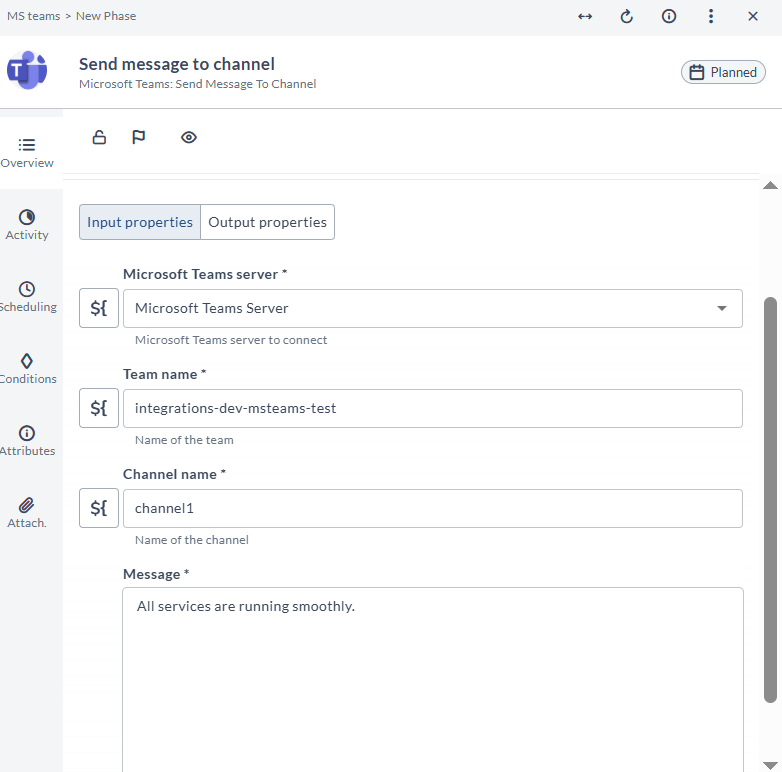
This task sends a notification to all members of a specific channel within a Microsoft Teams team.
- In the release or template, click Add task.
- Click All types and select MICROSOFT TEAMS > Send Message To Channel.
- Open the added task.
- Enter the following details:
- Microsoft Teams server: Select the Microsoft Teams server connection.
- Team name: Enter the Microsoft Teams team name.
- Channel name: Enter the target channel name.
- Message: Enter the notification text to be sent.

After the notification is sent, the task stores the Message ID as an output property.
Send Message to Group
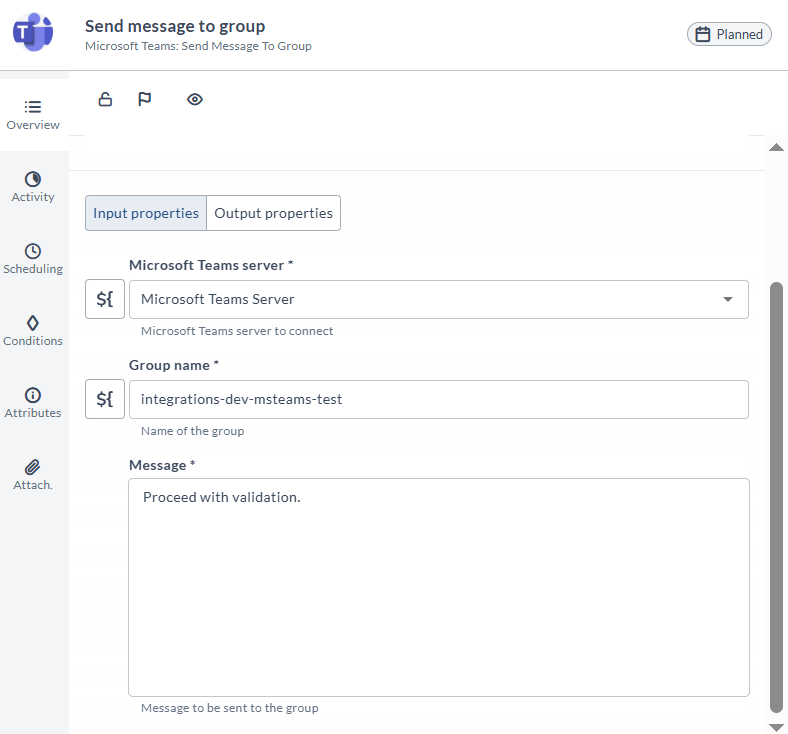
This task sends a notification to all members of a Microsoft Teams group.
- In the release or template, click Add task.
- Click All types and select MICROSOFT TEAMS > Send Message To Group.
- Open the added task.
- Enter the following details:
- Microsoft Teams server: Select the Microsoft Teams server connection.
- Group name: Enter the target Microsoft Teams group name.
- Message: Enter the notification text to be sent.

After the notification is sent, the task stores the Message ID as an output property.