Azure DevOps Plugin
Use the Azure DevOps plugin to integrate Digital.ai Release with Azure DevOps. This topic illustrates the tasks available with the Azure DevOps plugin.
Prerequisites
- Digital.ai Release 24.3 or later
- Azure DevOps account
Supported Authentication Types
The Azure DevOps plugin supports two authentication methods:
- Personal Access Token (PAT): For more information, see Use personal access tokens.
- OAuth2: Uses client credentials obtained from the Microsoft Entra ID (formerly Azure Active Directory)
Install the Digital.ai Azure DevOps Plugin
Install the Azure DevOps plugin using the Plugin Manager.

Connect Release to Your Azure DevOps Server
-
Log on to Digital.ai Release as an administrator.
-
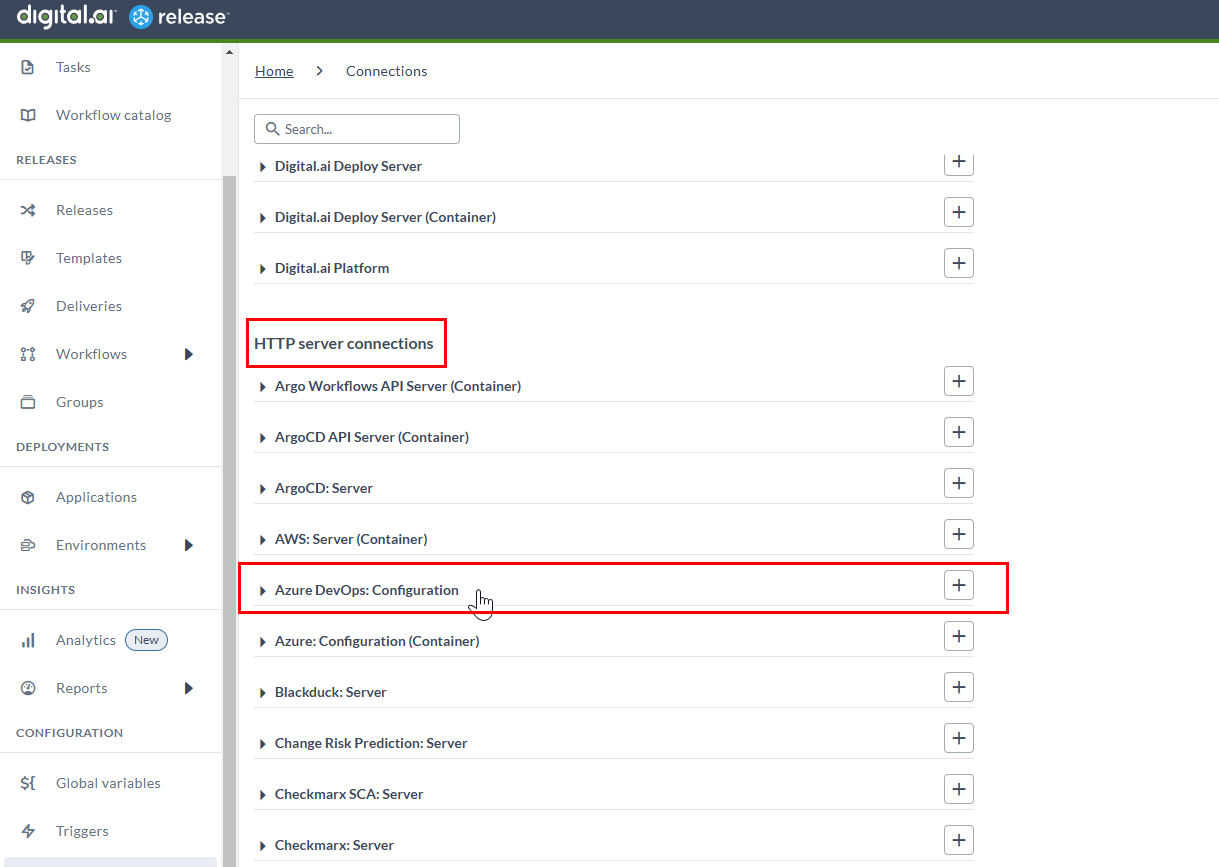
Select Connections from the sidebar navigation menu.
-
Under HTTP server connections, click the + icon next to Azure DevOps: Configuration.
-
Enter the Title and Organization.
-
Choose your authentication method from the dropdown and provide the required information:
- Personal Access Token (PAT): Enter the Personal Access Token (PAT) associated with the integration
- OAuth2: Enter the Client ID, Client Secret, and Tenant ID obtained from the Microsoft Entra ID (formerly Azure Active Directory)
-
If your Digital.ai Release server is using a proxy, specify the necessary values.
-
Click Test to verify your connection to the Azure DevOps server.
-
Click Save.
Here's a list of Azure DevOps tasks available in Digital.ai Release.
Add Build Pipeline Run Tag
This task adds tags to the build pipeline run.
To add a Add Build Pipeline Run Tag task:
-
In the release or template, click Add task.
-
Click All types and select Azure Devops > Add Build Pipeline Run Tag.
-
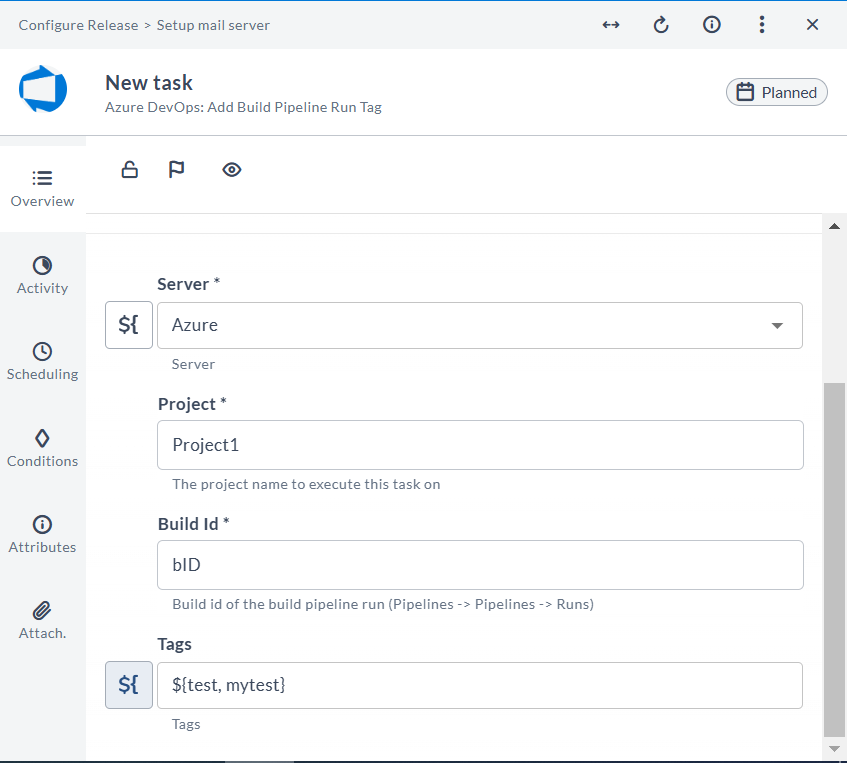
Open the added task.
-
In the Server field, select the Azure server connection.
-
In the Project field, enter the name of your project to execute the task.
-
In the Build Id field, enter the unique identifier of the build.
-
In the Tags field, enter a list of strings that are added to the build as tags.
Run Pipeline
This task is used to run a Azure pipeline.
To run pipeline:
-
In the release or template, click Add task.
-
Click All types and select Azure DevOps > Run Pipeline.
-
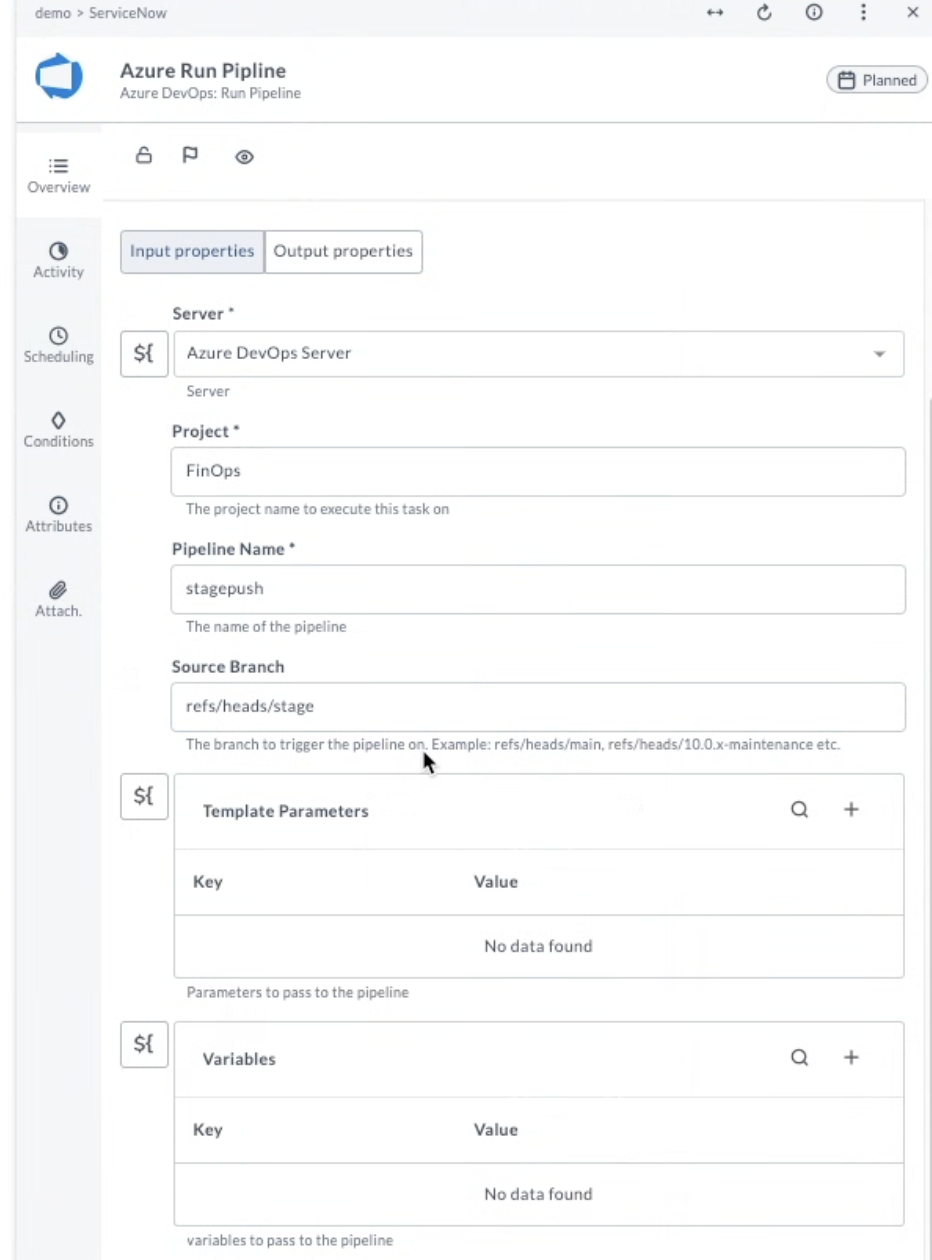
Open the added task.
-
In the Server field, select the Azure server connection.
-
In the Project field, enter your project name to execute the task.
-
In the Pipeline Name field, enter the unique pipeline name to be run.
-
In the Source Branch field, enter the branch reference.
-
Add any additional template parameters and variables that need to be passed to run the pipeline.
Approve Deployment in Release
This task allows you to approve deployment in Digital.ai Release.
To approve deployment in release:
-
In the release or template, click Add task.
-
Click All types and select Azure Devops > Approve Deployment in Release.
-
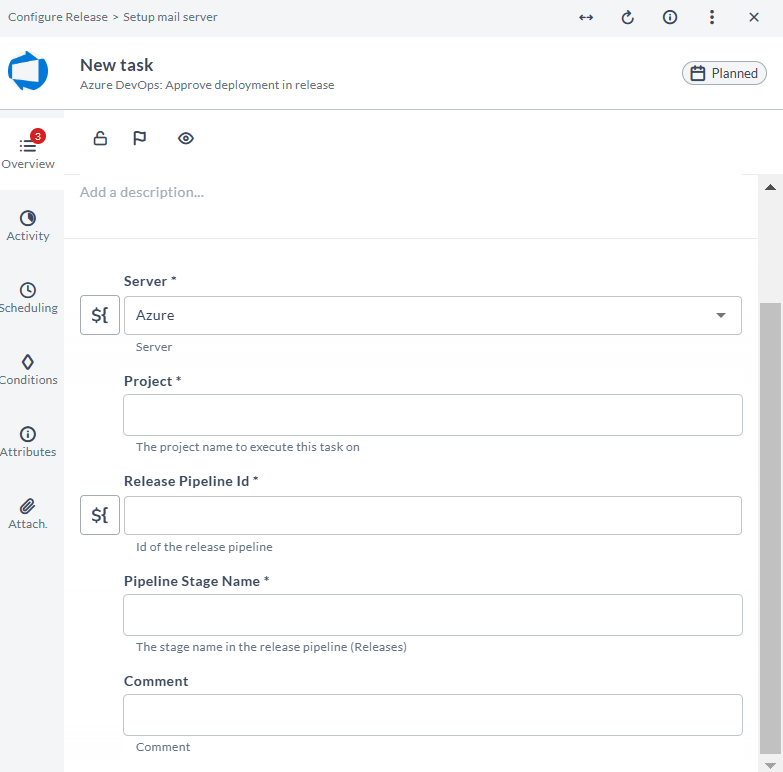
Open the added task.
-
In the Server field, select the Azure server connection.
-
In the Project field, enter the name of your project to execute the task.
-
In the Release Pipeline Id, enter the ID of the release pipeline.
-
In the Pipeline Stage Name, enter the stage name in the release pipeline.
Create Work Item
This task creates an Azure DevOps type work item.
To create work item:
-
In the release or template, click Add task.
-
Click All types and select Azure Devops > Create Work Item.
-
Open the added task.
-
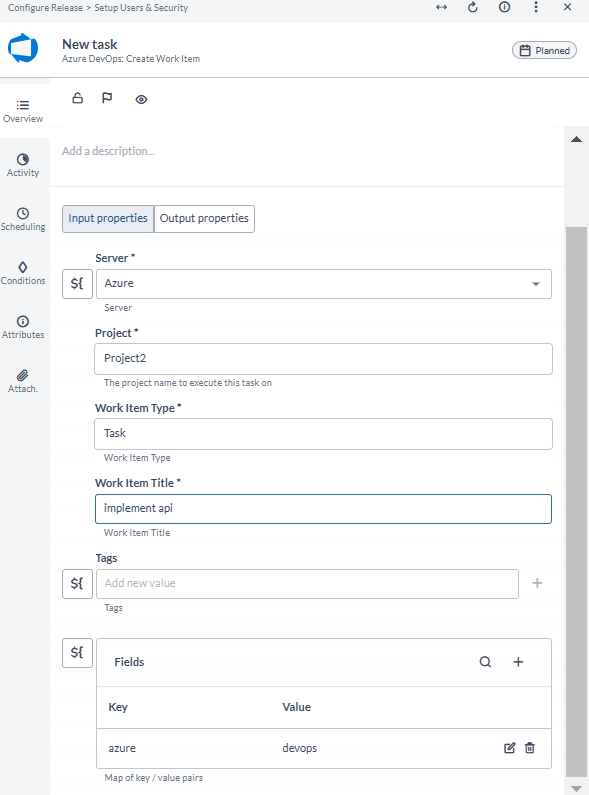
Provide the following input properties:
- Server: Select the Azure server connection.
- Project: Enter the name of your project to execute the task.
- Work Item Type: The type of work item.
- Work Item Title: The title of the work item.
- Tags: Work item tags.
- Fields: Additional fields that should be modified. Each of the fields can be modified by specifying the field name as a key and the desired value as a value in the fields map.
-
Provide the output properties:
- Work Item Id: The ID of the new work item.
Create New Release
This task starts a new release.
To create a new release:
-
In the release or template, click Add task.
-
Click All types and select Azure Devops > Create New Release.
-
Open the added task.
-
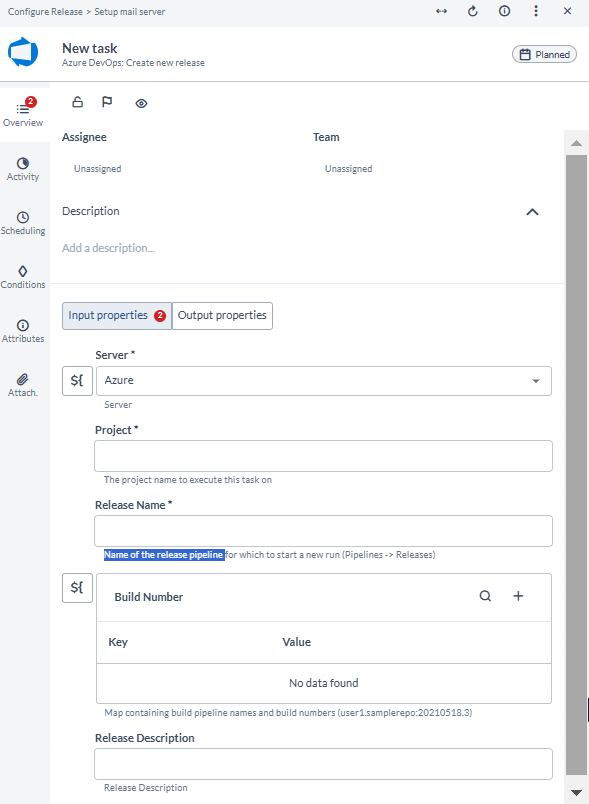
Provide the following input properties:
- Server: Select the Azure server connection.
- Project: Enter the name of your project to execute the task.
- Release Name: Enter the name of the release pipeline.
- Build Number: The assigned value from the build engine based on the build number format option in your build definition.
- Release Description: Enter the description for the release.
Get Work Item
This task retrieves and returns any specified work item and its field.
To get work item:
-
In the release or template, click Add task.
-
Click All types and select Azure Devops > Get Work Item.
-
Open the added task.
-
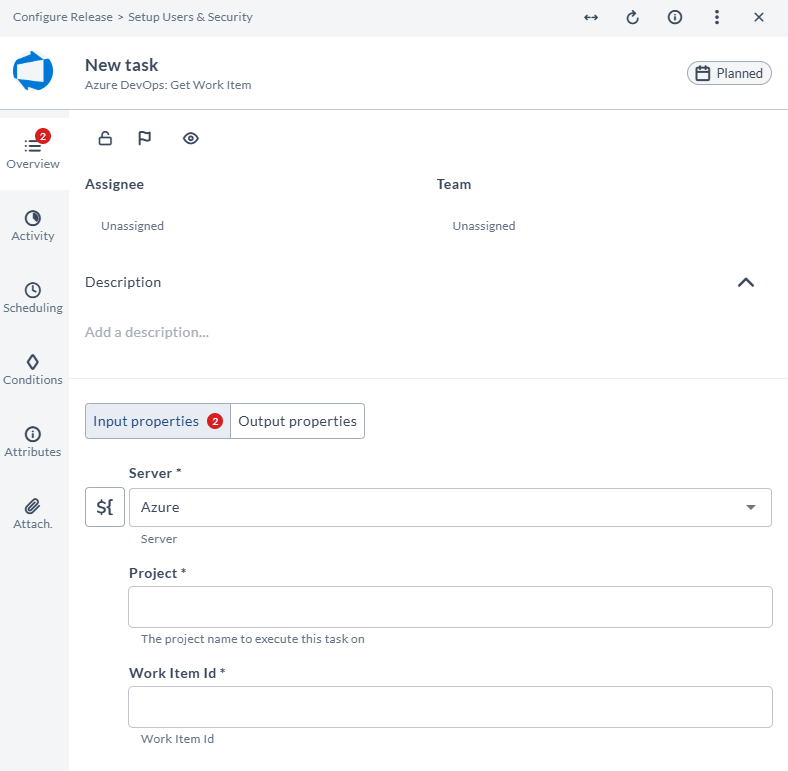
Provide the following input properties:
- Server: Select the Azure server connection.
- Project: Enter the name of your project to execute the task.
- Work Item Id: The ID of the new work item.
-
Provide the output properties:
- Fields: Additional fields that should be modified.
Get Work Items By Managed Query
This task retrieves the work items by managed query.
To get work items by managed query:
-
In the release or template, click Add task.
-
Click All types and select Azure Devops > Get Work Items By Managed Query.
-
. Open the added task.
-
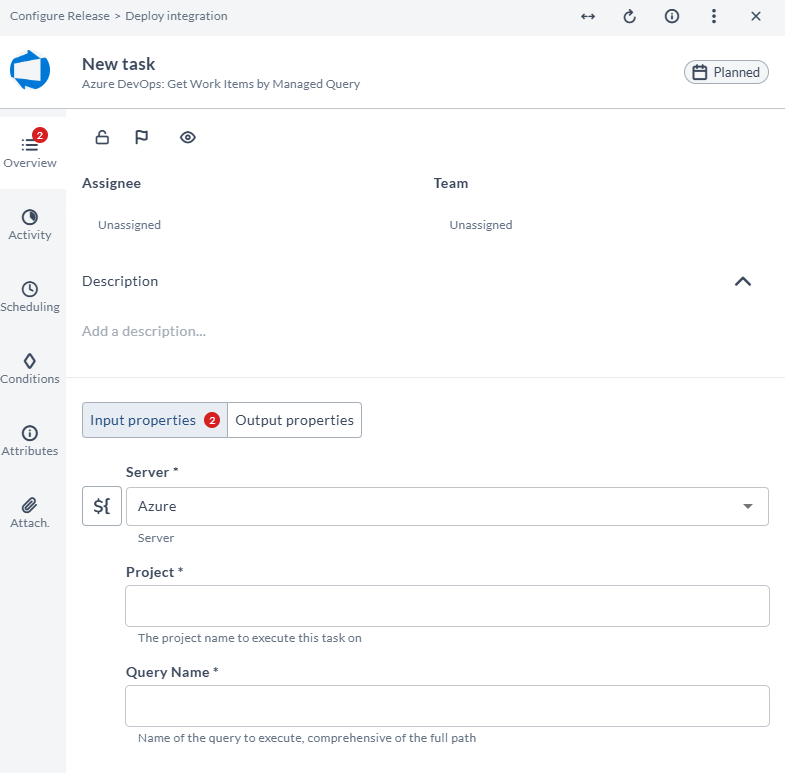
Provide the following input properties:
- Server: Select the Azure server connection.
- Project: Enter the name of your project to execute the task.
- Query Name: Name of the query to execute.
-
Provide the output properties:
- Retrieved IDs: List of work item IDs that are retrieved by the query.
Query Work Items
This task allows you to retrieves multiple work item IDs by specifying a WIQL query.
To query work items:
- In the release or template, click Add task.
- Click All types and select Azure Devops > Query Work Items.
- Open the added task.
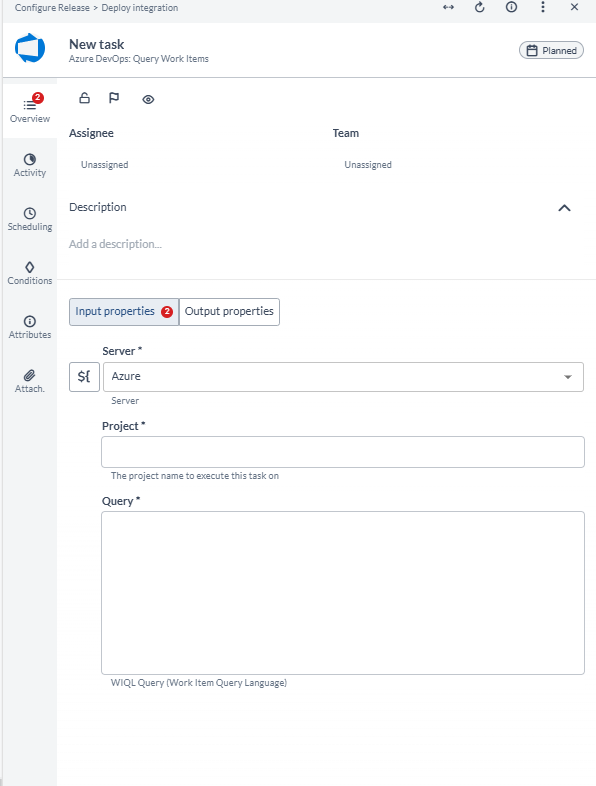
- Provide the following input properties:
- Server: Select the Azure server connection.
- Project: Enter the name of your project to execute the task.
- Query: Specify a query written in WIQL language.
- Provide the output properties:
- Retrieved IDs: List of work item IDs that are retrieved by the query.
Queue Build
This task queues a build.
To queue a build:
-
In the release or template, click Add task.
-
Click All types and select Azure Devops > Queue Build.
-
Open the added task.
-
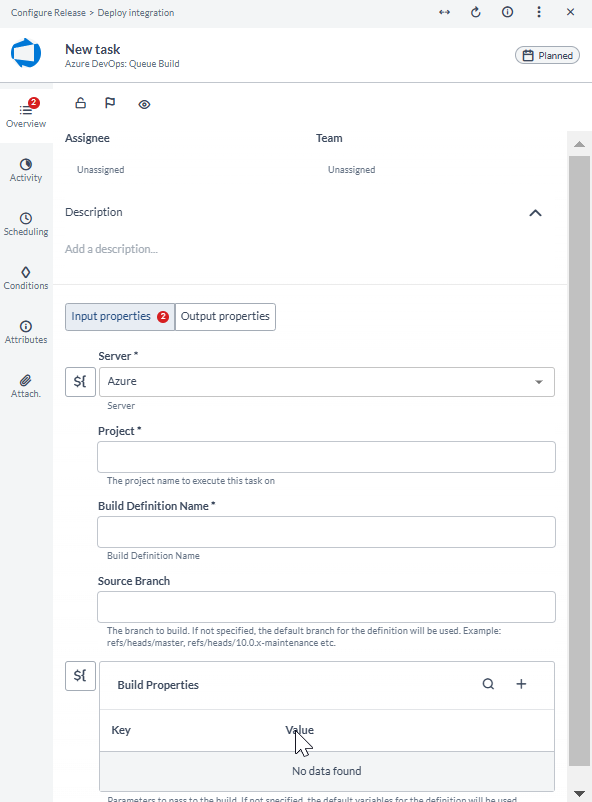
Provide the following input properties:
- Server: Select the Azure server connection.
- Project: Enter the name of your project to execute the task.
- Build definition name: The name of the build definition from which you want to trigger a build.
- Source branch: The branch to build.
- Build properties: Parameters to pass to the build.
-
Provide the output properties:
- Build ID: Unique identifier of the build run.
- Build Number: The assigned value from the build engine based on the build number format option in your build definition.
- Build Resultt: Build result.
Start Deployment in Release
This task starts the deployment in Digital.ai Release.
To start a deployment in release:
-
In the release or template, click Add task.
-
Click All types and select Azure Devops > Start Deployment in Release.
-
Open the added task.
-
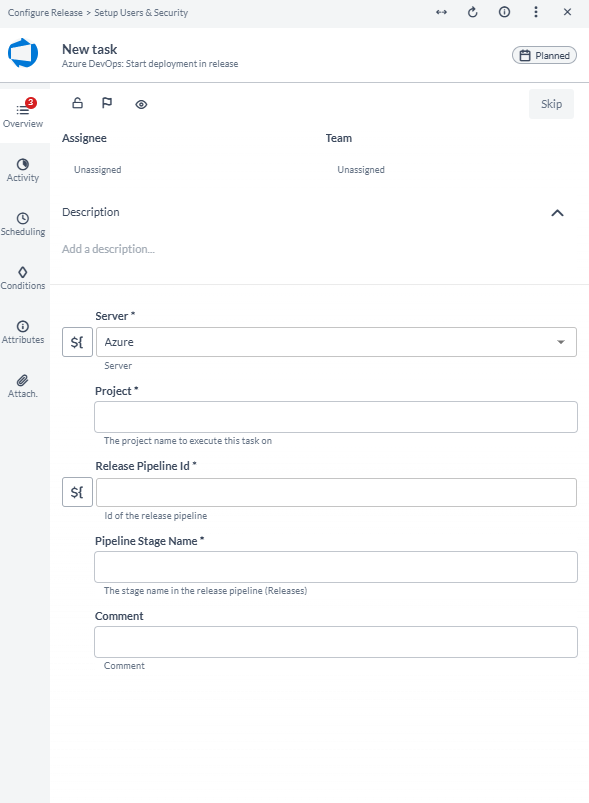
In the Server field, select the Azure server connection.
-
In the Project field, enter the name of your project to execute the task.
-
In the Release Pipeline Id field, enter the ID of the release pipeline.
-
In the Pipeline Stage Name filed, enter the stage name in the release pipeline.
Update Work Item
This task updates the work item.
To update a work item:
-
In the release or template, click Add task.
-
Click All types and select Azure Devops > Update Work Item.
-
Open the added task.
-
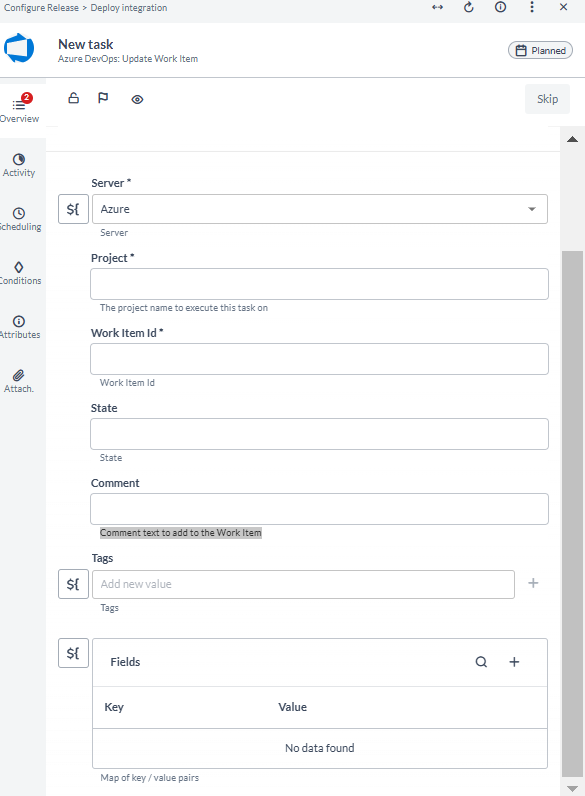
In the Server field, select the Azure server connection.
-
In the Project field, enter the name of your project to execute the task.
-
In the Work Item Id filed, enter the ID of the new work item.
-
In the State field, enter the state of the work item.
-
In the Comment field, enter the comment text to add to the work item.
-
In the Tags field, enter the work item tags.
-
In the Fields, enter the additional fields that should be modified.
Update Work Items By Managed Query
This task updates the work item by Managed query.
To update work items by managed query:
- In the release or template, click Add task.
- Click All types and select Azure Devops > Update Work Items By Managed Query.
- Open the added task.
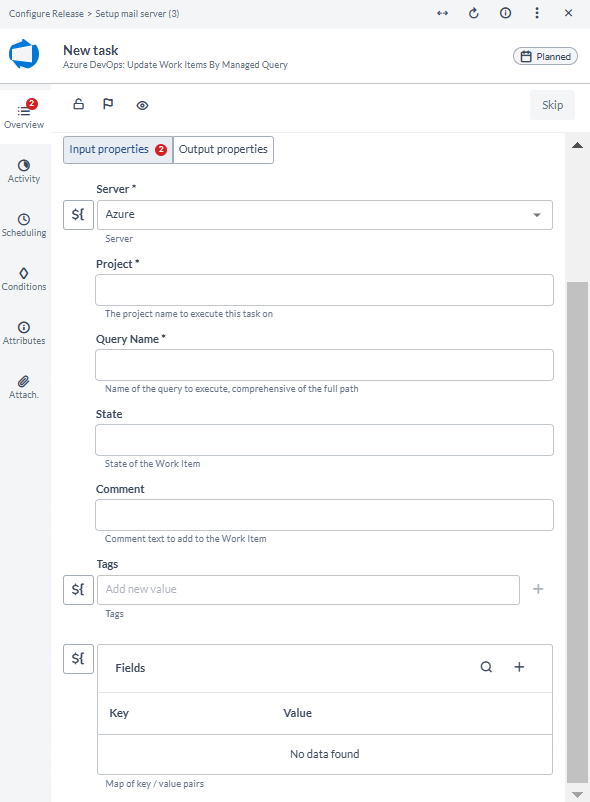
- Provide the following input properties:
- Server: Select the Azure server connection.
- Project: Enter the name of your project to execute the task.
- Query Name: Enter the name of the query to execute.
- State: Enter the state of the work item.
- Comment: Enter the comment text to add to the work item.
- Tags: Enter the work item tags.
- Fields: Enter the additional fields that should be modified.
- In the Work Item Id filed, enter the ID of the new work item.
- In the State field, enter the state of the task.
Update Work Items By Query
This task updates the work item using Work Item Query Language (WIQL).
To update work items by query:
-
In the release or template, click Add task.
-
Click All types and select Azure Devops > Update Work Items By Query.
-
Open the added task.
-
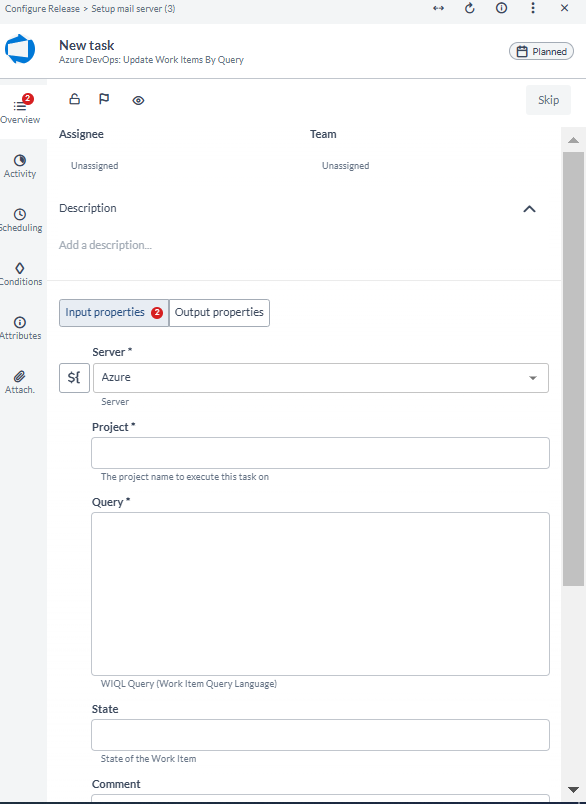
Provide the following input properties:
- Server: Select the Azure server connection.
- Project: Enter the name of your project to execute the task.
- Query: Enter the WIQL query to execute.
- State: Enter the state of the work item.
- Comment: Enter the comment text to add to the work item.
- Tags: Enter the work item tags.
- Fields: Enter the additional fields that should be modified.
-
Provide the following output properties:
- Work Items: IDs of work item updated by the WIQL query.
Wait For Work Item State
This task waits until the work item changes to the required state.
-
In the release or template, click Add task.
-
Click All types and select Azure Devops > Wait For Work Item State.
-
Open the added task.
-
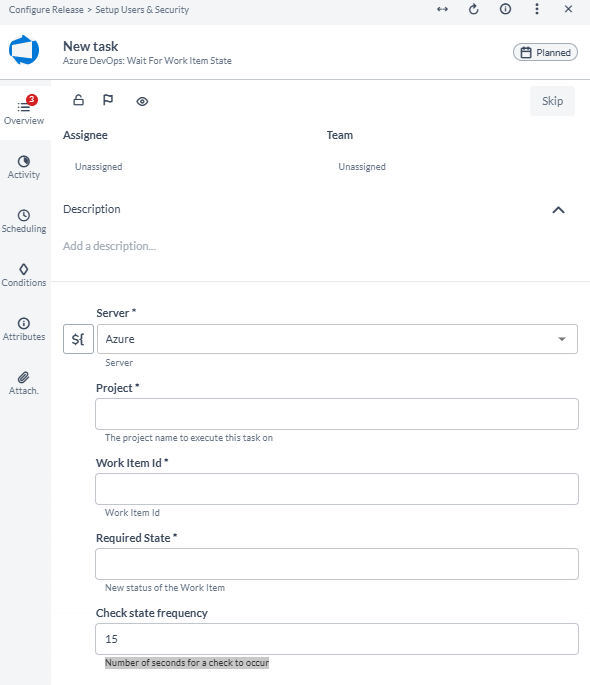
In the Server field, select the Azure server connection.
-
In the Project field, enter the name of your project to execute the task.
-
In the Work Item Id field, enter the ID of the new work item.
-
In the Required State field, enter the new status of the work item.
-
In the Check state frequency, enter the number of seconds for a check to occur.
Wait For Deployment in Release
This task waits for the deployment in Digital.ai Release.
-
In the release or template, click Add task.
-
Click All types and select Azure Devops > Wait For Deployment in Release.
-
Open the added task.
-
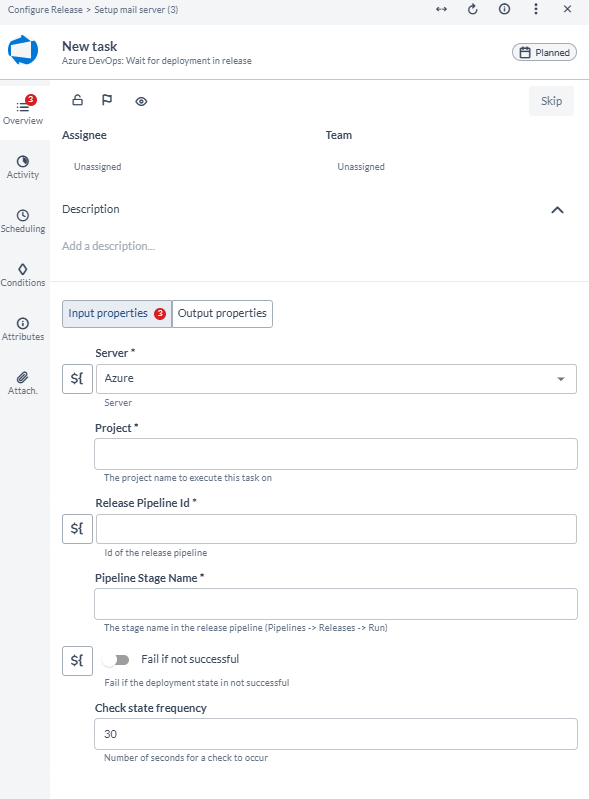
Provide the following input properties:
- Server: Select the Azure server connection.
- Project: Enter the name of your project to execute the task.
- Release Pipeline Id: Enter the release pipeline Id.
- Pipeline Stage Name: Enter the pipeline stage name.
- Toggle Fail if the deployment state in not successful.
- Check state frequency: enter the number of seconds for a check to occur.
-
Provide the following output properties:
- Status: Enter the status of the work item.