TeamForge Integration
This topic describes how to configure the Digital.ai Release—TeamForge integration plugin.
Prerequisites
You need the following to set up the Release—TeamForge integration:
- Digital.ai Release 10.2 or later
- TeamForge plug-in (can be installed using the Plugin Manager)
- Credentials (with the required TeamForge tracker permissions to create and edit tracker artifacts) to connect to the TeamForge server
Before you begin
Gather the following TeamForge data and keep them handy.
- TeamForge server's URL—for example,
https://yourcompany.teamforge.com/ - TeamForge user name and password
Install Digital.ai Release 10.3 or later
Install Digital.ai Release. For more information, see Basic Install.
Install the License Key
Note: You can skip this part if you had your Digital.ai Release license file (xl-release-license.lic) created before starting the installation. For more information, see Basic Install. If not, install the license when you are logging on to Digital.ai Release for the first time.
-
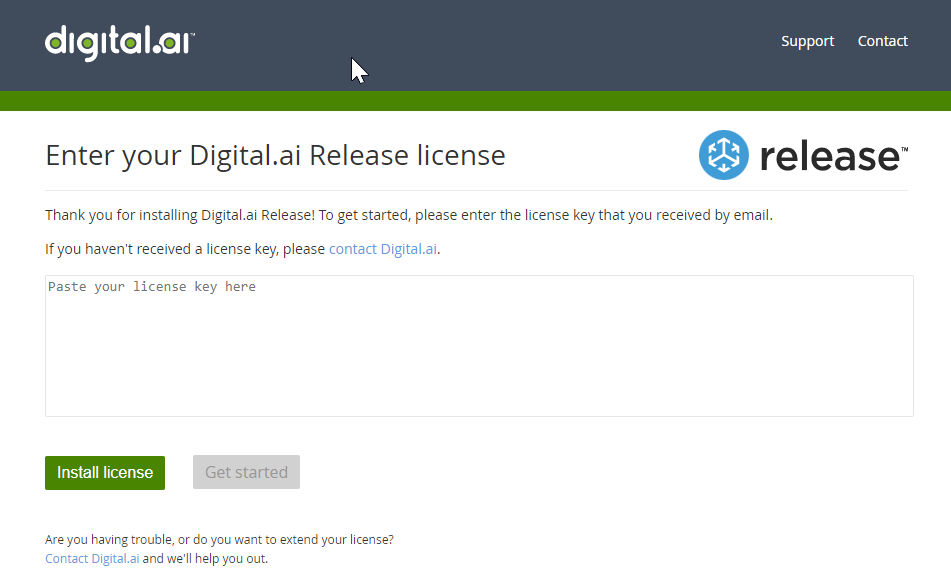
Log on to Digital.ai Release as an Admin. You would be prompted to enter your license key.
-
Copy the Digital.ai Release's license key, paste the license key in the text box, and click Install license.
Install the TeamForge plug-in
-
Click Plugins from the top navigation bar, select the Browse tab, search for the TeamForge plug-in, and click Install.
-
Restart Digital.ai Release. Open a command prompt or terminal, go to
XL_RELEASE_SERVER_HOME/bindirectory, and run the following command.Operating system Command Microsoft Windows platform run.cmdUnix platform run.sh -
Alternatively, you can also install the TeamForge plug-in by uploading the plug-in JAR file.
-
For example, Go to
http://digitalai-release.com:5516/. -
Log on to Release as an Admin.
-
Click Plugins from the top navigation bar.
-
Select the Installed tab.
-
Click Upload new plugin file, browse, and select the TeamForge plug-in JAR file.
-
Restart Digital.ai Release.
Open a command prompt or terminal, go to
XL_RELEASE_SERVER_HOME/bindirectory, and run the following command.Operating system Command Microsoft Windows platform run.cmdUnix platform run.sh
-
Configure the TeamForge Server in Digital.ai Release
- Log on to Digital.ai Release as an Administrator.
- Select Settings > Connections and click the
+icon next to TeamForge: Server. - Type a title and URL.
- Type the username and password.
- Click Test to verify your connection to the TeamForge server.
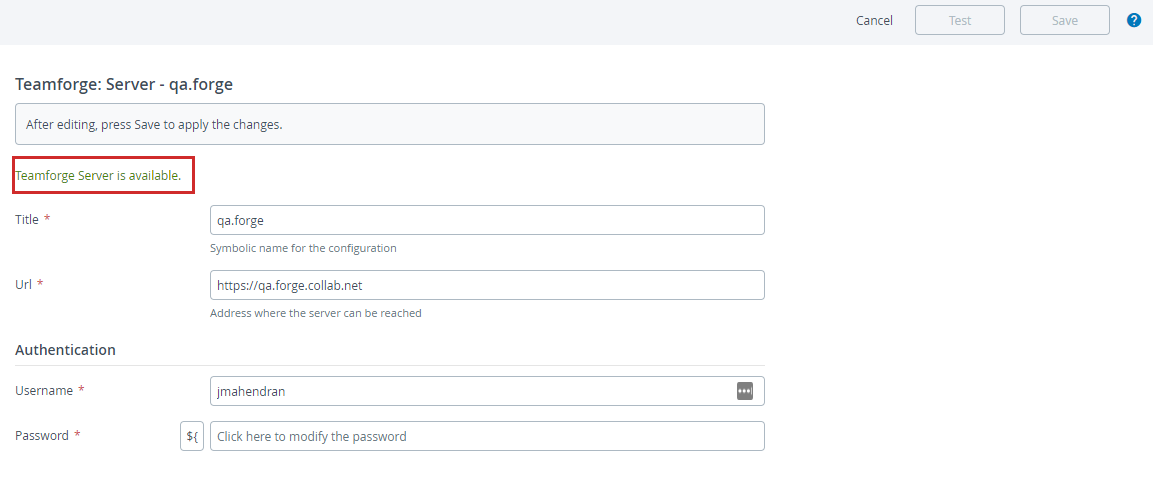
- Click Save when the connection is successful.
Tasks available with the TeamForge plugin
Here's a list of tasks that you can perform with TeamForge using this plugin.
- Create Artifact
- Create Associations
- Get Artifact Children
- Get Artifact Details
- Get Artifact Status
- Get Associations
- Update Artifact
Create Artifact
This task lets you create new artifacts in Digital.ai TeamForge.
Input Properties
You must pass the TeamForge server's name, tracker ID (of the tracker on which you want to create new artifacts), artifact title and description, and values for any other mandatory fields as configured for the specific TeamForge tracker.
Create Artifact example
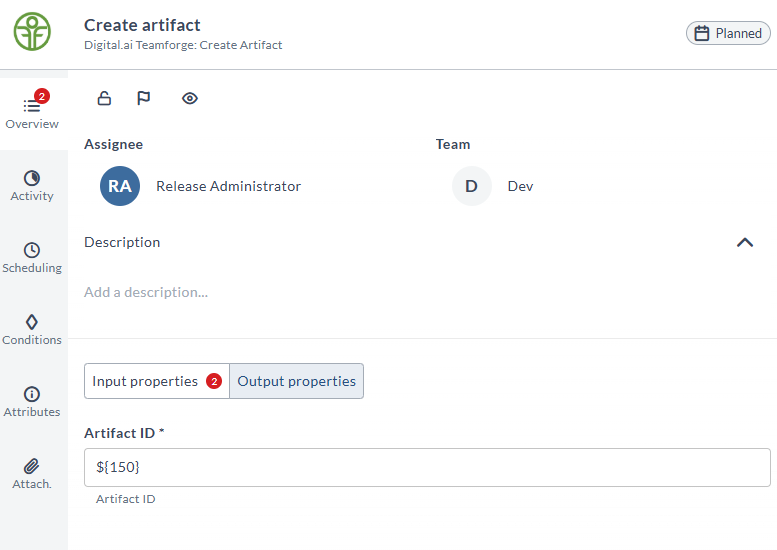
- Task configuration for creating a new TeamForge artifact.
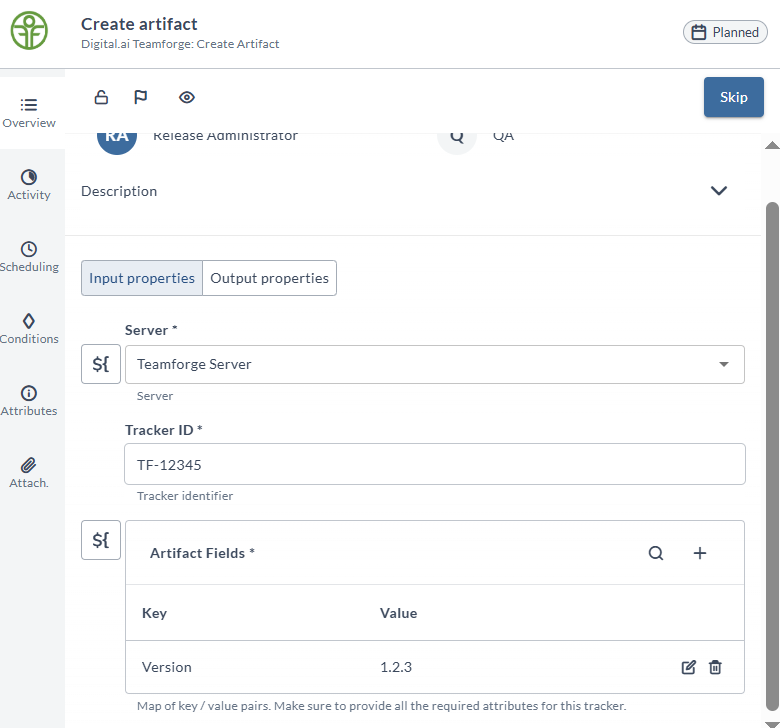
- Once you run the task, a new artifact is created in TeamForge. You can find the new artifact's ID in the Output properties.
Create Associations
This task lets you associate one or more artifacts with a target artifact in Digital.ai TeamForge.
Input Properties
You must pass the:
- TeamForge server's name
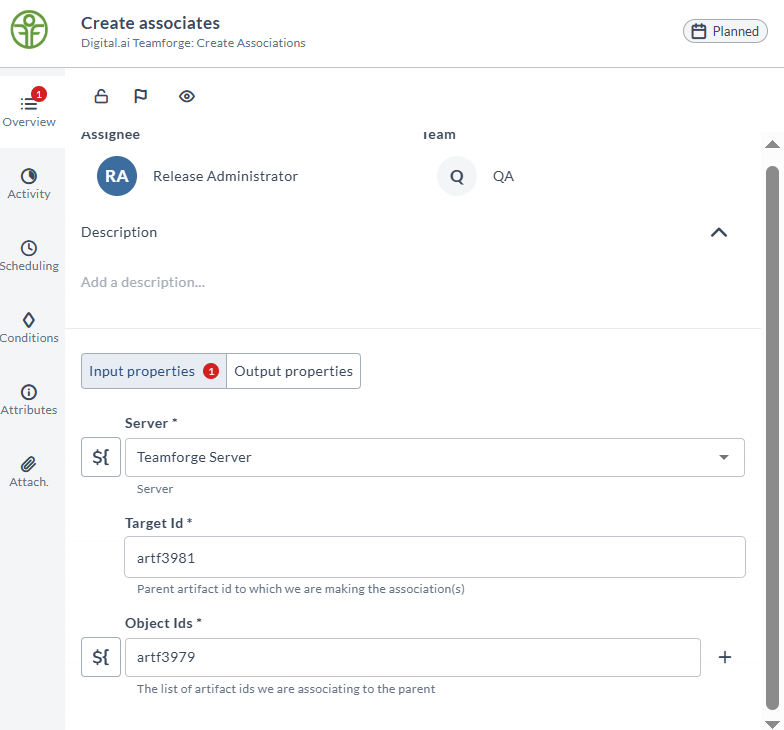
- Target Id—which is the parent artifact's ID
- Object Ids—one or more artifact IDs that you want to associate with the parent artifact
Create Association example
- Task configuration for creating associations.
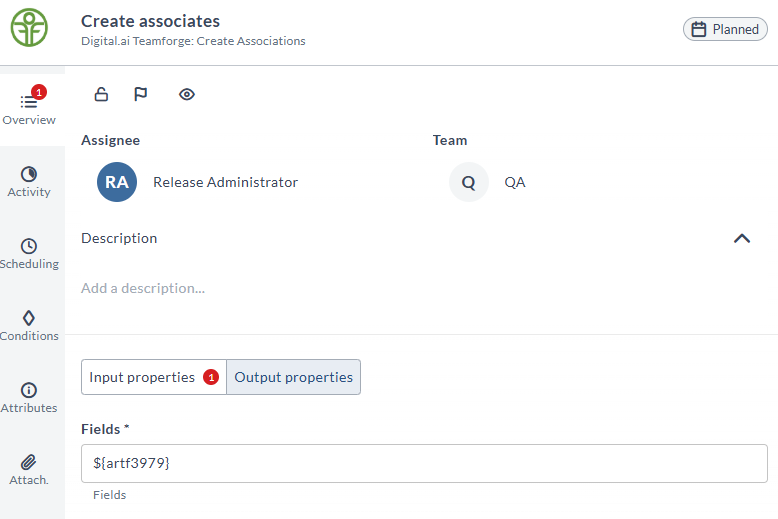
- Once you run the task, associations are created in TeamForge. You can find the association details in the Output properties.
Get Artifact Children
This task lets you fetch the list of child artifacts for a given TeamForge parent artifact.
Input Properties
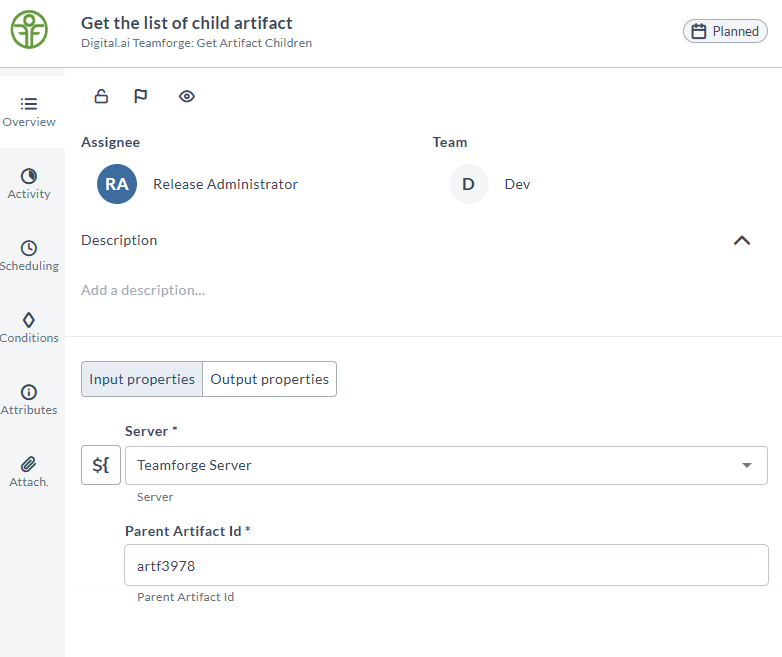
You must pass the TeamForge server's name and parent artifact's ID to fetch the list of child artifacts.
Get Artifact Children example
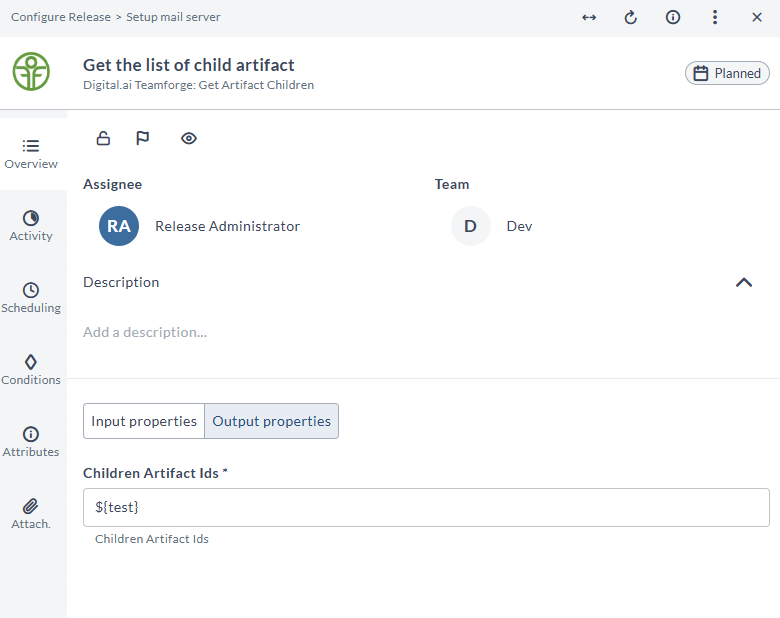
- Task configuration for fetching the list of child artifacts.
- Once you run the task, you can find the child artifact IDs in the Output properties.
Get Artifact Details
This task lets you fetch the details of a given TeamForge artifact.
Input Properties
You must pass the TeamForge server's name and the TeamForge artifact's ID to fetch the details of that specific artifact.
Get Artifact Details example
-
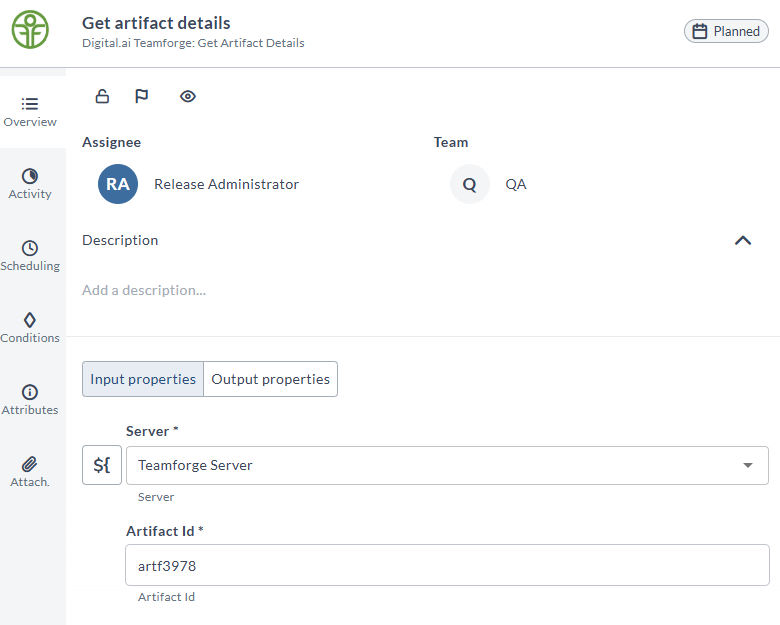
Task configuration for fetching the artifact details.
-
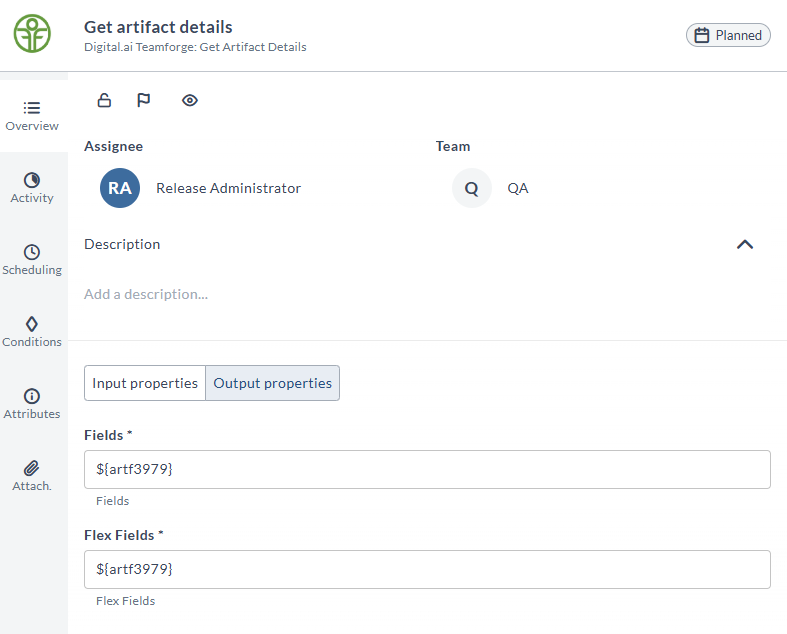
Once you run the task, this task fetches the artifact details from TeamForge. You can find the artifact details in the Output properties.
Get Artifact Status
This task lets you check if an artifact is in a particular status and if yes proceed to the next Release task. If the status you pass and the artifact's actual status in TeamForge are different, this task keeps polling the artifact, at the given polling interval, until the artifact's status changes to the desired one. Once both the statuses match, the task is completed.
For example, you may want to check if a particular TeamForge artifact has been closed before you proceed to the next Release task.
To prevent incessant polling, you must also set the maximum number of tries (Max Tries) after which the polling stops and the task fails with an exception (Maximum number of attempts exceeded) if there is no change in the artifact's status.
Input Properties
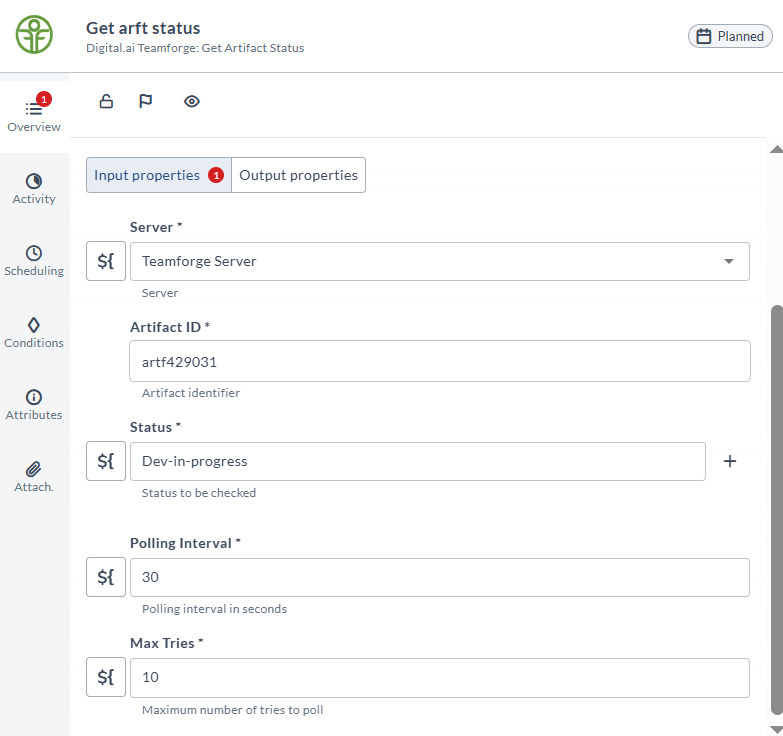
Server: The TeamForge server's name.
Artifact ID: The TeamForge artifact ID for which you want to check the status.
Status: The status of the artifact that you want the artifact to be in to proceed to the next Release task.
Polling Interval: The time in seconds between each polling action.
Max Tries: The maximum number of polling attempts, at the given polling interval, after which the polling stops.
Get Artifact Status example
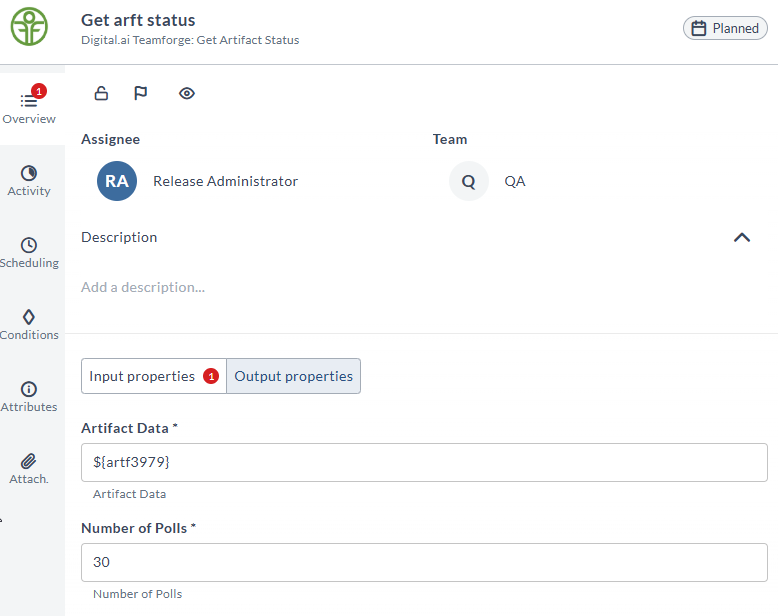
- Task configuration for checking the artifact's status.
- You can find the artifact's data in the Output properties.
Get Associations
This task lets you fetch the list of artifacts associated with a given TeamForge artifact.
Input Properties
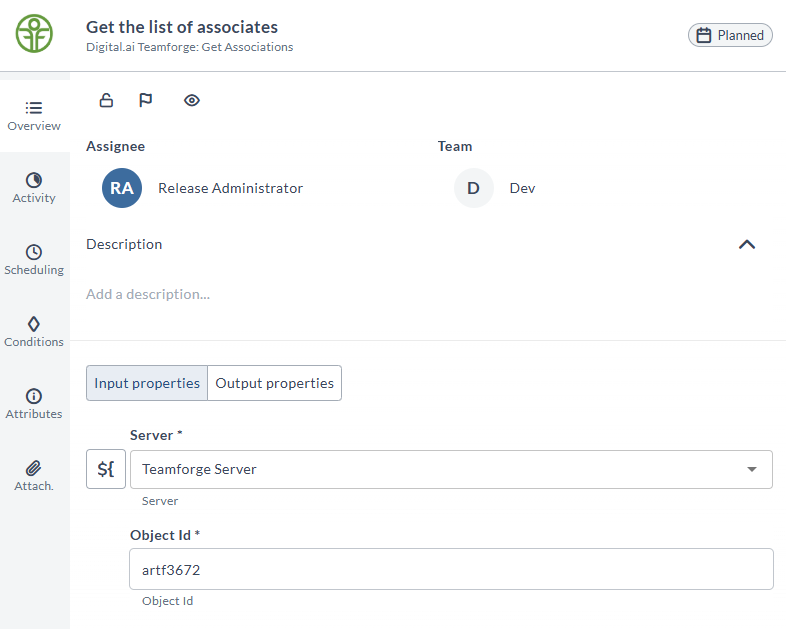
You must pass the TeamForge server's name and the TeamForge artifact's ID.
Get Associations example
- Task configuration for fetching the list of associated artifacts.
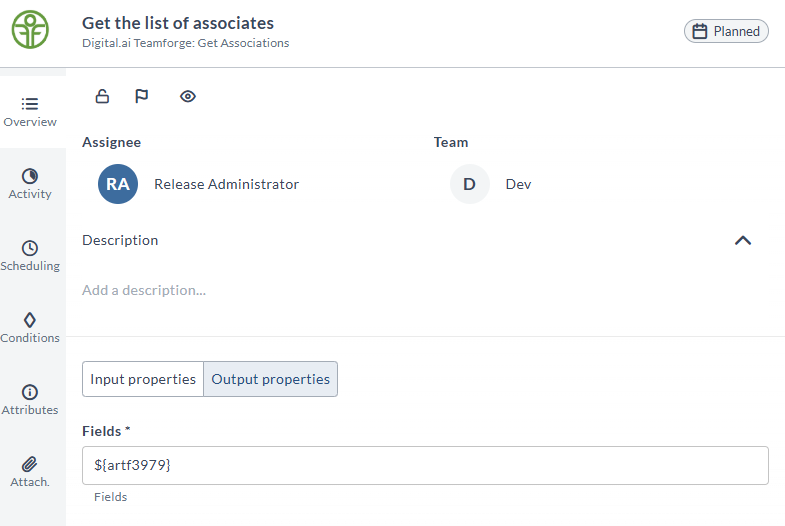
- Once you run the task, you can find the list of associated artifacts in the Output properties.
Update Artifact
This task lets you update the status of one or more TeamForge artifacts. Optionally, you can also add a comment to the artifacts.
Input Properties
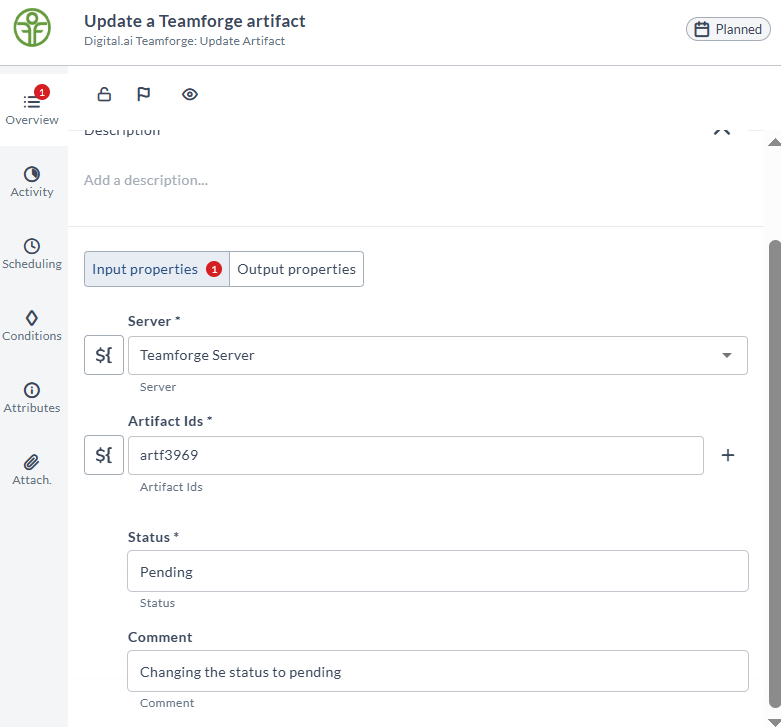
You must pass the TeamForge server's name and the list of TeamForge artifact IDs.
Get Associations example
-
Task configuration for updating one or more artifacts.
-
Once you run the task, this task updates the status of the artifacts. You can find the updated artifact details in the Output properties.
