SeeTestAutomation- Integration With Jenkins
Please note that this tool is classified as a Legacy tool. We recommend transitioning to our updated solutions to maintain optimal performance and security in your workflows. For more information on this matter, please reach out to technical support .
This page describes how to integrate SeeTestAutomation and Jenkins by exporting JUnit from SeeTestAutomation.
Prerequisites
To perform this integration you must have the following:
- JUnit test which you can execute from within Eclipse
- Server machine on which Jenkins is installed
- Source control environment which allows you to check-in your automation project
Creating an ANT File to Build and Run Your Tests
You can build an ANT file which includes either or both of the following target tasks:
- compile - Compiles your project.
- run_tests - Execute the tests while specifying a junit task
Below is depicted an example ANT file which includes both of these tasks.
Important: This file should be named build.xml and placed in your automation project root.
<project name="regression build" default="compile">
	<!-- - - - - - - - - - - - - - - - - -  target: compile - - - - - - - - - - - - - - - - - -->
	<target name="compile">

		<delete dir="classes" failonerror="false">
		</delete>

		<mkdir dir="classes" />

		<path id="lib.path.ref">
			<fileset dir="lib" includes="*.jar" />
		</path>

		<javac srcdir="src" destdir="classes" classpathref="lib.path.ref">
		</javac>

		<copy todir="classes">
			<fileset dir="src" excludes="**/*.java" />
		</copy>

	</target>

	<path id="tests.classpath">
		<pathelement location="classes" />
		<fileset dir="lib">
			<include name="**/*.jar" />
		</fileset>
	</path>

	<target name="run_tests">
		<junit>
			<formatter type="xml" usefile="true" />
			<classpath refid="tests.classpath" />
			<test name="com.experitest.regression.IMDbTest" />
		</junit>
	</target>

</project>
For more information about the syntax of the junit task, see http://ant.apache.org/manual/Tasks/junit.html
It is assumed that the specified tests have all the jar files needed for the project stored under the lib directory.
You will find the ‘test’ tag that contains the test class to execute:
<testname="com.experitest.regression.IMDbTest"/>
If your tests are located in multiple classes you can add multiple lines of testname.
Setting Up Your Jenkins Environment
Step 1: Open your Jenkins environment and create a New Job.
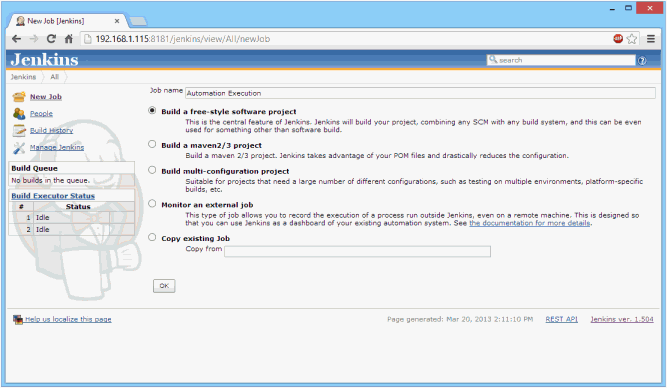
Step 2: Name the project and select Build a free-style software project. Then click OK.
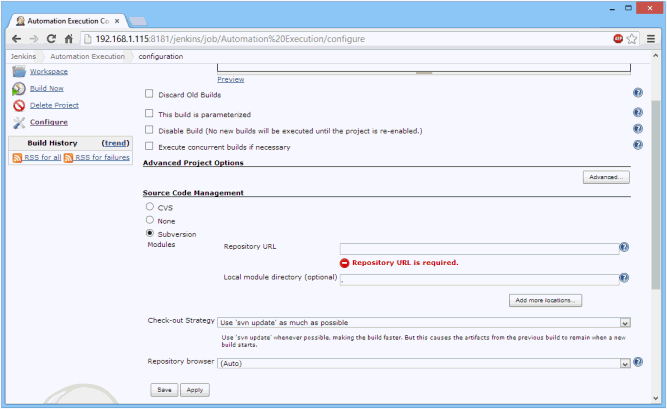
Step 3: Set your project's SVN properties.
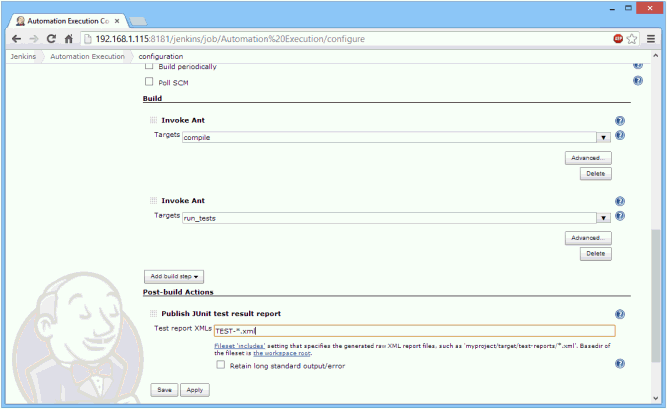
Step 4: In the Build section select Add build step, then select Invoke Ant. The first target to designate should be the test build target. (In the above example, this target is named compile).
Step 5: Add an additional Invoke Ant build step, with a target named run_tests.
Step 6: Select Add post-build action > Publish JUnit test report and enter "‘TEST-*.xml" in the Test report XMLs field.
Step 7: Save the project.
Executing the Tests
After you have completed the above setup procedure, execute your tests.
During the run execution graphs will be displayed.
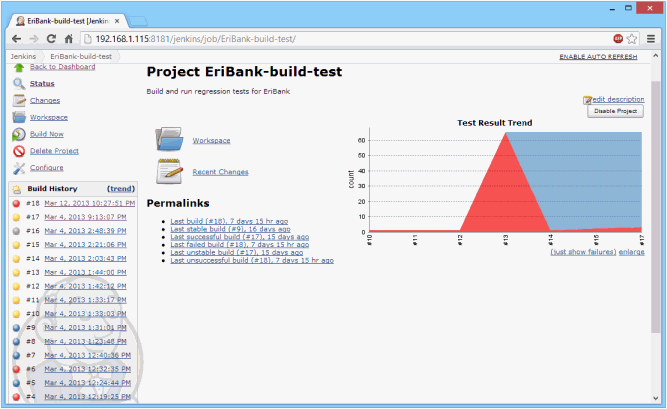
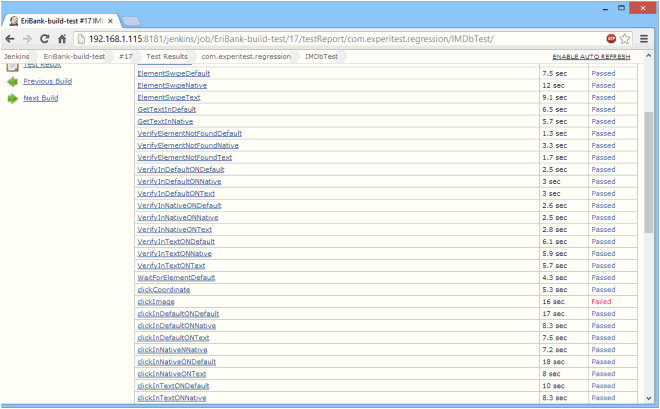
After execution has been completed, detailed results are shown.
