Configure Digital.ai Platform Integration
Set up GitHub as your Source Control Management (SCM) system in Digital.ai Platform and generate the authentication tokens required for CommitStream integration with Digital.ai Agility.
Overview
This topic covers two essential steps for configuring Digital.ai Platform:
- Configure GitHub SCM Integration - Connect Digital.ai Platform to GitHub repositories
- Generate Platform Personal Access Token - Create authentication token for webhook security
Both steps are required for complete CommitStream functionality.
Prerequisites
Digital.ai Platform:
- Administrator privileges in Digital.ai Platform
- Active Platform account and license
GitHub:
- GitHub account with access to your organization's repositories
- Ability to create GitHub Personal Access Tokens
- Repository admin access
Part 1: Configure GitHub SCM Integration
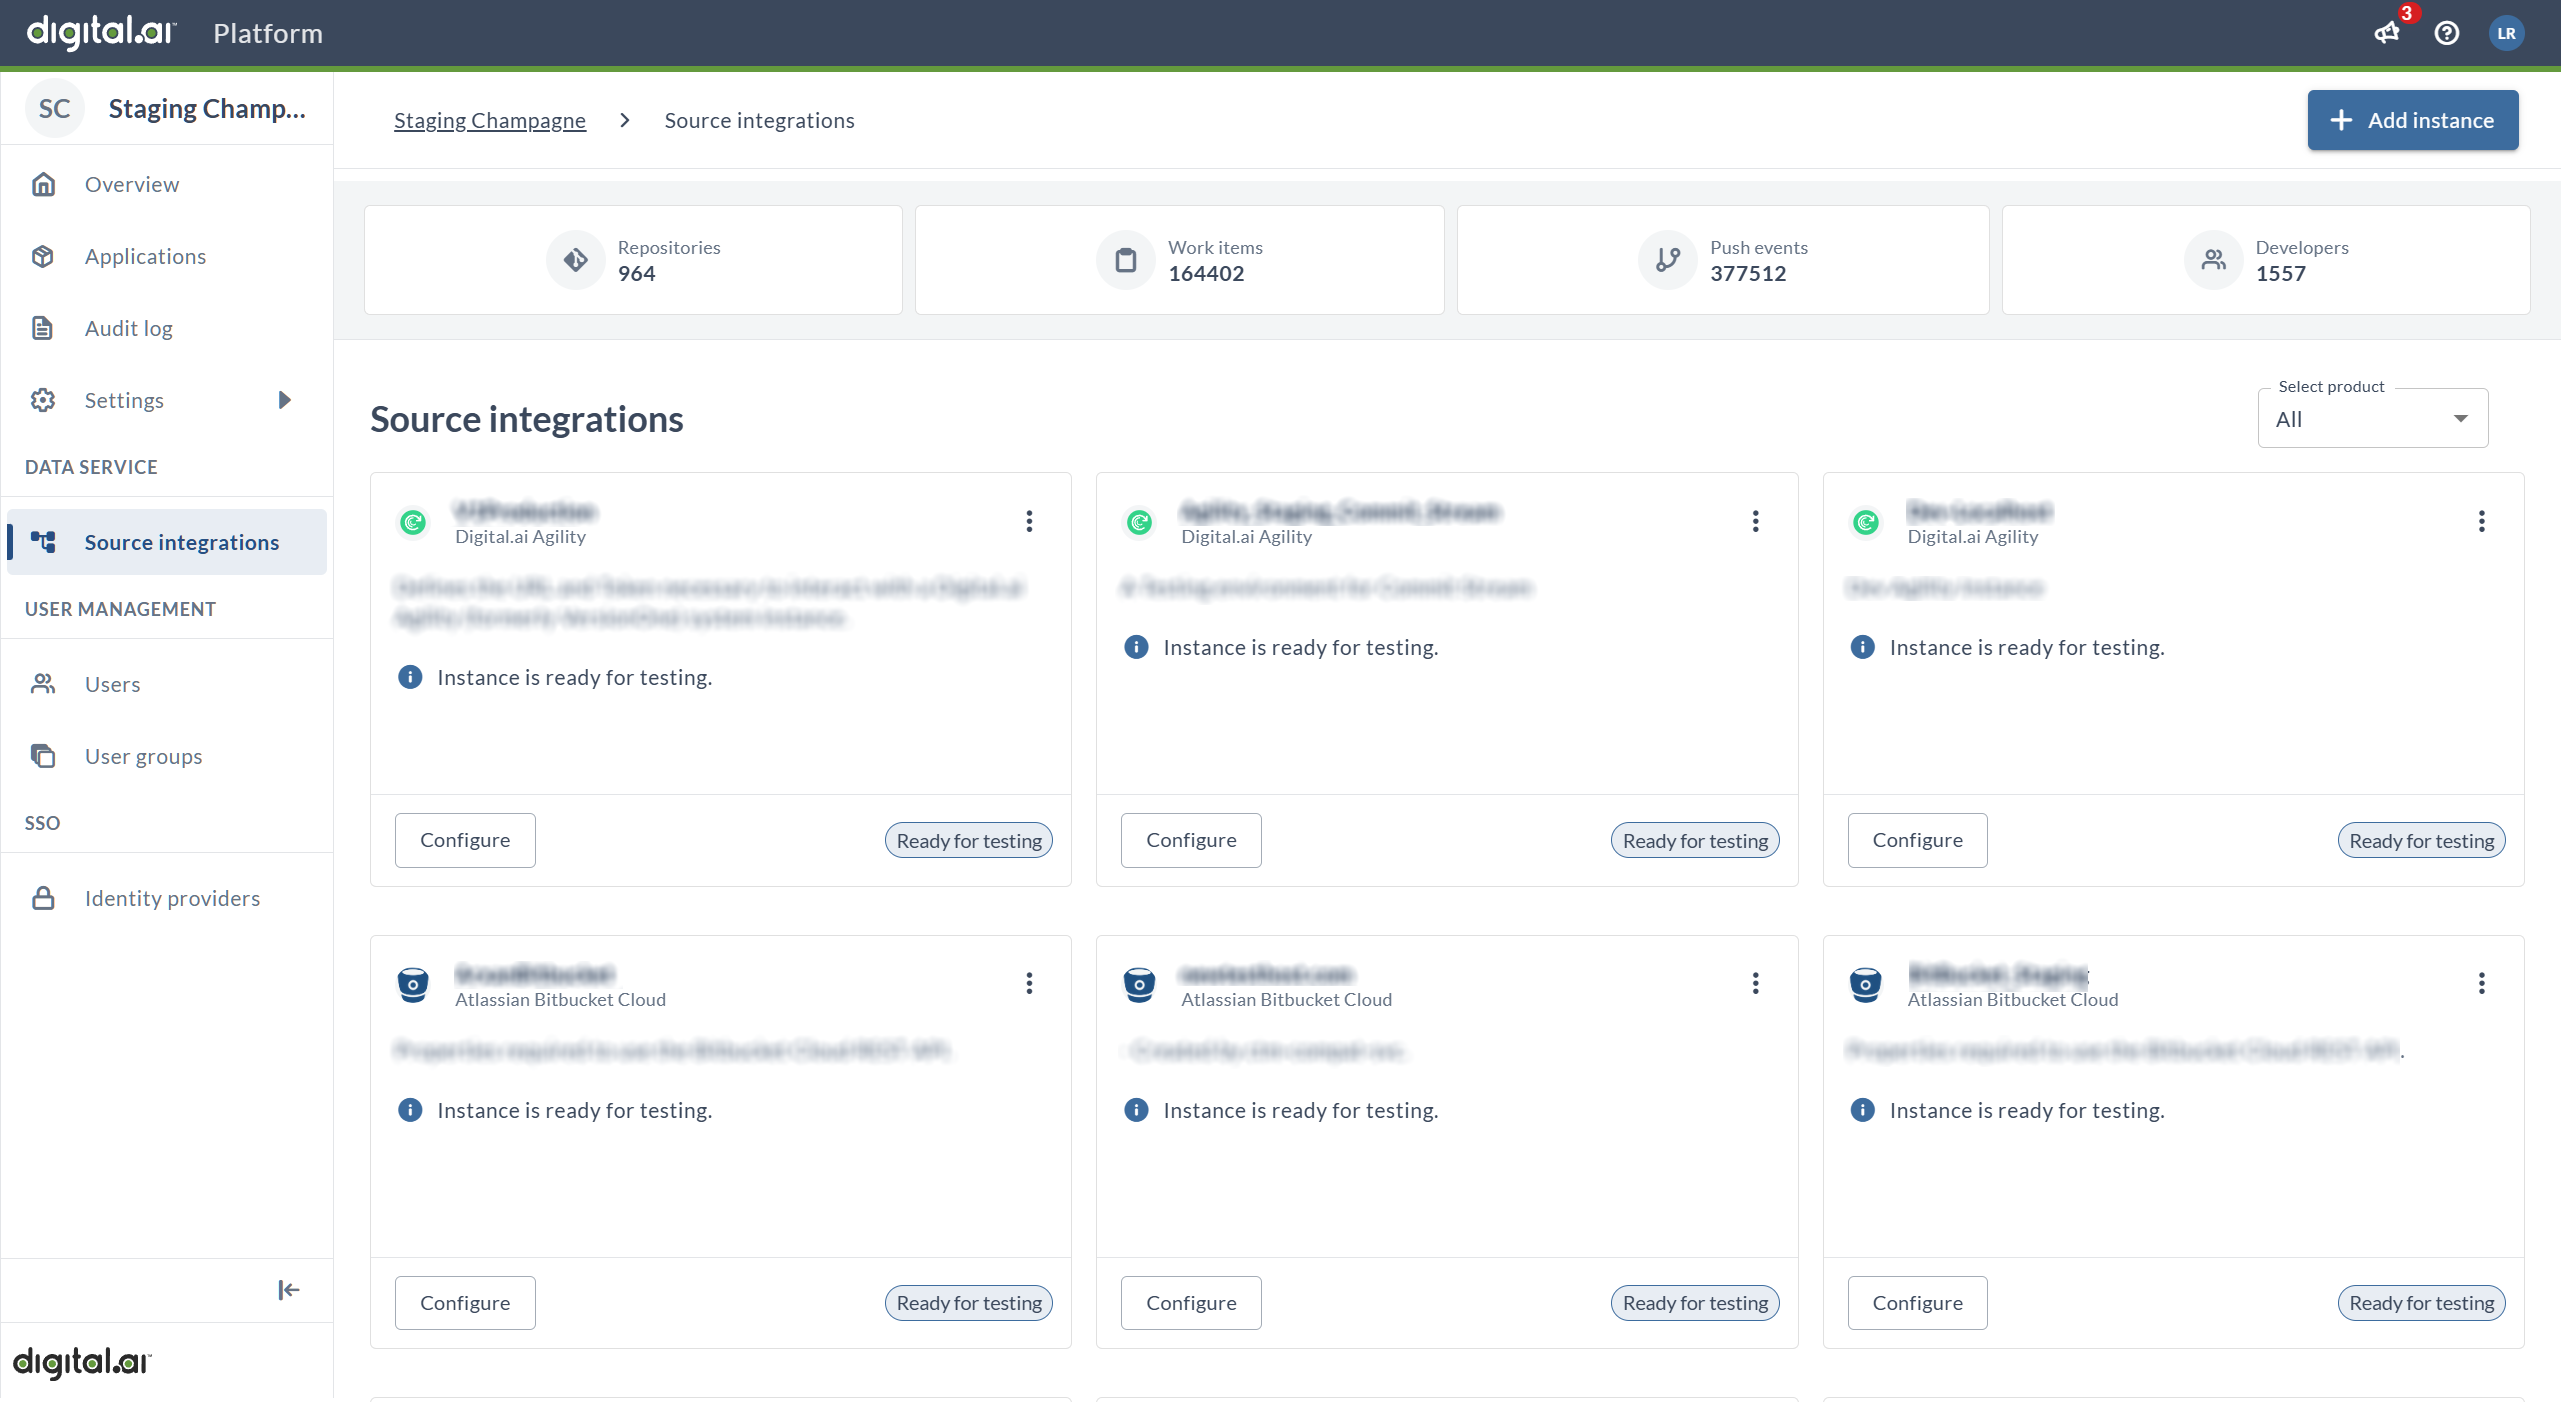
Step 1: Access Source Integrations
- Log in to Digital.ai Platform
- Navigate to Source Integrations
- You'll see the Source Integrations page displaying all existing integrations
- Click the Add Instance button (top right corner) to create a new GitHub integration
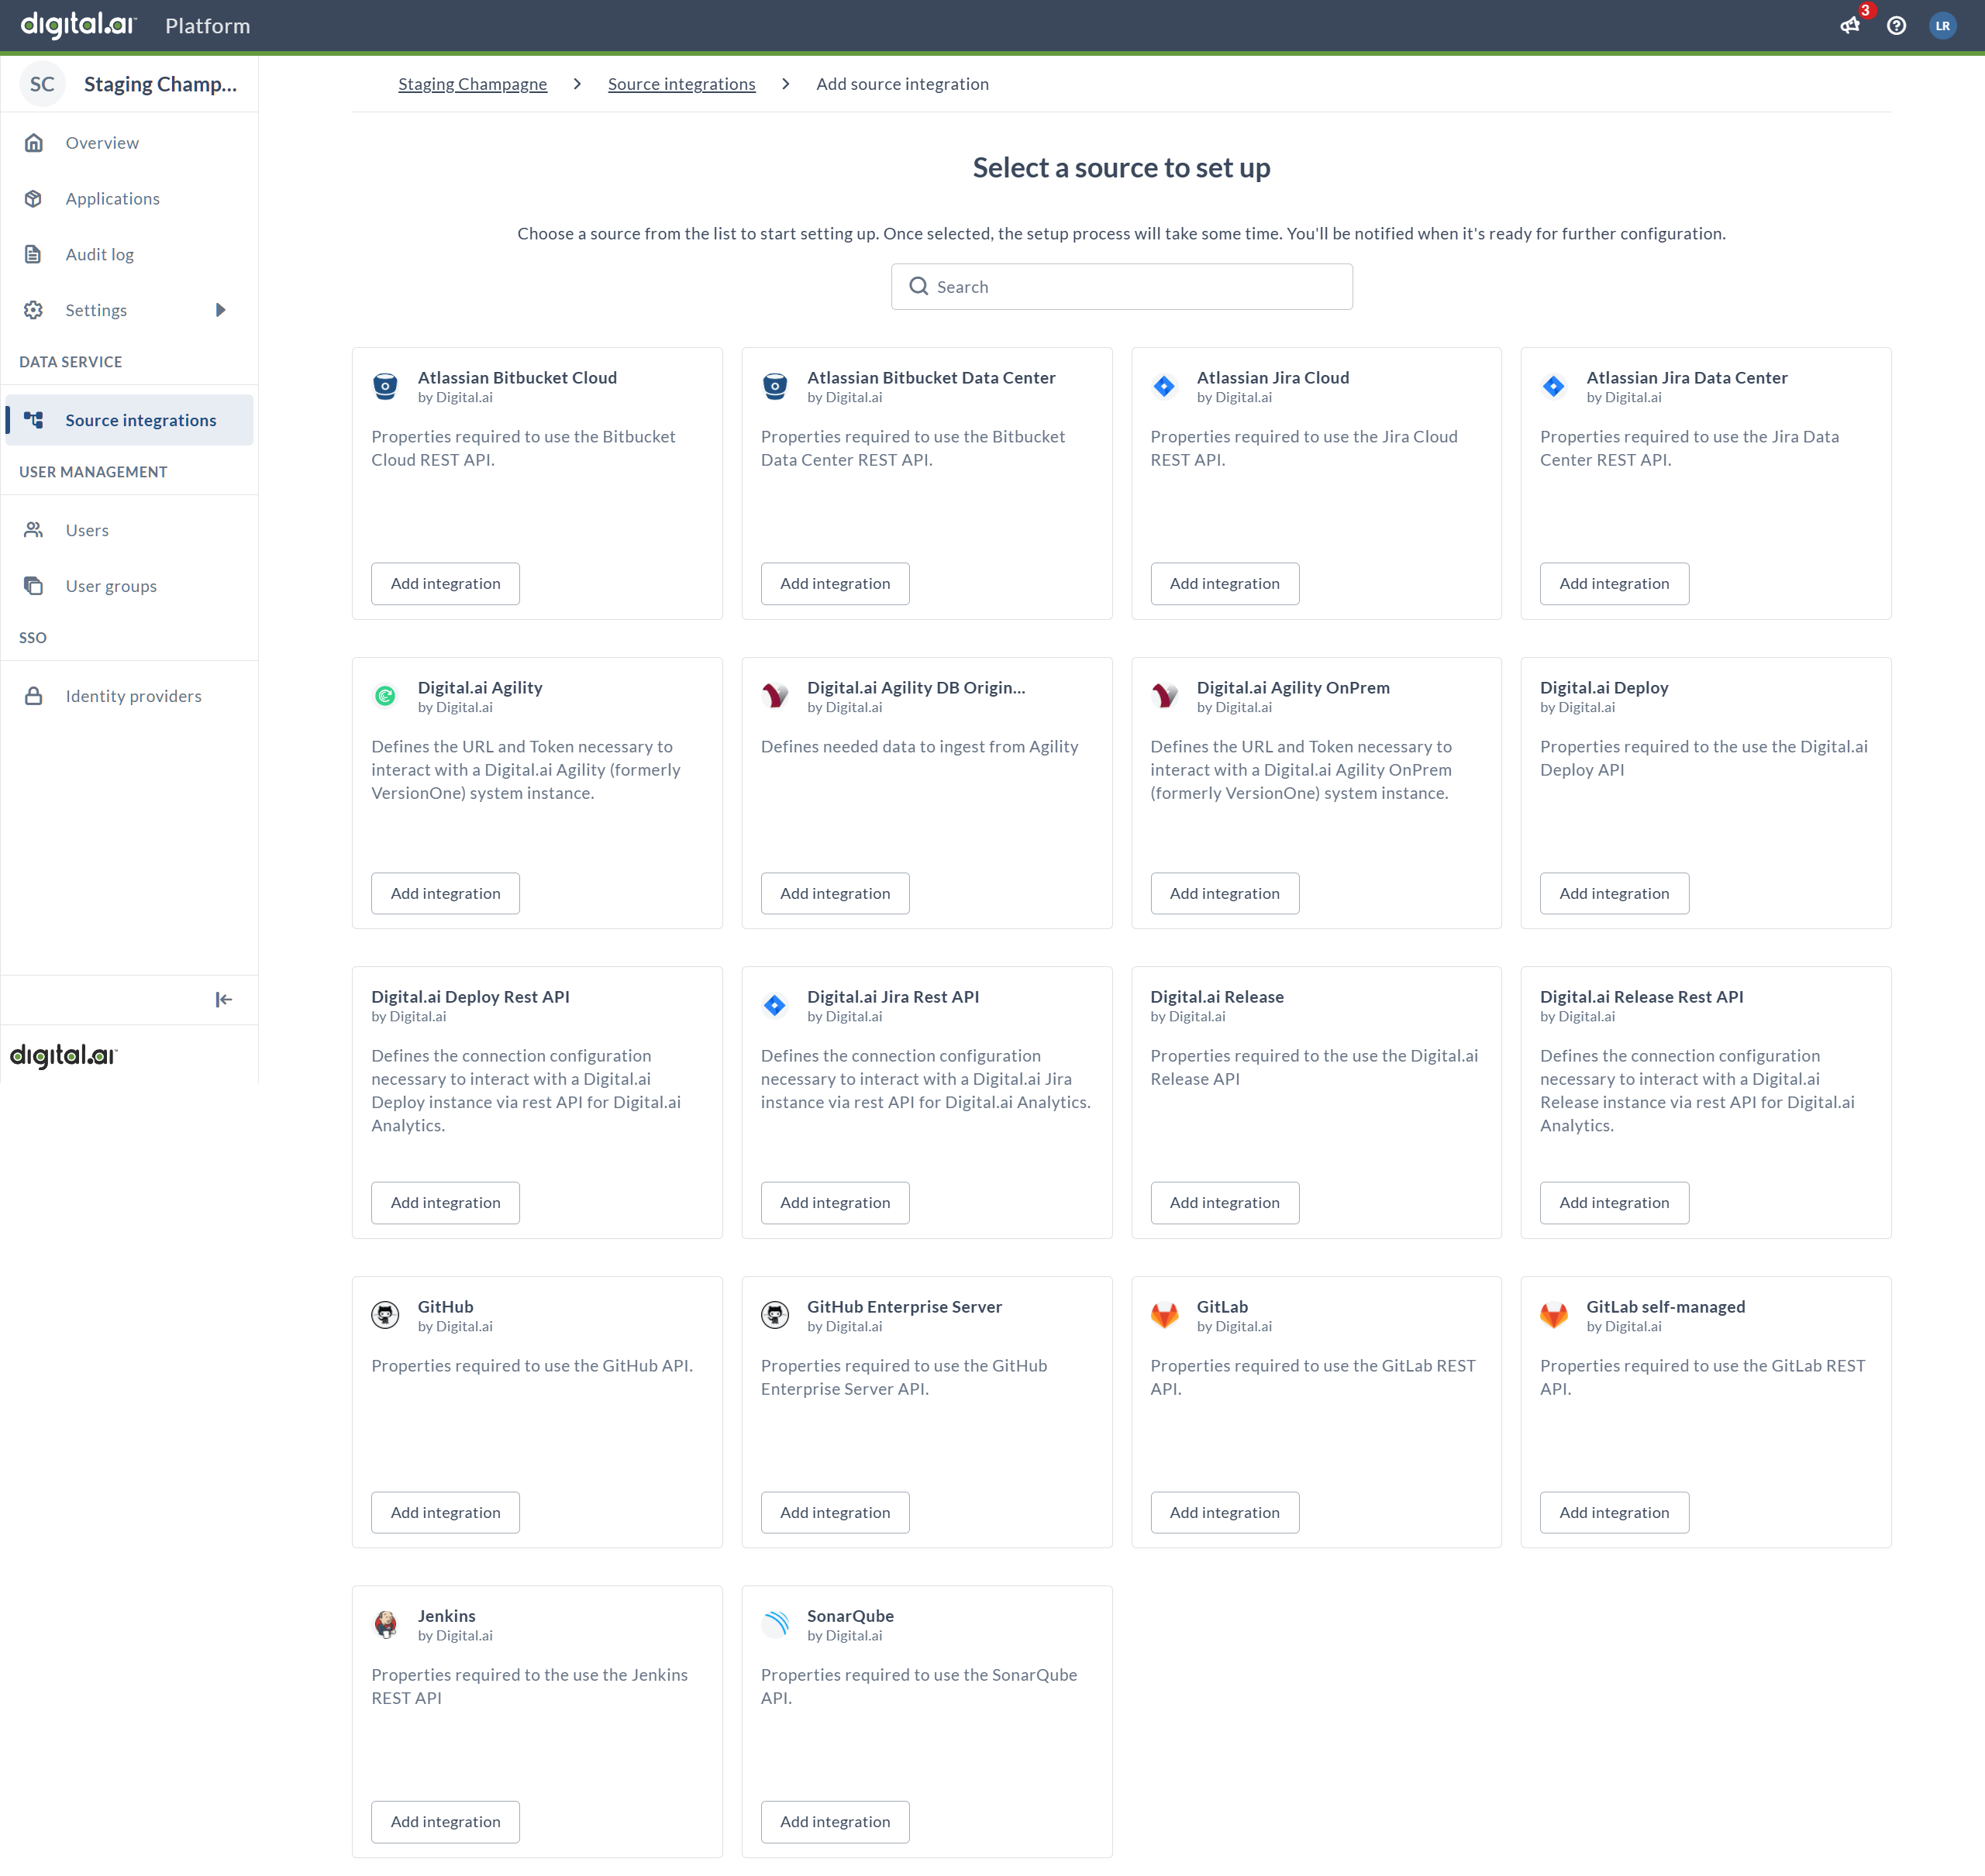
Step 2: Select GitHub as Source Integration
After clicking Add Instance, you'll see the "Select a source to set up" page displaying various source control integrations as cards/tiles.
- Type
githubin the search bar at the top of the page - The page will filter to show only GitHub-related integrations
- You'll see GitHub and GitHub Enterprise Server cards
- Locate the GitHub card (use "GitHub Enterprise Server" if you have a self-hosted installation)
- Click the Add integration button on the appropriate GitHub card to proceed
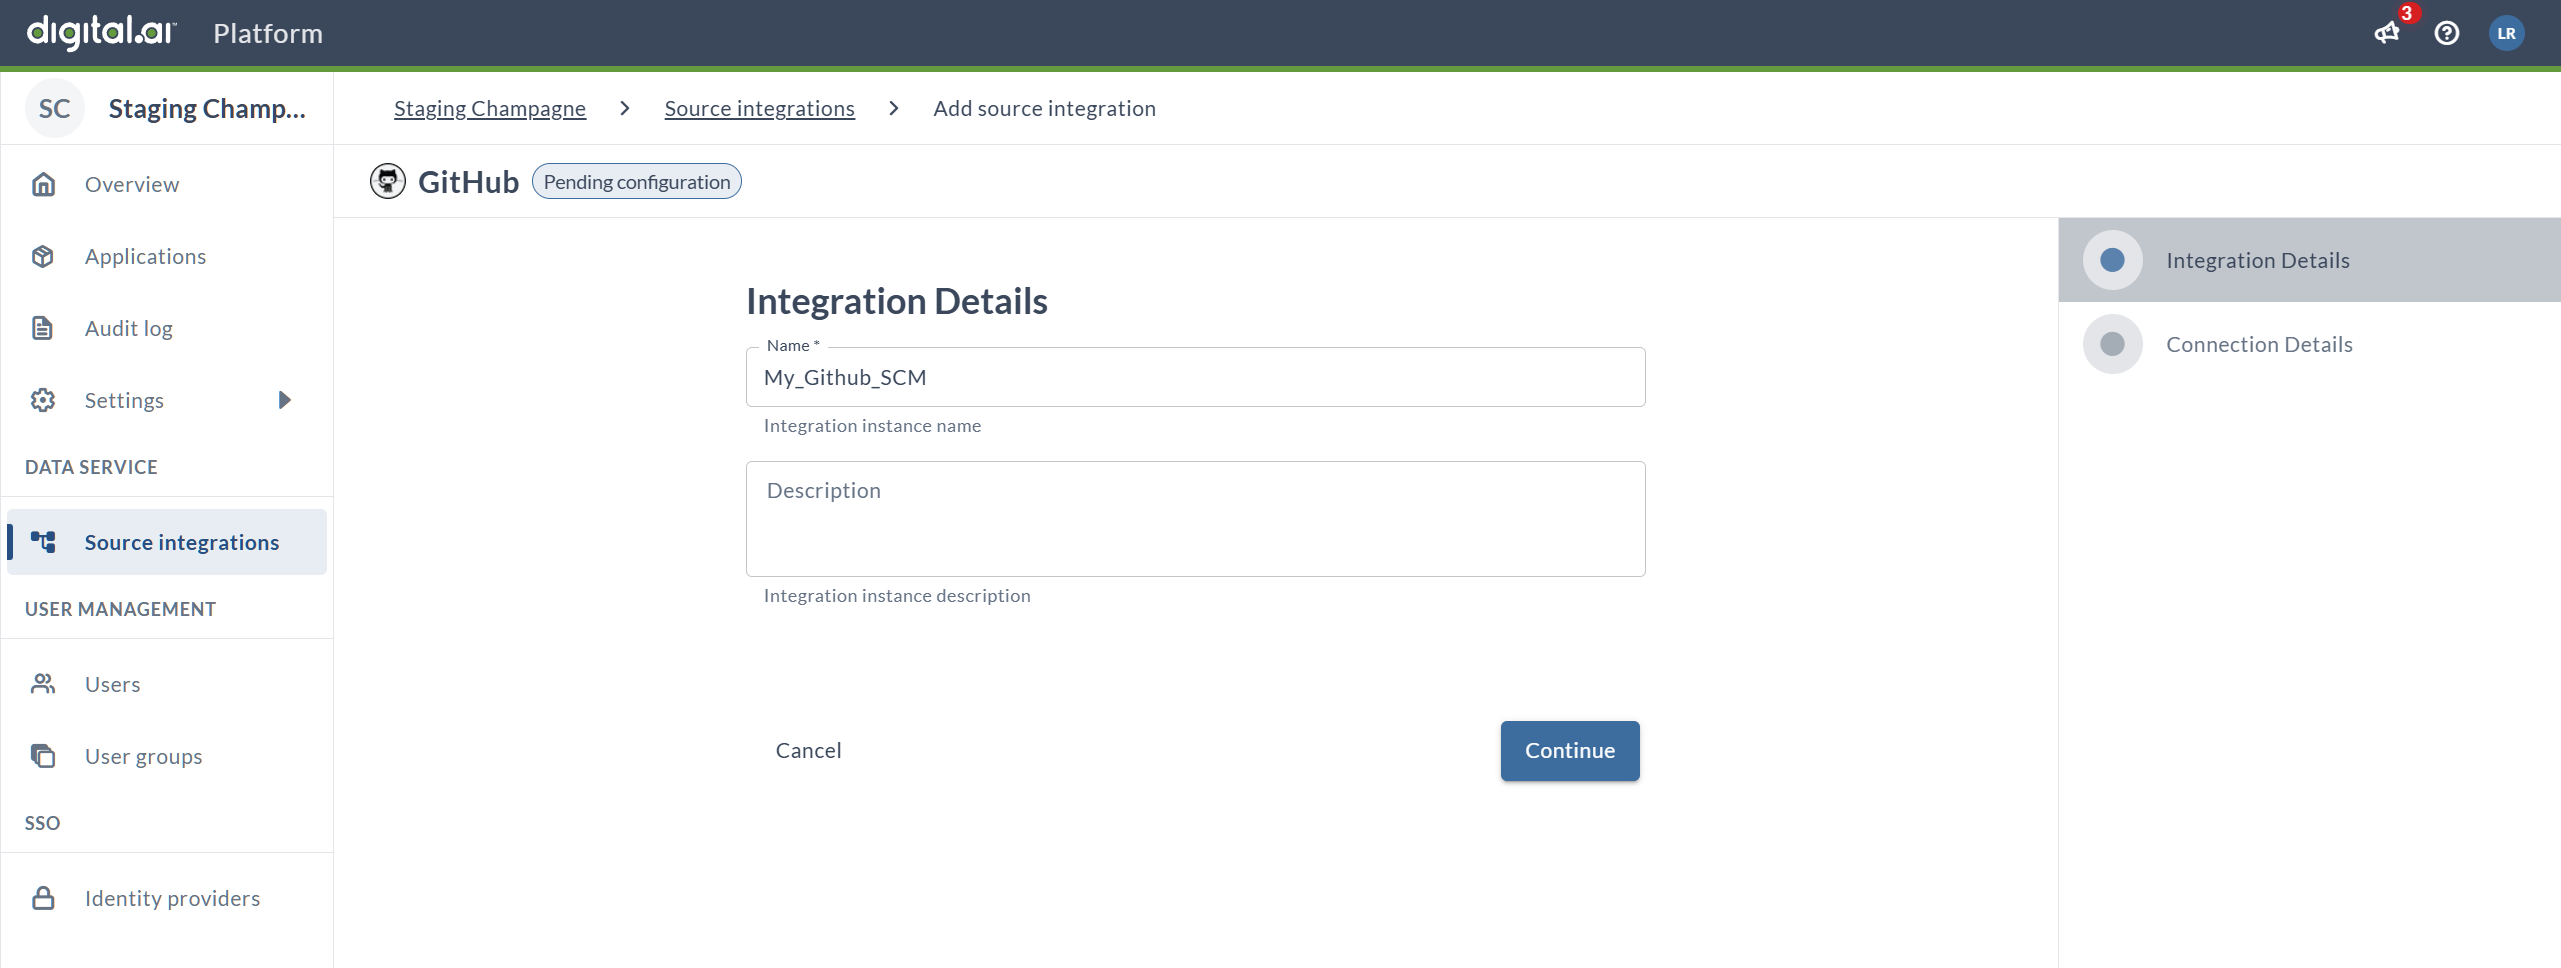
Step 3: Enter Integration Details
After clicking Add integration, the setup wizard begins with the Integration Details page:
-
Name (required): Enter a descriptive name for this GitHub integration instance
- Example:
My_GitHub_SCMorGitHub-Main-Repos - This name will help you identify this integration in Digital.ai Platform
- Can only contain alphanumeric characters, dots (.), dashes (-), and underscores (_)
- This name will be visible in Digital.ai Agility when configuring repositories
- Example:
-
Description (optional): Add a description explaining the purpose of this integration
- Example:
GitHub integration for Agility CommitStream
- Example:
-
Click Continue to proceed to the connection configuration
Note: You'll see "Pending configuration" status until the setup is complete. The wizard shows two tabs: "Integration Details" (current) and "Connection Details" (next).
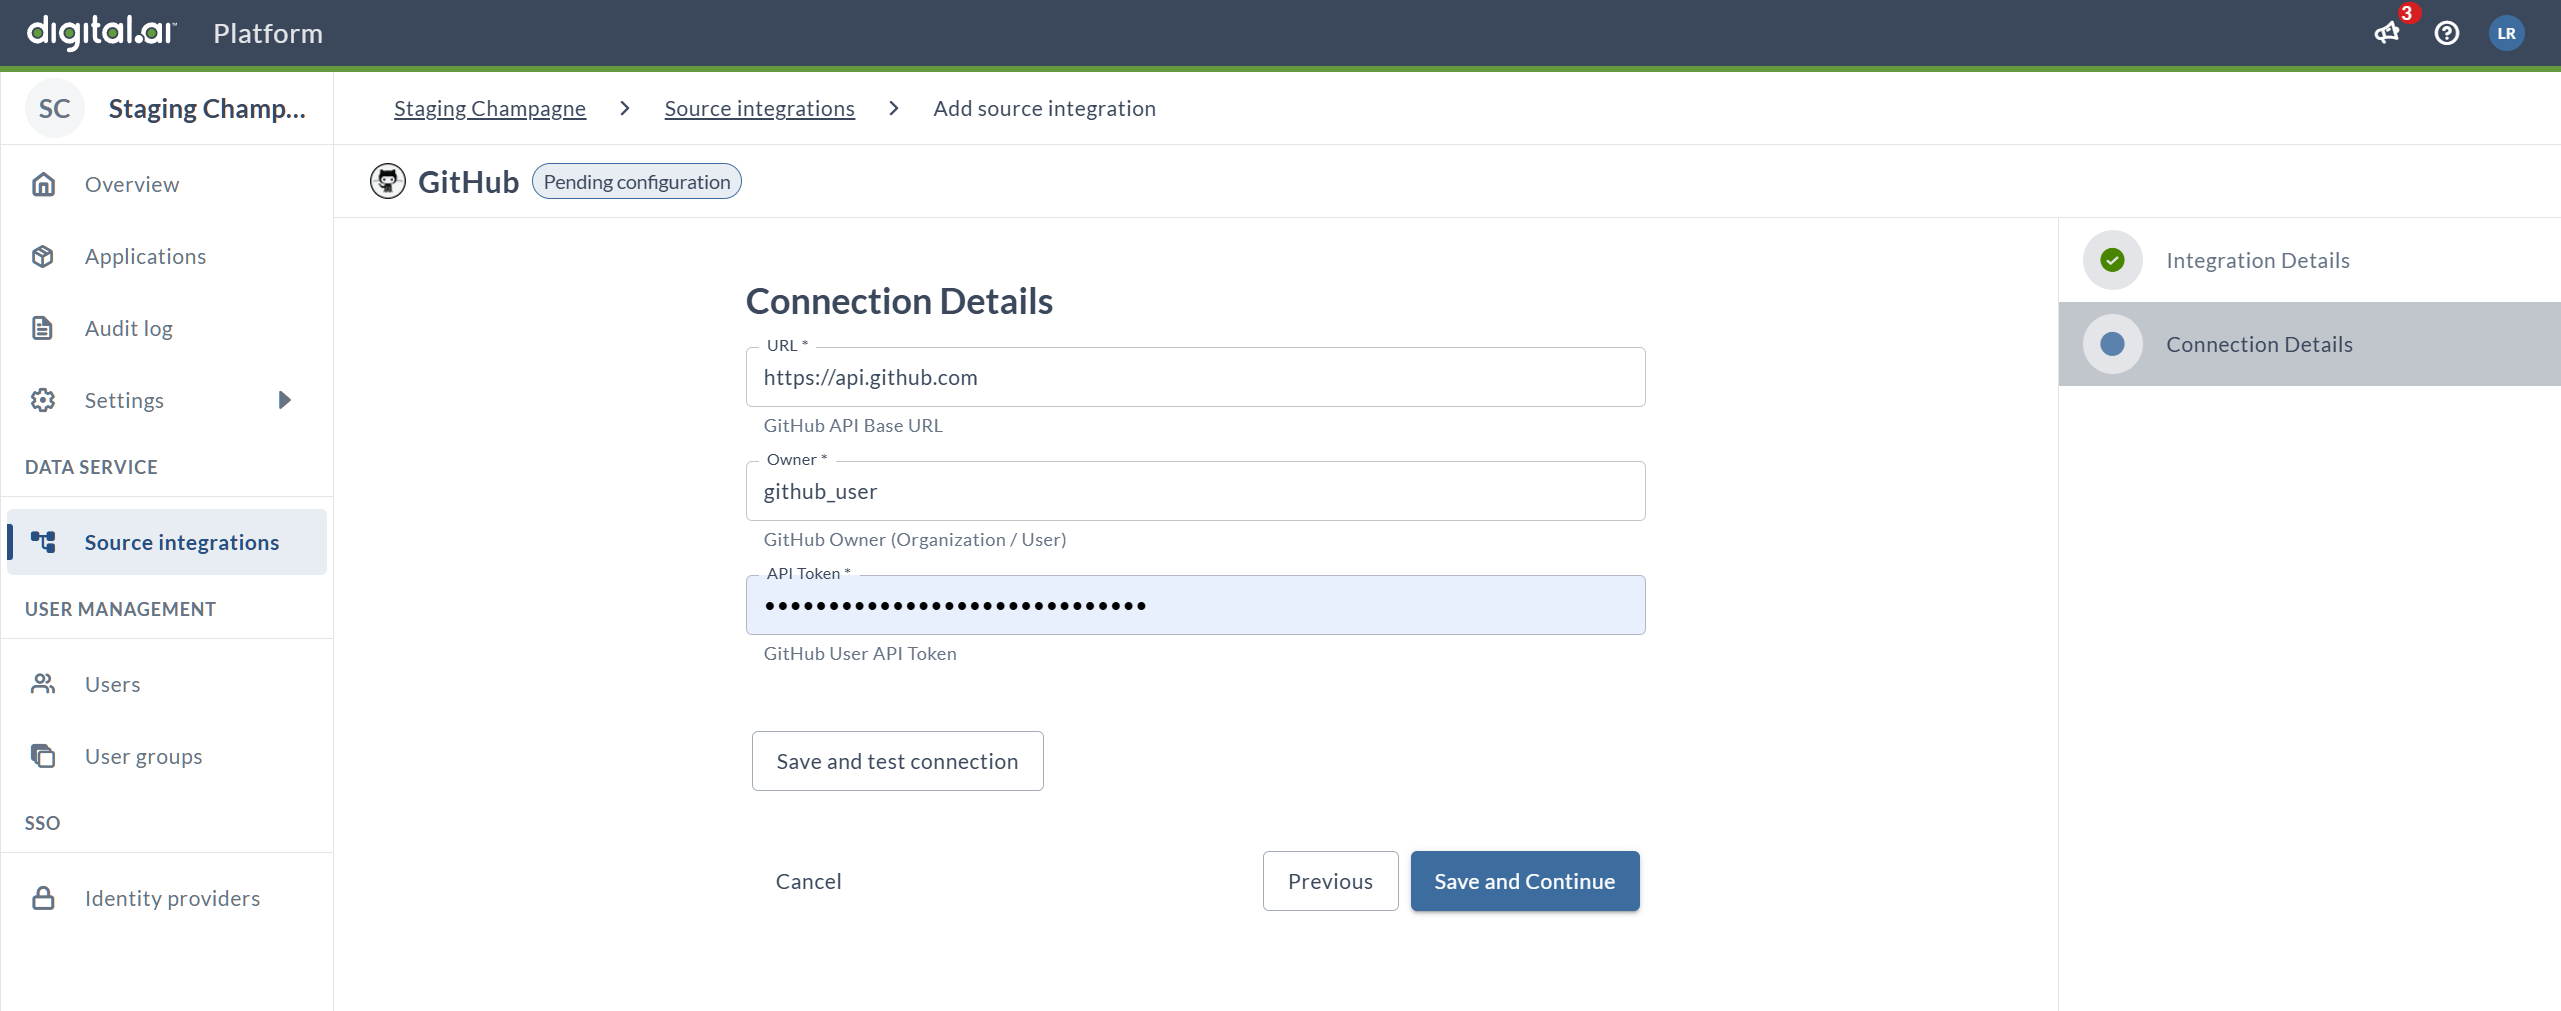
Step 4: Configure Connection Details
After clicking Continue from the Integration Details page, you'll see the Connection Details tab:
-
URL (required): Enter the GitHub API base URL
- For GitHub.com:
https://api.github.com - For GitHub Enterprise Server:
https://your-github-server.com/api/v3 - The field shows "GitHub API Base URL" as a helper text
- For GitHub.com:
-
Owner (required): Enter the GitHub owner
- Format:
organization/user - Example:
digital-aiormy-github-username - Helper text shows: "GitHub Owner (Organization / User)"
- Format:
-
API Token (required): Paste the GitHub Personal Access Token with read-only permissions
- The token will be masked (shown as dots) for security
- Required permissions:
repo:status,public_repo, orContents: Read-only - Used only for retrieving commit details when webhook payloads exceed GitHub's 25 MB size cap
The existence of this integration configuration serves as a marker that identifies this GitHub repository as connected to Digital.ai Platform. The integration itself enables commit tracking for Digital.ai Agility work items. Each SCM system has its own webhook payload structure and size cap - the API token is used as a fallback to retrieve commit details when payloads are capped.
Step 5: Test and Save Connection
-
Test the connection: Click Save and test connection to verify your credentials
- Digital.ai Platform will validate the URL, owner, and token
- Wait for confirmation that the connection is successful
- If the test fails, review the troubleshooting section below
-
Save your configuration:
- Click Save and Continue to complete the GitHub integration setup
- Or click Previous if you need to go back and modify the integration name
- Click Cancel to abort the setup
Result: Your GitHub integration is now configured in Digital.ai Platform and ready to use with CommitStream.
Verify Integration Status
After saving:
- The integration should appear in your Source Integrations list
- Status should show as "Active" or "Connected"
- The integration name will be available for selection in Digital.ai Agility CommitStream configuration
GitHub Personal Access Token Permissions
Your GitHub PAT should have the following minimum permissions:
For public repositories:
public_repo- Access public repositories
For private repositories:
repo- Full control of private repositories (or more granularly:)repo:status- Access commit statusrepo_deployment- Access deployment statuspublic_repo- Access public repositories
Best practices for GitHub PAT:
- Use read-only permissions whenever possible
- Create a dedicated service account for integrations
- Set appropriate token expiration dates (90 days or longer for production)
- Document which tokens are used for which integrations
- Store tokens securely in a password manager or secrets vault
Part 2: Generate Platform Personal Access Token
Platform Personal Access Tokens (PATs) are used to authenticate webhook requests from GitHub to Digital.ai Platform.
Step 6: Access Personal Access Tokens
- Stay logged in to Digital.ai Platform
- Navigate to the Digital.ai Platform overview page
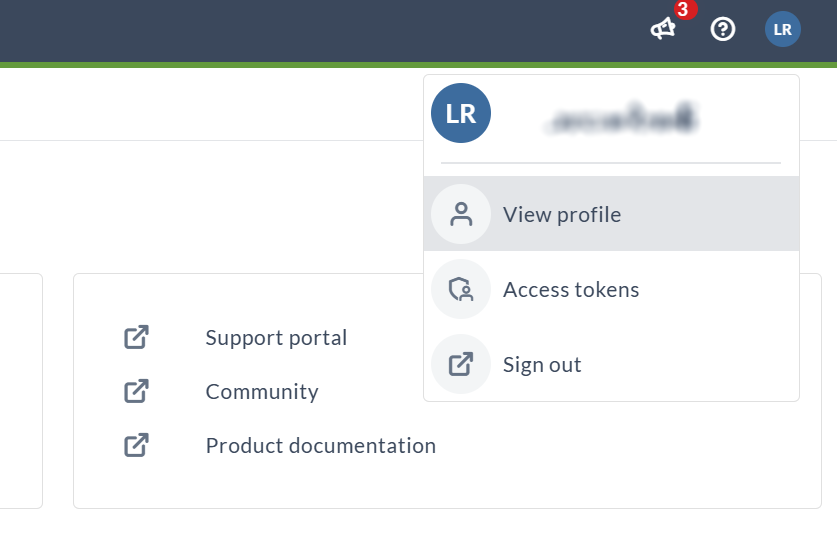
- Click on your user profile icon (showing your initials) in the top-right corner
- A dropdown menu will appear with the following options:
- View profile
- Access tokens
- Sign out
- Click on Access tokens to proceed to the token generation page
Step 7: Create New Token
You'll see the Personal access tokens page with:
- Generate new tokens section at the top
- Tokens in use table showing any existing tokens
-
In the Token name field, enter a descriptive name for your token
- Example:
token-for-commit-stream-webhook - Use a name that clearly identifies its purpose and integration
- Recommended format:
commitstream-[environment]-[date]
- Example:
-
Select the Expiration period from the dropdown
- Options: 30 days, 60 days, 90 days, Never
- For production integrations, consider using Never or 90 days
- For testing, shorter periods (30-60 days) are recommended
- Balance security requirements with operational convenience
-
Click the Generate button

Step 8: Copy and Store Token
- The token will be generated and displayed immediately
Make sure to copy your personal access token now. You won't be able to see it again!
- Click the Copy token button to copy the token to your clipboard
- Immediately paste the token in a secure location:
- Secure password manager
- Secrets management system
- Encrypted documentation
- You will need this token when configuring webhooks in GitHub
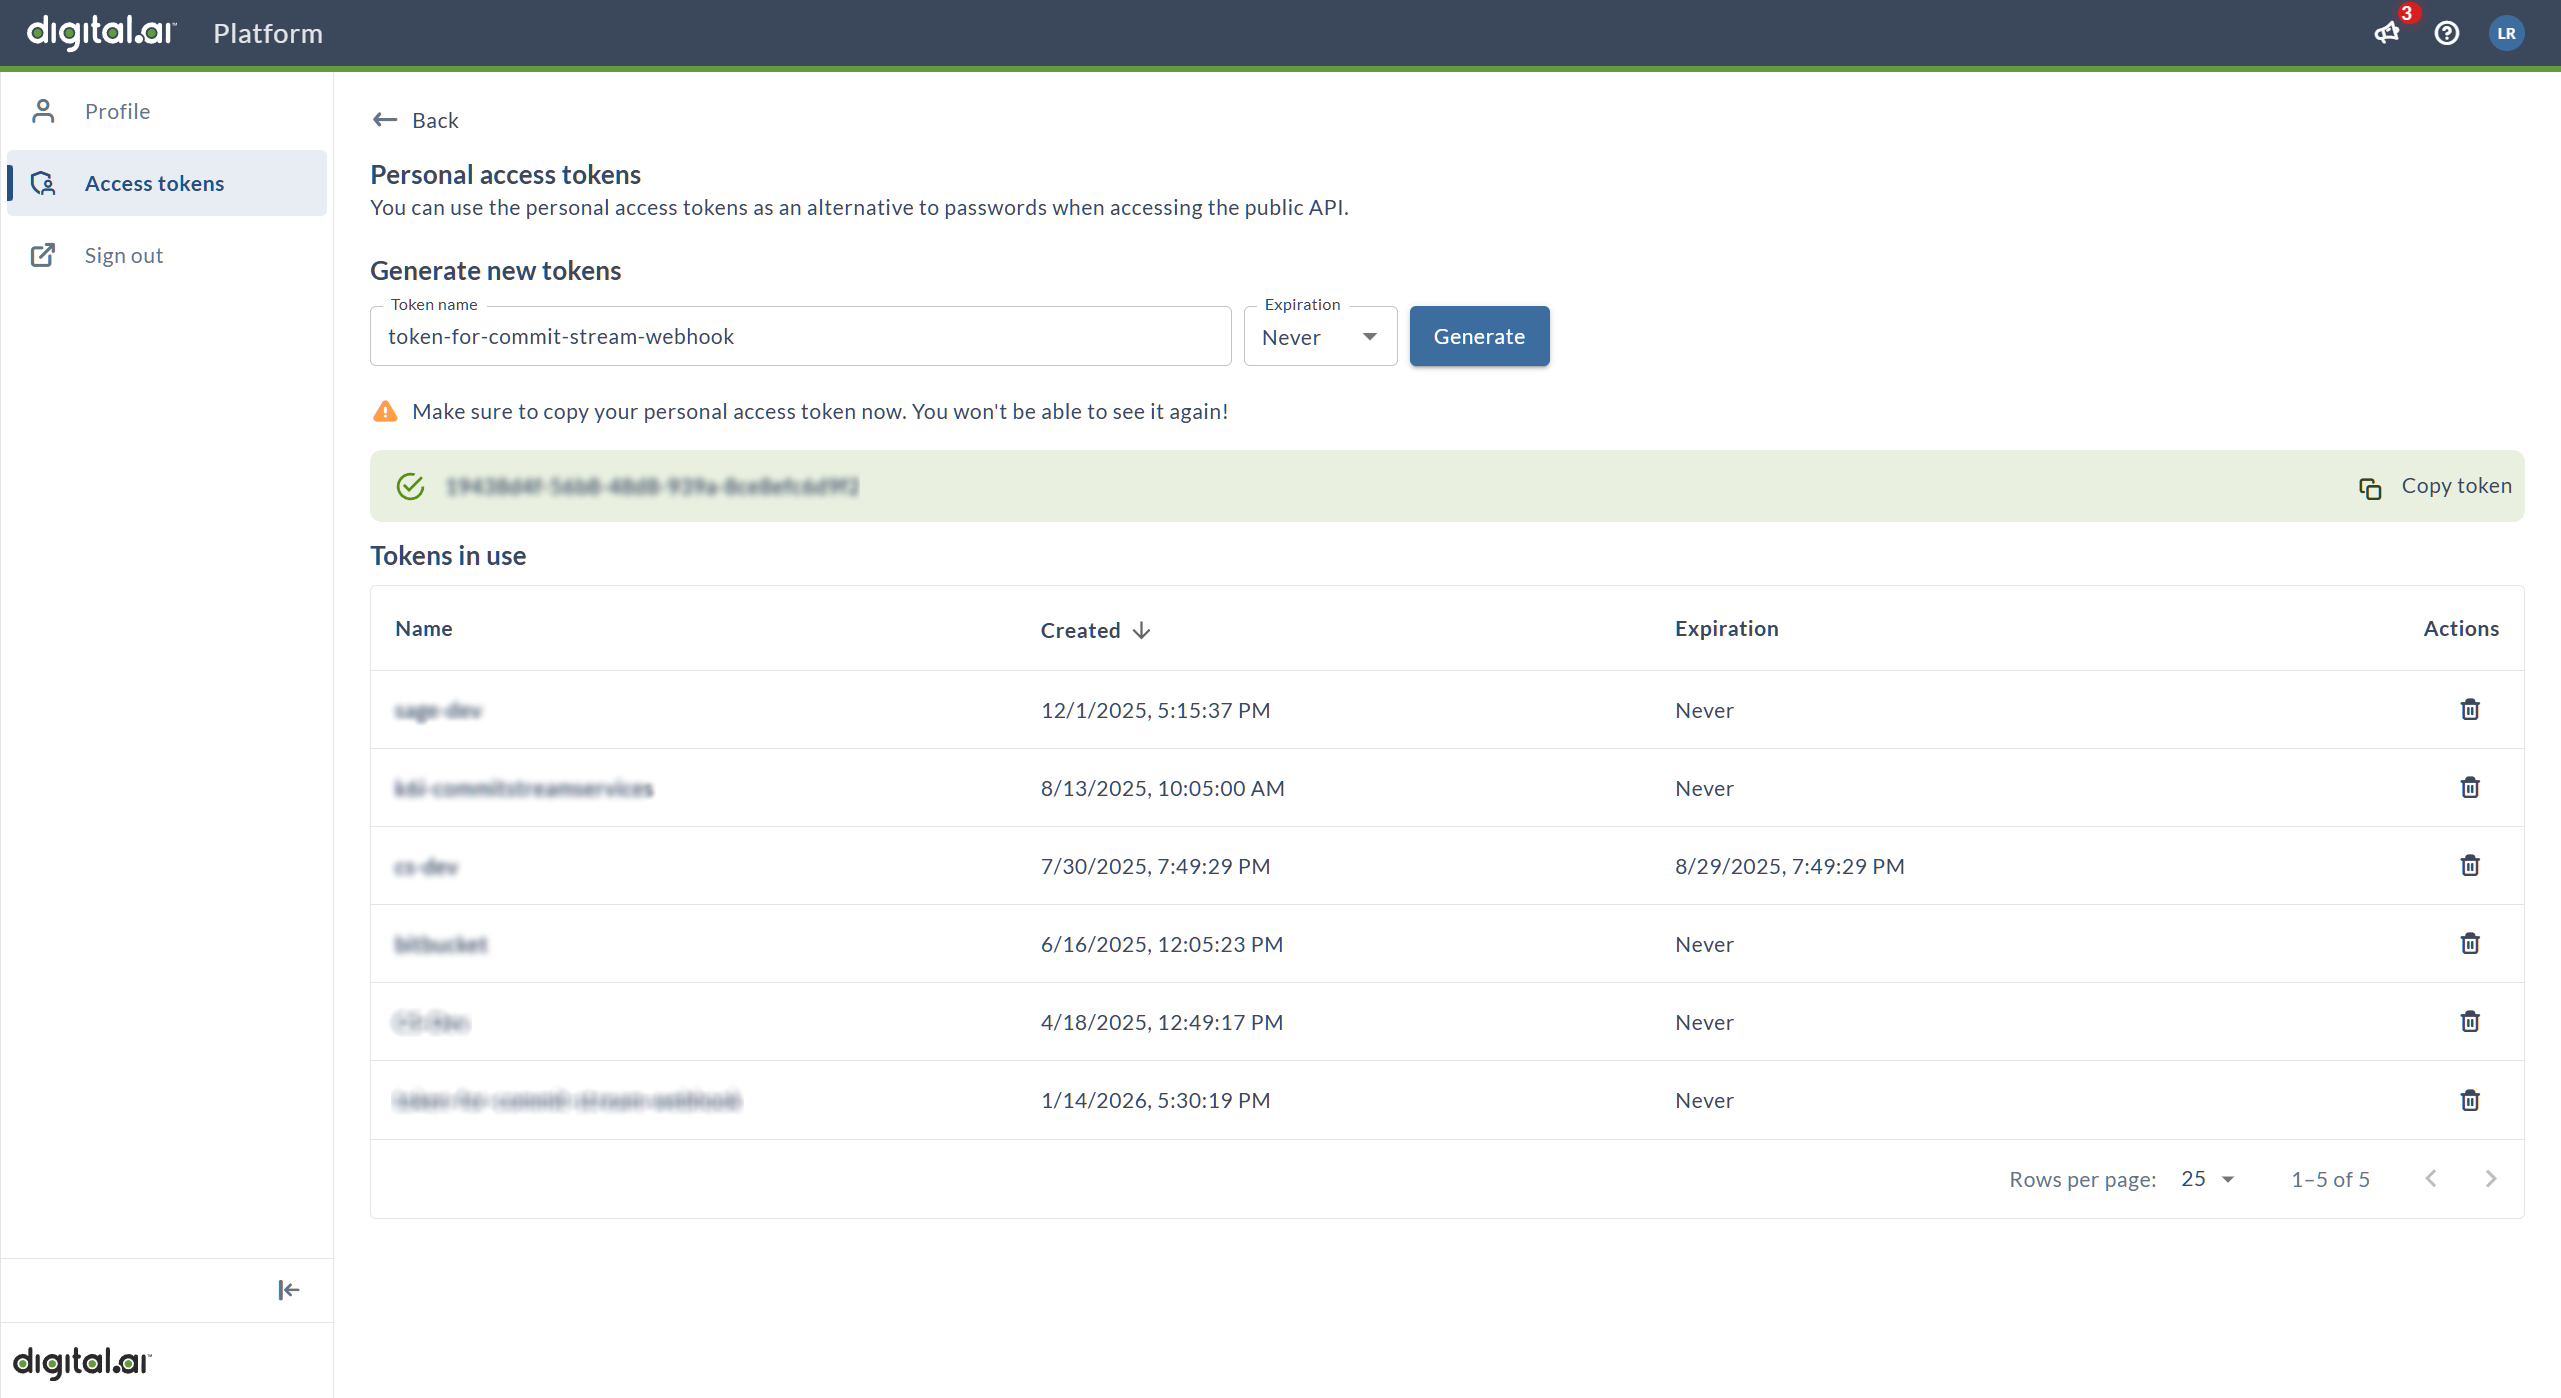
Result: The new token will appear in the Tokens in use table with:
- Token name
- Creation date and time
- Expiration date (or "Never")
- Delete action
Once you navigate away from this page, you cannot view the token value again. If you lose it, you must delete and regenerate a new token.
Token Security Best Practices
Storage and Handling:
- ✓ Copy and store the token immediately after generation
- ✓ Keep tokens in a secure password manager or secrets vault
- ✓ Never commit tokens to source code repositories
- ✓ Never share tokens via email or messaging platforms
- ✓ Limit access to tokens to authorized personnel only
Token Management:
- ✓ Use descriptive names to identify token purposes
- ✓ Set appropriate expiration dates based on security policies
- ✓ Delete unused or expired tokens regularly
- ✓ Rotate tokens periodically for enhanced security (quarterly recommended)
- ✓ Document which services use which tokens
Access Control:
- ✓ Create separate tokens for different integrations
- ✓ Use service accounts for production integrations
- ✓ Audit token usage regularly
- ✓ Monitor for unauthorized access or suspicious activity
Manage Existing Tokens
In the Tokens in use table, you can:
- View all active tokens by name and creation date
- Check expiration dates to plan token rotation
- Delete tokens using the trash icon in the Actions column
- Monitor token status and identify unused tokens
Note: Once a token is generated, you cannot view its value again. If you lose a token, you must delete it and generate a new one.
Token Expiration Management
Before Token Expires
- Note the expiration date when creating the token
- Set a calendar reminder to rotate the token 1-2 weeks before expiration
- Plan for token rotation during a maintenance window to minimize disruption
- Prepare communication to affected teams
When Token Expires or Needs Rotation
- Generate a new token with a similar name (add version or date if needed)
- Update all services using the old token:
- Update webhook URLs in all GitHub repositories
- Test each webhook after updating
- Verify integration functionality with the new token
- Delete the expired token from the tokens list
- Document the token rotation in your change log
For Production Integrations
Consider using tokens with longer expiration periods or "Never" to avoid service interruptions:
- Advantage: No unexpected authentication failures
- Trade-off: Requires manual rotation for security compliance
- Best practice: Implement regular token rotation schedule (e.g., quarterly or annually)
- Monitoring: Set up alerts for tokens nearing expiration
Use Cases for Platform PAT
Platform Personal Access Tokens are used for:
- Webhook Authentication: Authenticate webhook requests from GitHub to Digital.ai Platform (primary use for CommitStream)
- API Access: Programmatic access to Digital.ai Platform APIs
- Integration Services: Service-to-service authentication for third-party tools
- Automation: CI/CD pipelines and automated workflows
- Custom Applications: Applications built on Digital.ai Platform APIs
Troubleshooting
GitHub Integration Connection Test Fails
Problem: Unable to connect to GitHub API
Solutions:
- Verify the GitHub URL is correct (use
https://api.github.comfor GitHub.com) - For GitHub Enterprise, verify your server URL format
- Check network connectivity and firewall rules
- Ensure Digital.ai Platform can reach GitHub's servers
- Review proxy settings if applicable
GitHub Authentication Errors
Problem: Invalid or expired GitHub token error
Solutions:
- Verify the GitHub PAT is correct (no extra spaces or characters)
- Check that the token hasn't expired in GitHub
- Ensure the token has the required repository permissions
- Regenerate the token if necessary
- Test the token with GitHub API directly (using curl or Postman)
GitHub Owner Not Found
Problem: Cannot find specified organization or user
Solutions:
- Verify the owner name is spelled correctly (case-sensitive)
- Ensure the token has access to the specified owner's repositories
- Check that the organization/user exists in GitHub
- For private organizations, verify token permissions include private repository access
Platform Token Not Working
Problem: Platform PAT authentication fails after generation
Solutions:
- Verify you copied the complete token value (no truncation)
- Check for extra spaces or characters when pasting
- Ensure the token hasn't expired
- Confirm the token is active in the Tokens in use table
- Test the token with a simple webhook delivery
Lost Platform Token Value
Problem: Need to view Platform PAT value again
Solution:
- Token values cannot be retrieved after generation
- Delete the old token in Digital.ai Platform
- Generate a new token
- Update all webhook URLs in GitHub repositories with the new token
- Test webhook deliveries after updating
Platform Token Expired
Problem: Webhook authentication fails with 401 error
Solutions:
- Check token expiration date in Digital.ai Platform
- Generate a new token before the old one expires
- Update all webhook URLs with new token immediately
- Test webhook deliveries after rotation
- Delete the expired token
Verification Checklist
Before proceeding to the next configuration step, verify:
- ✅ GitHub integration appears in Digital.ai Platform Source Integrations list
- ✅ GitHub integration status shows as "Active" or "Connected"
- ✅ GitHub integration name is descriptive and meaningful
- ✅ Platform Personal Access Token is generated and copied
- ✅ Platform PAT is stored securely and accessible for next steps
- ✅ Platform PAT expiration date is documented
- ✅ Integration details are documented for team reference
Next Steps
After completing Digital.ai Platform configuration:
-
Configure Digital.ai Agility: Configure Digital.ai Agility for CommitStream
- Enable CommitStream in backend configuration
- Add repository connections in Agility UI
- Generate webhook URLs
-
Configure Webhooks: Configure Webhooks and Verify Integration
- Set up webhooks in GitHub repositories
- Use Platform PAT for webhook authentication
- Test the complete integration
-
Optional TeamRoom Setup: Configure TeamRoom CommitStream Panel
- Customize CommitStream display per TeamRoom
- Configure repository filtering