Manage Workflows
This topic describes how to create, run, and manage workflows.
Create New Workflows at Folder-Level
-
Create a new folder under Folders section and select the folder.
-
Click Workflows in the left-navigation pane. It displays the Workflow templates and Workflow executions tabs in the left-navigation pane within the folder.
noteTemplates and Workflows in a folder must have unique names.
-
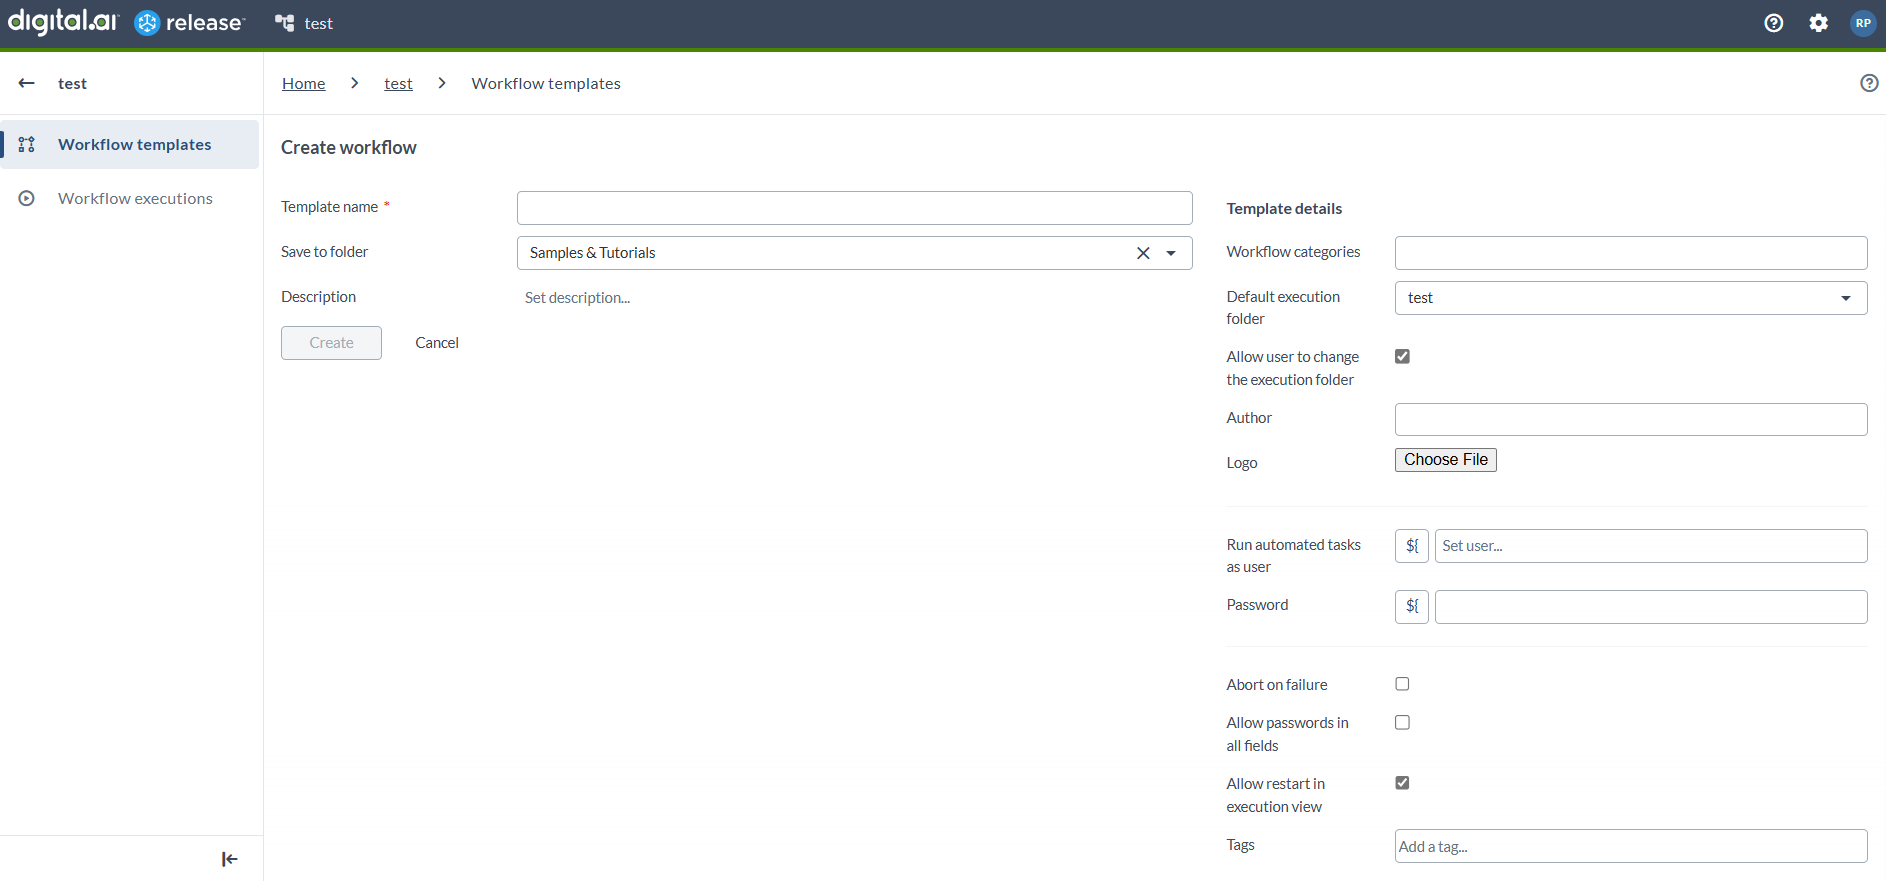
In the Workflows templates tab, click New workflow template. It opens the Create workflow page.
-
Enter the required values in the Create workflow page.
-
Enter a unique name for the workflow in the Template name field.
-
Assign a category to the workflow by selecting one or more categories in the Workflow categories drop-down list.
-
You can see that the folder where the workflow is being created is selected by default in the Default execution folder drop-down list. You can change the folder based on your requirements.
-
Allow user to change the execution folder (enabled by default) - This allows the workflow user to change the execution folder when you run the workflow.
-
Allow restart in execution view (enabled by default) - This controls whether running workflows can be restarted from the execution (stepped) view.
-
Click Create to create a workflow.
As a result, in the Workflows executions tab, you can view the workflows that are being executed.
Filtering Workflow Templates
You can filter workflow templates using multiple criteria to quickly locate the workflow templates you need.
Use free text search to filter workflow templates by Title. For more filtering options, use Filter Drawer.

You can filter workflow templates by the following criteria:
Filter by Workflow Tags
Filter workflow templates by one or more tags.
- All - Show templates that contain all selected tags.
- Any - Show templates that contain at least one selected tag.
This helps you quickly find templates grouped under specific tags.

Filter by Workflow Categories
Filter workflow templates by one or more workflow categories. A template must match at least one of the selected categories to appear in the results.

Filtering Workflow Executions
Use free text search to filter workflow executions by Title. For more filtering options, use Filter Drawer.

You can filter workflow executions by the following criteria:
Filter by Workflow Owner
Filter by the workflow owner’s username or email address. To display only your executions, click My workflow executions.

Filter by Workflow Status
Filter by one or more workflow statuses:
- Planned: Workflow executions created but not yet started (in the planned state)
- In Progress: Workflow executions currently in progress
- Paused: Workflow executions that are paused
- Failing: Workflow executions that are failing
- Failed: Workflow executions that have failed
- Aborted: Workflow executions in the aborted state
- Completed: Workflow executions in the completed state
Use the Select All option to add all the statuses.

Filter by Workflow Tags
Filter by one or more workflow execution tags.
- All: Display workflows containing all selected tags.
- Any: Display workflows containing at least one of the selected tags.

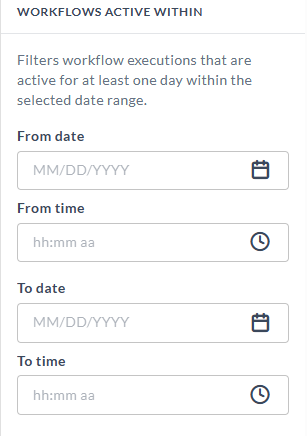
Filter by Workflows Active Within
Use this filter to view workflow executions that were active for at least one day within a specific date and time range.
You can define the range using both date and time selectors:
- From date / From time – Specify the start of the time window.
- To date / To time – Specify the end of the time window.
Filter by Task Tags
Use this filter to display workflow executions that include tasks with specific tags.
If any task within a workflow execution contains any of the selected tags, the workflow execution will be shown in the results.

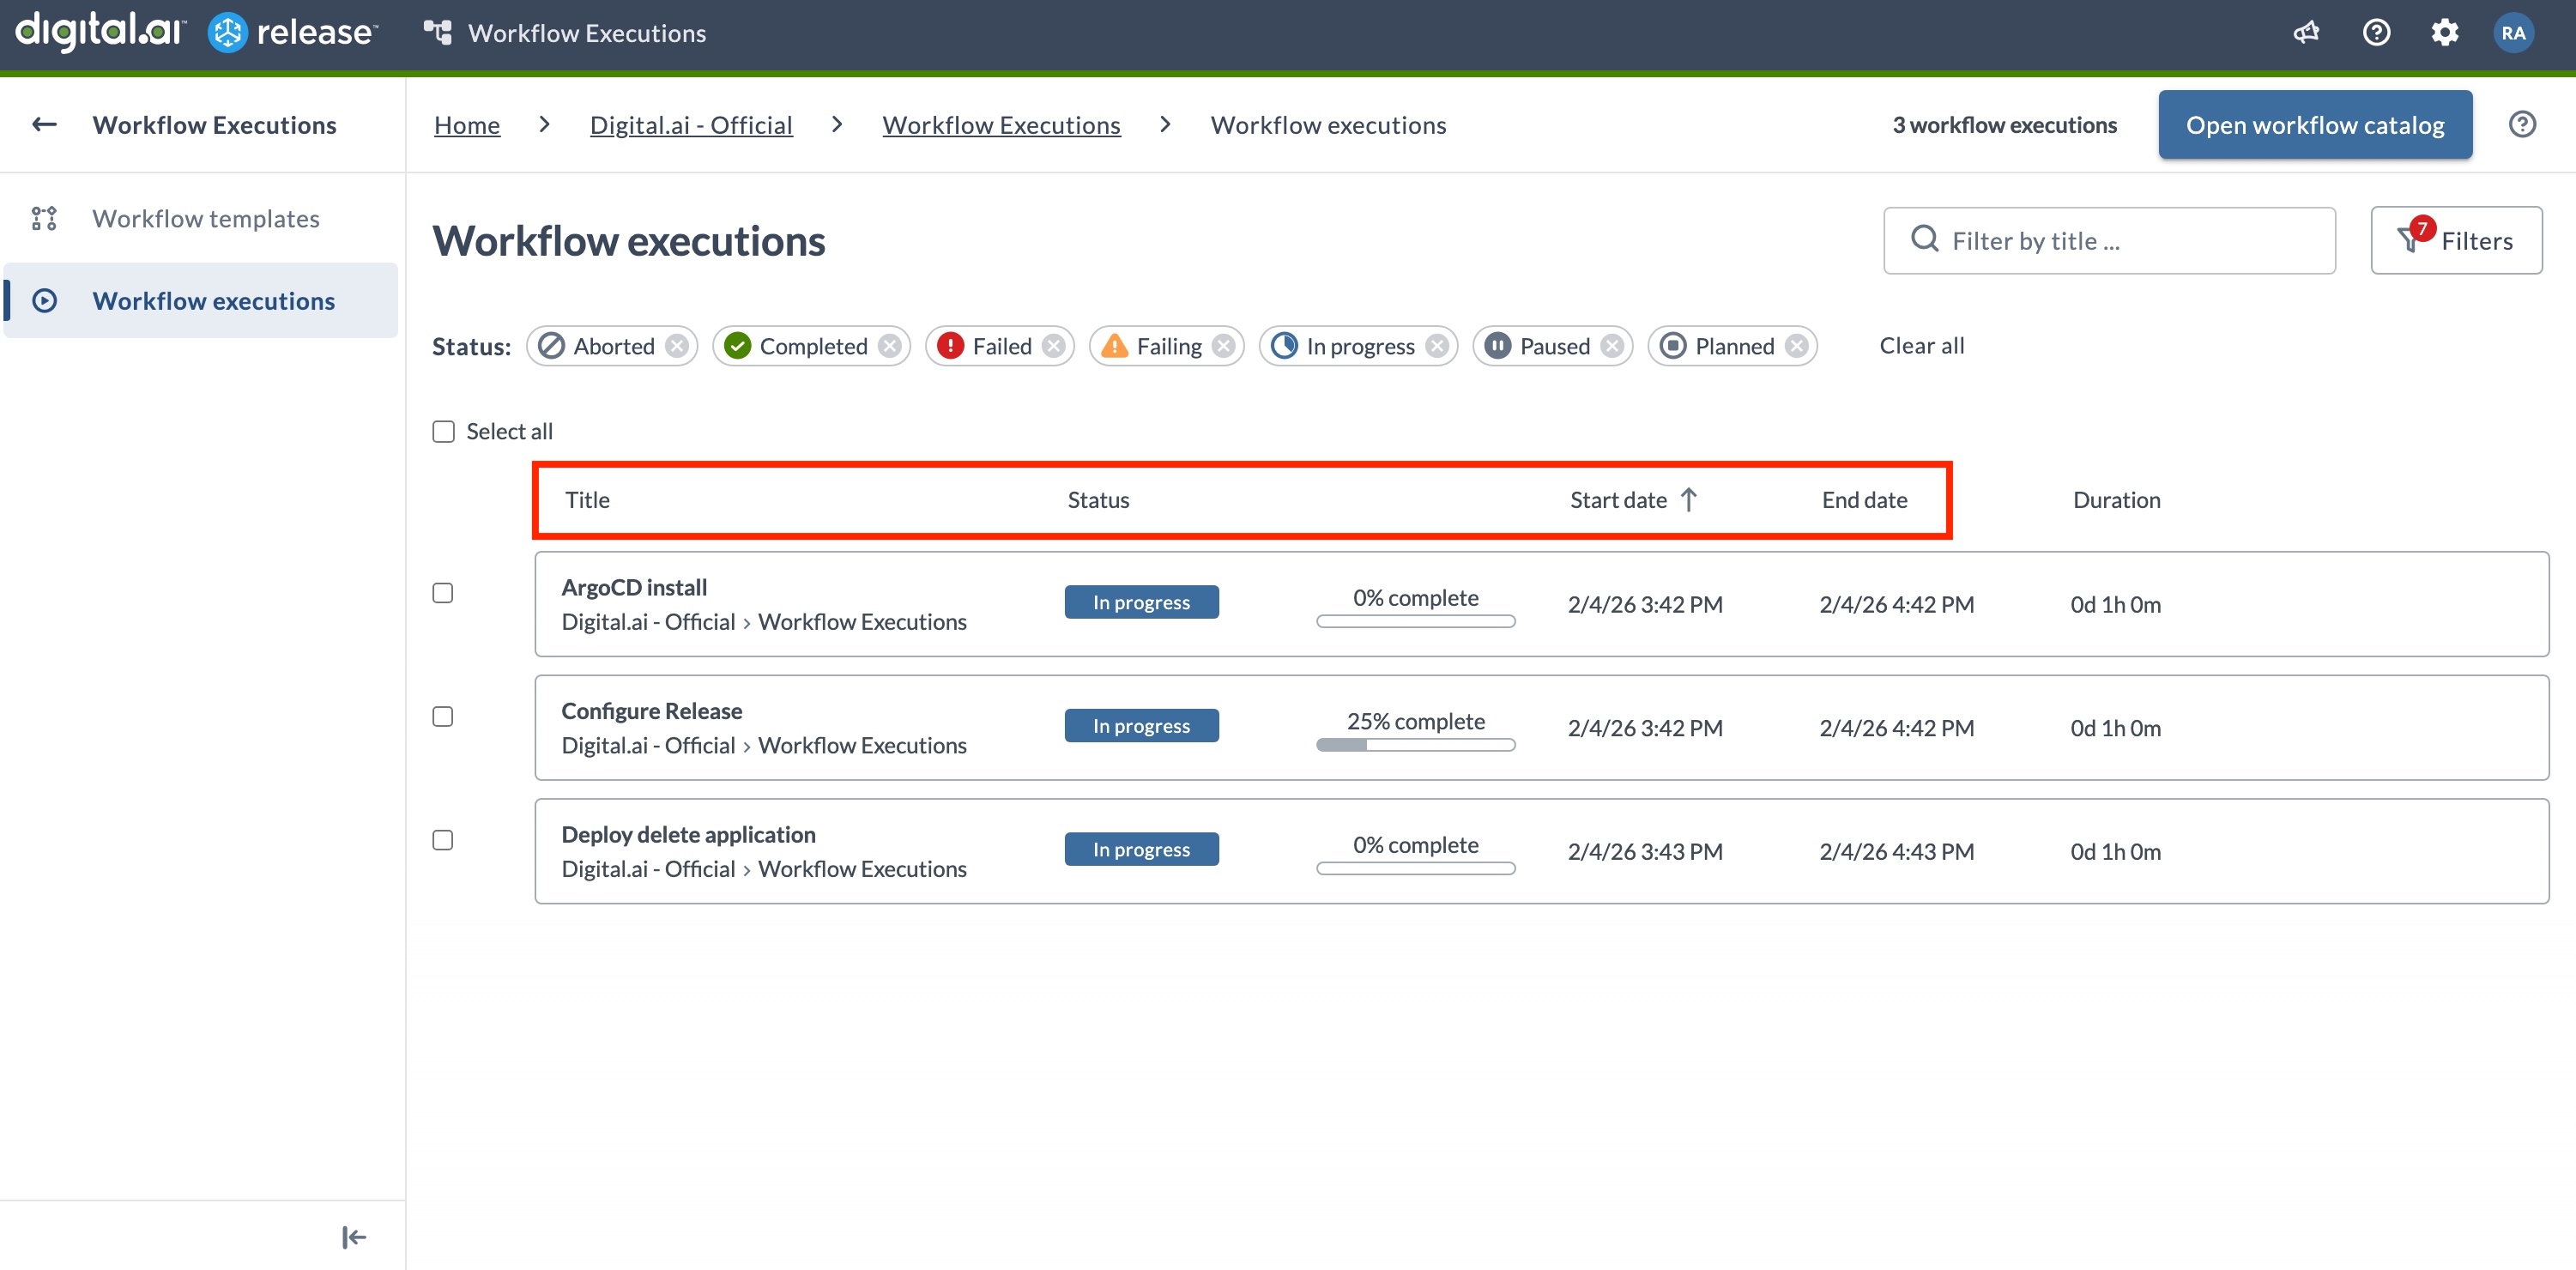
Sorting Workflow Executions
You can sort the workflow executions list by several columns to quickly find and prioritize the workflow executions you need. By default, workflow executions are sorted by the start date (oldest first).
To sort workflow executions by column:
- Click on a column header in the workflow executions list table to sort by that column.
- Click the same column header again to toggle between ascending and descending order (for example, A–Z or Z–A, oldest to latest, etc.).
Available Sorting Options:
- Title: Alphabetically (A–Z or Z–A).
- Status: Based on status name (A–Z or Z–A).
- Start date: Newest or Oldest first.
- End date: Newest or Oldest first.
Run Workflows
If the Allow user to change the execution folder checkbox is not selected, then the workflow will start to run in the default execution folder. If the Allow user to change the execution folder checkbox is selected, then you can perform step #2.
The existing workflows bundled with Release and the newly created workflows are available in the Workflow catalog page. To run your workflows, you must navigate to the Workflow catalog page. For more information, see Access Workflow Catalog.
- Identify the workflow required for your use-case and click Run workflow. The Choose folder dialog opens.
- In the Folder name drop-down list, select the folder where you want to run your workflow and click Run workflow.
- The workflow is presented in the form of a stepper view in the Workflow executions tab of the selected folder.
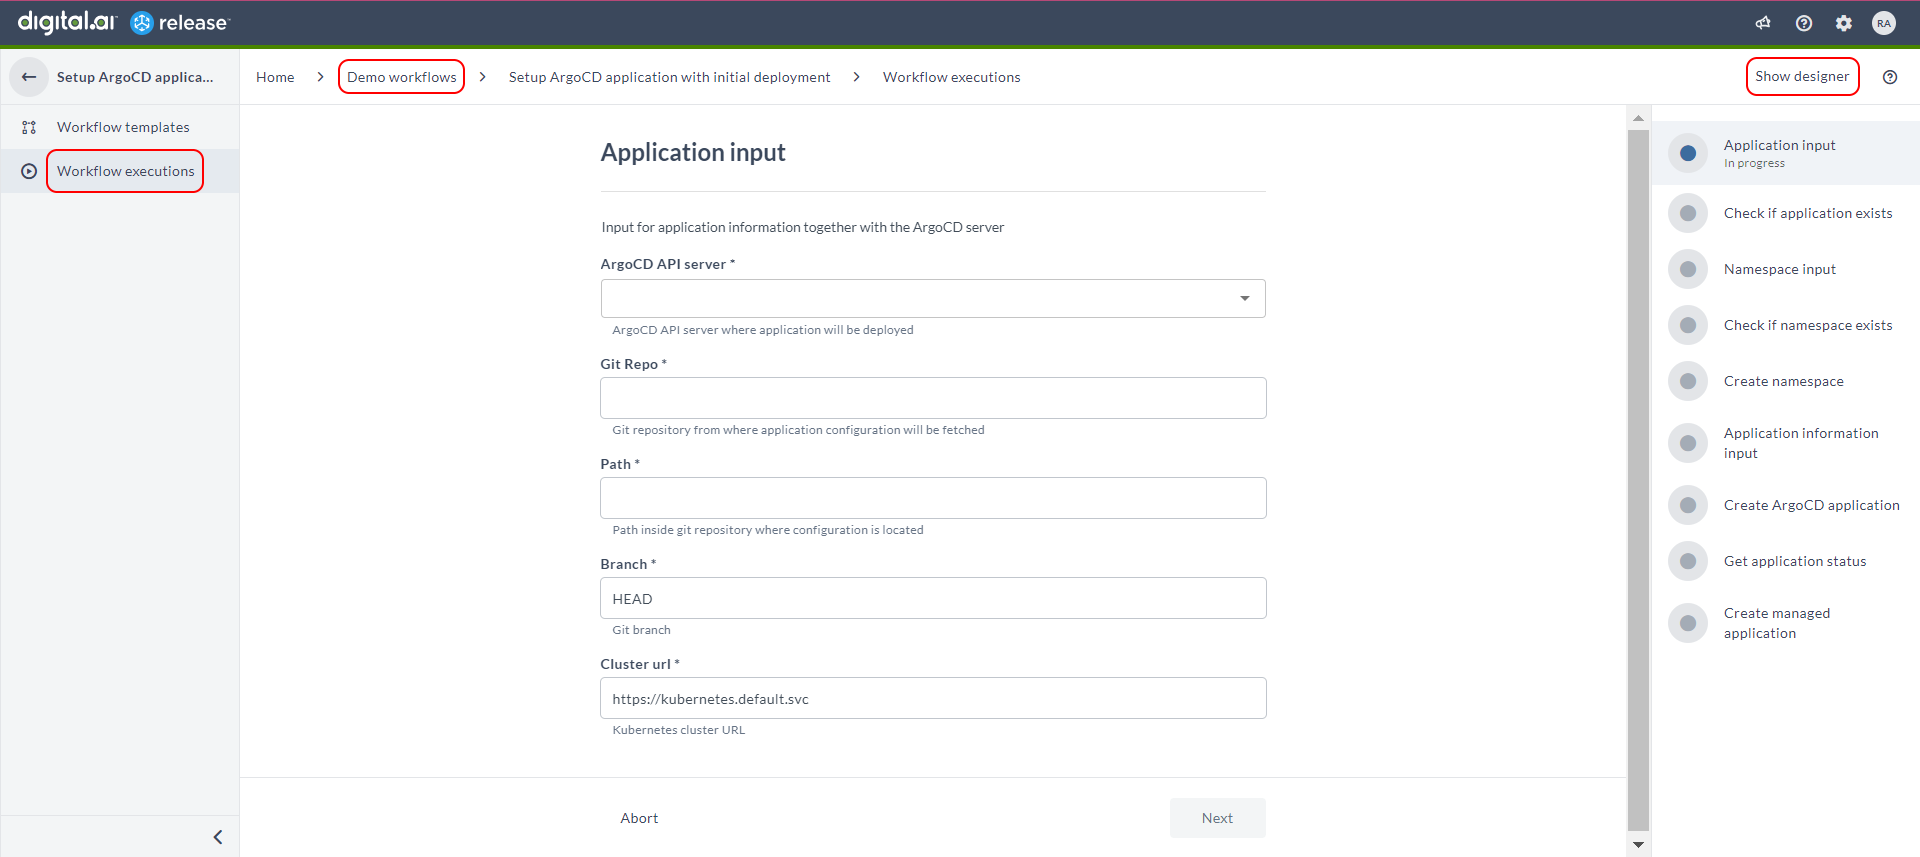
Detailed information about executing these workflows in a step-by-step view is discussed in Setup Argo CD Application with Initial Deployment.
- Enter the required details when prompted. It takes you through multiple steps of application creation process.
- Click Finish when the steps are completed.
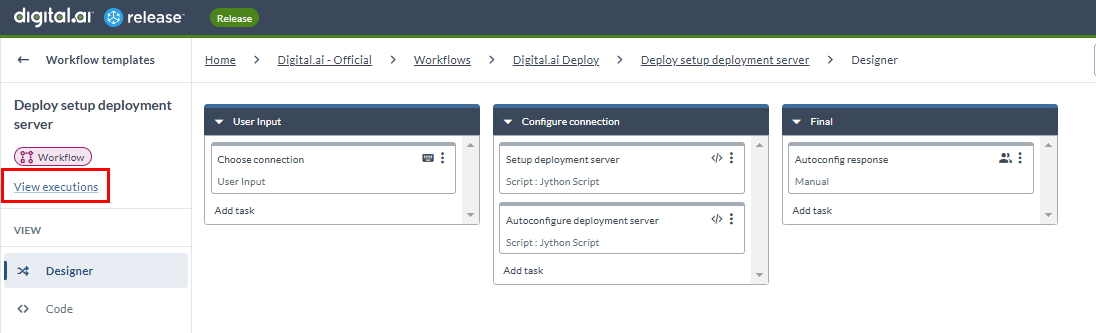
Switch Workflow Views
You can now switch between the workflow designer view and the stepper view for the workflows. Click View Execution to go to the stepper view and click Show designer to go to the Workflow designer view, which is similar to the Release-flow editor view.
You can go to and fro between the Workflow templates and Workflow executions pages using the View workflow and View executions links in the sidebar.
Create Release Task in Workflows
Workflows now support the Create Release task (since Release 25.3), enabling direct visibility into release execution and coordination of workflow and release activities.
You can use the Create Release task in workflow templates to create new releases as part of your workflow execution.
Key Features
- Releases appear in the workflow execution view with real-time status
- Direct link to each release for quick access
- Option to wait for the release to finish or continue without waiting
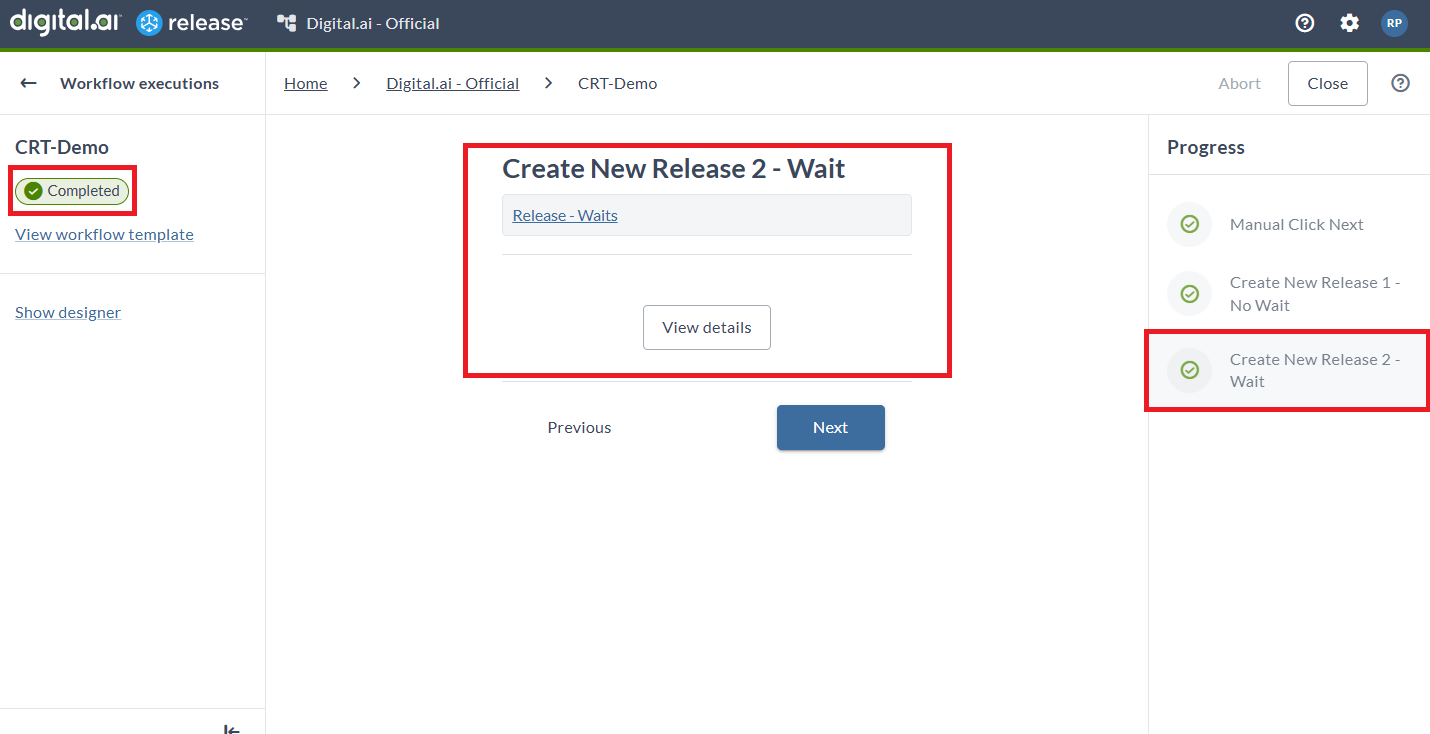
Success Scenario
When the Create Release task executes successfully, the workflow execution view shows:
-
A Green status indicator in the Progress panel
-
A Direct link to the successfully created release (For example, "Release - Waits" in the following example)
-
Clicking View Details shows system messages/logs for additional context
Failed/Failing Scenario
This applies when Wait for release to finish setting is enabled in the Create Release task settings. For more information, see Create Release Task.
If a release fails or is in a failing state, the workflow execution view displays detailed status information:
-
Status Link: Shows the status of the release (For example, "Failed: Release - Waits" in the following example)
-
View Button: Opens the release in a new tab for direct access
-
Clicking View Details shows system messages/logs for troubleshooting
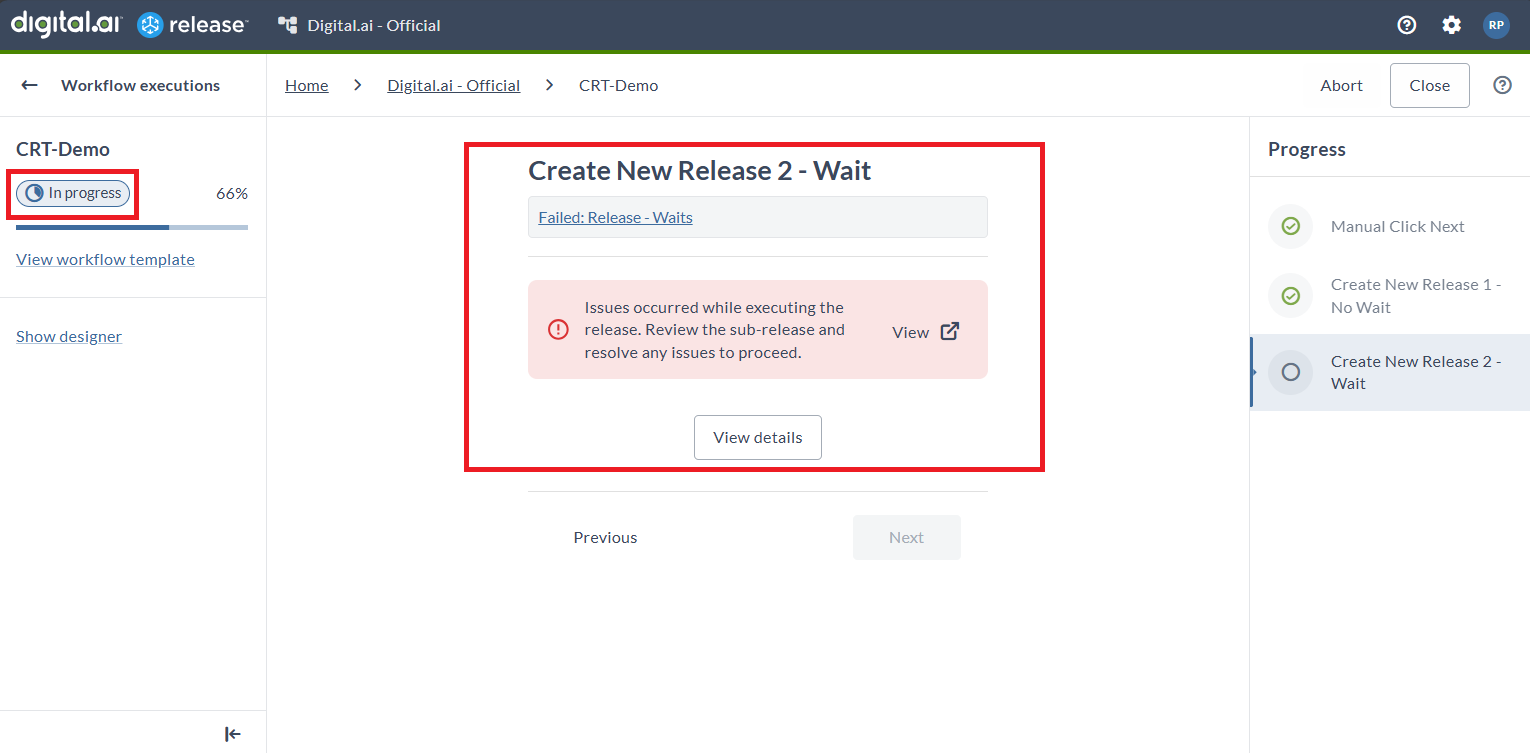
For troubleshooting:
- Inspect system logs by clicking View Details and resolve the issue.
- Open the failing/failed release in a new tab by clicking View.
- The workflow will continue once you resolve the issues and once the release finishes successfully.
View Deployed Applications
The created applications are listed in the Live Deployments dashboard.
For more information, see Live Deployments in Release.