GitLab Container Plugin
The GitLab container plugin allows you to perform various functions in your GitLab ecosystem.
important
You must set up a connection to the GitLab server before adding GitLab tasks. For more information, see Set up Connection to GitLab Server.
note
In the release flow editor, Container tasks have a blue border.
GitLab plugin provides the following features:
- Accept Merge Request (Container)
- Approve Merge Request (Container)
- Close Merge Request (Container)
- Create Branch (Container)
- Create Group (Container)
- Create Merge Request (Container)
- Create Project (Container)
- Create Project Webhook (Container)
- Create Tag (Container)
- Delete Tag (Container)
- Query Commits (Container)
- Query Data (Container)
- Query Merge Requests (Container)
- Query Pipeline Status (Container)
- Query Project (Container)
- Query Secure Data (Container)
- Query Tags (Container)
- Trigger Pipeline (Container)
Prerequisites
For GitLab integration, you need the following:
- GitLab server running and accessible via HTTP(s)
- Digital.ai Release Runner setup to run the container tasks
Set up Connection to GitLab Server
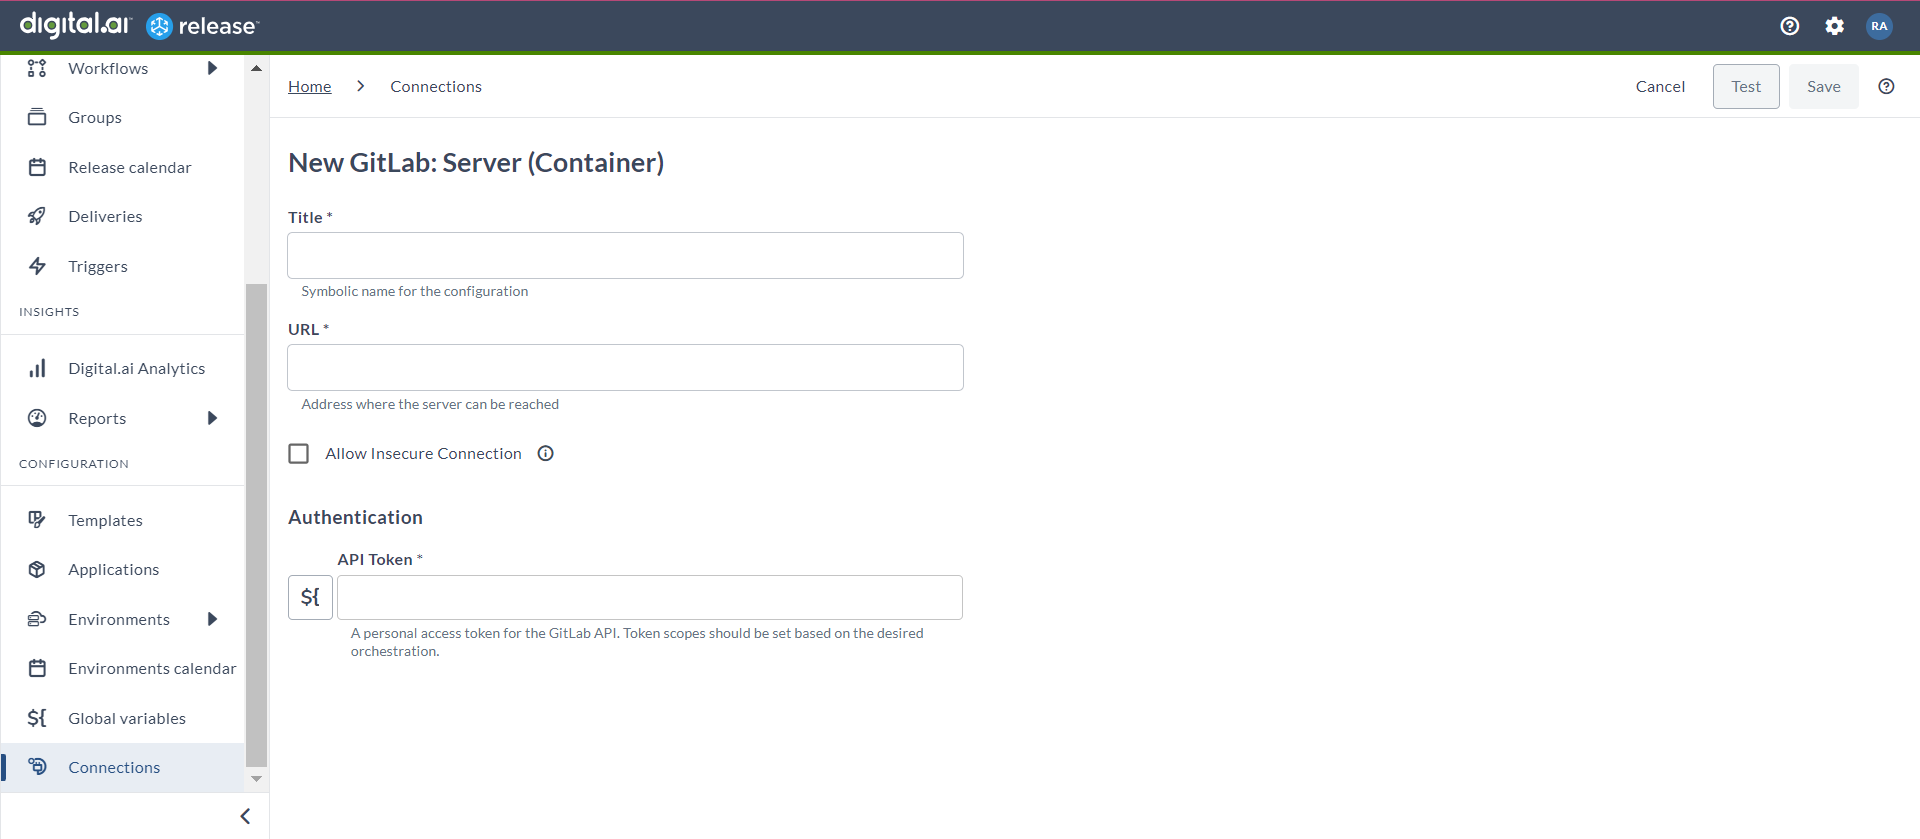
- From the navigation pane, under CONFIGURATION, click Connections.
- Under HTTP Server connections, next to GitLab: Server (Container), click
. The New GitLab: Server (Container) page opens.
- In the Title field, enter a name for the configuration.
- In the URL field, enter the server URL.
- If you want to connect to the server, without validating the TLS/SSL certificate, select the Allow Insecure Connection checkbox.
- In the API Token field, enter the PAT token created for the GitLab API.
- To test the connection, click Test.
- To save the configuration, click Save.

Create Project (Container)
The Create Project (Container) task creates a project in GitLab.
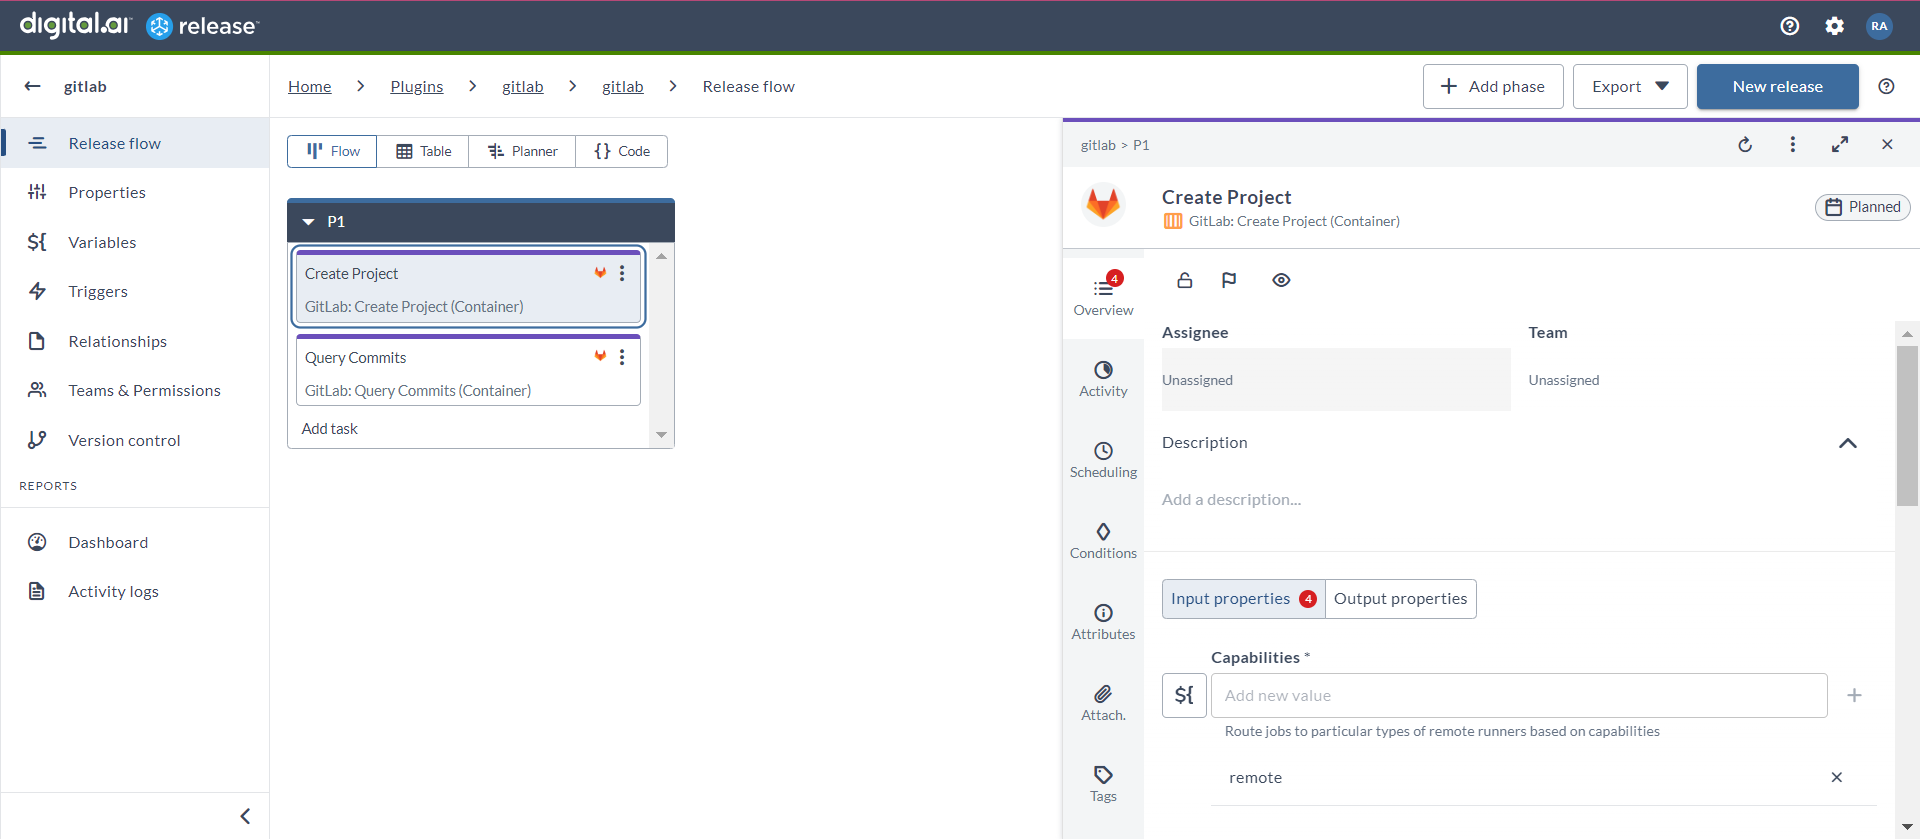
- In the release flow tab of a Release template, add a task of type GitLab > Create Project (Container).
- Click the added task to open it.
- In the Capabilities field, enter a value that matches the capability set for your Runner. This will help you to route jobs to that particular Runner.
- In the GitLab Server field, select the configured GitLab server.
- In the Project Name field, enter the name of the project that you want to create.
- In the Project Path field, enter the path for the project.
- In the Namespace field, enter a namespace ID for the project.
- In the Project Description field, enter the description of the project.
- In the Import URL field, enter the URL of the repository for the project.
- In the Project Visibility drop-down list, select the required visibility option for the project.
The options are as follows:
- public
- internal
- private

Query Commits (Container)
The Query Commits (Container) task queries the commit history within the GitLab repositories.
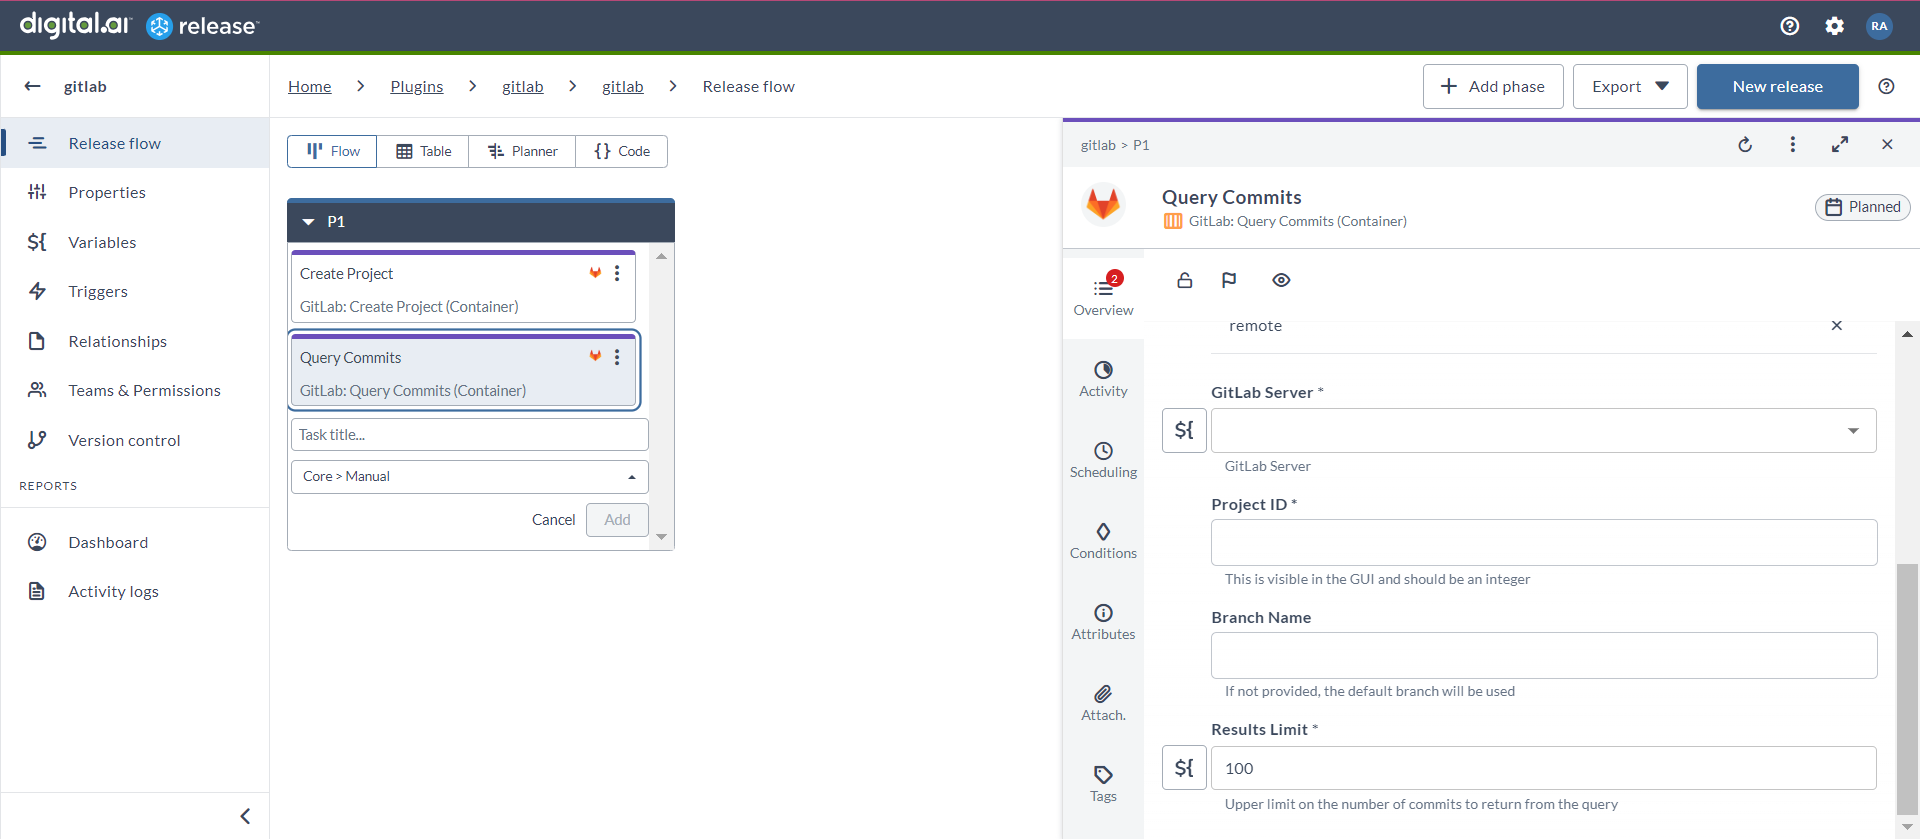
- In the release flow tab of a Release template, add a task of type GitLab > Query Commits (Container).
- Click the added task to open it.
- In the Capabilities field, enter a value that matches the capability set for your Runner. This will help you to route jobs to that particular Runner.
- In the GitLab Server field, select the configured GitLab server.
- In the Project ID field, enter the ID of the project.
- In the Branch Name field, enter the branch name where you want to query commits.
- In the Results Limit field, enter a value to define the number of commits to return from the query.
By default, the value is set to
100.
