Kubernetes Container Plugin
The Kubernetes container plugin offers a range of functionalities to enhance Kubernetes cluster management, deployment, and operations.
important
You must set up a connection to the Kubernetes server before adding AWS tasks. For more information, see Set up Connection to Kubernetes Server.
note
In the release flow editor, Container tasks have a blue border.
Kubernetes provides the following features:
- Apply Command (Container)
- Check Resource Readiness (Container)
- Check Status of Pods in Namespace (Container)
- Check if Namespace Exists (Container)
- Create Annotation for Resource (Container)
- Create ConfigMap (Container)
- Create Label for Resource (Container)
- Create Namespace (Container)
- Create Secret (Container)
- Delete Annotation for Resource (Container)
- Delete ConfigMap (Container)
- Delete Label for Resource (Container)
- Delete Namespace (Container)
- Delete Secret (Container)
- Execute Command (Container)
- Fetch Resources as YAML (Container)
- Get Annotation for Resource (Container)
- Get ConfigMap by Name in Namespace (Container)
- Get Label for Resource (Container)
- Get Secret by Name in Namespace (Container)
- List Annotation for Resource (Container)
- List all Namespaces (Container)
- List all Services in Namespace (Container)
- Patch ConfigMap (Container)
- Patch Resource (Container)
- Patch Secret (Container)
- Update Annotation for Resource (Container)
- Update ConfigMap (Container)
- Update Label for Resource (Container)
- Update Secret (Container)
- Wait for Resource Conditions (Container)
Prerequisites
For Kubernetes integration, you need the following:
- Kubernetes server running and accessible via HTTP(s)
- Digital.ai Release Runner setup to run the container tasks
Set up Connection to Kubernetes Server
- From the navigation pane, under CONFIGURATION, click Connections.
- Under HTTP Server connections, next to Kubernetes API Server (Container), click
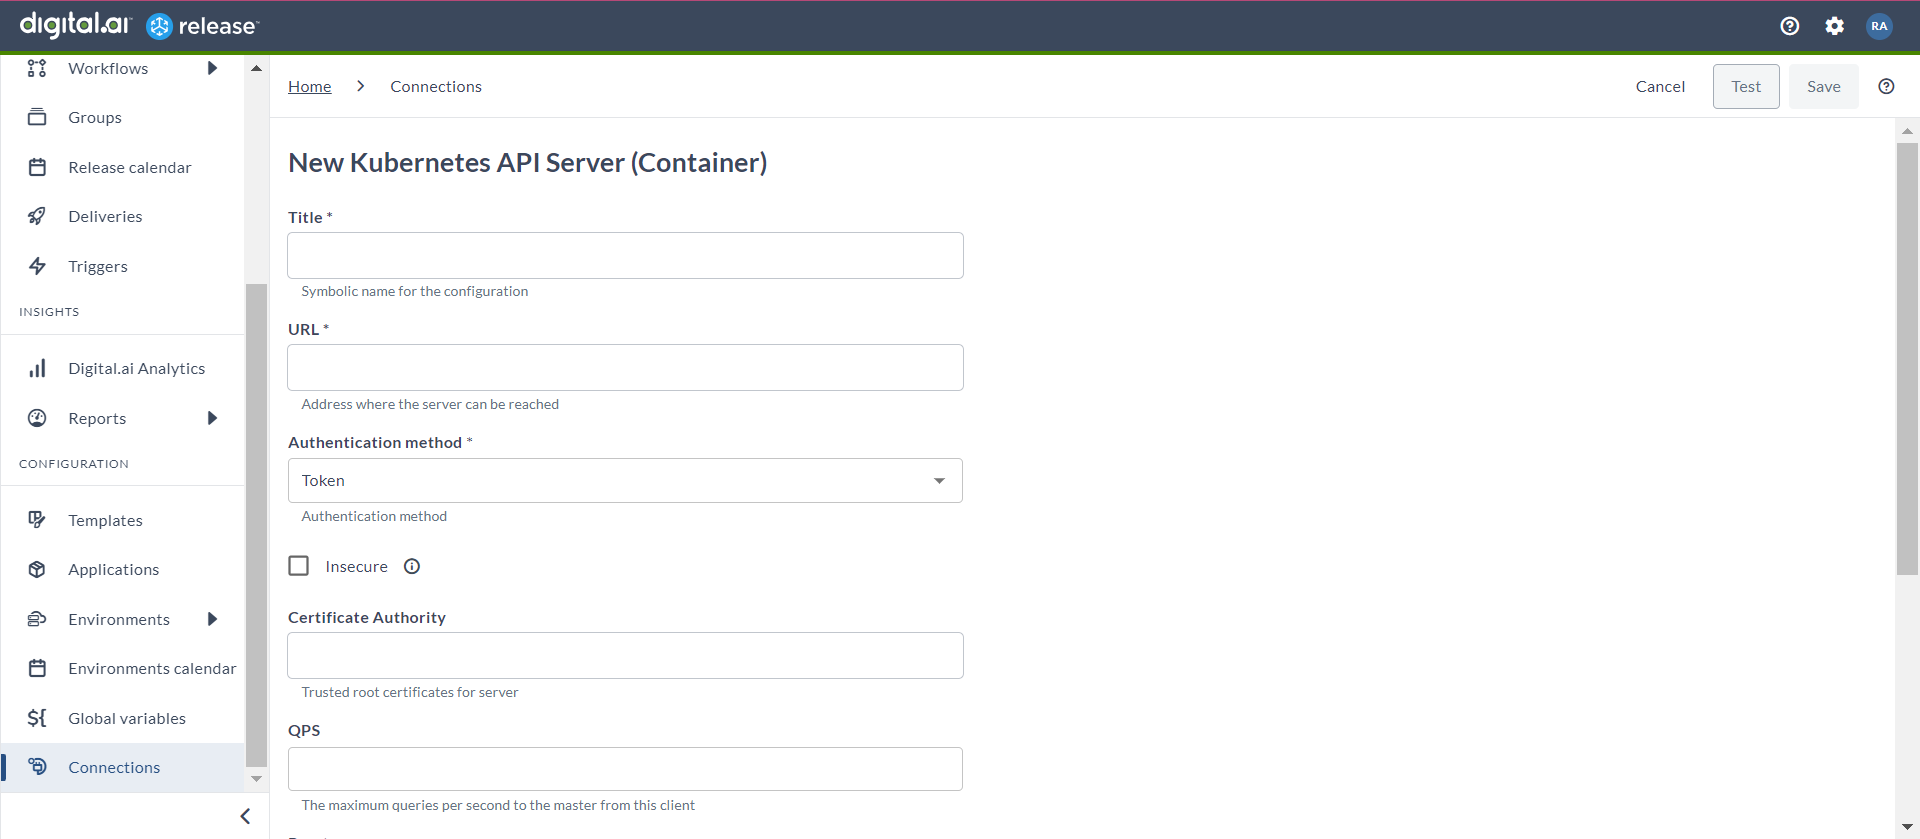
. The New Kubernetes API Server (Container) page opens.
- In the Title field, enter a name for the configuration.
- In the URL field, enter the URL of the Kubernetes API server.
- In the Authentication method drop-down list, select the required authentication option.
The options are as follows:
- Token
- Client Certificate
- OAuth2 Client Credentials
- OIDC Flow Note that, some additional fields will be enabled based on the authentication option selected.
- If you want to connect to the server, without validating the TLS certificate, select the Insecure checkbox.
- In the Certificate Authority field, enter the trusted root certificate for server in base64 format.
- In the QPS field, enter a value to define the maximum queries that can be sent per second to the master from this client.
- In the Burst field, enter a value to define the maximum burst capacity allowed for a specific resource, such as API requests, within a given time frame.
- In the Provider Type drop-down list, select the cloud provider. The options are as follows:
- AWS
- GCP
- Azure
- In the Bearer Token field, enter the bearer token for authentication. You can also add the variable here.
- To test the connection, click Test.
- To save the configuration, click Save.

Apply Command (Container)
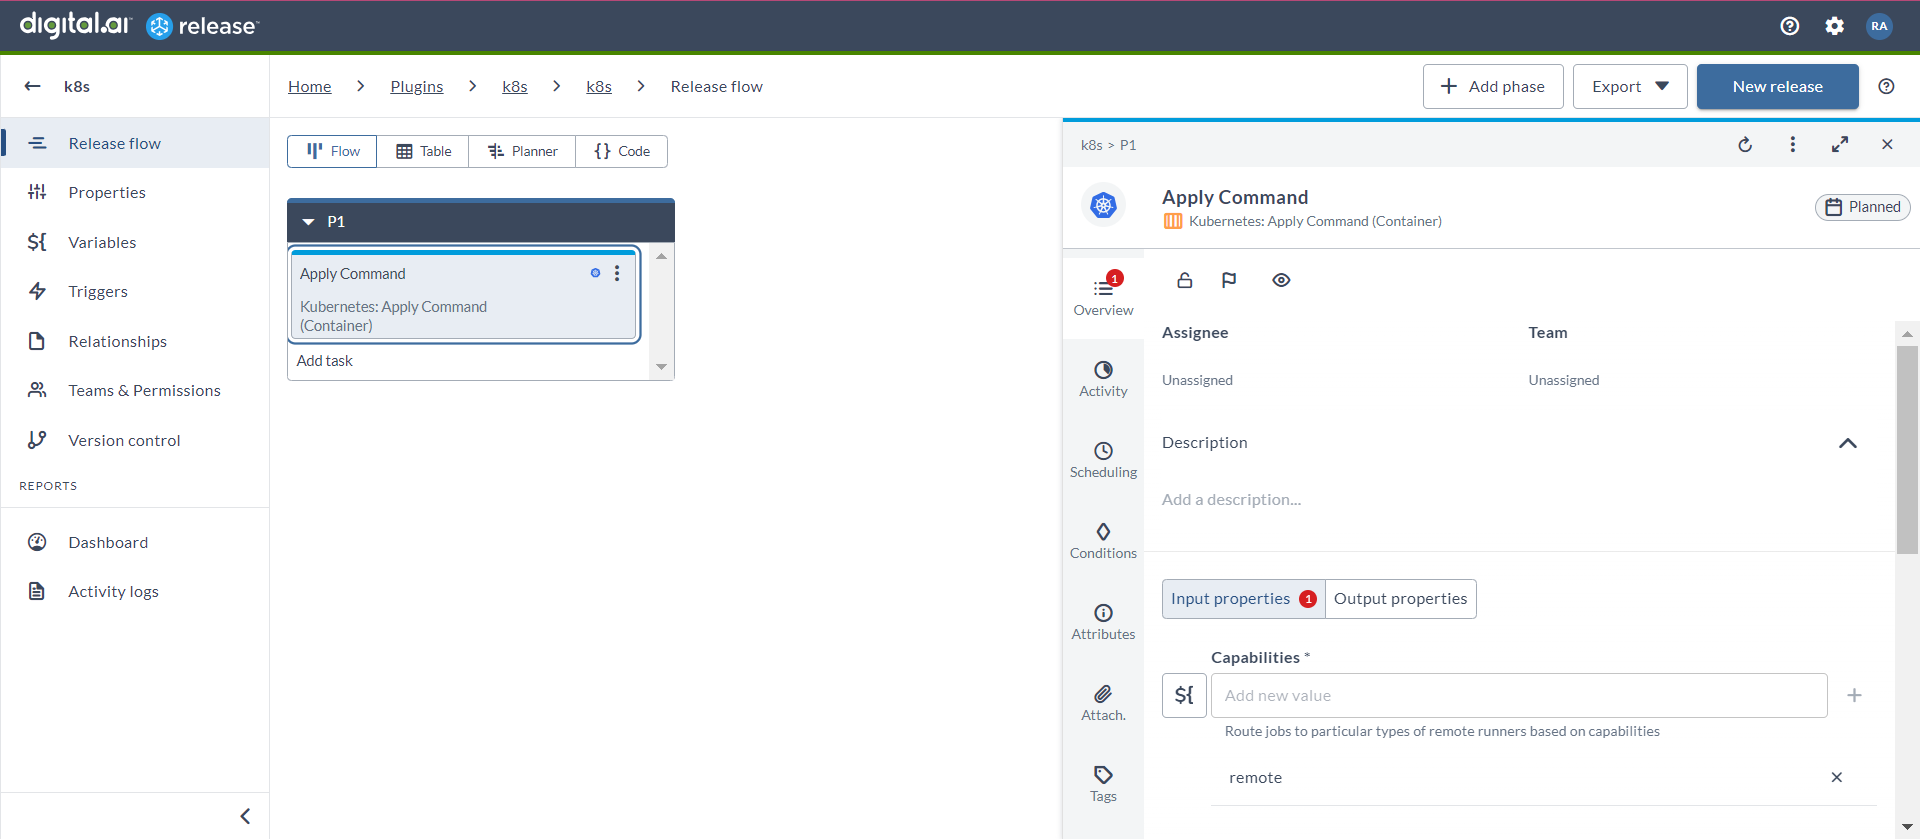
The Apply Command (Container) task creates or updates resources defined in a Kubernetes configuration file.
- In the release flow tab of a Release template, add a task of type Kubernetes > Apply Command (Container).
- Click the added task to open it.
- In the Capabilities field, enter a value that matches the capability set for your Runner. This will help you to route jobs to that particular Runner.
- In the Server field, select the configured Kubernetes server.
- In the Namespace field, enter a Kubernetes namespace in which the target pod is located.
- In the Yaml Location field, enter the location of the Kubernetes YAML file.
- In the Yaml Content field, enter the content of the Kubernetes YAML file.

Execute Command (Container)
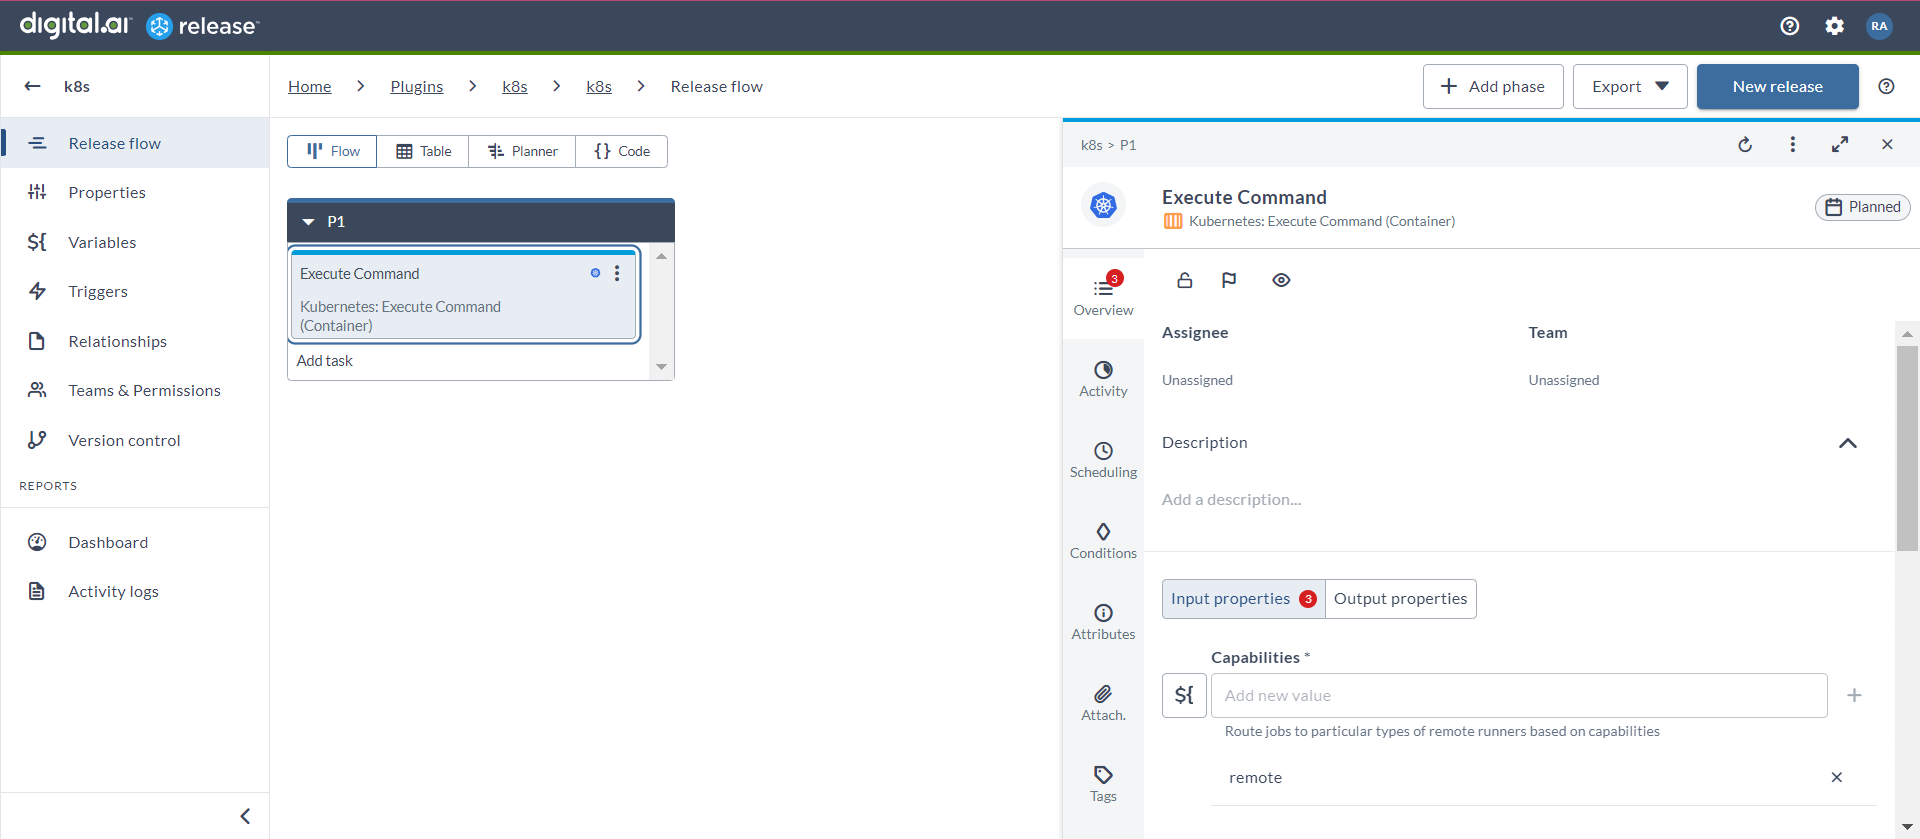
The Execute Command (Container) task enables you to directly execute commands within a container running in a Kubernetes pod.
- In the release flow tab of a Release template, add a task of type Kubernetes > Execute Command (Container).
- Click the added task to open it.
- In the Capabilities field, enter a value that matches the capability set for your Runner. This will help you to route jobs to that particular Runner.
- In the Server field, select the configured Kubernetes server.
- In the Namespace field, enter a Kubernetes namespace in which the target pod is located.
- In the Pod Name field, enter the name of the pod in which the command will be executed.
- In the Container Name field, enter the name of the container inside the pod in which the command will be executed.
- In the Command field, enter the command to be executed within the specified container of the selected pod.
