Deploy Container Plugin
The Deploy container plugin allows you to start a deployment of an application on Deploy.
important
You must set up a connection to the Deploy server before adding Deploy tasks. For more information, see Set up Connection to Deploy Server.
note
In the release flow editor, Container tasks have a blue border.
Deploy plugin provides the following features:
- Control Task (Container)
- Create Directory (Container)
- Deploy (Container)
- Get All Versions (Container)
- Get Last Deployed Version (Container)
- Get Latest Version (Container)
- Import package (Container)
- Migrate package (Container)
- Undeploy (Container)
Prerequisites
For Deploy integration, you need the following:
- Deploy server running and accessible via HTTP(s)
- Digital.ai Release Runner setup to run the container tasks
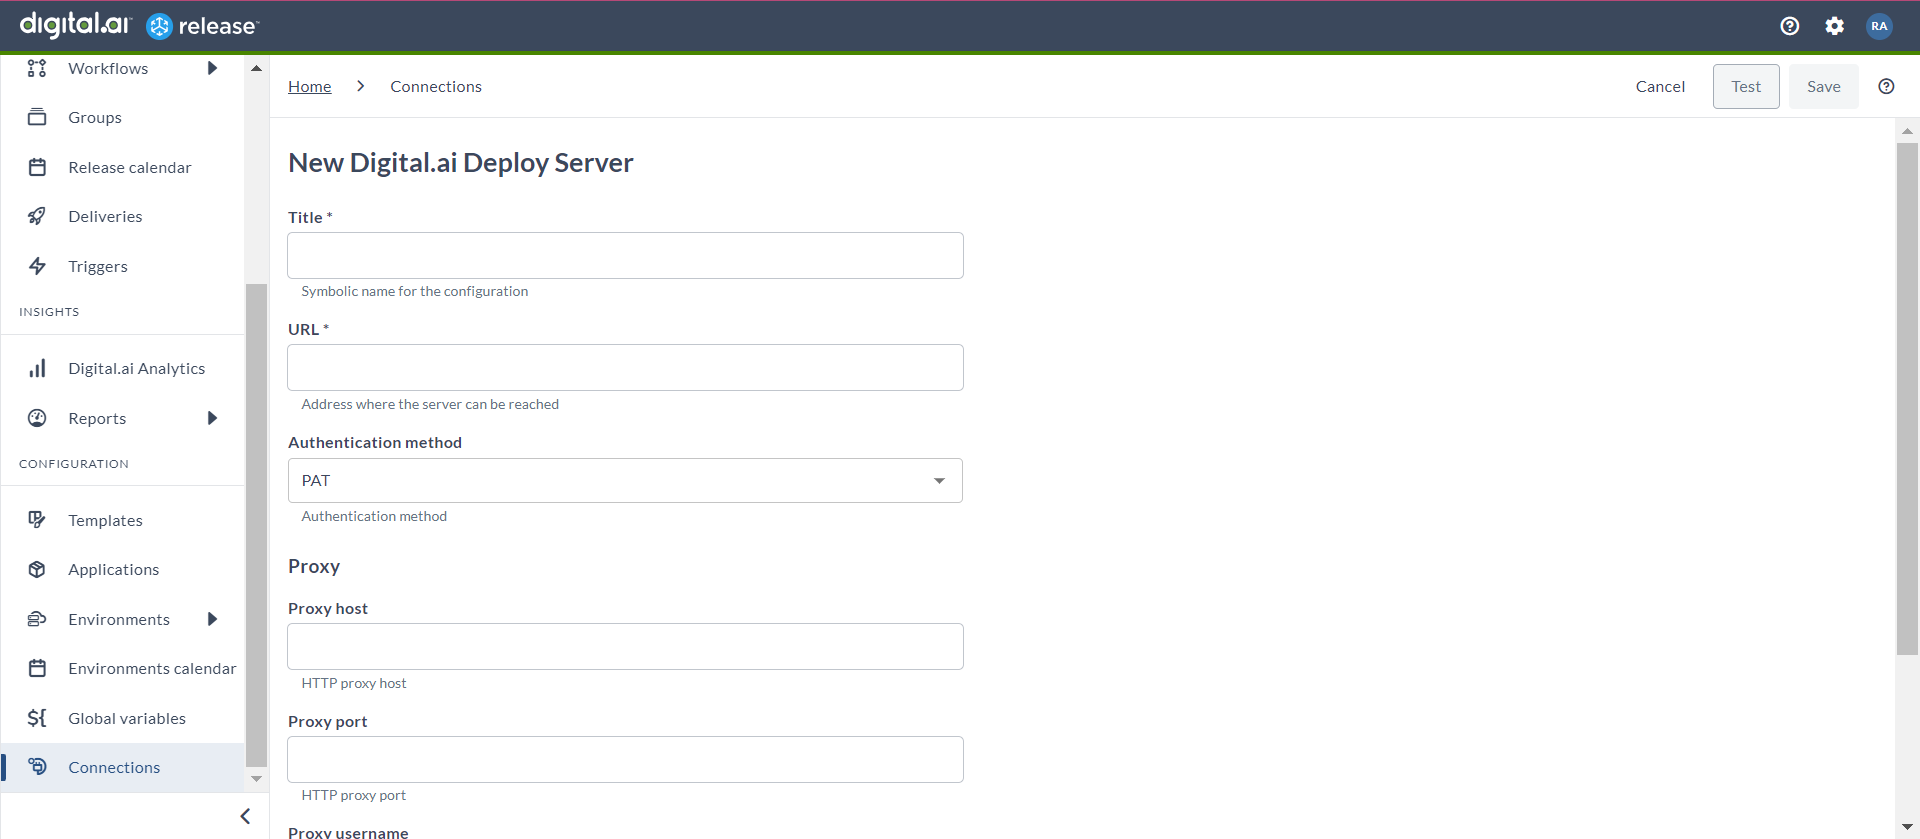
Set up Connection to Deploy Server
- From the navigation pane, under CONFIGURATION, click Connections.
- Under HTTP Server connections, next to Digital.ai Deploy Server, click
. The New Digital.ai Deploy Server page opens.
- In the Title field, enter a name for the configuration.
- In the Authentication Method field, select your relevant authentication type from the drop-down list.
- PAT
- Basic
- Ntlm
- Bearer
- For Basic, you can enter Username and Password.
- For others, you can enter the proxy details.
- To test the connection, click Test.
- To save the configuration, click Save.

Deploy (Container)
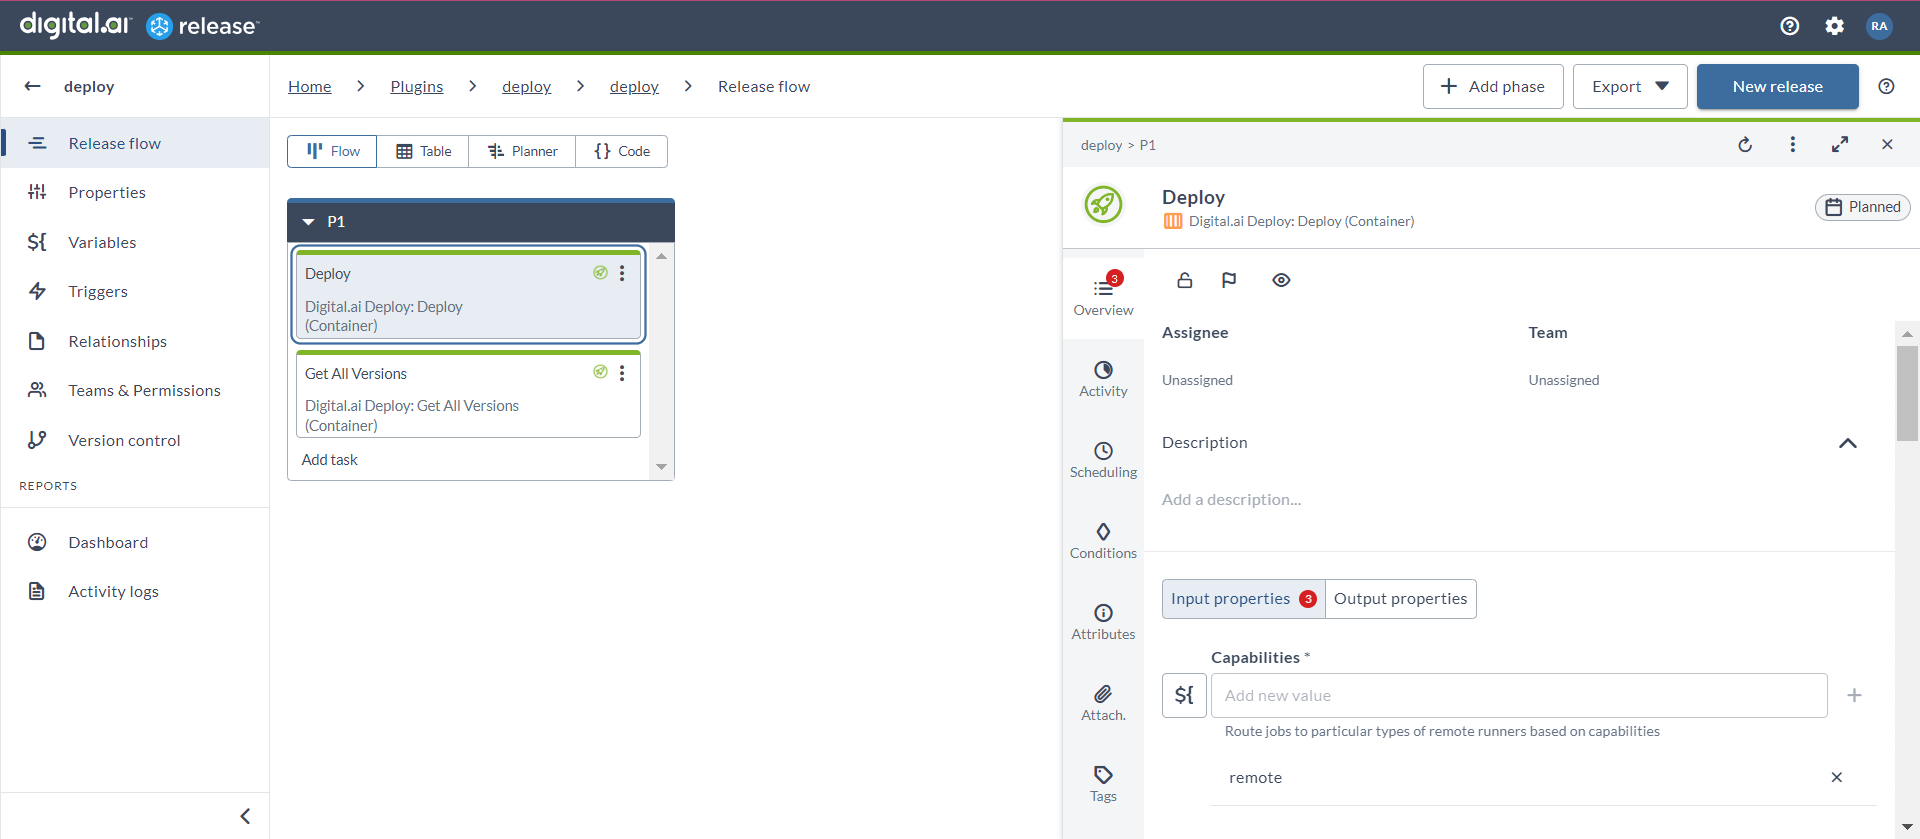
The Deploy (Container) task allows you to deploy an application.
- In the release flow tab of a Release template, add a task of type Digital.ai Deploy > Deploy (Container).
- Click the added task to open it.
- In the Capabilities field, enter a value that matches the capability set for your Runner. This will help you to route jobs to that particular Runner.
- In the Server field, select the configured Deploy server.
- In the Application field, enter the ID of the application to deploy.
- In the Version field, enter the version of the application to deploy.
- In the Package field, enter the package name of the application to be deployed.
- In the Environment field, enter the name of the environment where the application must be deployed.
- If you select the Continue If Step Fails toggle, you can retry the task even if the step fails. This is not selected by default.
- In the Number Of Continue Retrials field, enter a value to define the number of times you can retry the task if the step fails.
- In the Polling Interval field, enter the polling interval in seconds to check the task status.
- In the Polling Retry Count field, enter a value to define the number of times you can retry to check the task status.
- In the Connection Retries field, enter a value to define the number of times you can retry the task in case of a connection failure/timeout.
- The following toggles are enabled by default:
- Display Step Logs
- Rollback on Failure
- Rollback on Abort
- Cancel If Not Rolling Back
- Fail On Pause
- If you select the Reuse previous output properties toggle, when you retry you can use the same Deploy task ID. This is not selected by default.

Get All Versions (Container)
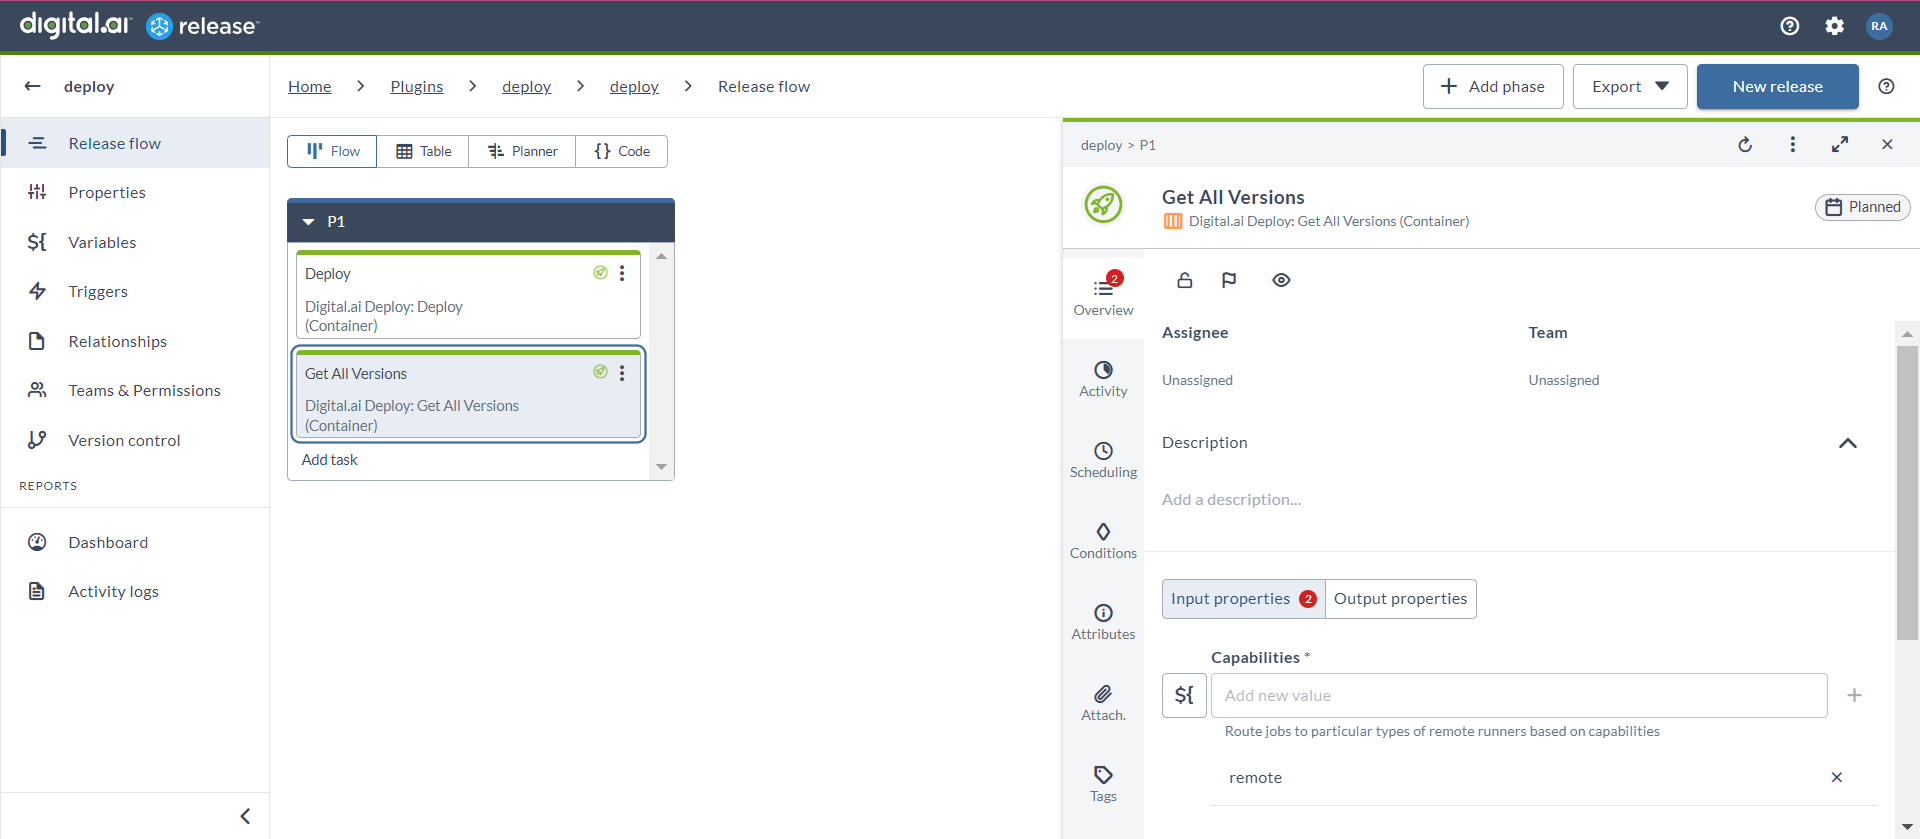
The Get All Versions (Container) task allows you to get all the version of the deployed application.
- In the release flow tab of a Release template, add a task of type Digital.ai Deploy > Get All Versions (Container).
- Click the added task to open it.
- In the Capabilities field, enter a value that matches the capability set for your Runner. This will help you to route jobs to that particular Runner.
- In the Server field, select the configured Deploy server.
- In the Application ID field, enter the ID of the application to deploy.
- If you select the Throw on Fail toggle, the task will fail if the configuration item does not exist. This is not selected by default.
