AWS plugin
This plugin may appear to fail the JDK 17 compatibility test that runs as part of the Plugin Manager.
This result can be safely ignored — it does not impact the plugin’s functionality or the supported runtime environments.
This topic outlines the AWS plugin for Deploy, which supports launching, managing, and configuring various AWS services.
The Amazon Web Services (AWS) plugin for Deploy supports:
- Launching and terminating AWS Elastic Compute Cloud (EC2) and Virtual Private Cloud (VPC) instances
- Deploying applications to AWS cloud-based instances
- Using Amazon's Elastic Load Balancing feature for EC2 instances
- Creating and using Simple Storage Service (S3) buckets for file storage
- Provisioning EC2 Container Service (ECS) clusters, tasks, and services
- Using the Relational Database Service (RDS) for databases
- Using the Elastic Block Store (EBS) for persistent block storage
- Provisioning AWS Elastic Compute Cloud (EC2) instances and deploying applications to those instances
- Deploying network configurations such as Virtual Private Cloud (VPC) instances, subnets, routing tables, and network interfaces
- Deploying load balancing configurations to AWS Elastic Load Balancing (ELB)
- Deploying storage configurations such as Elastic Block Store (EBS) volumes and Simple. Storage Service (S3) buckets for file storage
- Deploying content to S3 buckets
- Deploying tasks and services to ECS clusters
- Provisioning and working with EC2 Container Registry (ECR) repositories
- Provisioning and working with Relational Database Service (RDS) instances
- Deploying AWS Lambda functions
- Provisioning AWS API Gateway to invoke Lambda functions
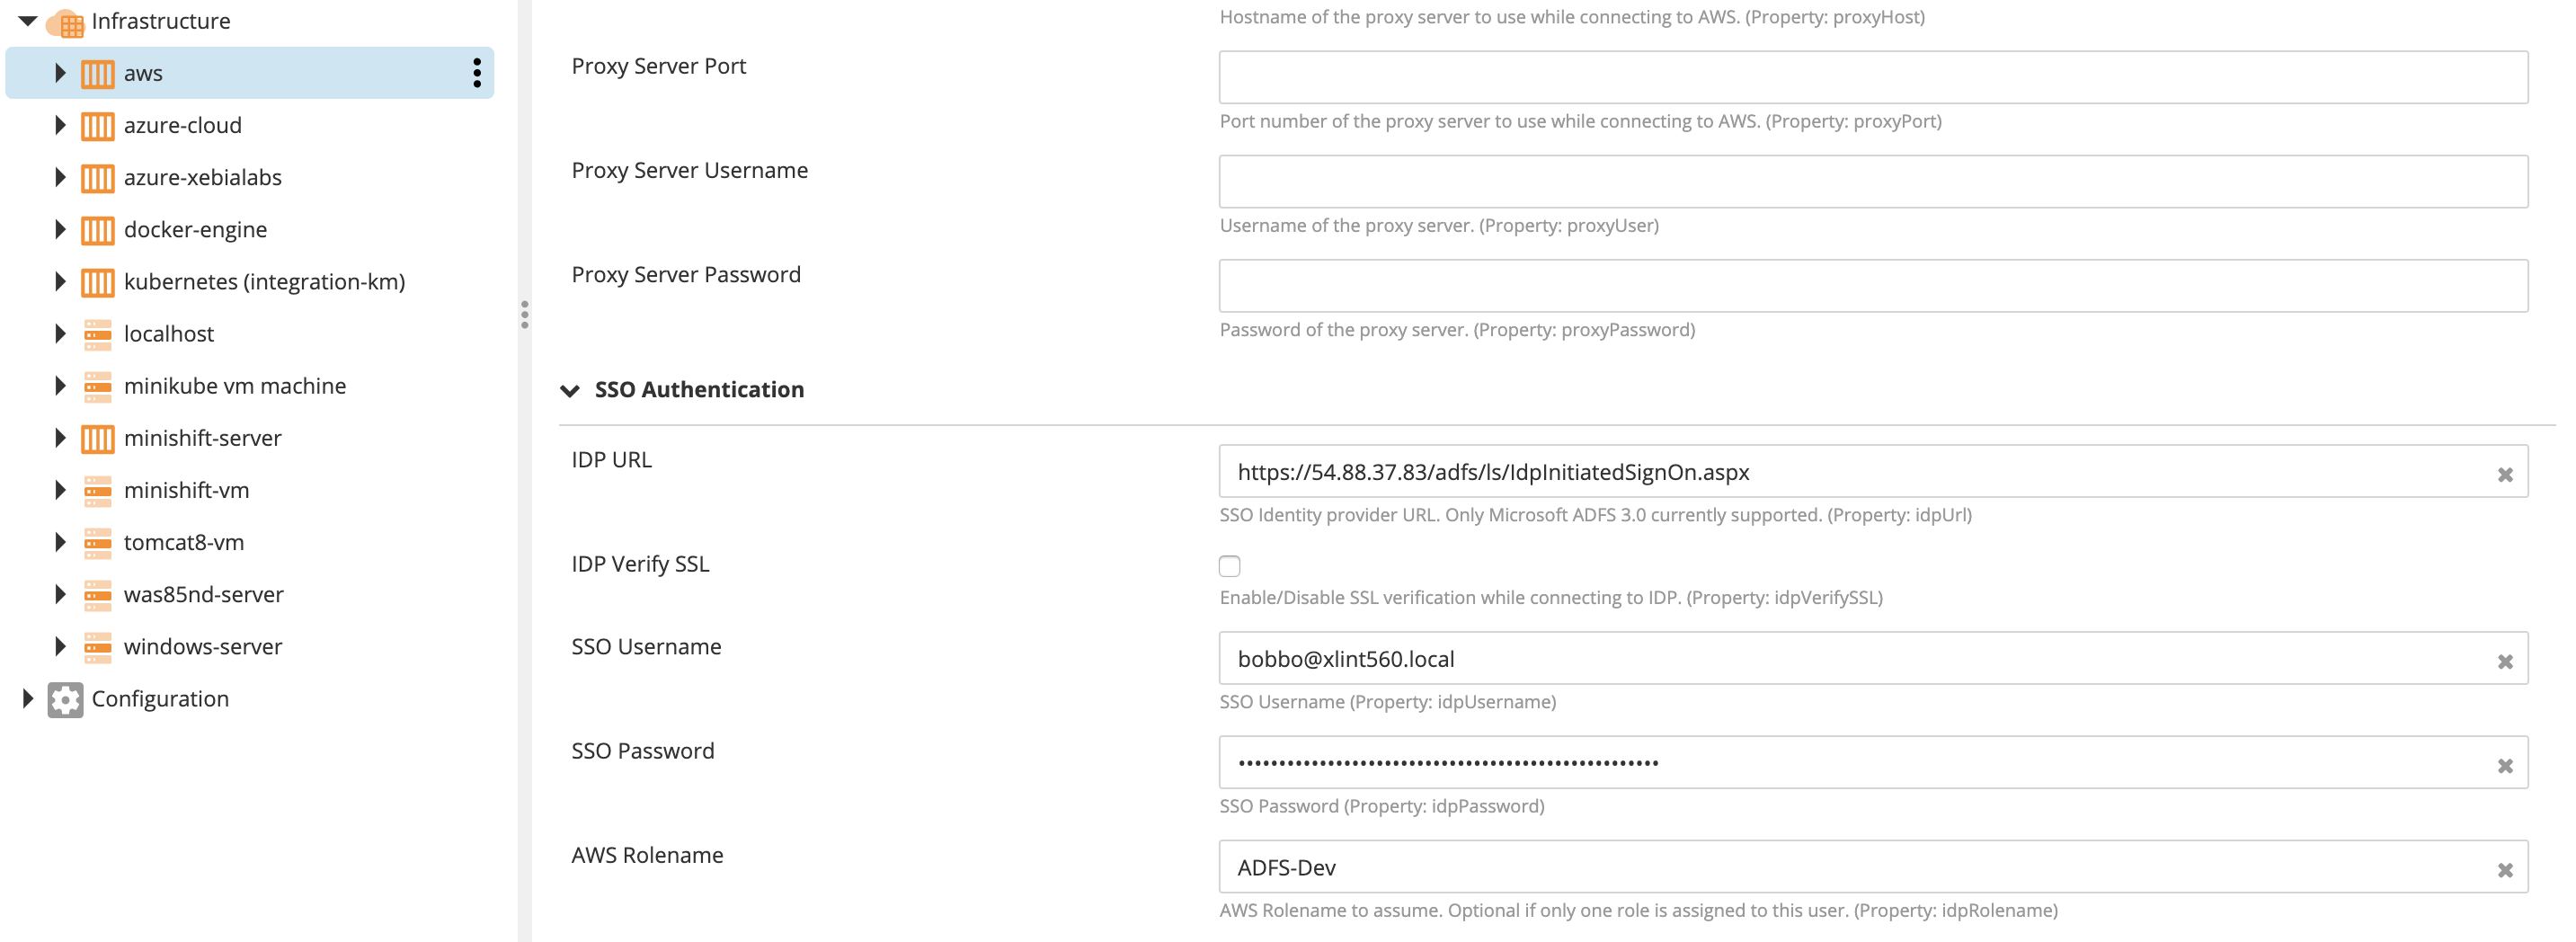
- Authenticating via SSO credentials instead of access keys
- Launching AWS Service Catalog products
Deploy AWS Plugin does not support deploying to AWS Auto Scaling Groups (ASGs).
For information on AWS requirements and the configuration items (CIs) that the plugin supports, see AWS Plugin Reference.
To avoid warning when you check the connection for aws.Cloud, enable Verify SSL to true in aws.Cloud CI (Configuration item).
Features
- Create virtual machines on Elastic Compute Cloud (EC2) with a specified Amazon Machine Image (AMI).
- Automatically destroy EC2 instances during undeployment.
- Provision a Simple Storage Service (S3) bucket.
Before you begin
Ensure you have the following:
- AWS Account
- AWS Credentials
Create AWS Cloud infrastructure
Setting up the AWS Cloud CI is the first step to establish connection between Deploy and your AWS infrastructure.
- In Deploy, go to Infrastructure > New > aws > Cloud. Create aws.Cloud appears.
- Configure the CI as required:
- ID: Specifies the folder structure for the CI under Infrastructure/.
- Name: The name of the AWS Cloud CI (e.g., aws.Cloud), which will be identified in Deploy.
- Type: Specifies the type of CI, here it's aws.Cloud, defining the CI as an AWS Cloud resource.
- The following table provides various settings and fields required for Assume Role, Deployment, Proxy Settings, and SSO Authentication in Digital.ai Deploy for AWS Cloud integration.
| Configuration | Field | Description |
|---|---|---|
| Assume Role | ||
| Note: To assume a different role, configure the system by providing the required role details. This works with the credentials specified below or with credentials and roles attached to the underlying machine. | External ID | The external ID used when assuming the role, a unique identifier for the external account. |
| Account ID | AWS account ID where the target IAM role resides. | |
| Role Name | The name of the IAM role to assume for accessing AWS resources. | |
| Duration Seconds | The duration (in seconds) that the assumed role's credentials should remain valid. | |
| Common | Access Key ID | AWS account's access key for authentication purposes. |
| Secret Access Key | Secret key corresponding to the access key ID for authentication. | |
| Session Token | The session token required for temporary security credentials (commonly used with MFA). | |
| Session Token Expiry Datetime | The expiration date and time of the session token for temporary credentials. | |
| Use Credentials | Enables authentication using the provided access and secret keys. Note: Disabling this option allows the system to use the credentials or roles attached to the underlying machine. | |
| Verify SSL | When enabled, SSL verification ensures secure communication with AWS services. | |
| Deployment | Tags | Use tags to map deployables to containers. For more information, refer to the documentation on tags for deployments. |
| Deployment Group Number | Groups certain deployables into a deployment group to deploy containers with the same number simultaneously. | |
| Deployment SubGroup Number | Subdivision within a deployment group to deploy containers with the same subgroup number together. | |
| Deployment SubSubGroup Number | Further subdivision within a subgroup to deploy containers with the same subsubgroup number together. | |
| Locking | Allow Concurrent Deployments | Enables concurrent deployments to occur simultaneously. |
| Limit Number Of Concurrent Deployments | Limits the number of concurrent deployments, based on user permissions. See Concurrent Deployments Limit. | |
| Proxy Settings | Proxy Server Protocol | The protocol used for connecting to the proxy server (e.g., HTTP, HTTPS). |
| Proxy Server Host | The hostname or IP address of the proxy server. | |
| Proxy Server Port | Port number used for connecting to the proxy server. | |
| Proxy Server Username | Username required for proxy server authentication. | |
| Proxy Server Password | Password associated with the proxy server username. | |
| SSO Authentication | IDP URL | URL of the Identity Provider (IdP) that handles the SSO authentication process. |
| IDP Verify SSL | Determines whether SSL verification is enabled for the Identity Provider connection. | |
| SSO Username | Username used for authentication with the Identity Provider. | |
| SSO Password | Password associated with the SSO username. | |
| AWS Role Name | Specifies the AWS role to assume once the user is authenticated via the Identity Provider (if multiple roles exist, this determines which role is used). |
Create AWS CloudFormation resources
With the Amazon Web Services (AWS) plugin for Deploy, you can create AWS CloudFormation templates and stacks.
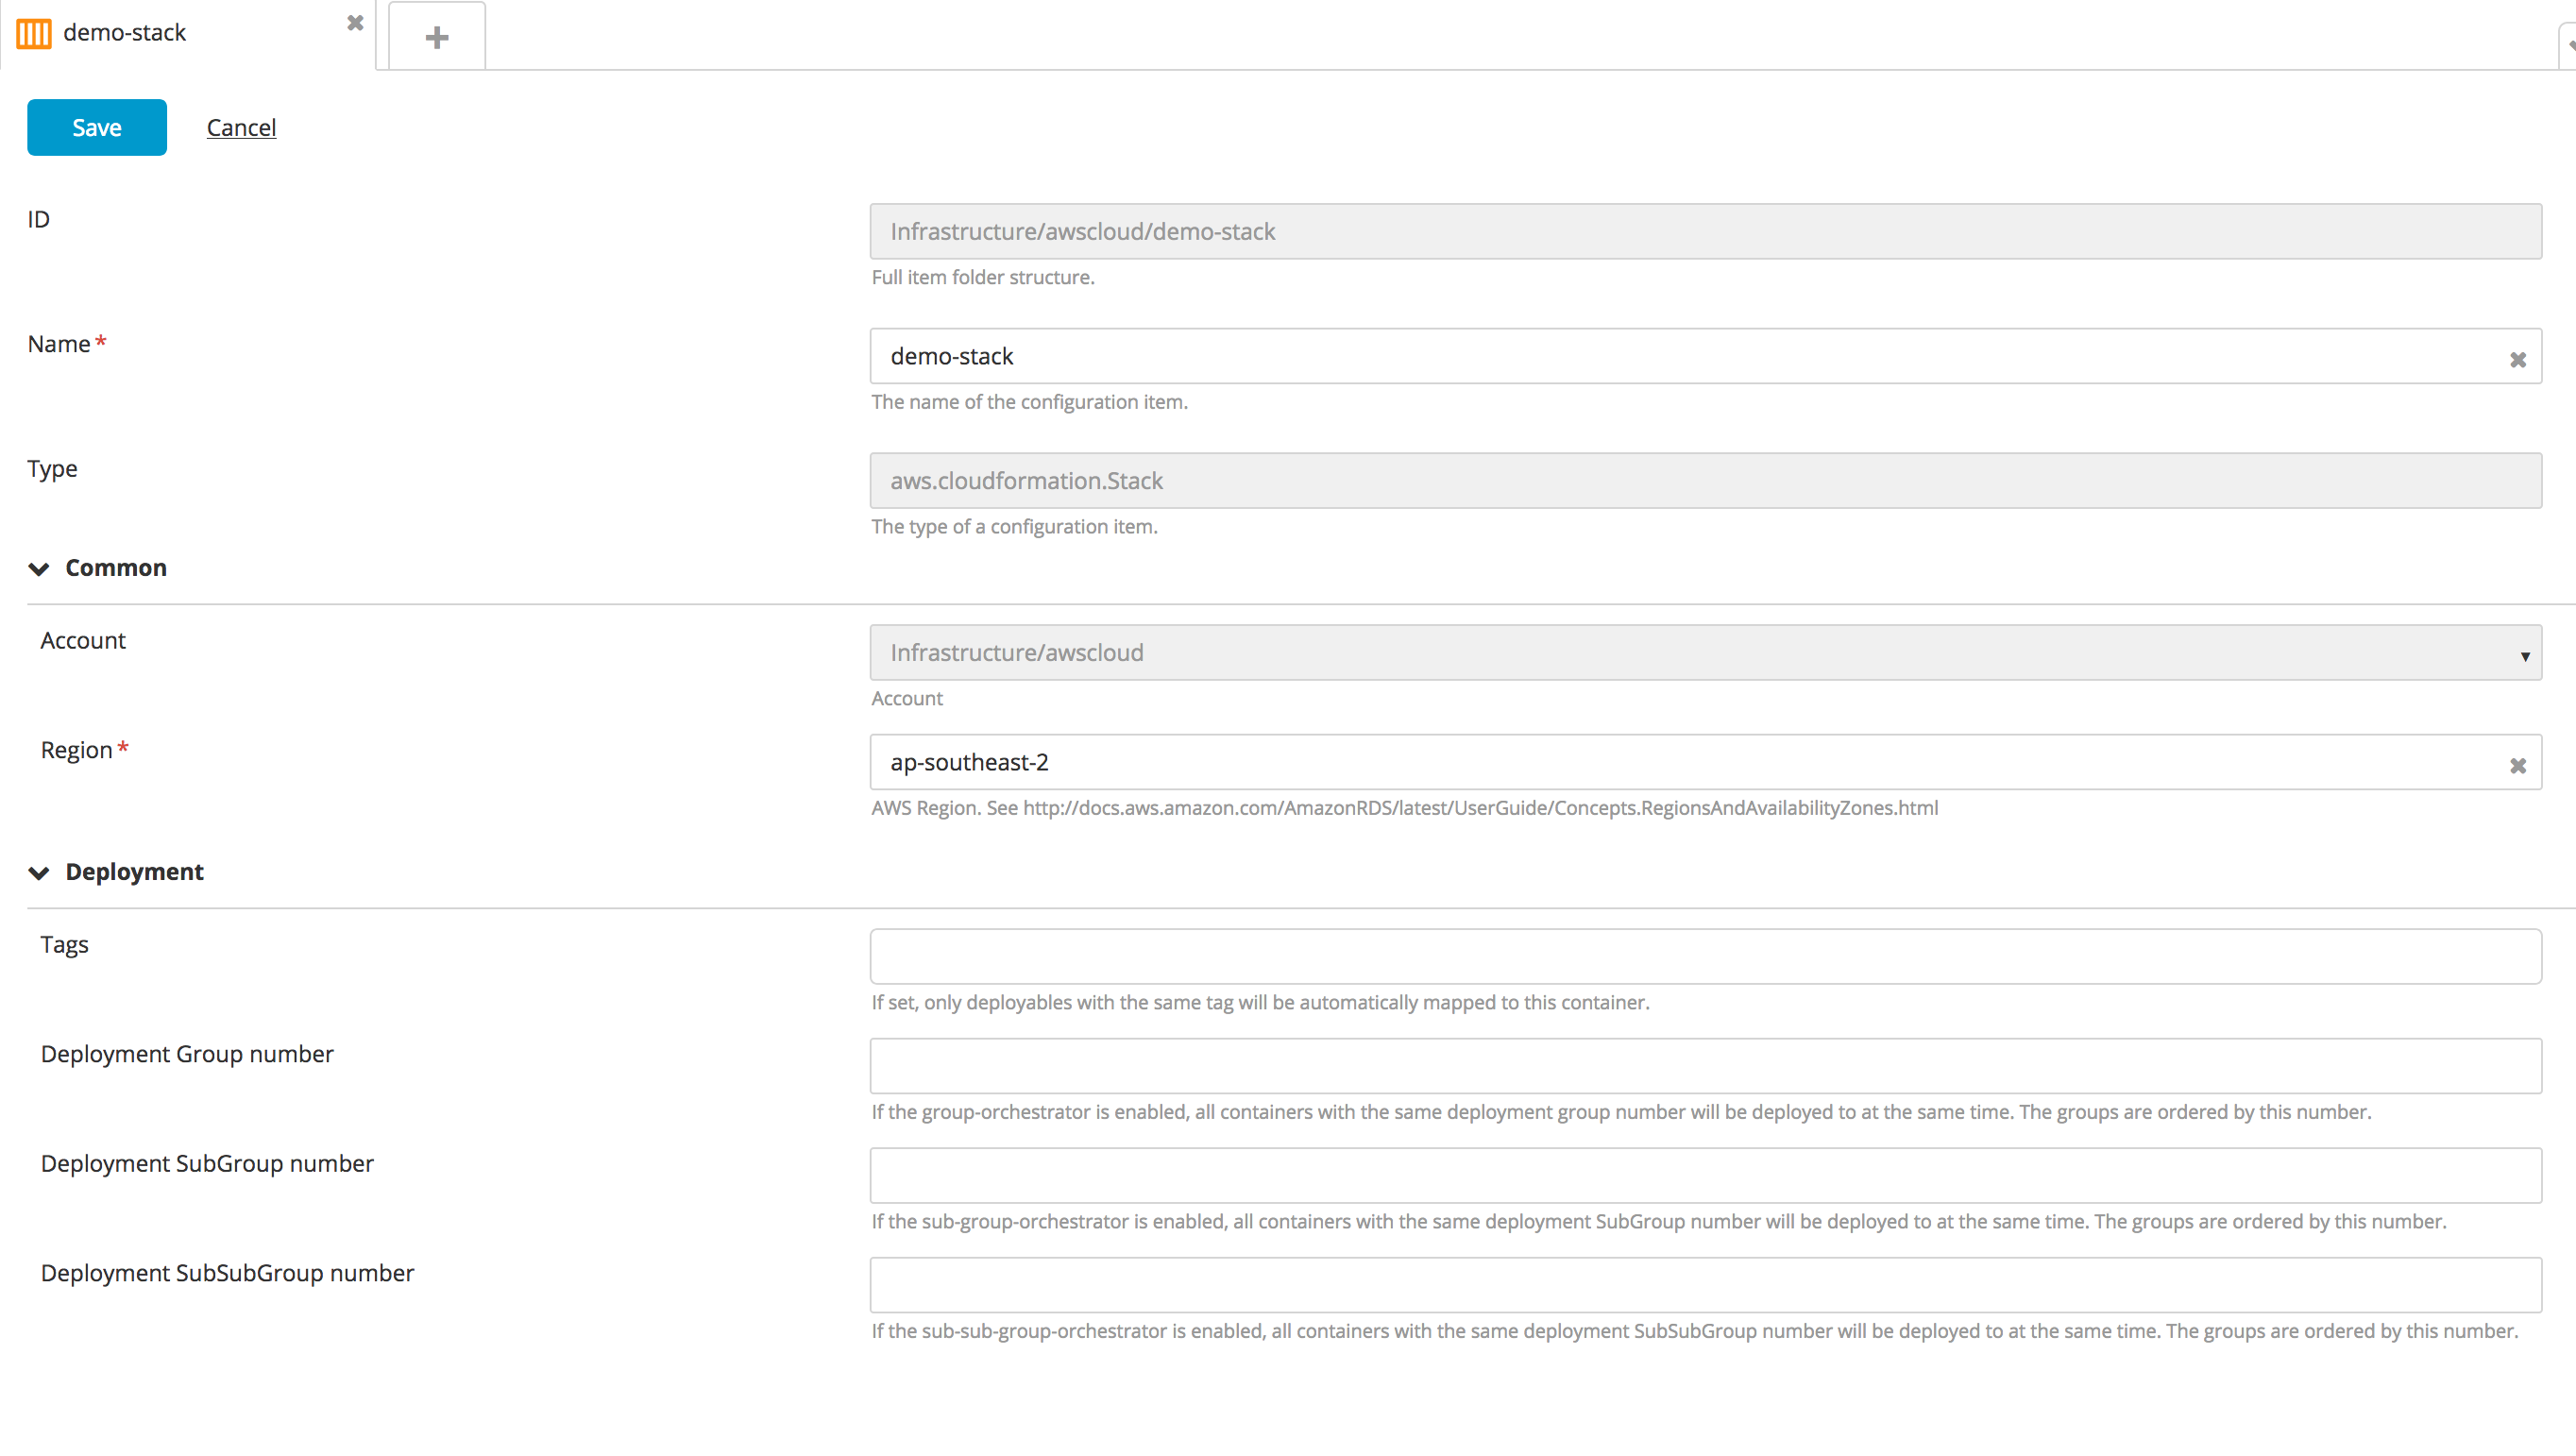
Create a new Stack type embedded infrastructure CI:
- In the top navigation bar, click Explorer.
- Expand the Infrastructure CI list.
- Navigate to a CI of AWS Cloud type, click
, and select New > aws > cloudformation > Stack.
- Specify a name region for the CI.
- Click Save.
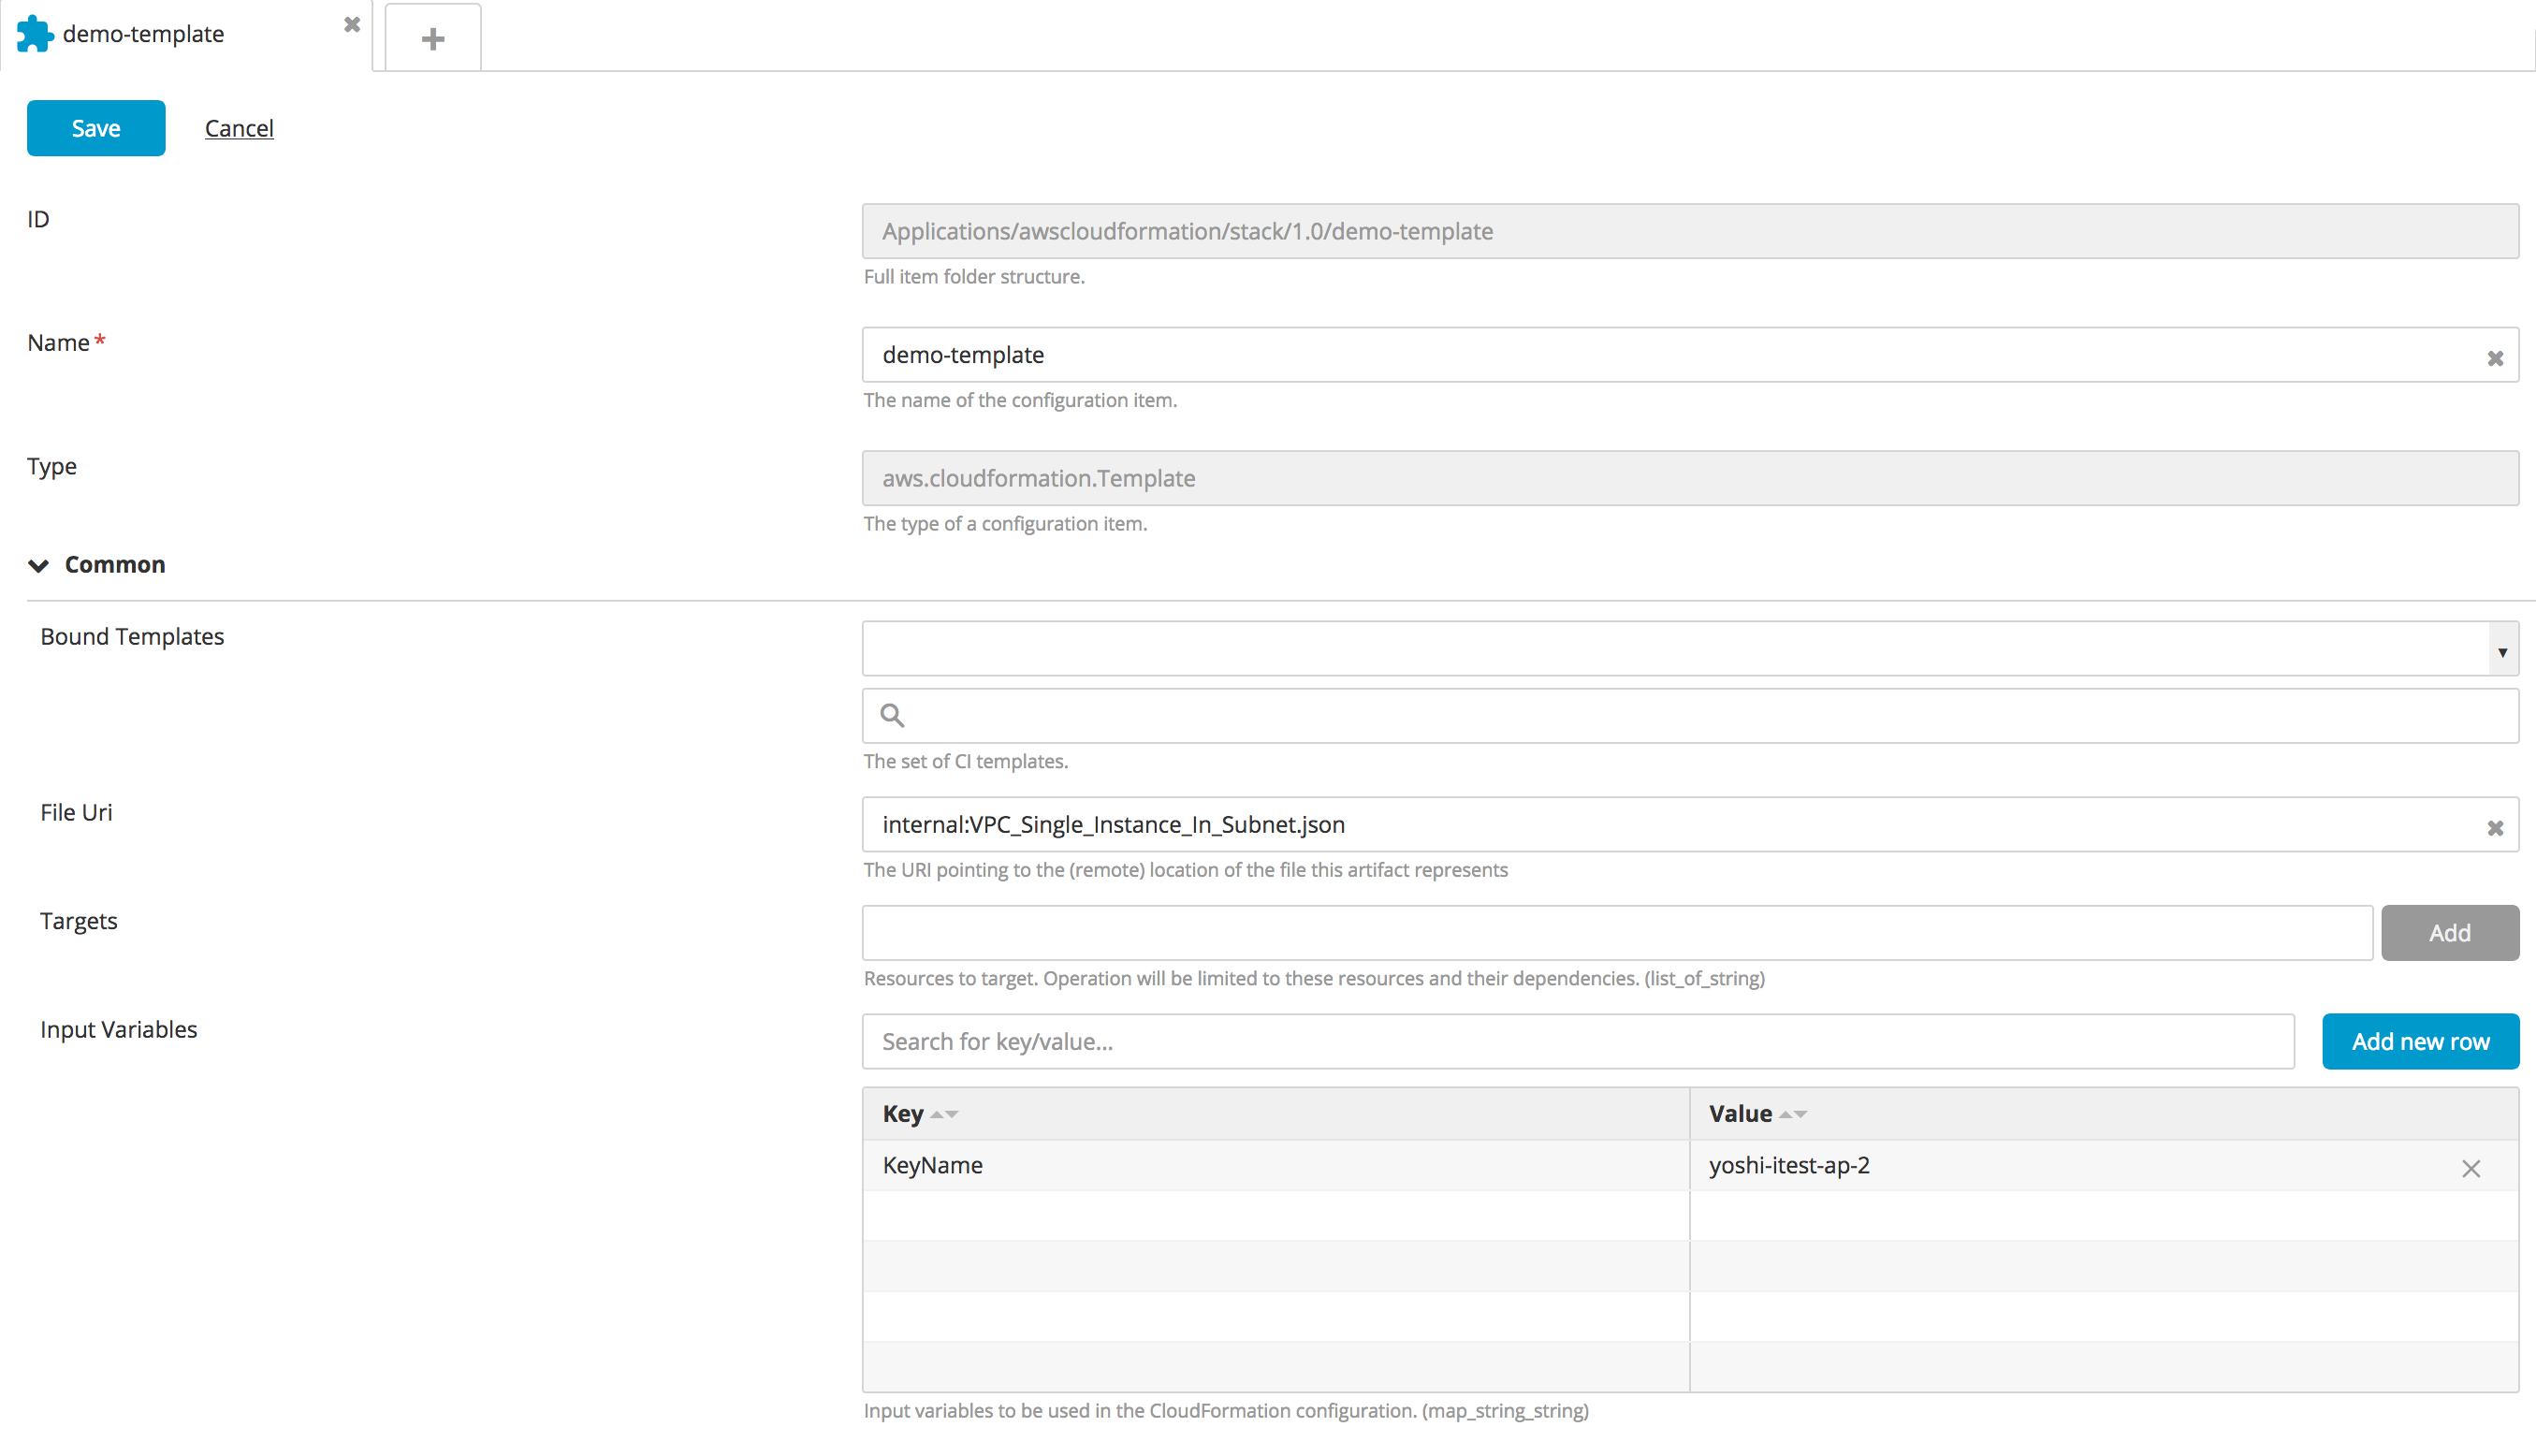
Create a new Template type CI:
- In the top navigation bar, click Explorer.
- Expand an application in the Applications list.
- Hover over a package, click
, and select New > aws > cloudformation > Template.
- Specify a name for the CI, the Json File as per AWS configuration, and the Input variables.
- To bind the templates with output variables, configure the Bound Templates.
You can also create the Deploy resources by configuring them in METADATA section.
"Metadata" : {"XLD::Infrastructure":[{"id":"cloud","type":"core.Directory"},{"id":"cloud/webserver","type":"overthere.SshHost","os":"UNIX","connectionType":"SFTP","address":"{Address}","port":"22","username":"admin"}],"XLD::Environments":[{"id":"cloud-dev","type":"udm.Environment","members":[{"ci ref":"Infrastructure/cloud/webserver"}]}]}
- Click Save.
Deploy AWS SAM Templates
The AWS plugin supports deploying AWS Serverless Application Model (SAM) templates. SAM templates are an extension of CloudFormation templates with additional serverless-specific capabilities.
Key differences between SAM and CloudFormation templates:
- SAM templates include a
Transformparameter that enables serverless resource processing - SAM provides simplified syntax for defining serverless resources like Lambda functions, API Gateway, and DynamoDB tables
- SAM templates are processed and expanded into standard CloudFormation templates during deployment
To deploy a SAM template:
- Create a
aws.cloudformation.TemplateCI as described above - Upload your SAM template file.
- Ensure the template includes the required
Transformdeclaration:Transform: AWS::Serverless-2016-10-31 - Add any required capabilities to the CloudFormation stack configuration
- Deploy the template to create serverless resources
SAM templates support the same deployment operations as CloudFormation templates, including rollback, update, and delete operations.
Example
AWSTemplateFormatVersion: '2010-09-09'
Transform: AWS::Serverless-2016-10-31
Description: Simple SAM Example that creates one S3 Bucket

Resources:
  MySimpleBucket:
    Type: AWS::S3::Bucket
    Properties:
      BucketName: "my-serverless-bucket"
Launch AWS Service Catalog resources
With the Amazon Web Services (AWS) plugin for Deploy, you can launch AWS Service Catalog product.
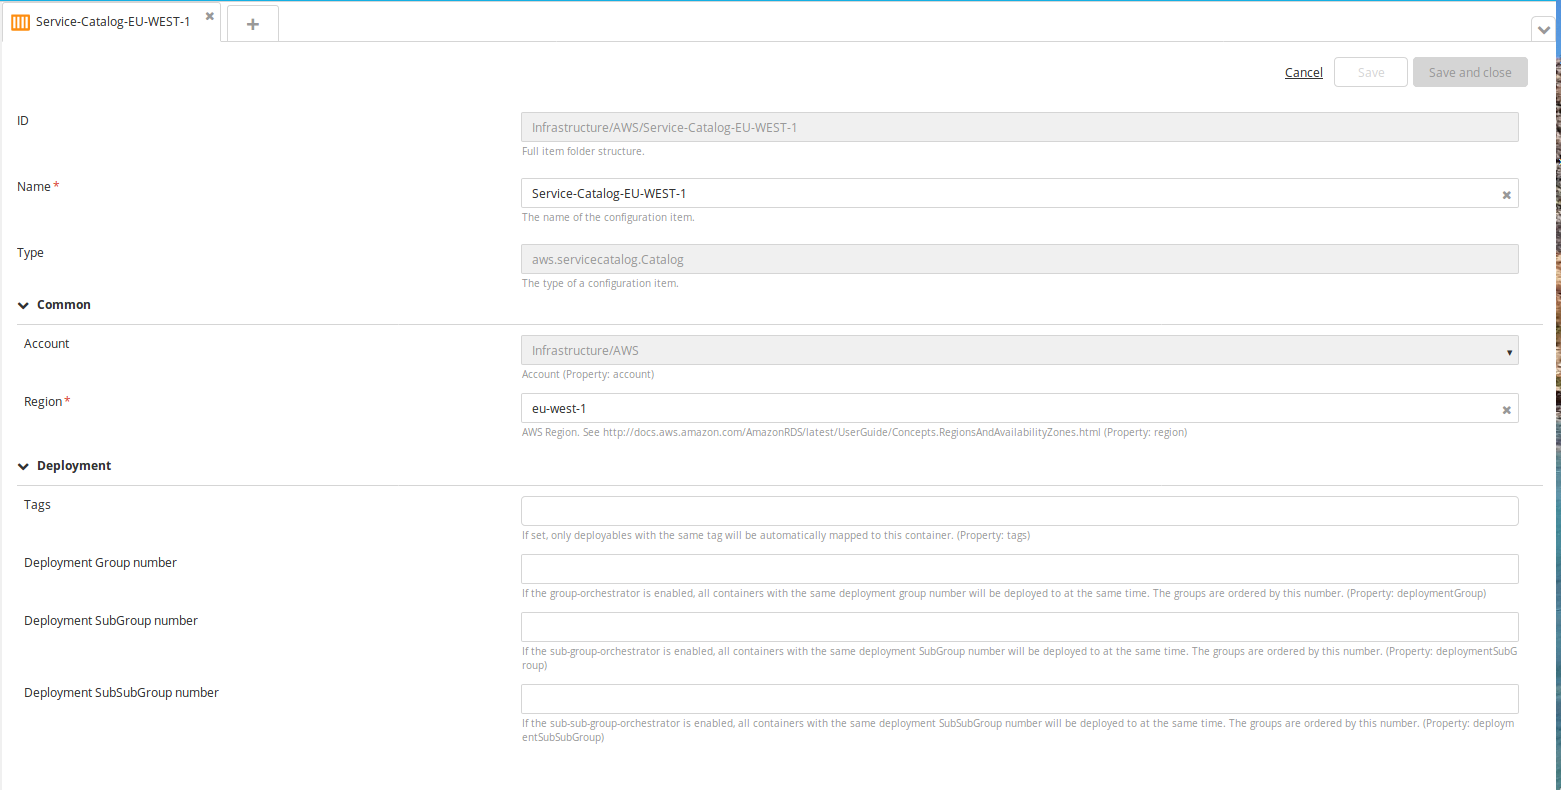
Create a new Catalog type embedded infrastructure CI:
- In the top navigation bar, click Explorer.
- Expand the Infrastructure CI list.
- Navigate to a CI of AWS Cloud type, click
, and select New > aws > servicecatalog > Catalog.
- Specify a name region for the CI.
- Click Save.
Create a new ProvisionedProductSpec type CI:
- In the top navigation bar, click Explorer.
- Expand an application in the Applications list.
- Hover over a package, click
, and select New > aws > servicecatalog > ProvisionedProductSpec.
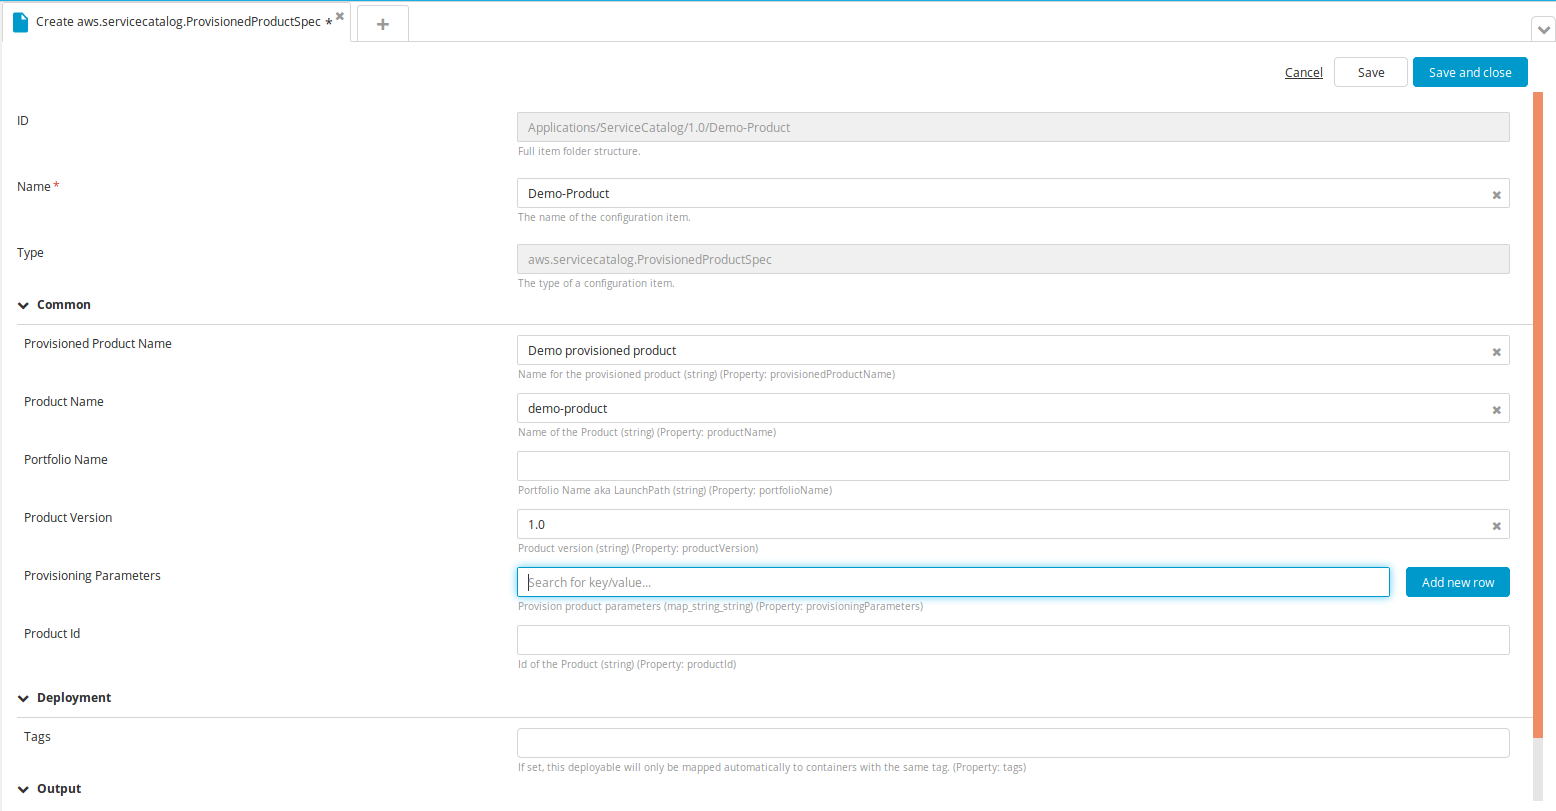
- Specify a name for the CI, Product Name, Product Version, and Provisioning Parameters, if there are any.
When the CI is deployed on the deployed type (ProvisionedProduct), you can see the output of the stack that the product created. It will be empty if there are no outputs on the stack.
- Click Save.
Create AWS ECS resources
With the Amazon Web Services (AWS) plugin for Deploy, you can create cluster instances and ECS task and services. The ECS task and services are deployed over an AWS cluster and run on the instances of the cluster. Amazon specifies the AMIs which are optimized for ECS For more information, see Amazon ECS-Optimized Amazon Linux AMI.
Create a new Cluster type CI:
- In the top navigation bar, click Explorer.
- Expand an application in the Applications list.
- Hover over a package, click
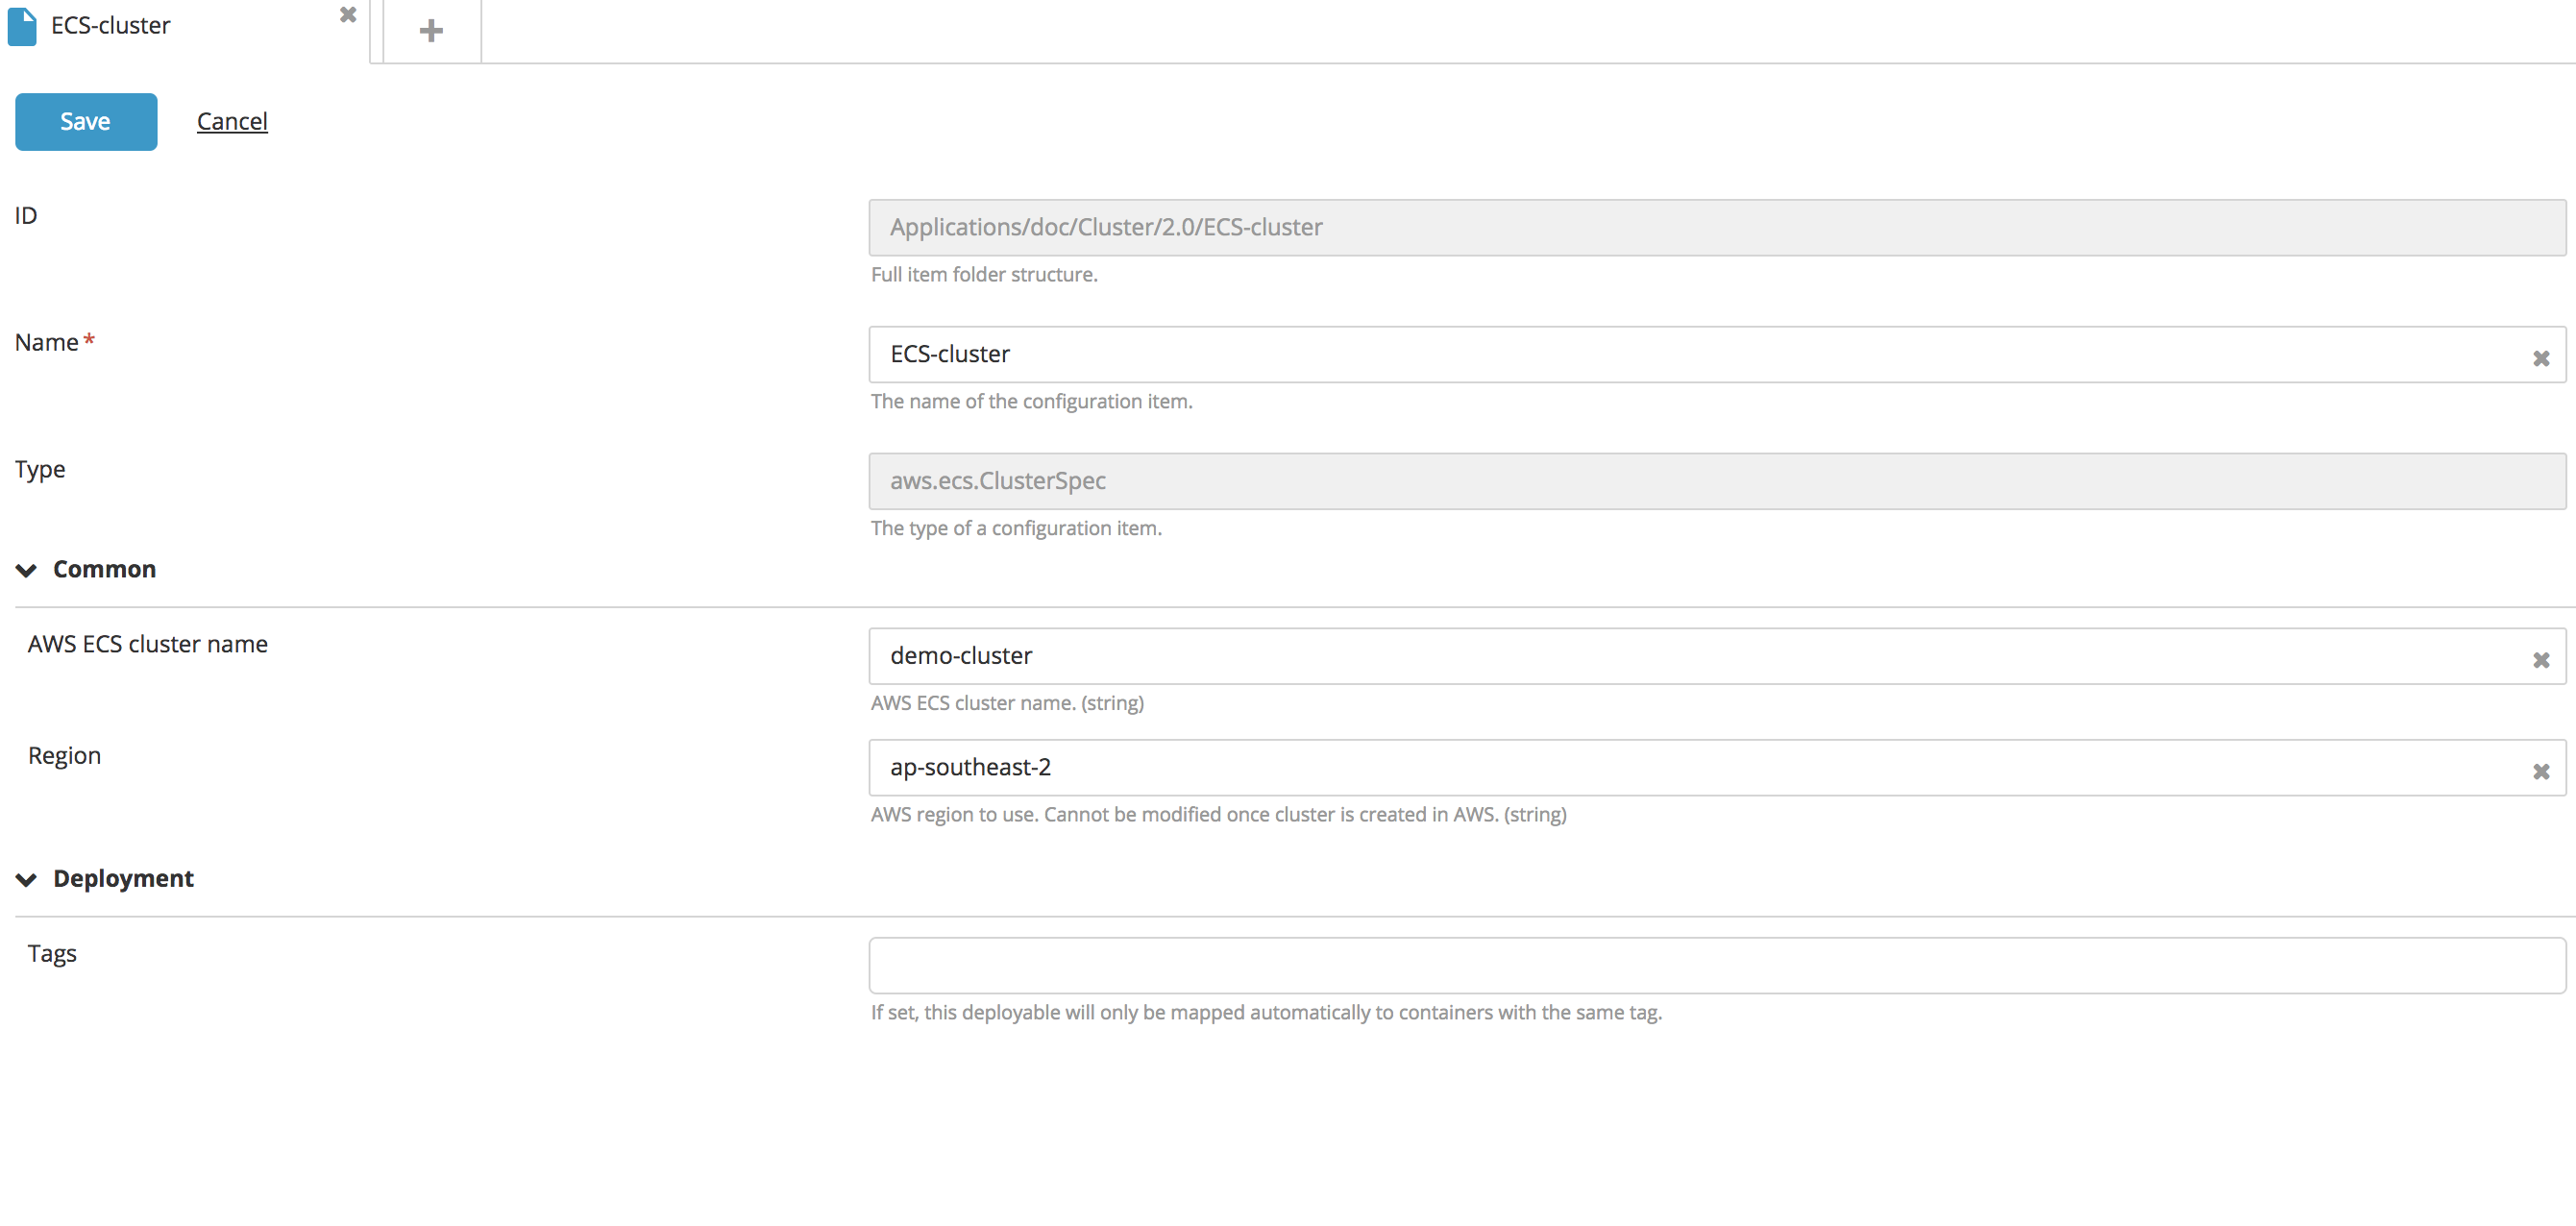
, and select New > aws > ecs > ClusterSpec.
- Specify a name for the CI, the AWS ECS Cluster Name, and the Region.
- Click Save.
Create a new Cluster (Container) Instance type CI:
- In the top navigation bar, click Explorer.
- Expand an application in the Applications list.
- Hover over a package, click
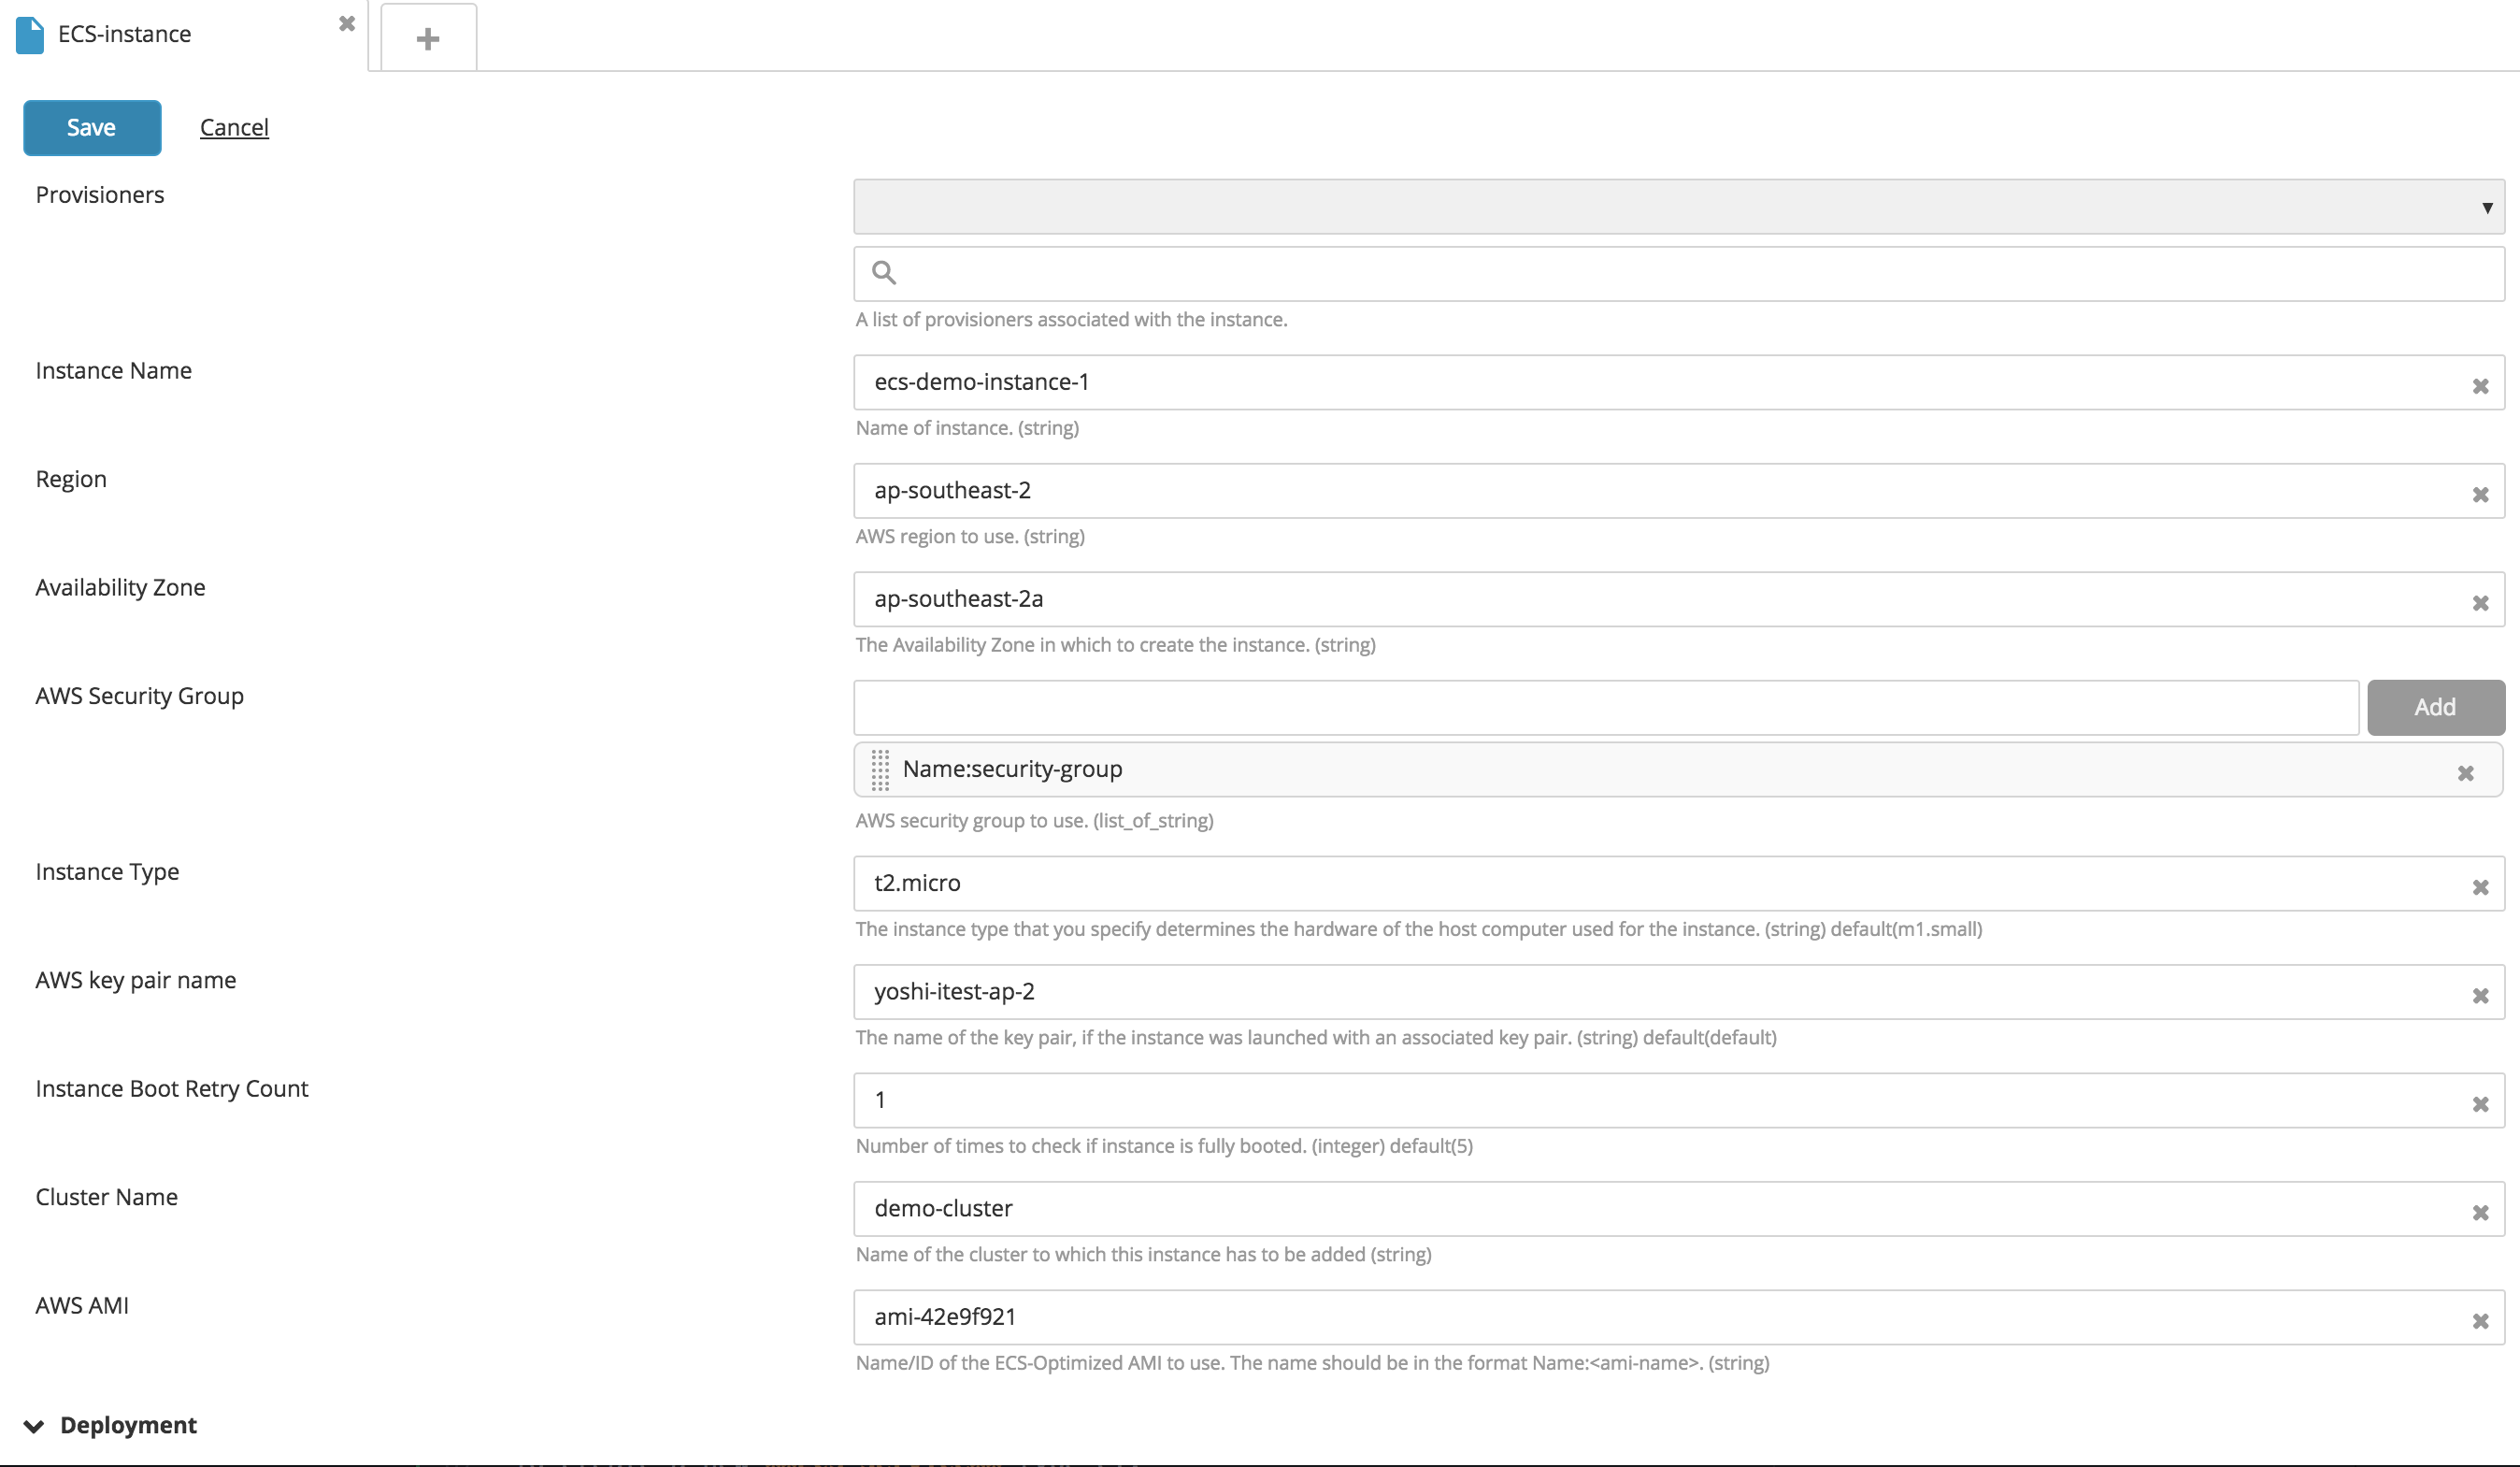
, and select New > aws > ecs > ContainerInstanceSpec.
- Go to the Create EC2 instances section.
- Fill in the following fields: Instance Name, Region, Availability Zone, AWS Security Group, AWS ECS Cluster Name, AMI ID, and IAMRole.
Container instance is an extension of the EC2 instance type. It supports all properties supported by the instance type.
- Click Save.
Create a new ECS Service type CI:
- In the top navigation bar, click Explorer.
- Expand an application in the Applications list.
- Hover over a package, click
, and select New > aws > ecs > ServiceSpec.
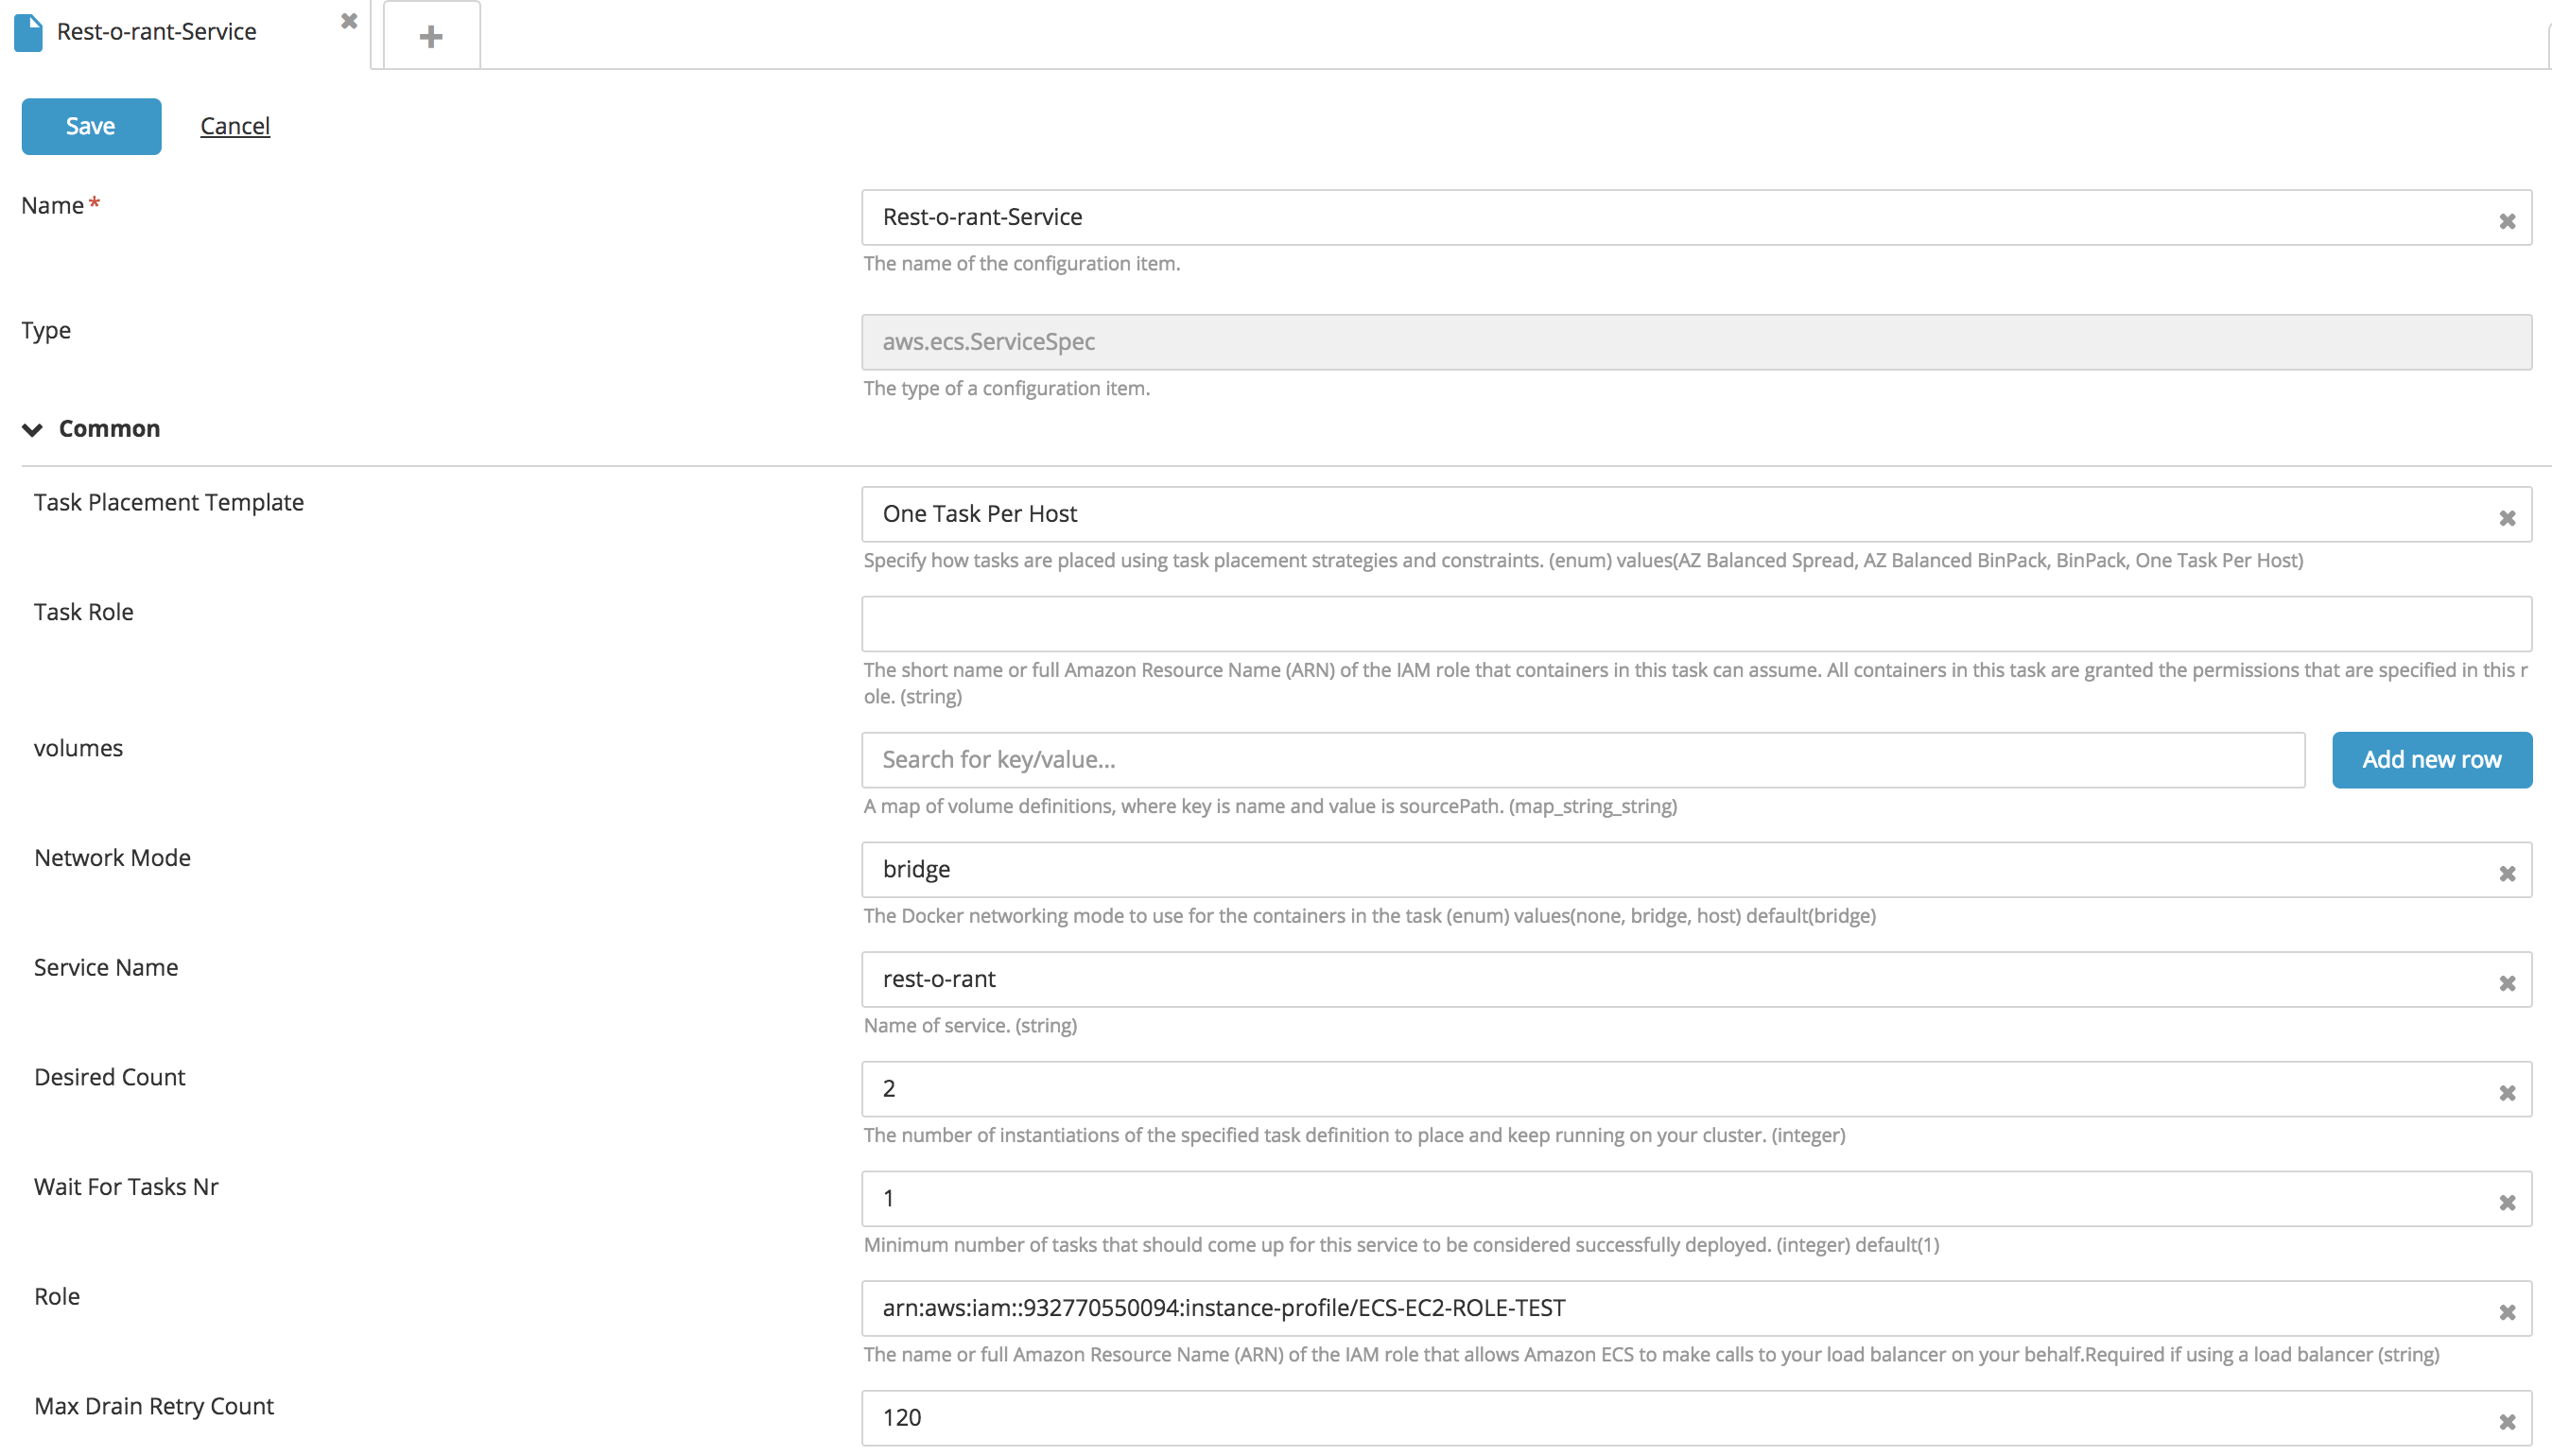
- Fill in the following fields: Name, Task Placement Template, Volumes, Network mode, and Service name.
- To configure the number of instances of a running task, enter a value for the Desired Count property.
- To attach the IAM Role to the EC2 instance, specify the IAMRole property.
- To configure a deployment configuration, specify values for the Maximum Percent and Minimum Healthy Percent properties.
The ECS Service contains an embedded CI for configuring Load Balancers and Container Definitions.
- To set the PidMode and IpcMode, choose an option from the corresponding drop down boxes.
- Click Save.
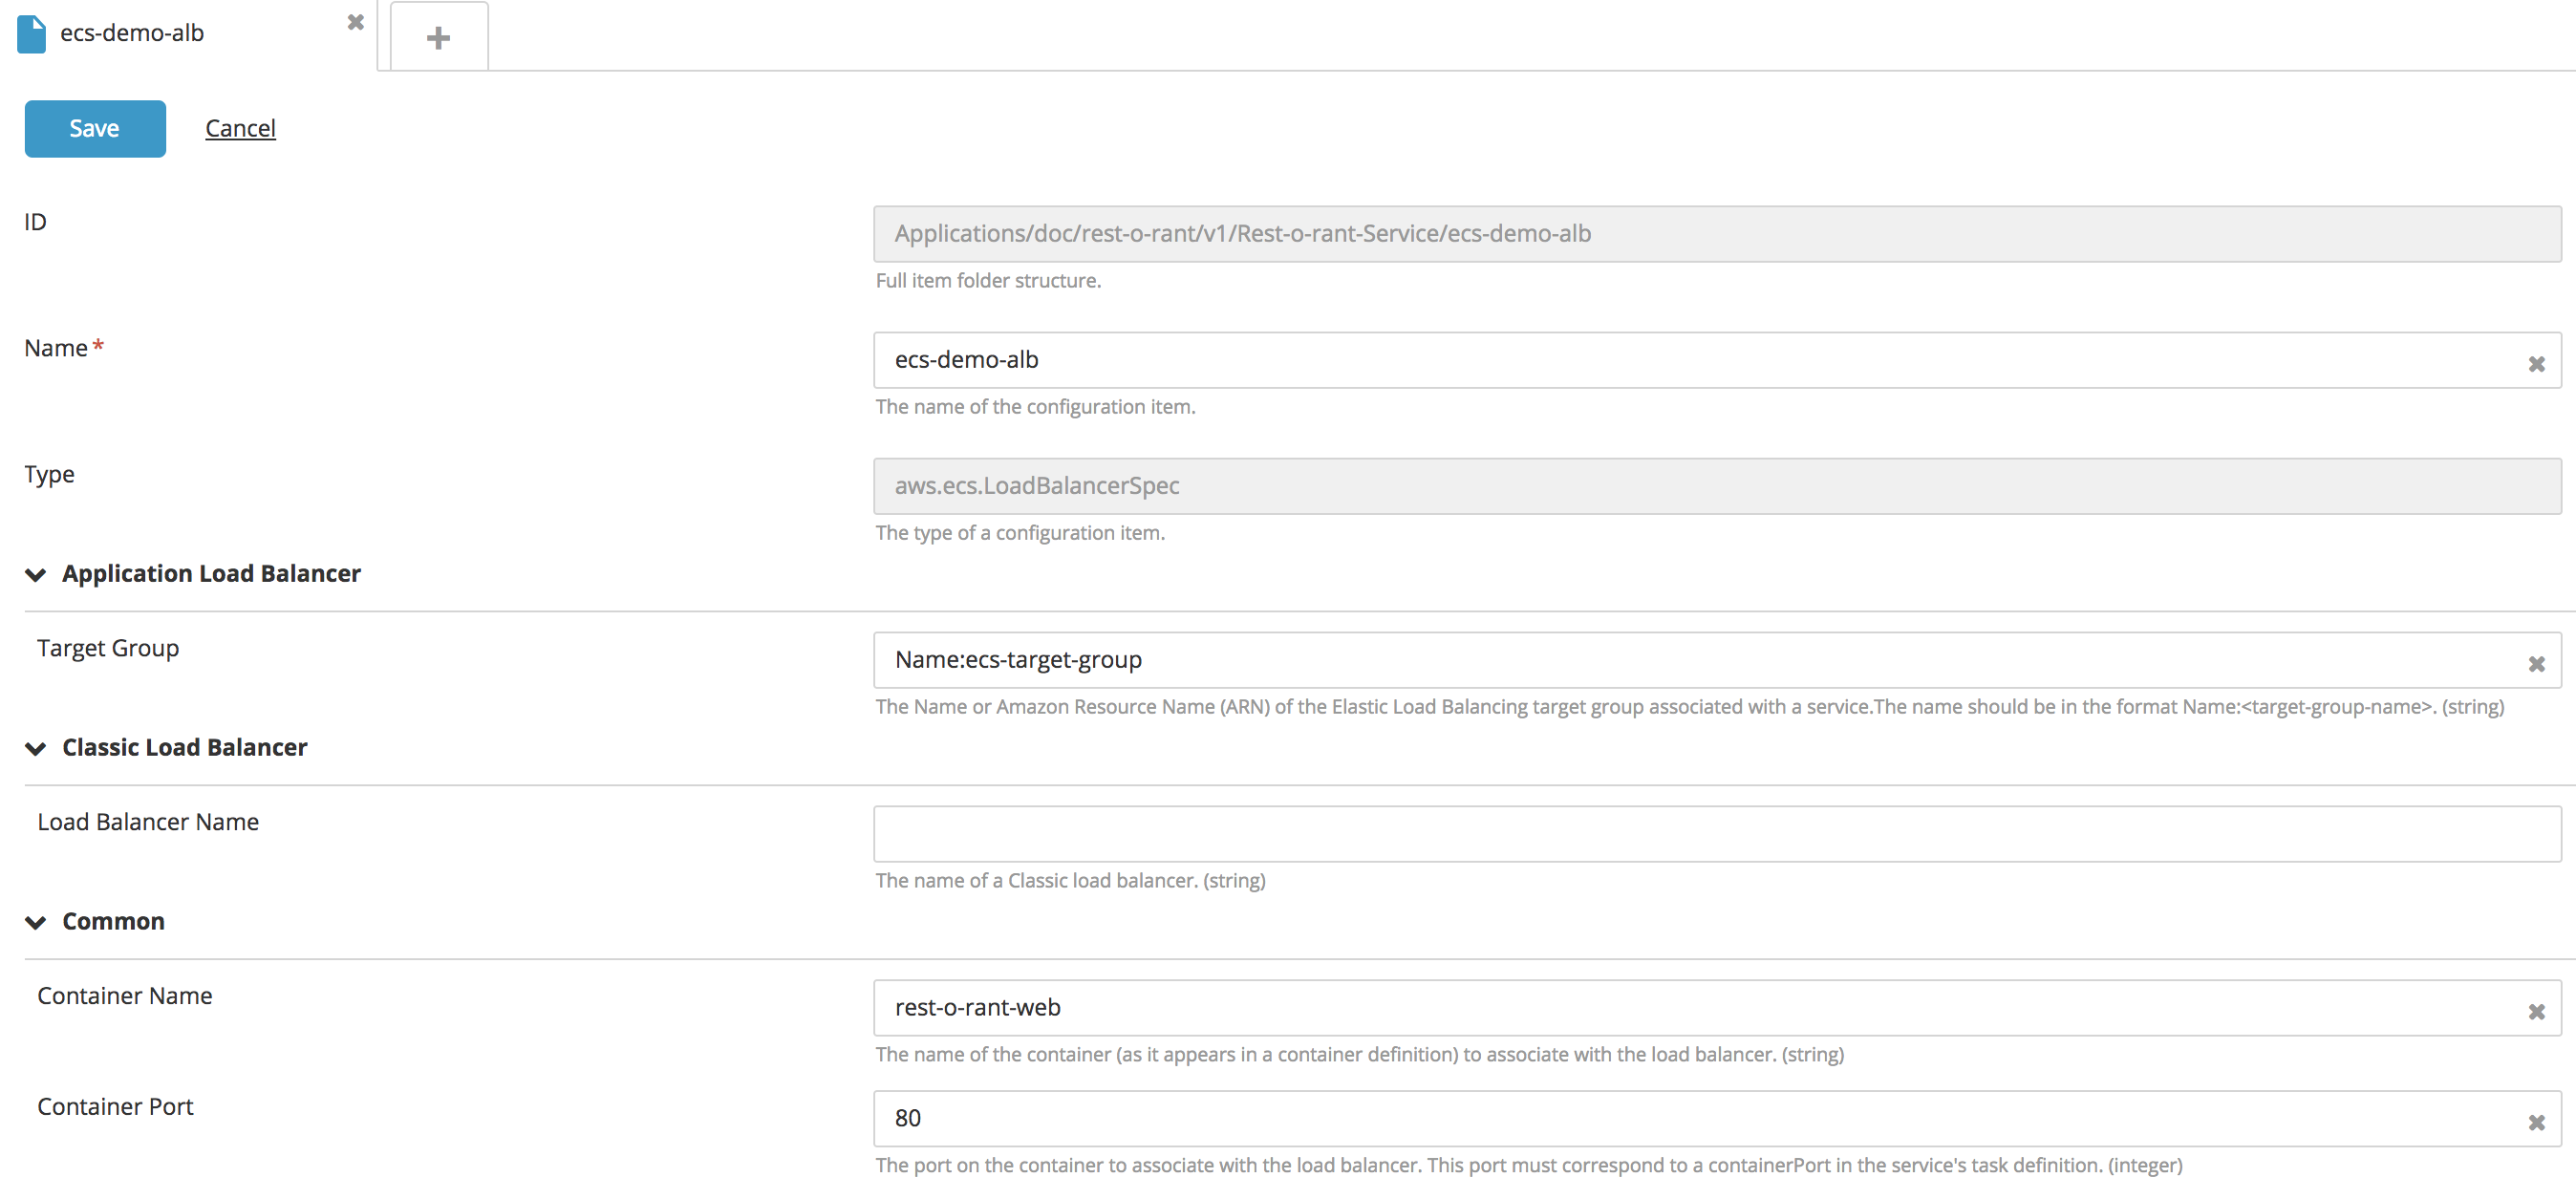
Create a new ECS Service Load Balancer type embedded CI:
- In the top navigation bar, click Explorer.
- Expand an application in the Applications list.
- Navigate to ECS Service, click
, and select New > aws > ecs > LoadBalancerSpec.
- Fill in the following fields: Name and Load Balancer Name.
- To configure the attached container configuration, specify the Container Name and Container Port properties.
- Click Save.
Create a new ECS Task type CI:
- In the top navigation bar, click Explorer.
- Expand an application in the Applications list.
- Hover over a package, click
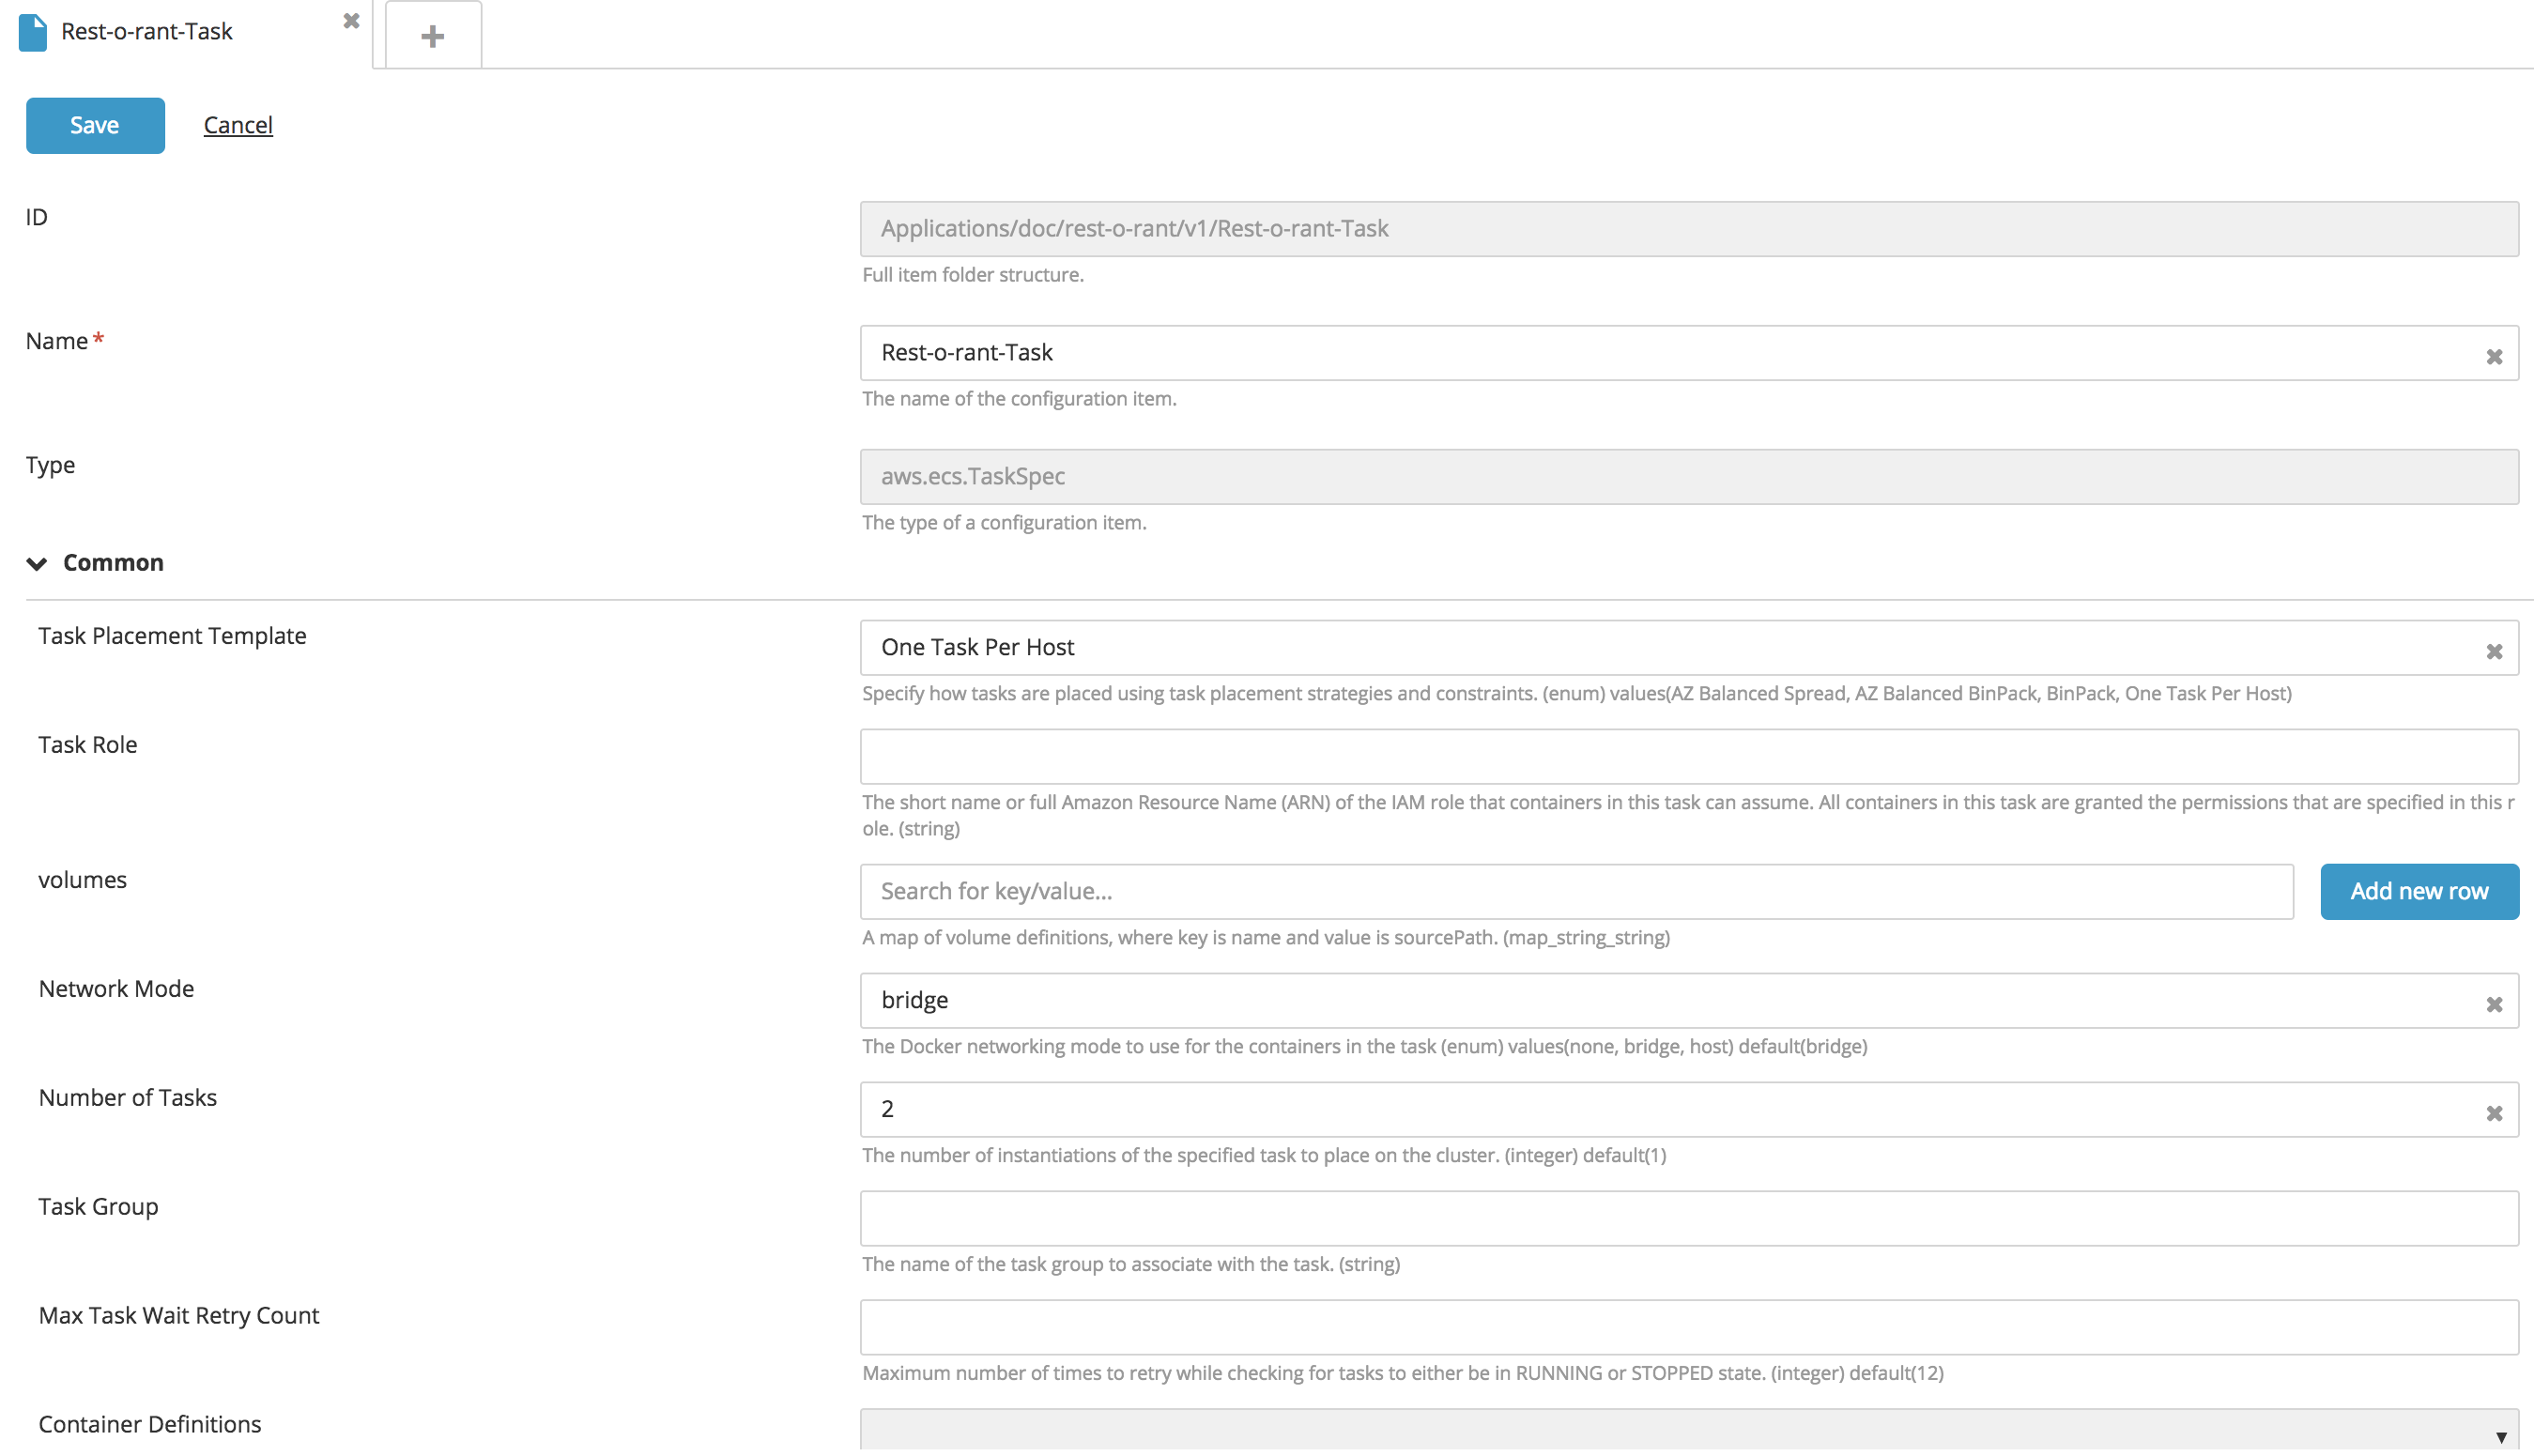
, and select New > aws > ecs > TaskSpec.
- Fill in the following fields: Task Placement Template, Task Role, Volumes, and Network mode.
- To configure the number of tasks, enter a value for the Number of Tasks property.
- To attach the IAM Role to the EC2 instance, specify the IAMRole property.
- Click Save.
The ECS Service contains an embedded CI for configuring Container Definitions. To configure, see Create a new ECS Service/Task Container type embedded CI.
Create a new ECS Service/Task Container type embedded CI:
- In the top navigation bar, click Explorer.
- Expand an application in the Applications list.
- Navigate to an ECS Service or ECS Task, click
, and select New > aws > ecs > ContainerDefinitionSpec.
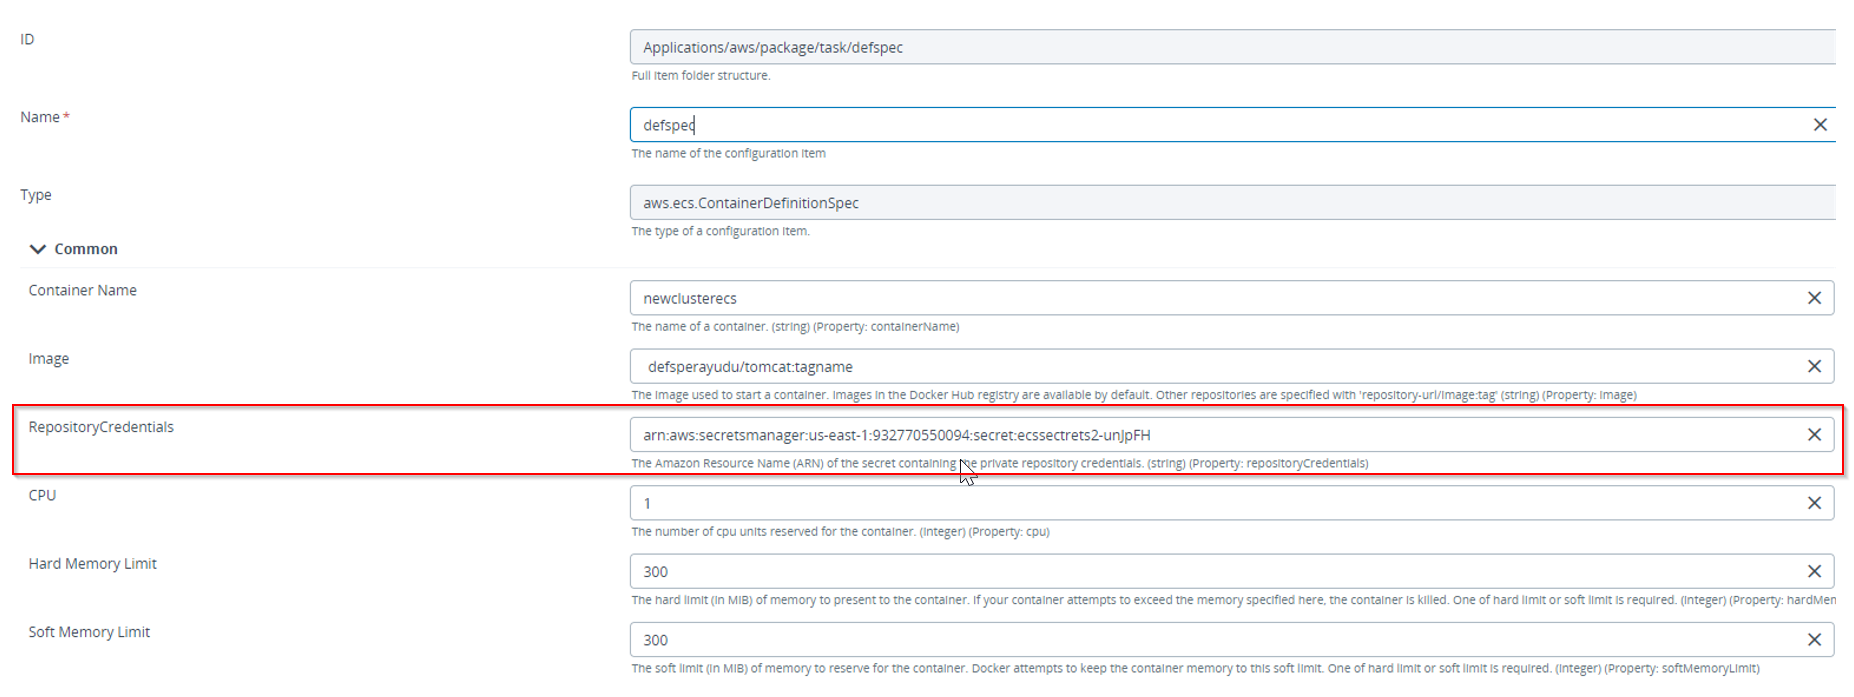
- Fill in the Container Name and Image fields.
- In the Repository Credentials field, enter the Amazon Resource Name (ARN) of the secret that contains the Private Repository credentials.
The Private Repository Image used in TaskSpec should be provided with Private Repository credentials.
- To configure the memory limit, specify values for the Hard Memory Limit and Soft Memory Limit properties.
- Optionally specify values for dnsSearchDomains, dnsServers, entryPoint, startTimeout, stopTimeout, essential, hostname, pseudoTerminal, user, readonlyRootFilesystem, dockerLabels and healthCheck
- Click Save.
The ECS Container contains an embedded CI for configuring Mount Points and Port Mappings. Mount Points are used for mounting the volume and Port Mappings for mapping the ports. Other embedded CIs include environmentFiles, resourceRequirements, ulimits, secrets, extraHosts, systemControls, linuxParameters. For accepted values for these parameters please see AWS ECS Register Task Definition.
Create network resources
With the Amazon Web Services (AWS) plugin for Deploy, you can create various network resources: VPCs, subnets, internet gateway, routing tables, and others.
Create a new VPC type CI:
- In the top navigation bar, click Explorer.
- Expand an application in the Applications list.
- Hover over a package, click
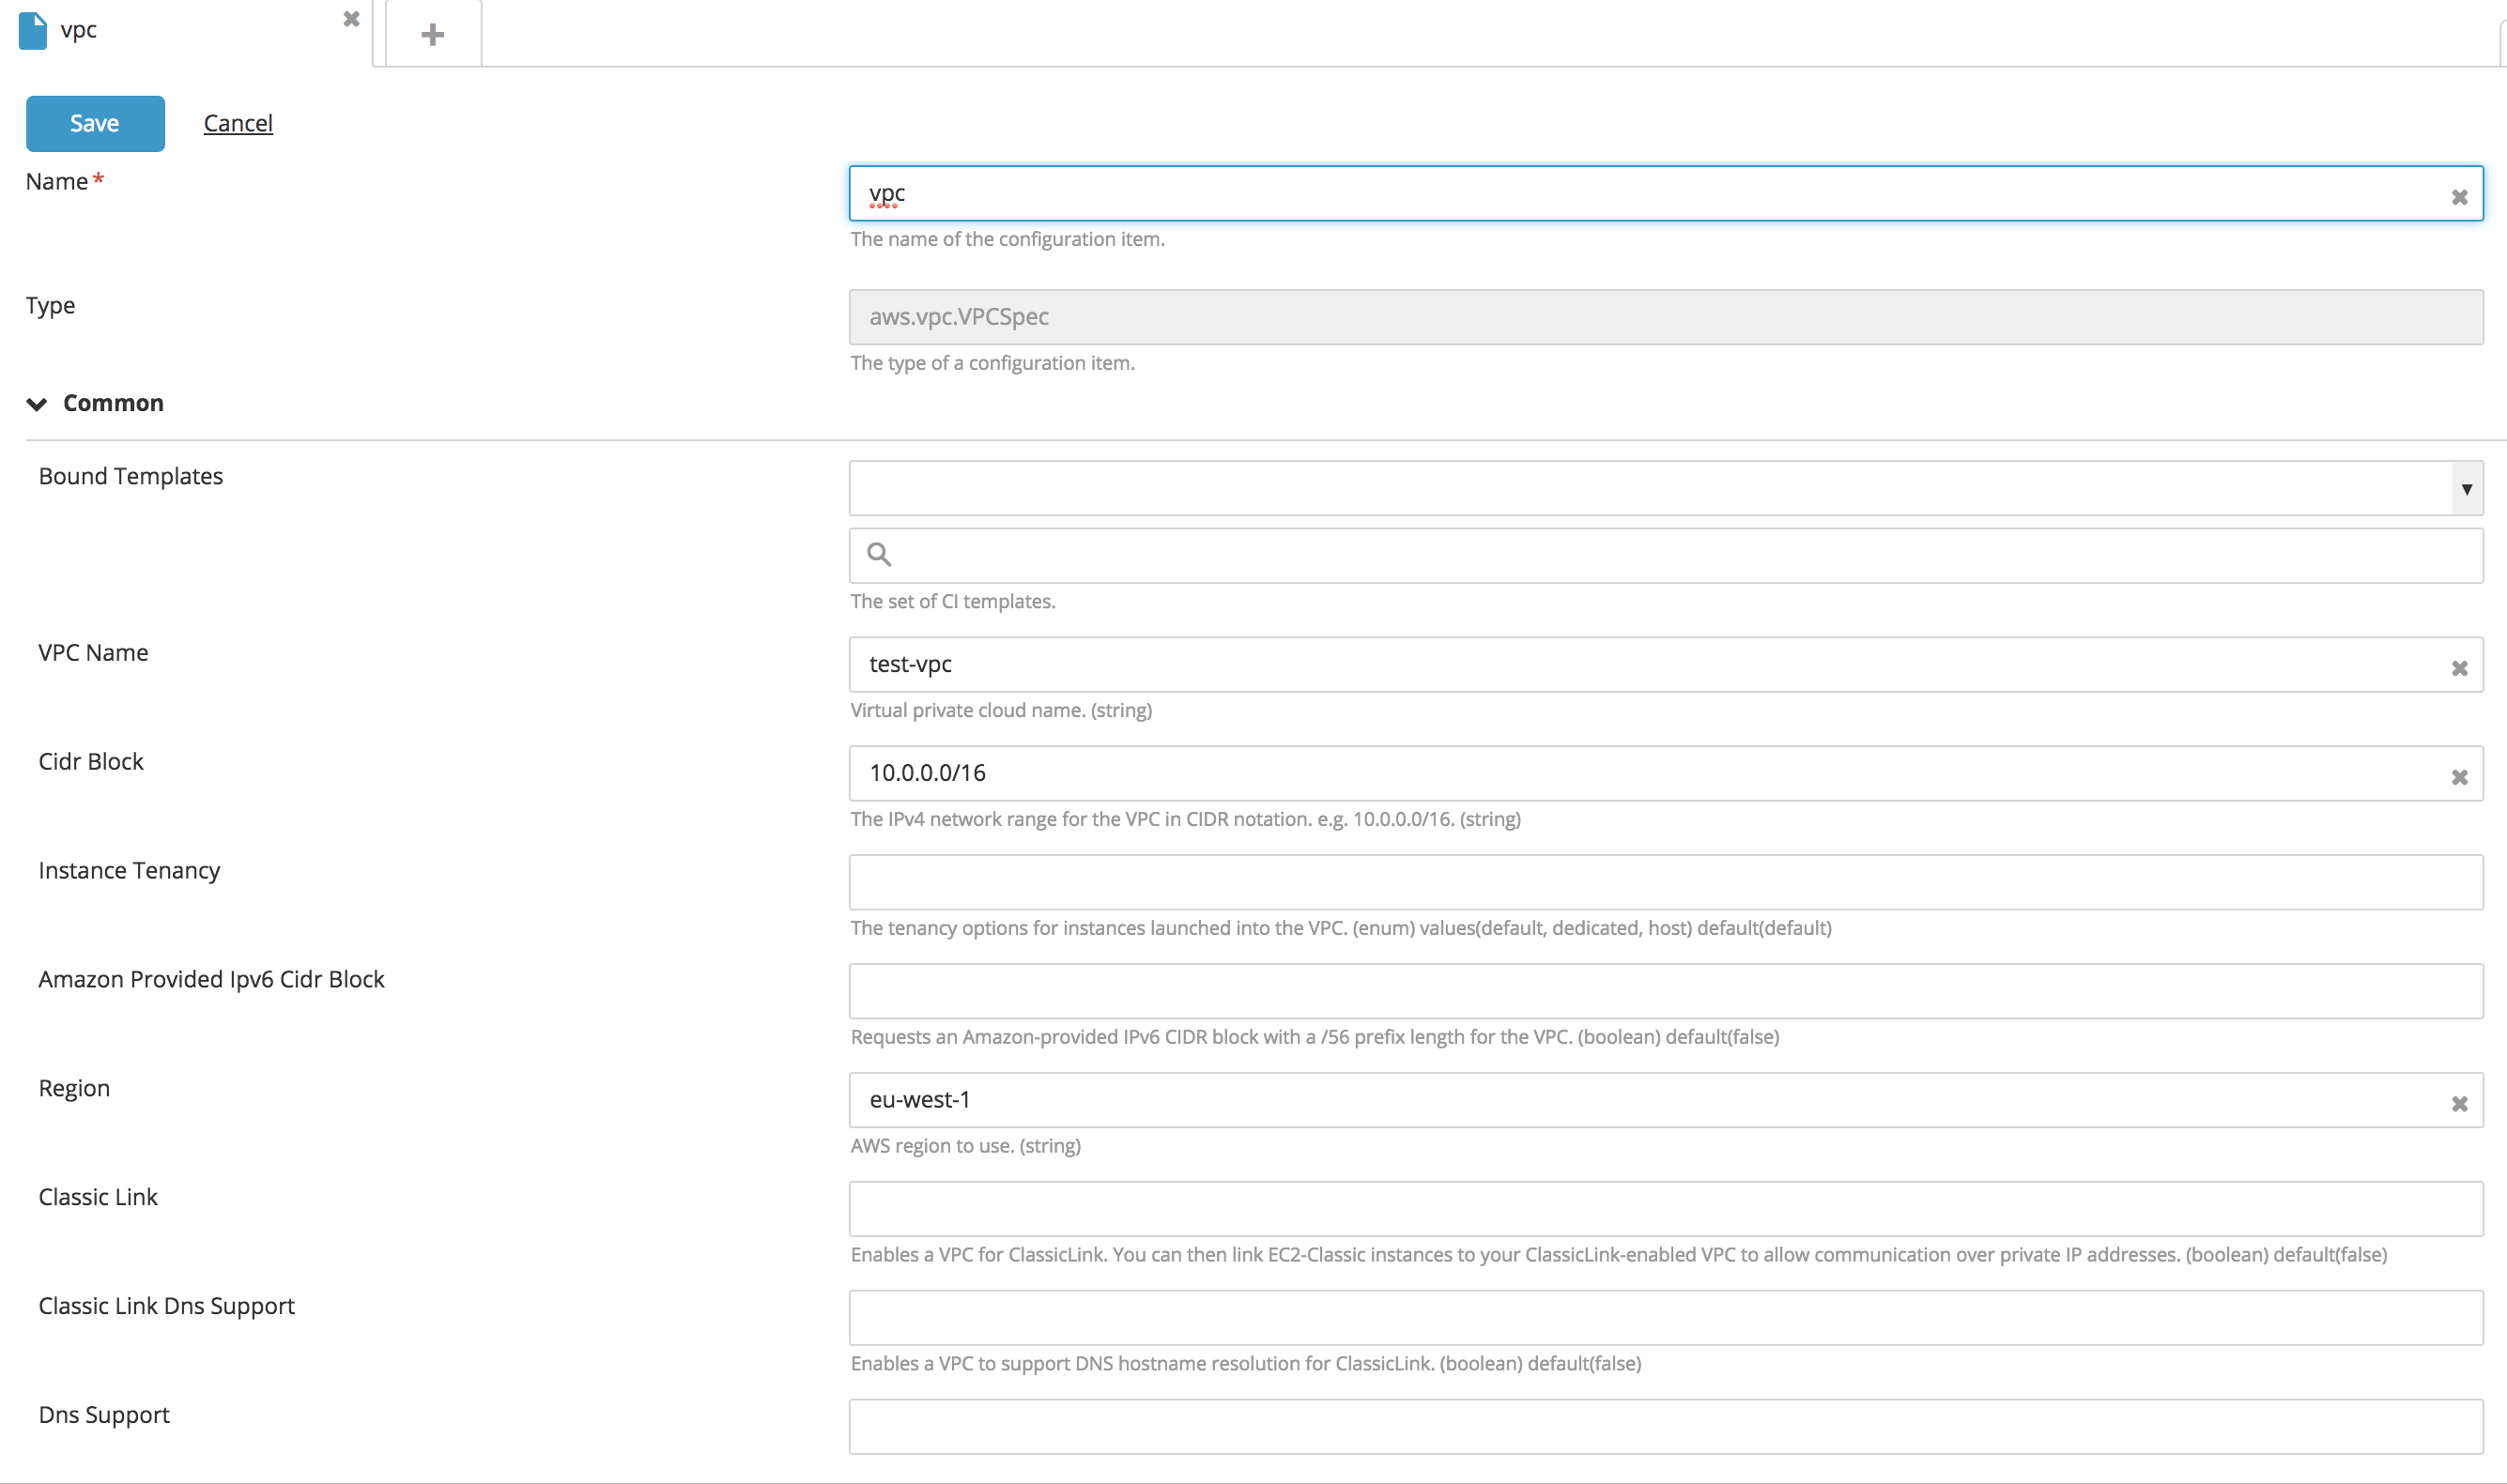
, and select New > aws > vpc > VPCSpec.
- Fill in the following fields: VPC Name, CIDR Block, and Region.
- To make classic EC2 (non VPC) accessible through this VPC, set Classic Link to
true. - To assign EC2 with hostname, set DNS Support to
true. - To connect privately to other VPCs, in the Peering Connections section, specify IDs or VPC names in Peer VPCs field.
- Click Save.
You can specify the VPC resource ID from the AWS console or specify the Name:/
Create an Internet Gateway network resource:
- In the Gateway section of the
aws.vpc.VPCSpecCI, set the Create Internet Gateway property totrue. The internet gateway is used when you require a subnet for public access. - Optionally, to specify a name for internet gateway, enter a name into the Name field.
- Click Save.

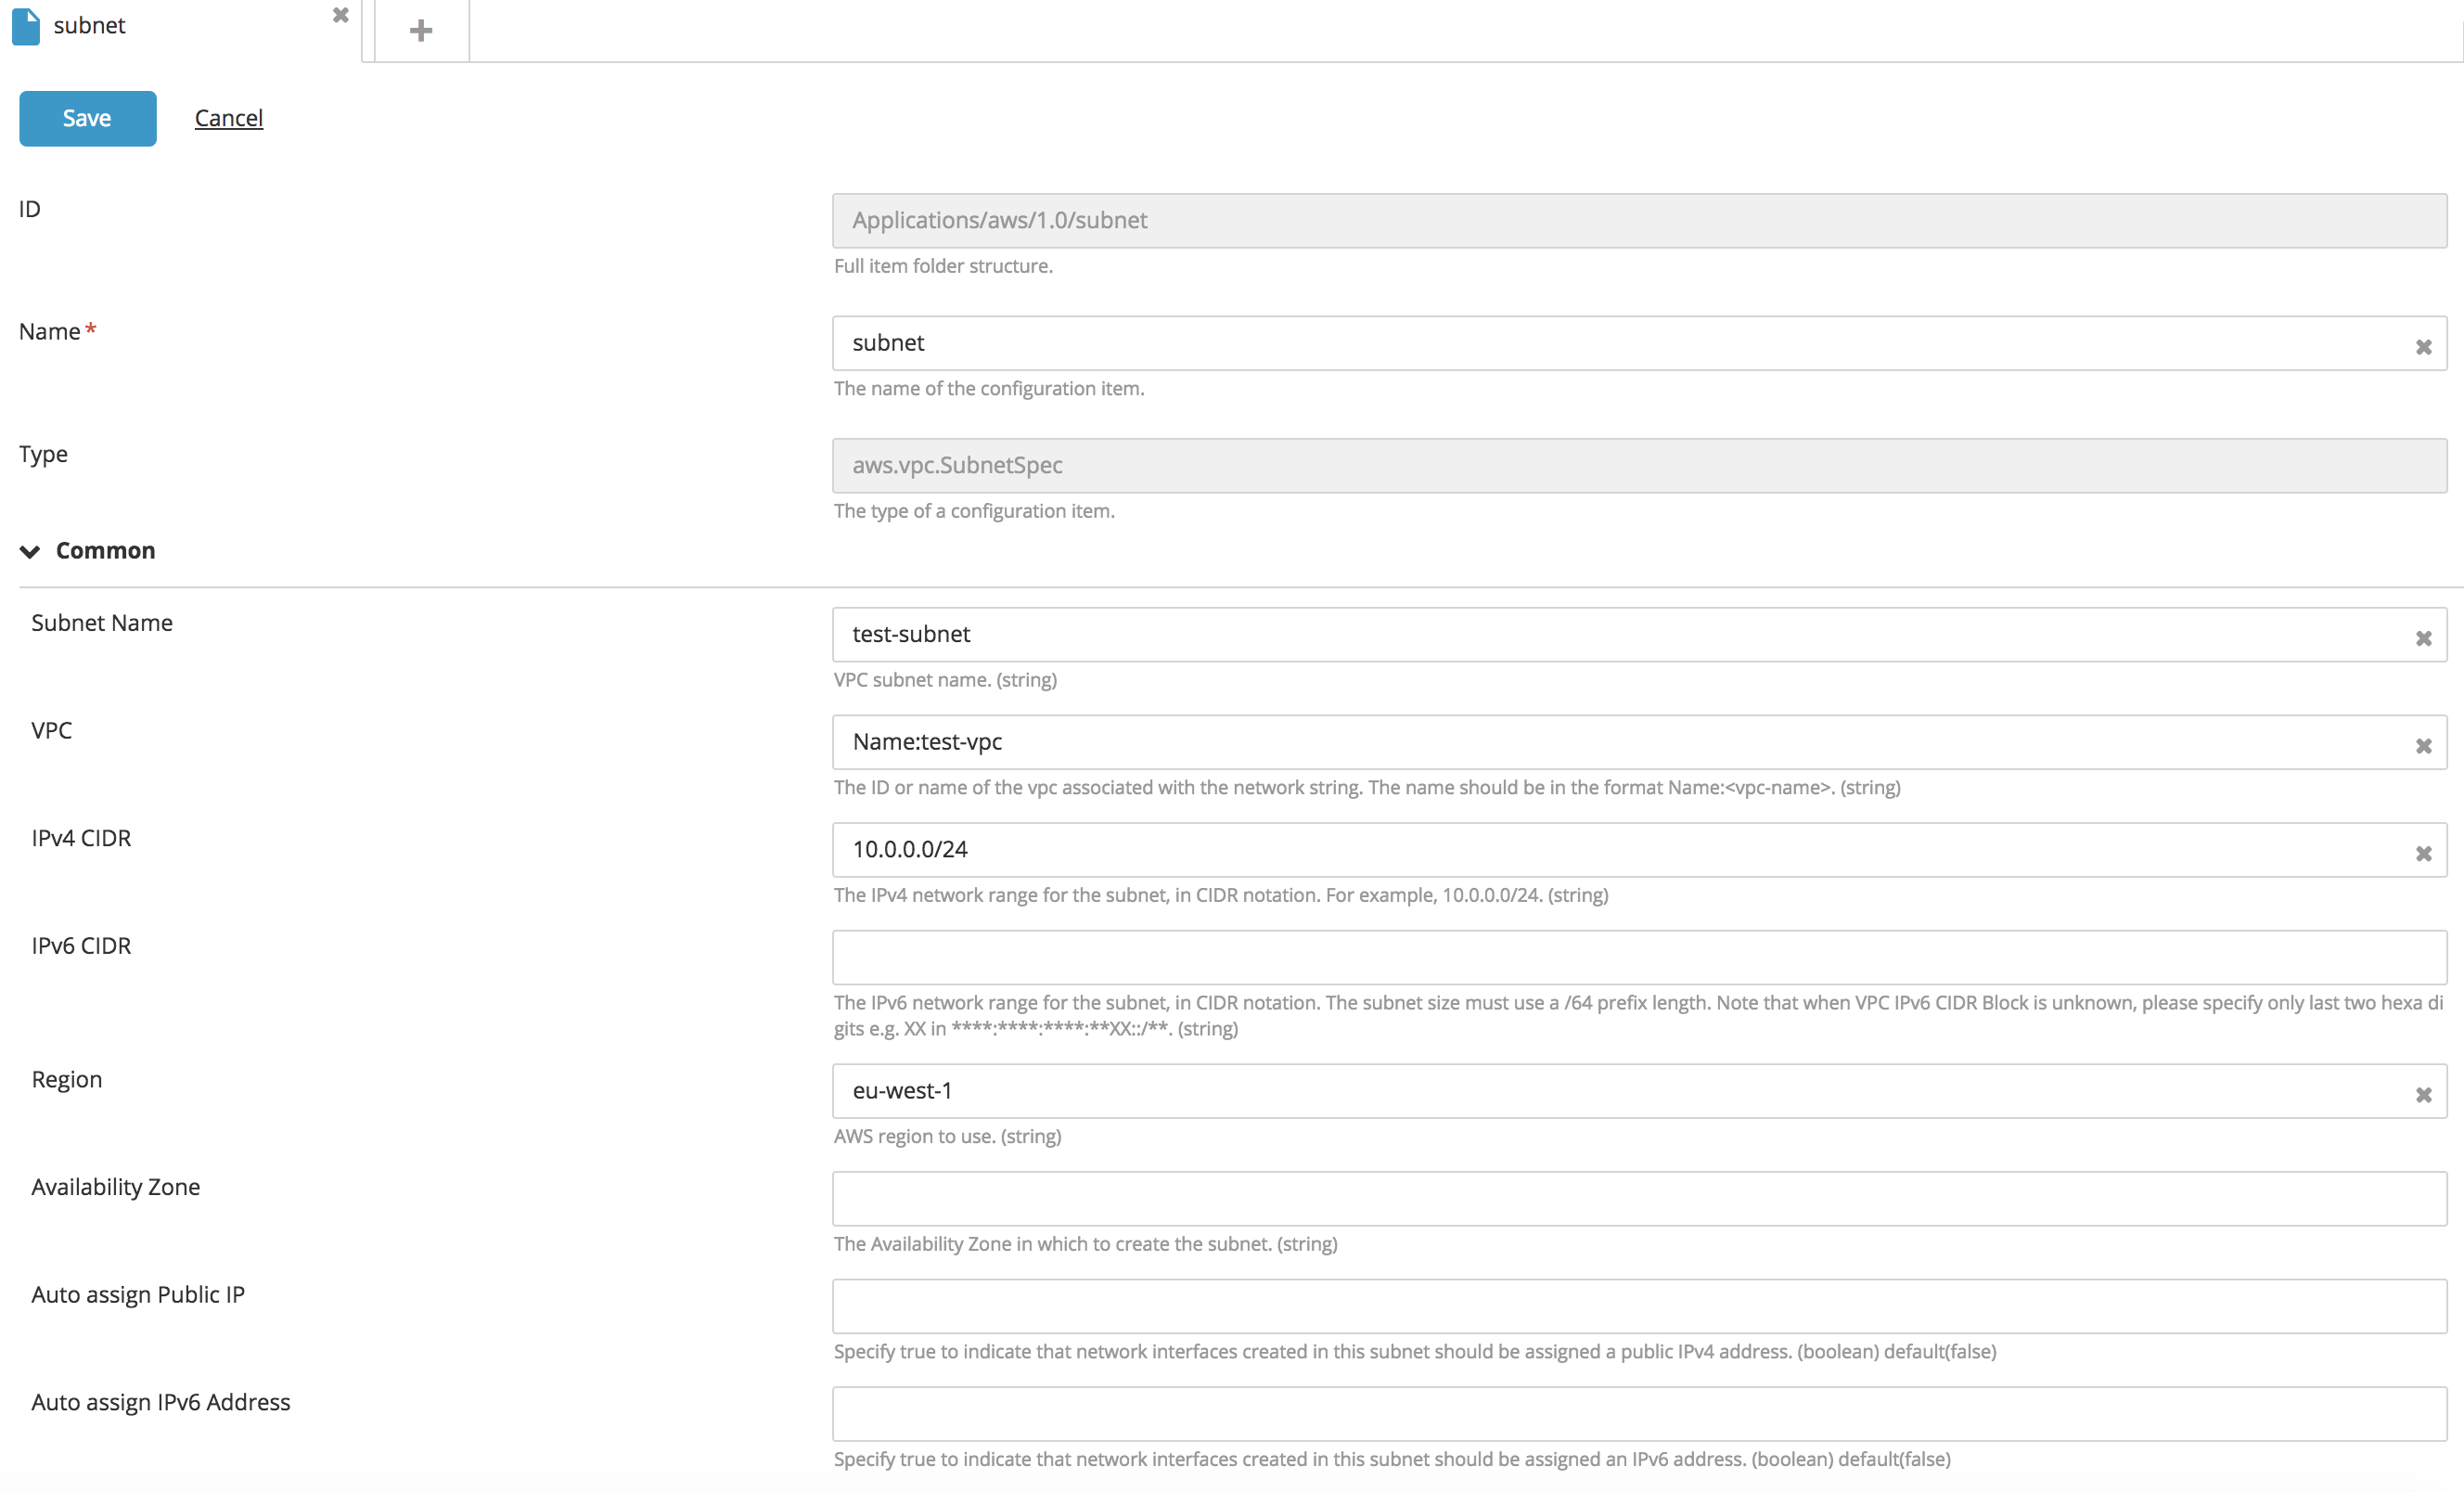
Create a new SubnetSpec* type CI:
- In the top navigation bar, click Explorer.
- Expand an application in the Applications list.
- Hover over a package, click
, and select New > aws > vpc > SubnetSpec.
- Fill in the following fields: Name, VPC, IPv4 CIDR, IPv6 CIDR, and Region.
- Click Save.
Notes:
- IPv4 CIDR and IPv6 CIDR represent the IP allocated to the subnet and is a unique subset of the target VPC.
- A VPC can be referred to by its VPC ID if the VCP already exists on AWS, or by Name:/
if the VPC belongs to the package that is to be deployed.
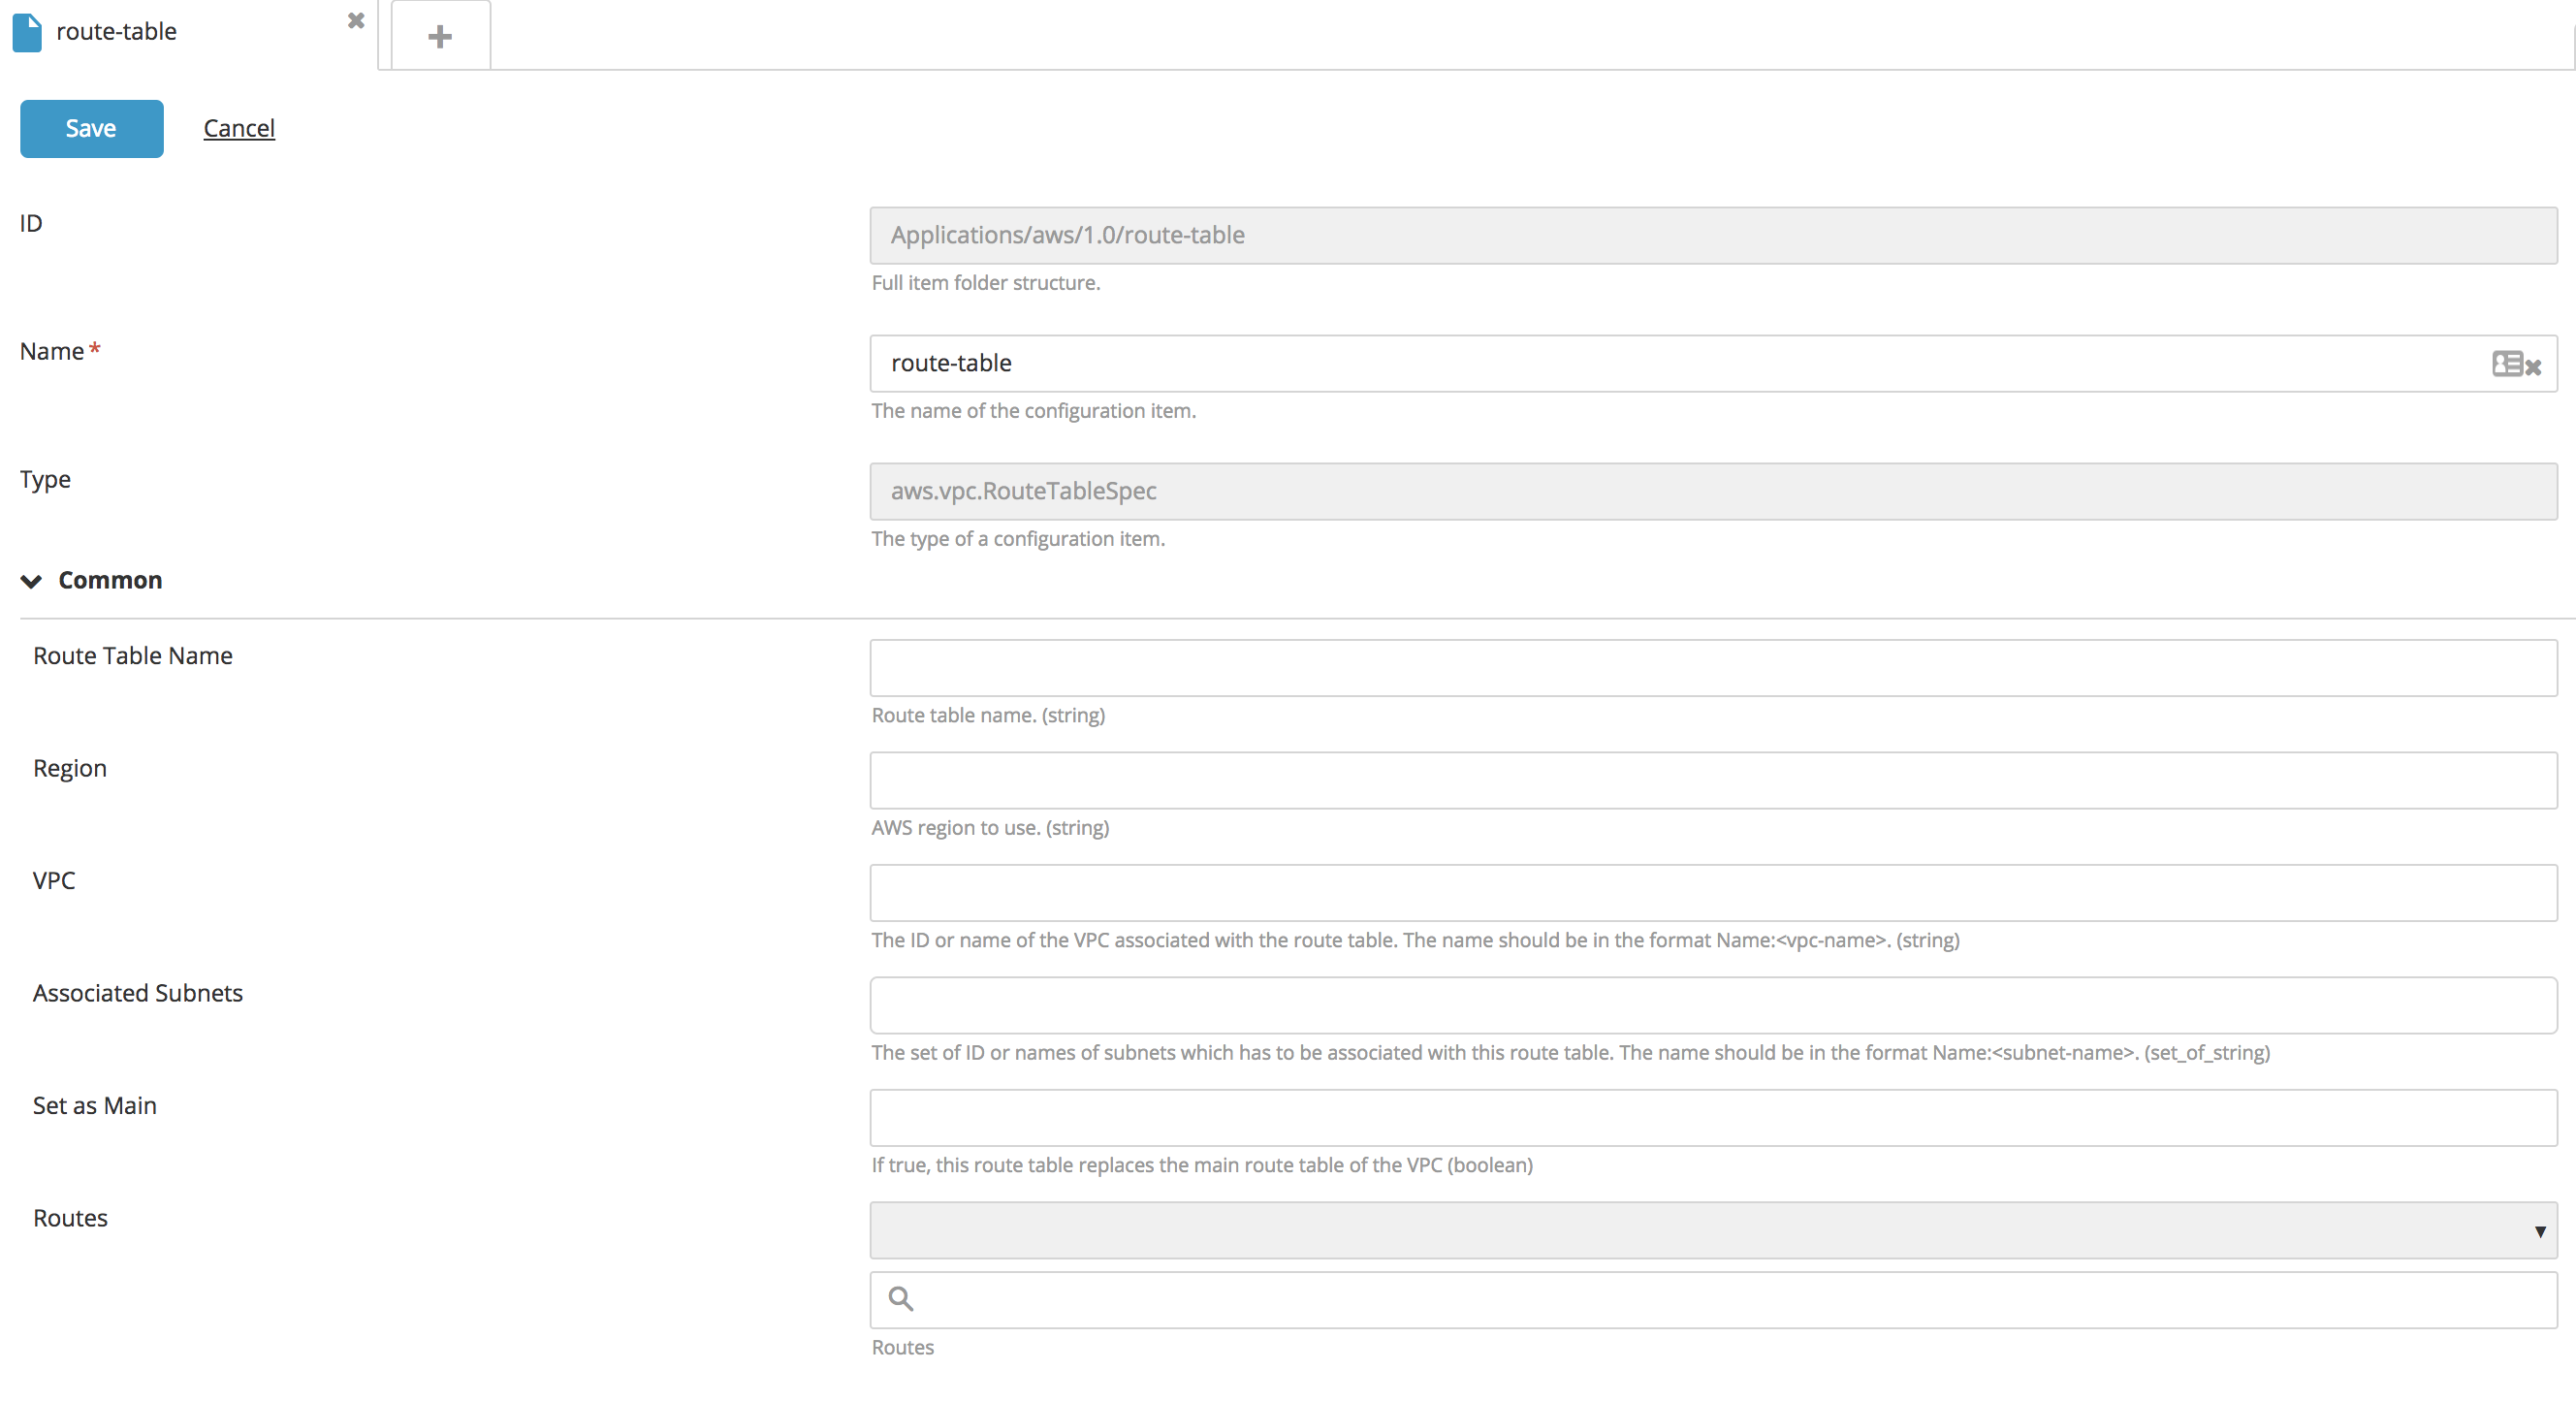
Create a new RouteTableSpec type CI:
- In the top navigation bar, click Explorer.
- Expand an application in the Applications list.
- Hover over a package, click
, and select New > aws > vpc > RouteTableSpec.
- Fill in the following fields: Name, VPC, Associated Subnets, and Routes.
- Click Save.
Notes:
-
A VPC can be referred to by its VPC ID if the VCP already exists on AWS, or by Name:/
if the VPC belongs to the package that is to be deployed. -
Subnets can be referred to by their subnet ID if the subnet already exists on AWS, or by Name:/
if the subnet belongs to the package that is to be deployed. -
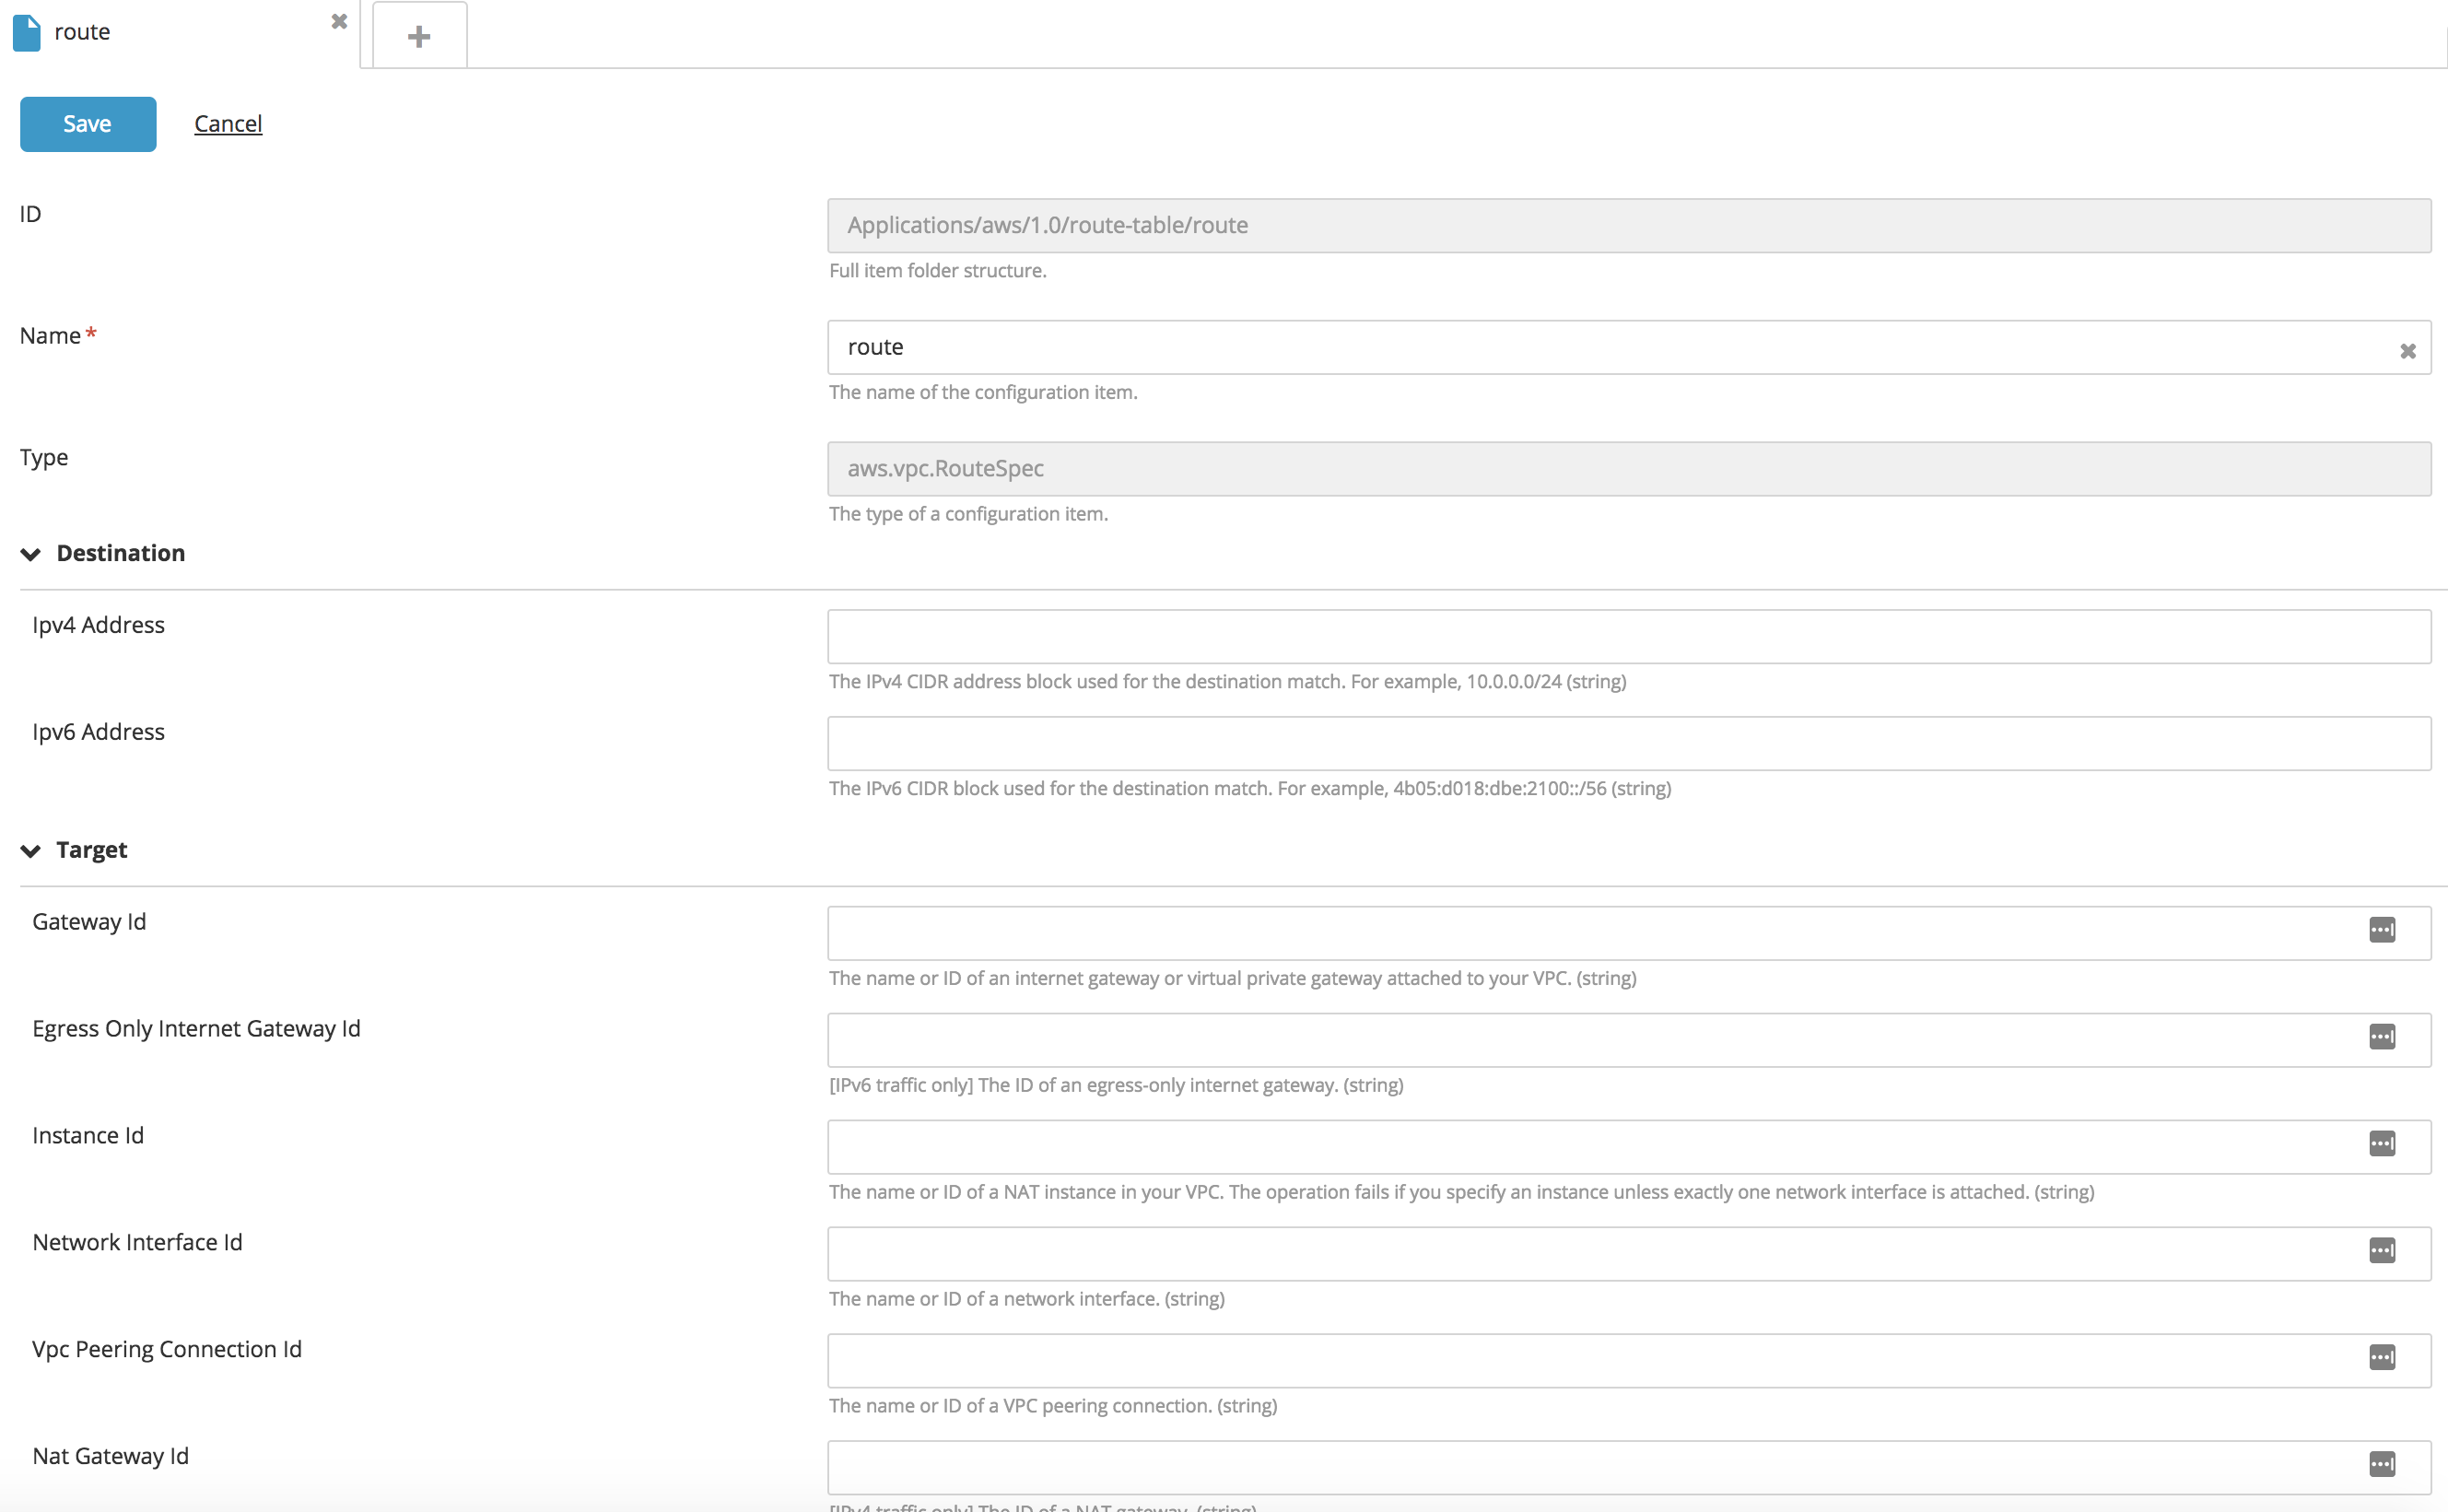
You can add a route as an embedded configuration item under Route Table with the following properties:
- Internet Gateway
- NAT Device
- Virtual Private Gateway
- VPC Peering Connection
- ClassicLink
- VPC Endpoint
- Egress-Only Internet Gateway
Create EC2 instances
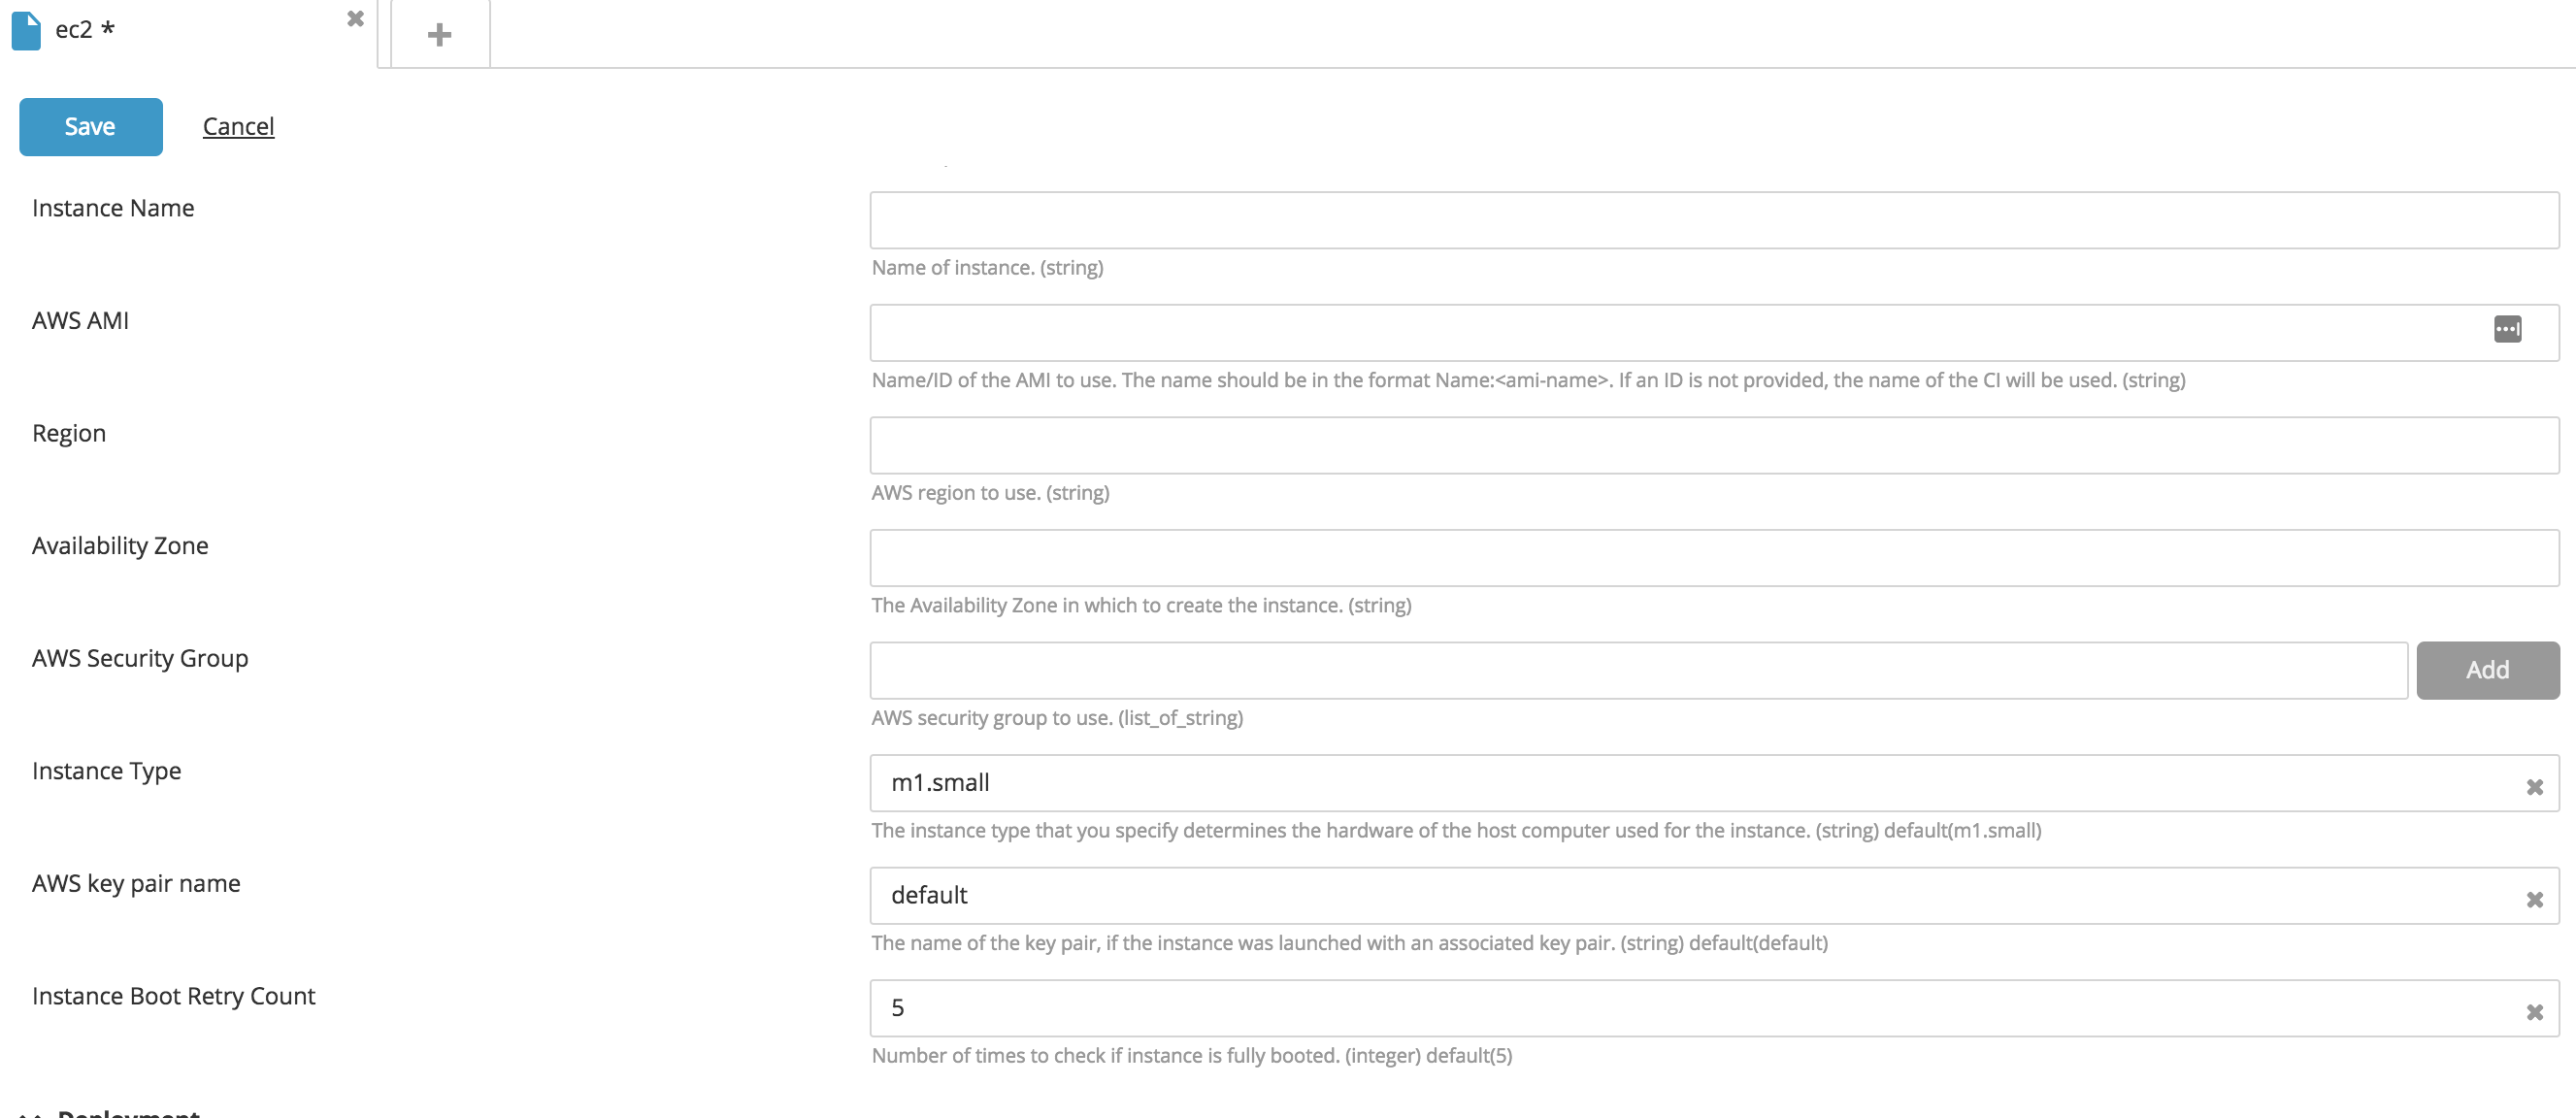
Create a new ec2.InstanceSpec type CI:
- In the top navigation bar, click Explorer.
- Expand an application in the Applications list.
- Hover over a package, click
, and select New > aws > ec2 > InstanceSpec.
- Fill in the following fields: Name, AMI name, Region, and Instance Type.
- To attach the IAM Role to the EC2 instance, specify the IAMRole property.
- Click Save.
Notes:
- You can refer to a subnet by its subnet ID if it already exists on AWS, or by Name:/
if the subnet belongs to the package that is to be deployed. - The AWS key pair name associates the existing key pair name with the EC2 instance to be created, and is used to access the EC2 instance via SSH.
- Creating or destroying an EC2 instance behind a proxy server requires setting the
http_proxyandhttps_proxyenvironment variables in addition to providing proxy configuration on the Deploy infrastructure.
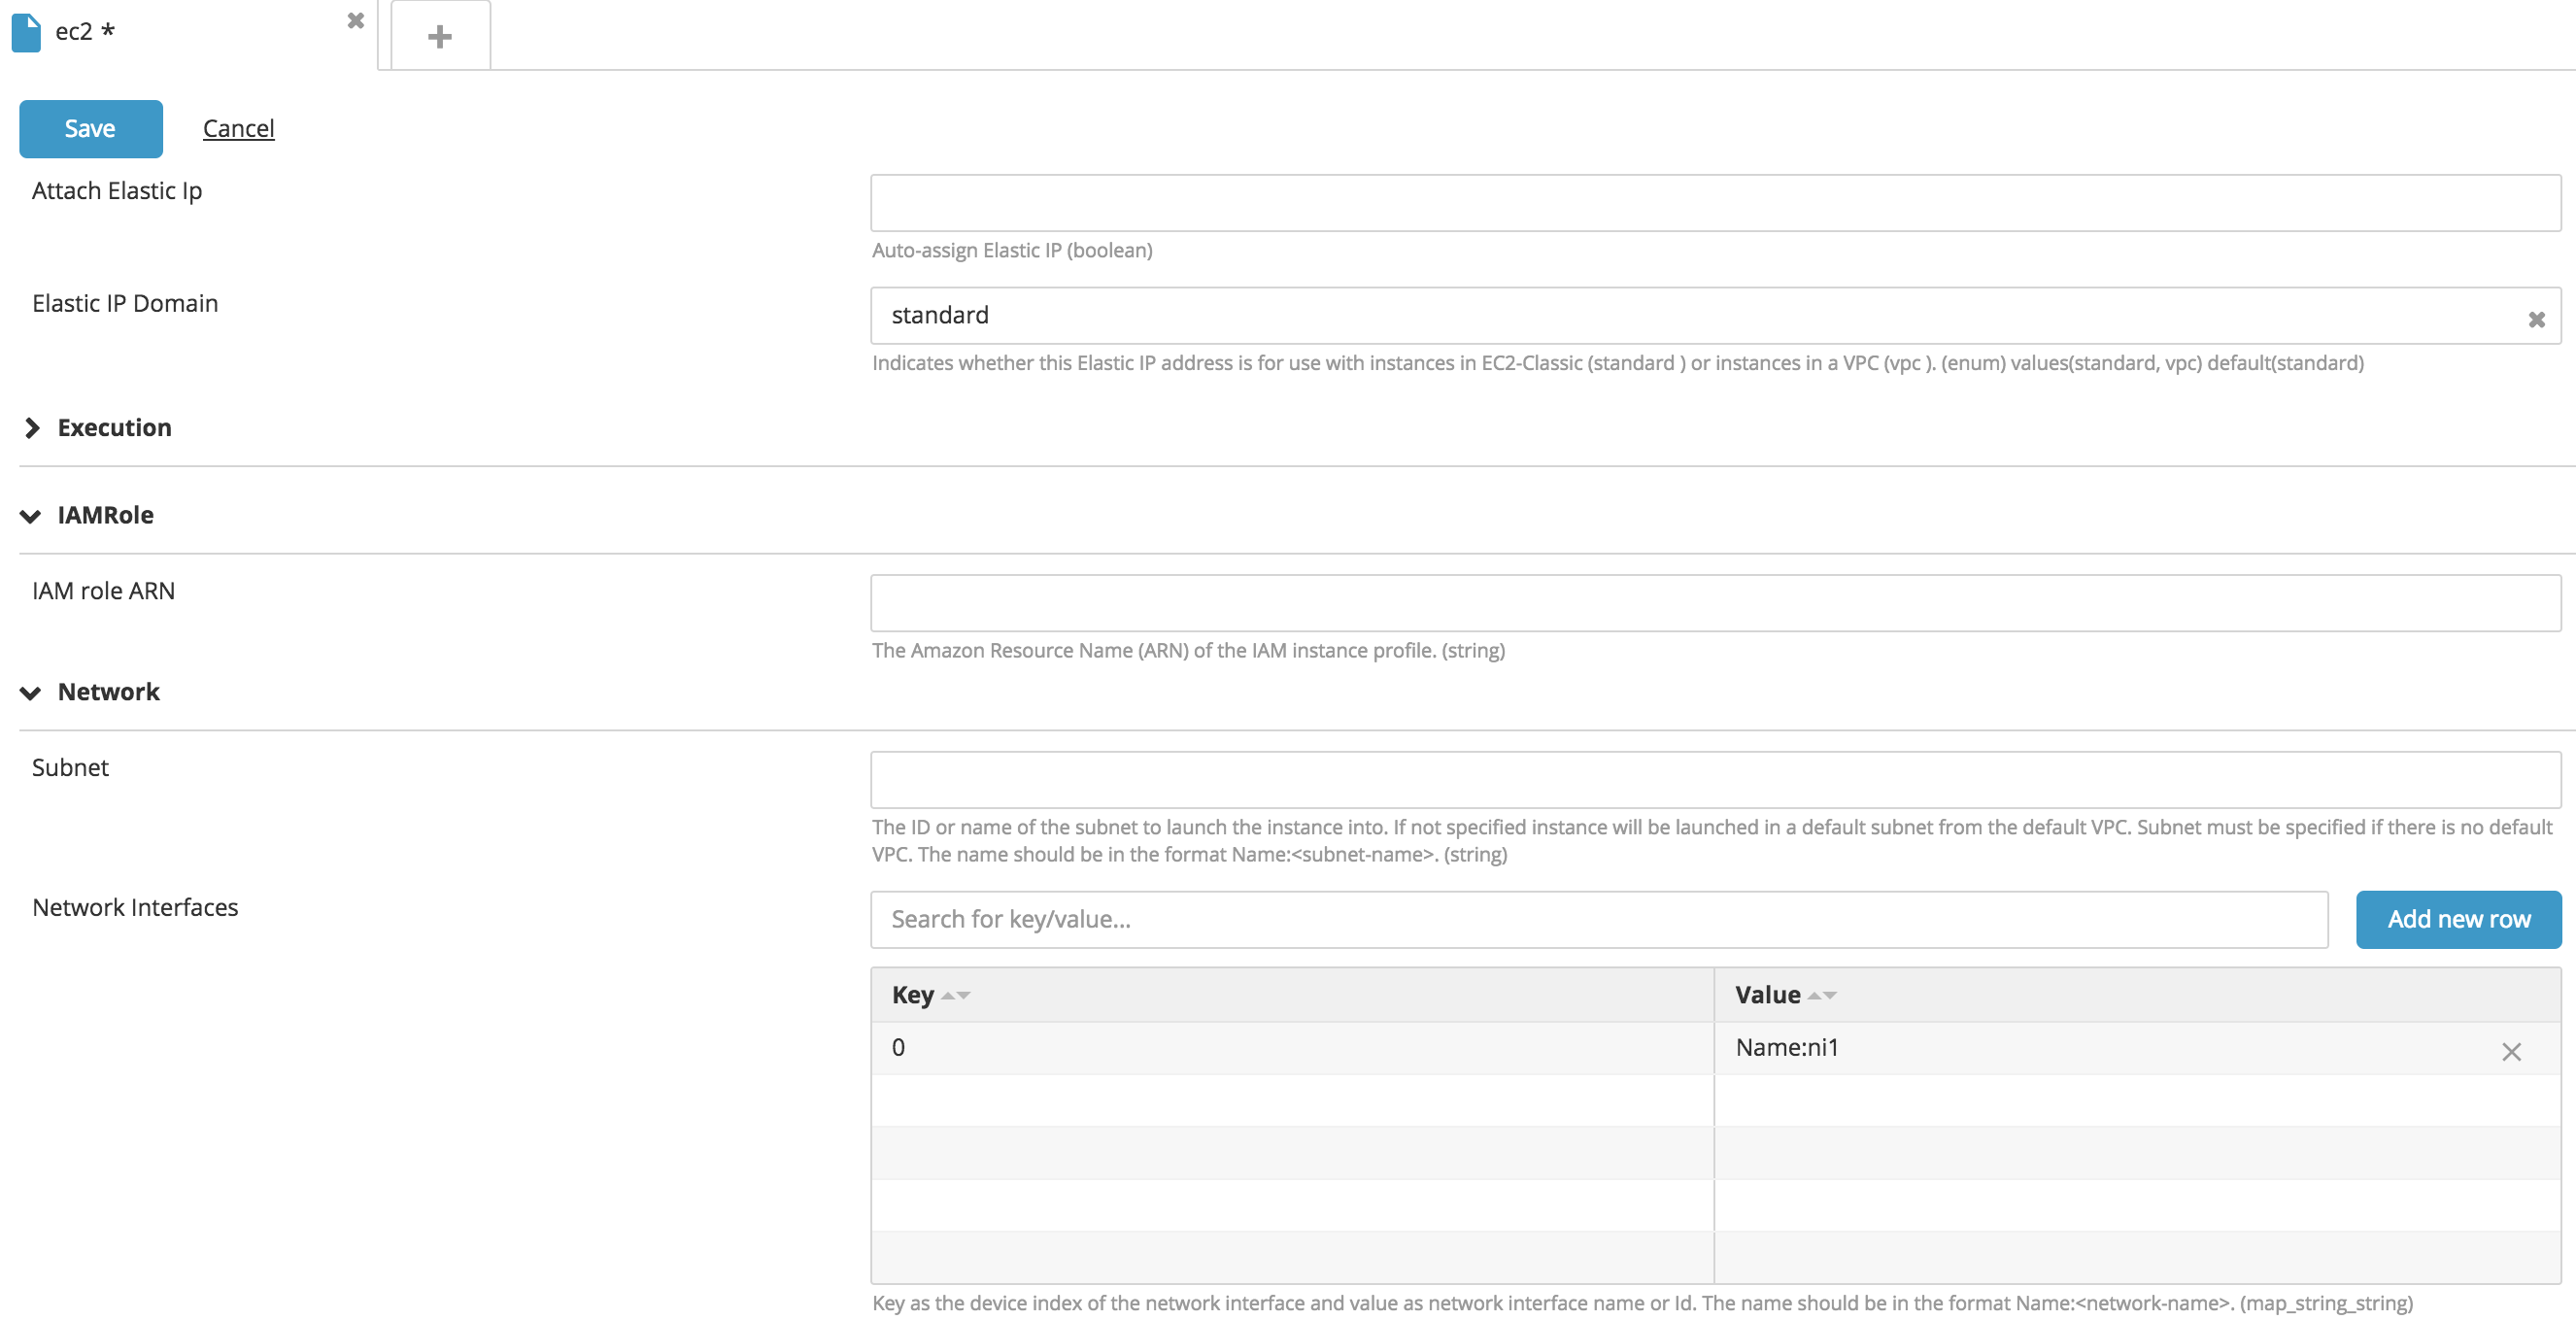
Attach a Network Interface to EC2 instances
You can attach multiple network interfaces to an EC2 instance by specifying the Network Interface map property. The key column is the index, and the value is the network interface ID, if the network interface exists on AWS, or Name:/
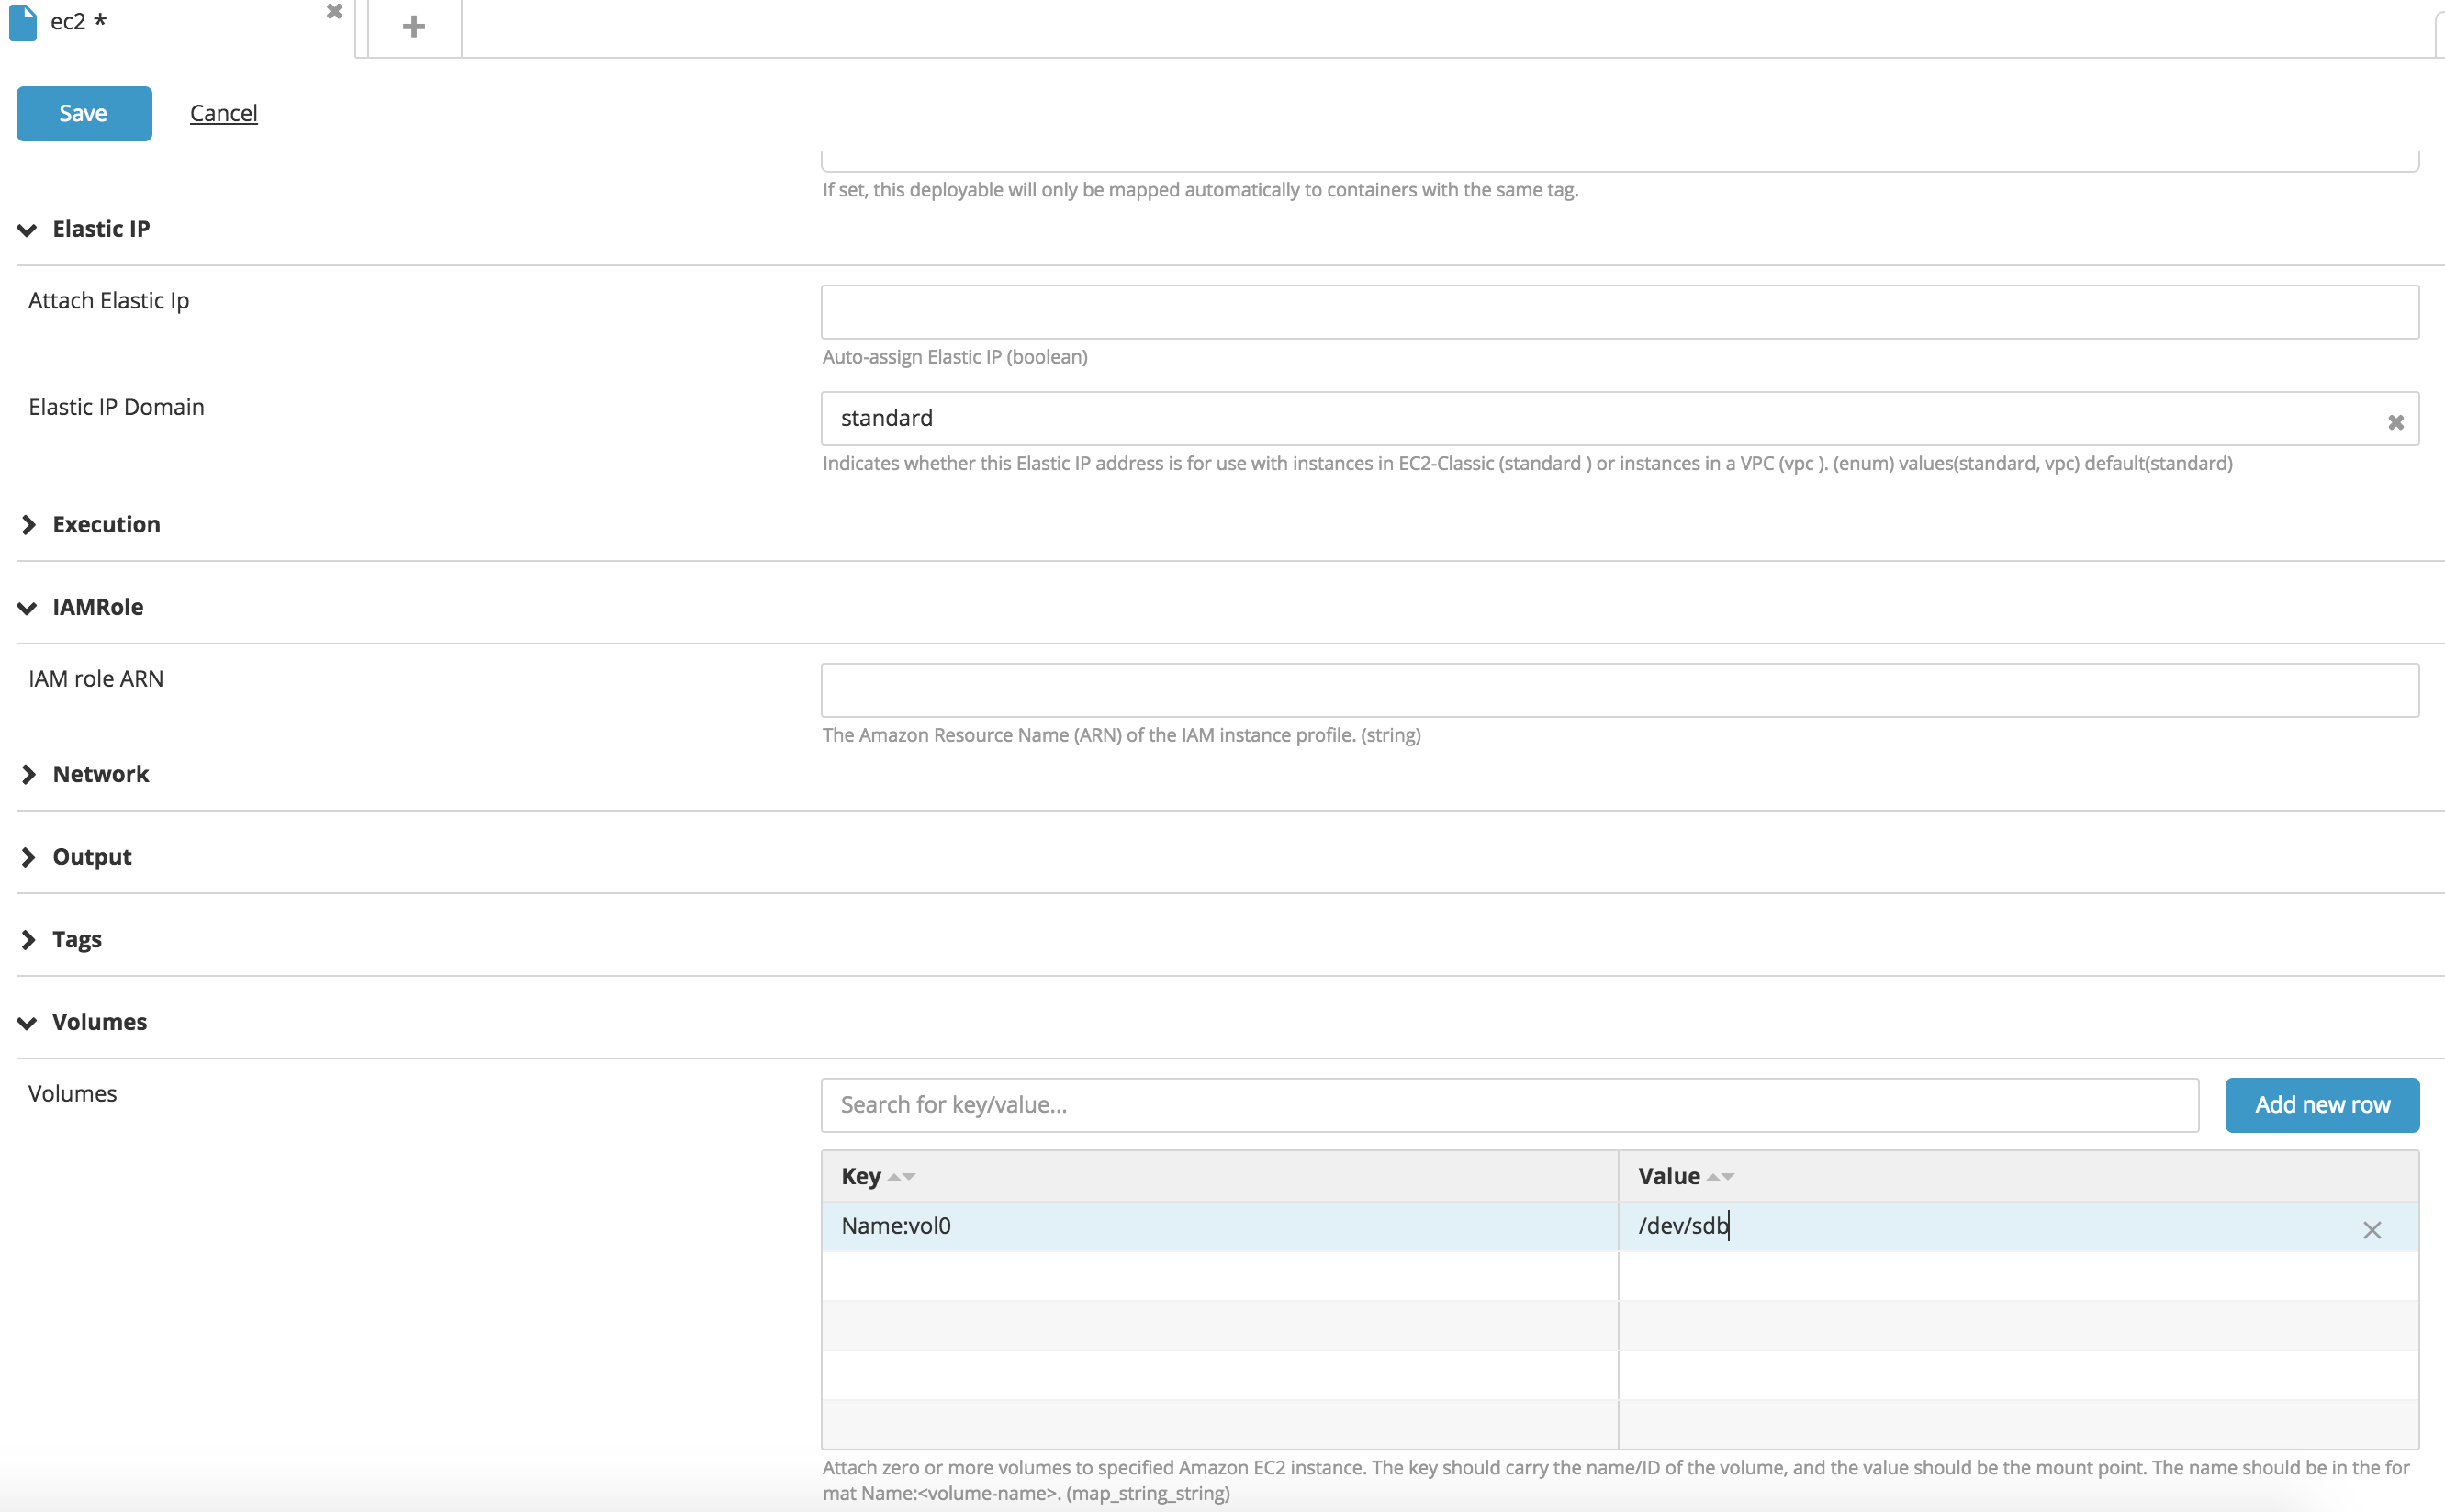
Mount volumes on EC2 instances
You can mount multiple volumes to an EC2 instance by specifying the Volumes map property. The key column is the volume ID if the volume exist on AWS, or Name:/
Creating Lambda function and run it in response to HTTP requests using Amazon API Gateway
Creating AWS Lambda function
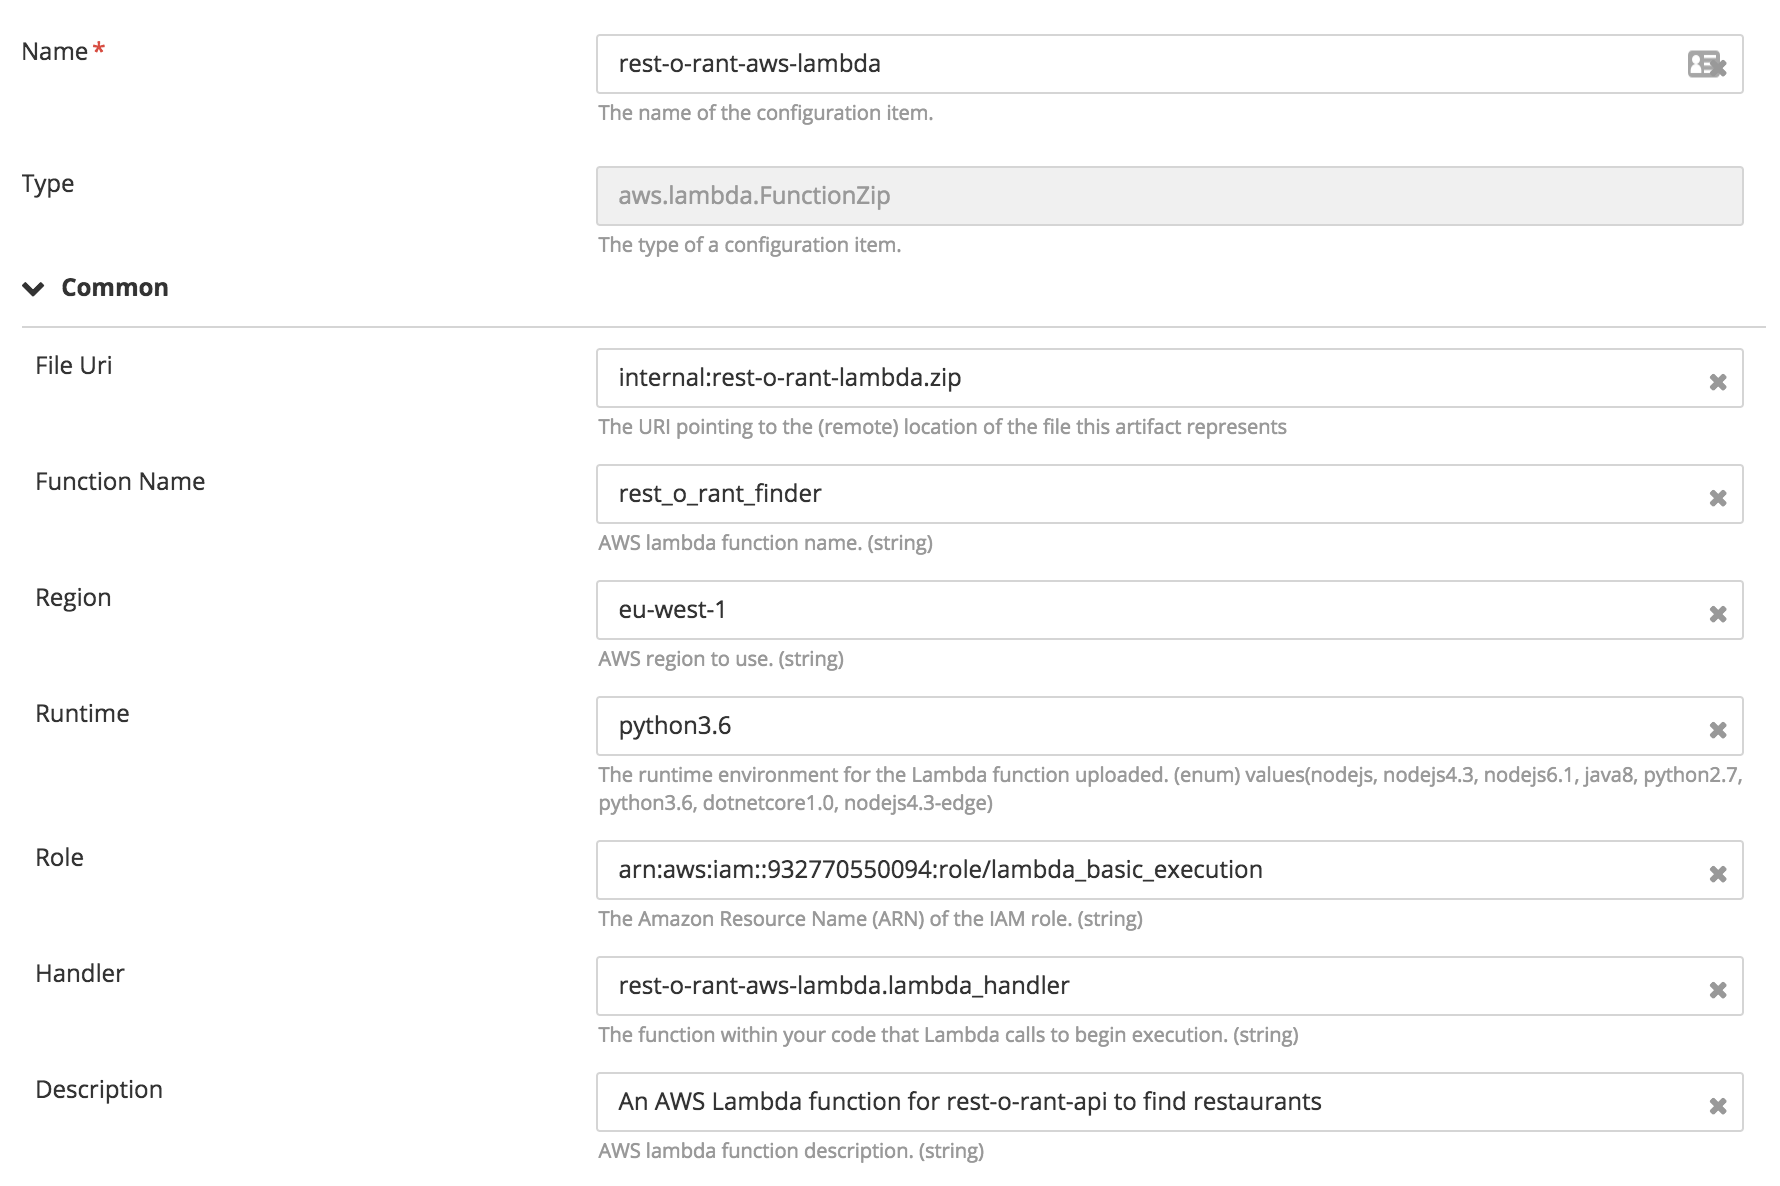
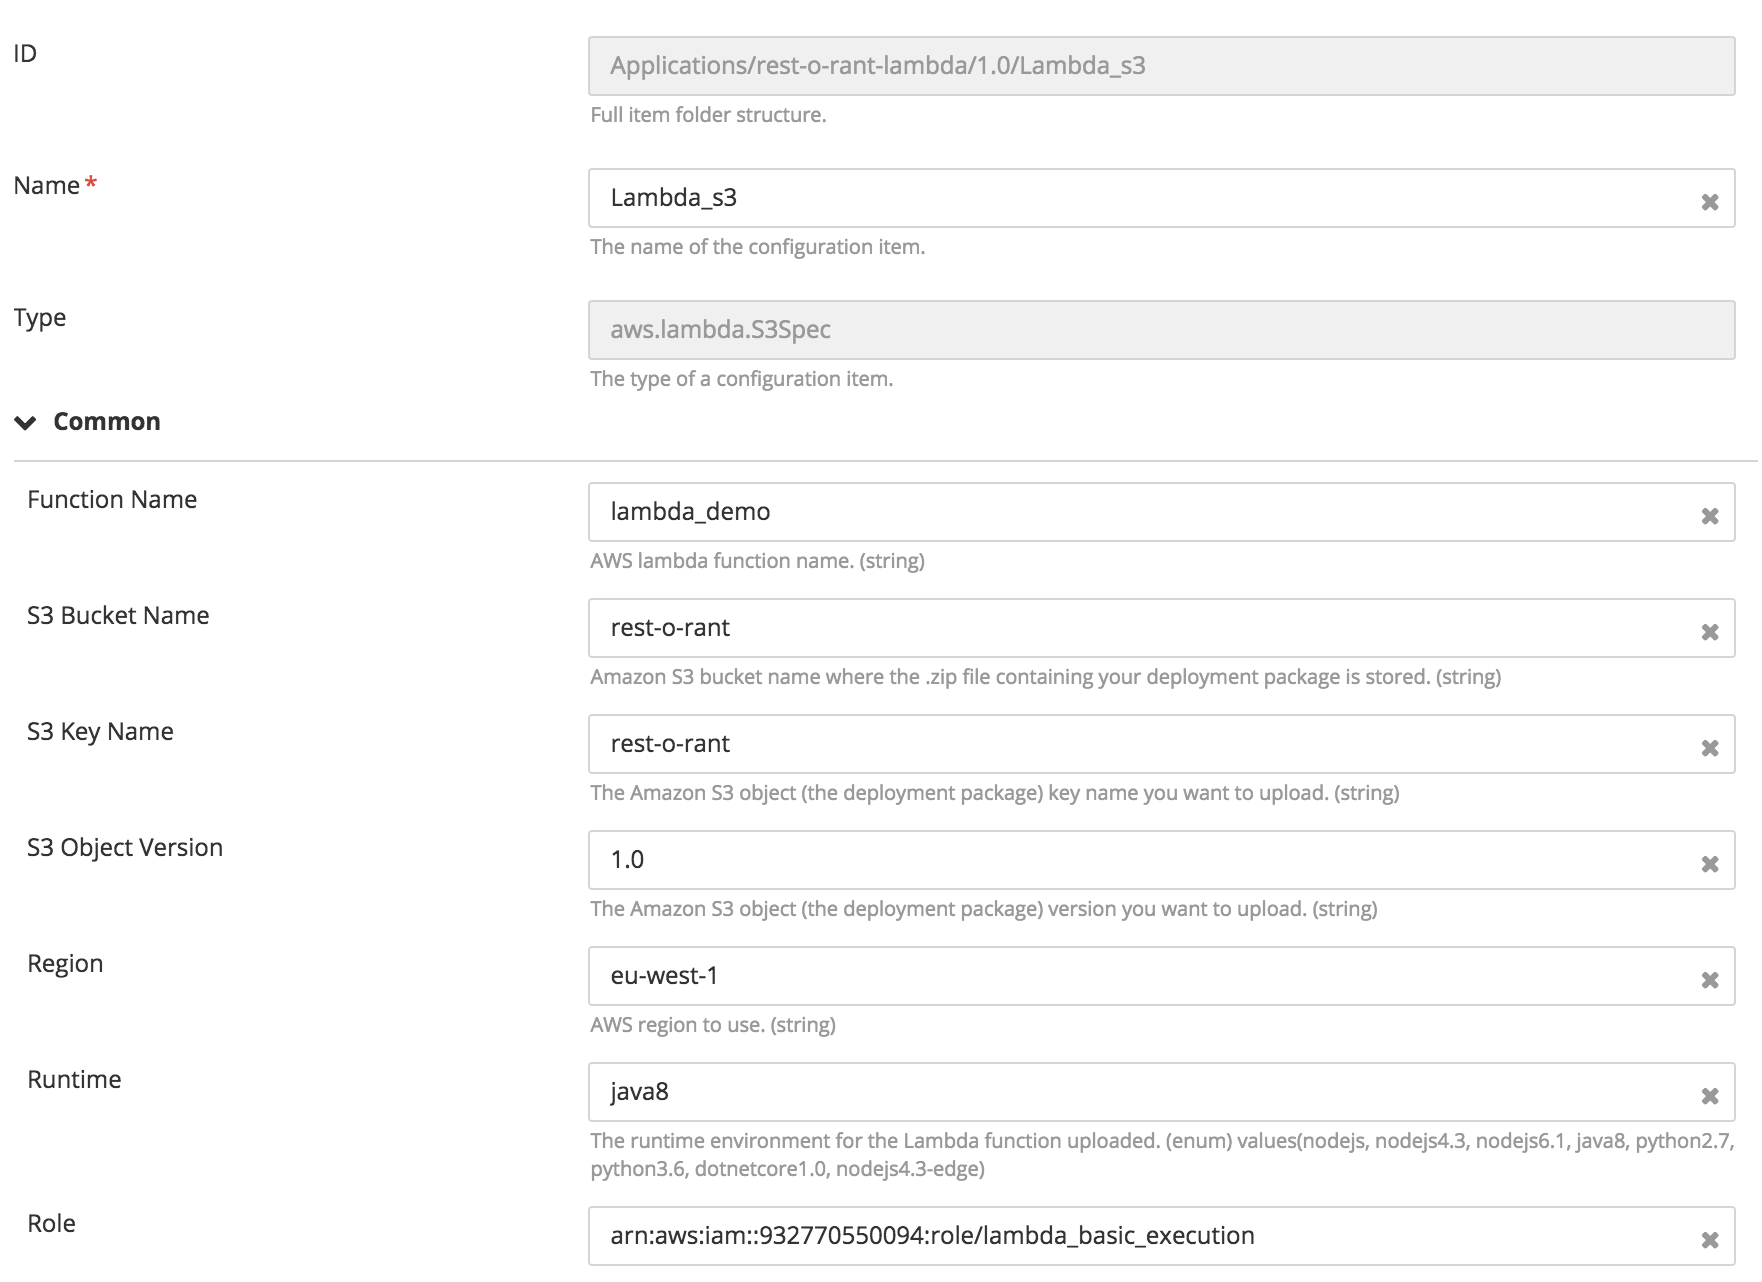
There are two ways to create a Lambda function. The first is by providing the complete code in zip format and to use the aws.lambda.Function type, and the second is to upload the code to s3 and use the aws.lambda.Function type.
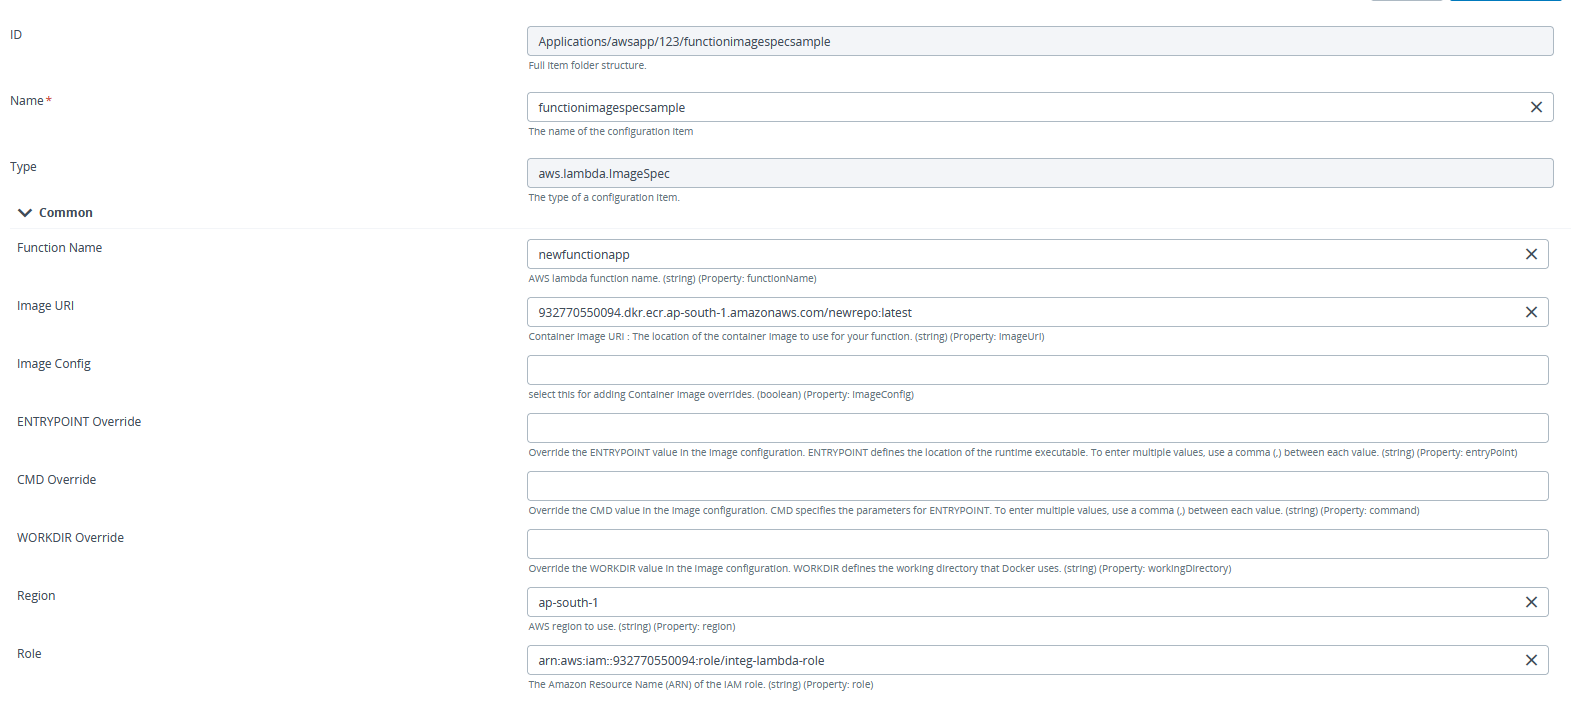
- Create an AWS Lambda function by specifying the functionName, region, runtime, role, handler.
- A role is the Amazon Resource Name (ARN) for the IAM role which has the rights to execute a Lambda function.
- Handler is the function within your code that Lambda calls to begin execution.
- Runtime is the runtime environment for the Lambda function uploaded (Example: python2.7, java8)
- If Lambda function code is uploaded on S3 we need to provide bucketName, s3Key, and s3ObjectVersion in addition to other properties.
- If Lambda function code is uploaded as an Image in Amazon Elastic Container Registry, then we need to provide functionName, imageUrl, region, and role in addition to other properties.
Create API Gateway
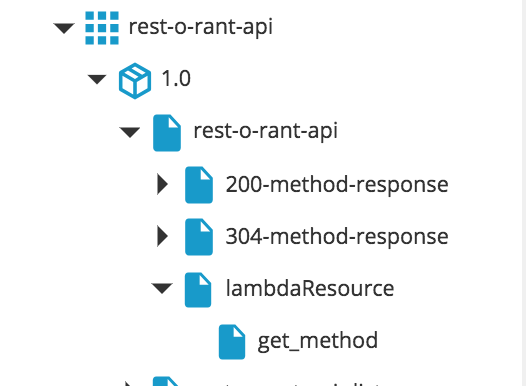
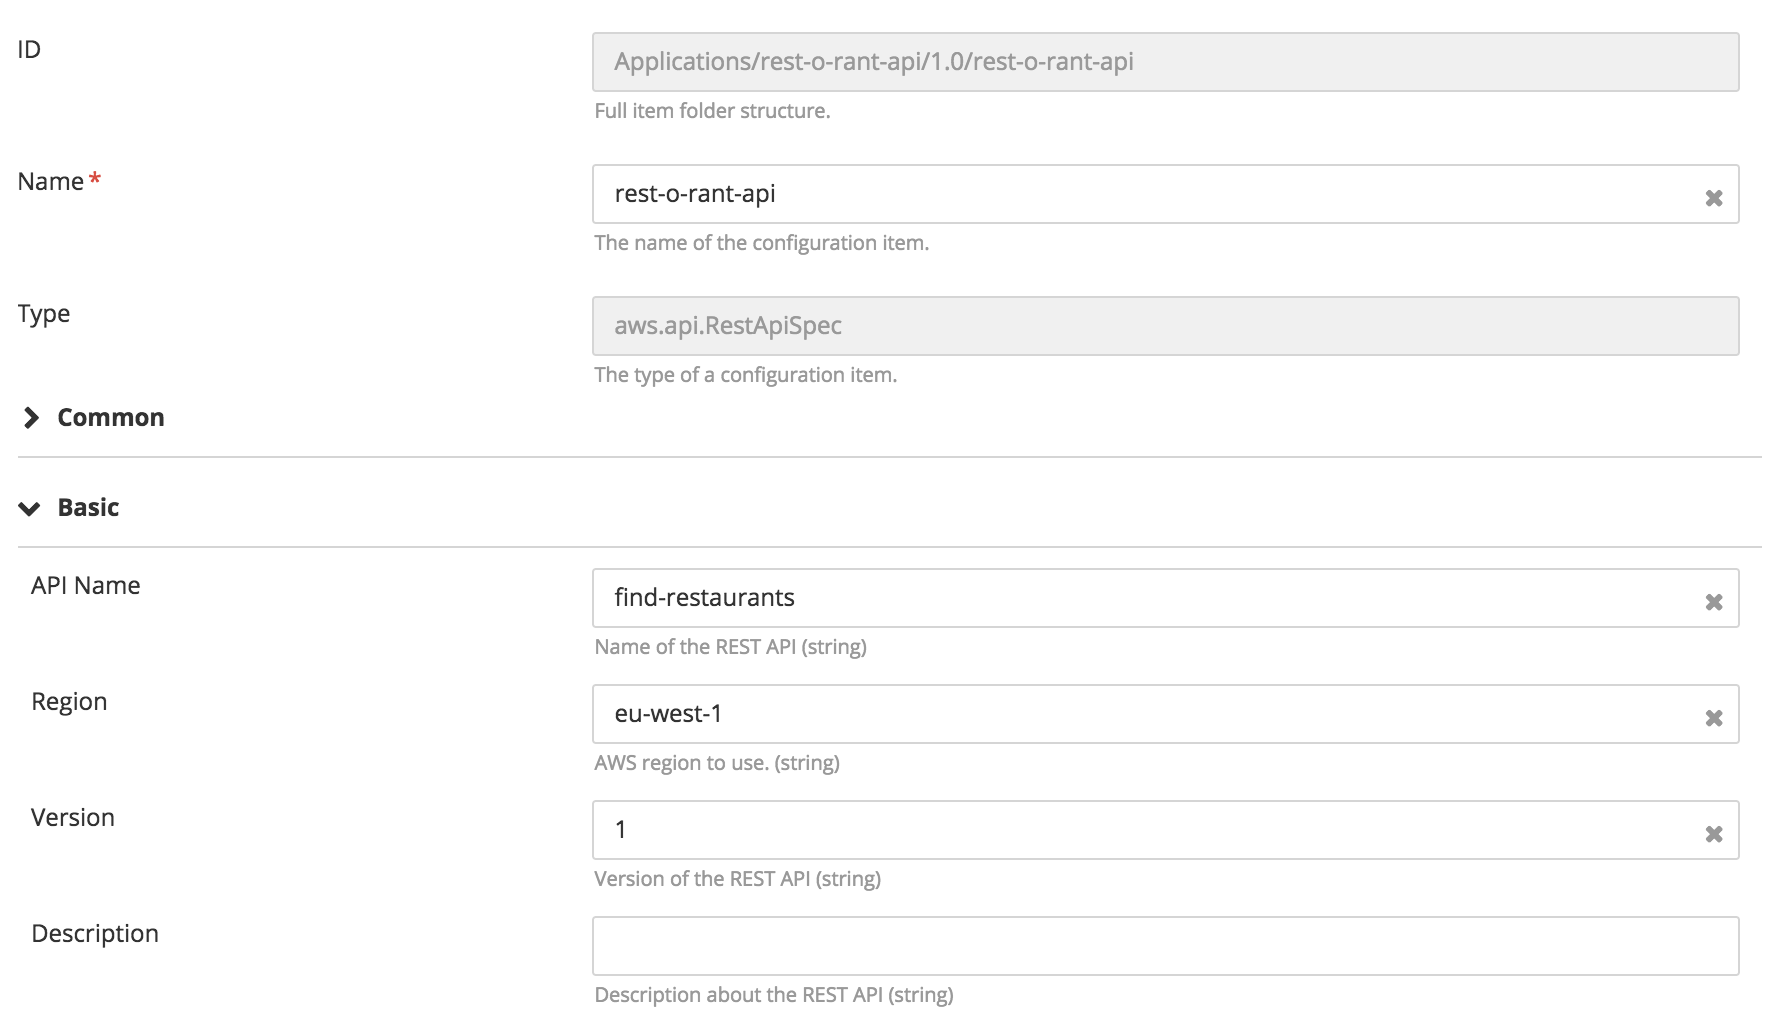
To provision an AWS API Gateway resource on AWS Cloud choose aws.api.RestApiSpec
- Create an
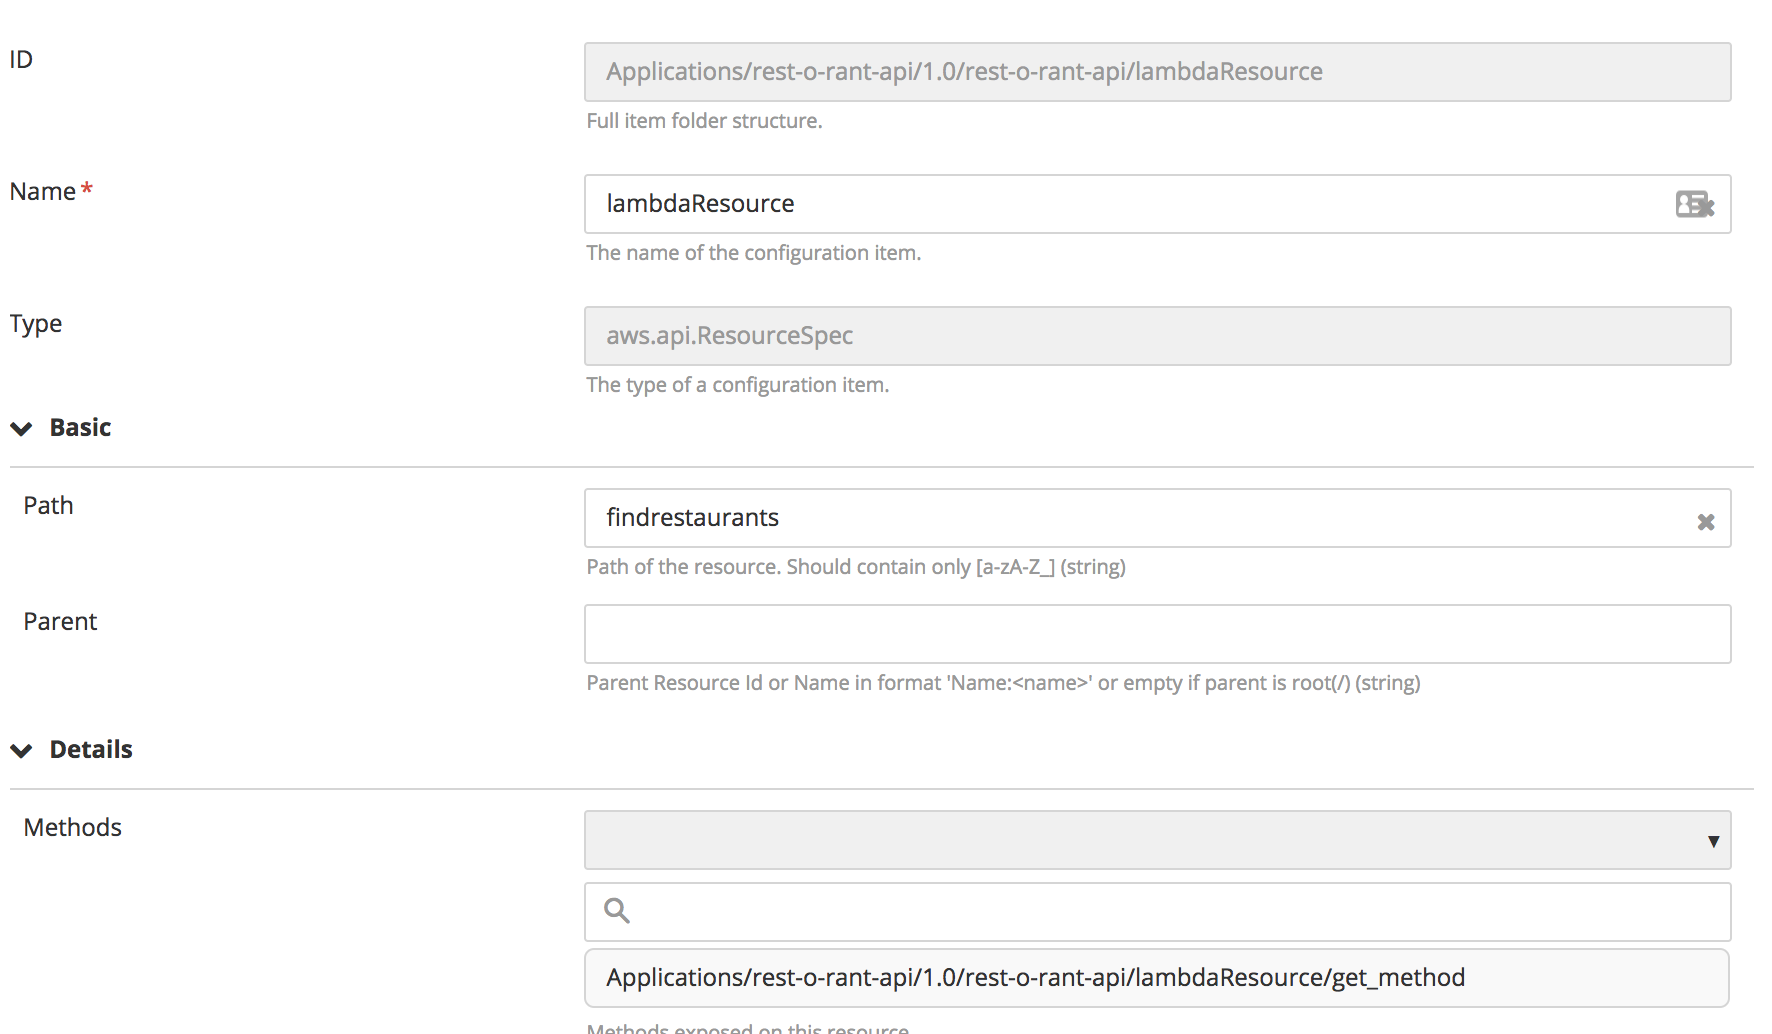
aws.api.RestApi, specify the apiName and region. - To bind a Lambda function to
aws.api.RestAPI, create aaws.api.ResourceSpec. Create aaws.api.ResourceSpec, specifying the path, parent, and methods. - Map multiple HTTP methods to
aws.api.ResourceSpecusingaws.api.MethodSpec. - To use the Lambda function with the API gateway in
aws.api.MethodSpec:- In the Type of integration field, select AWS.
- In the URI field, enter the Lambda name in the following format: Name:///
///.

Create and upload artifacts to Amazon S3
The Deploy AWS plugin lets you create and manage Amazon S3 artifacts, such as folders (aws.s3.Folder), files (aws.s3.File), buckets (aws.s3.BucketSpec), and archives (aws.s3.Archive).
Create a folder (aws.s3.Folder) CI in Digital.ai Deploy
-
In Deploy, go to desired Application.
-
Hover over a package, click
, and select> New > AWS > S3 > Folder.
-
Configure the
aws.s3.FolderCI:- ID: Displays the full folder structure.
- Name: Specify the name of the folder.
- Type: The type of CI. In this case, it is set to
aws.s3.Folder.
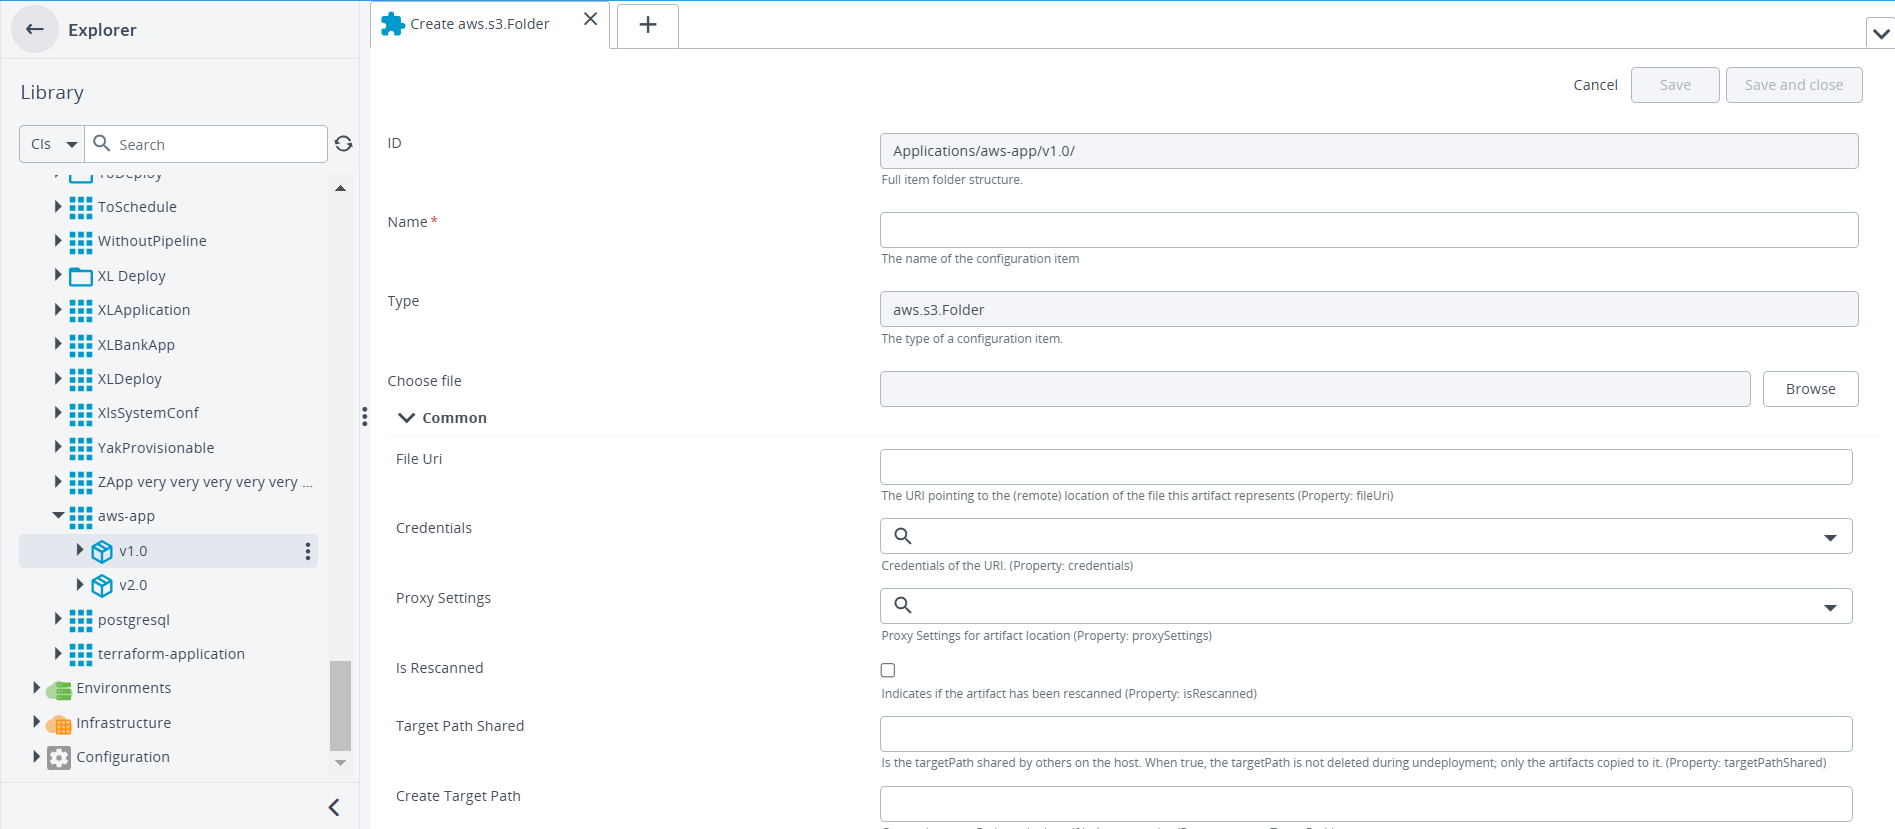
The following table provides overview of CI properties with default values:
| Category | Property | Description | Default Value |
|---|---|---|---|
| Common Properties | File URI | Provide the URI pointing to the folder in the Amazon S3 bucket. | None |
| Credentials | Associate credentials for accessing the S3 bucket. | None | |
| Proxy Settings | If a proxy is required to access the S3 folder, specify the proxy configuration. Ensure the proxy is pre-configured in Deploy. | None | |
| Is Rescanned | Select this option if the folder should be marked as rescanned for versioning or updates. | False | |
| Create Target Path | Creates the target path on the host if it doesn't exist. | False | |
| Target Path Shared | Indicate whether the folder is shared between multiple deployments. | False | |
| ACL (Access Control List) | Define the permissions for accessing the folder in Amazon S3 (e.g., public-read, private, authenticated-read, etc.). | None | |
| Sync Folder | Enable or disable syncing the remote folder in S3 with Deploy. Note: When enabled, the plugin uses file size and checksum comparison to upload only files that have changed. | False | |
| Remove Deleted Files on Sync | Whether to delete files from S3 if they are removed locally. Note: When enabled, the plugin removes files from the S3 bucket that have been deleted in the source during sync. | False | |
| Deployment | Tags | Assign tags (key-value pairs) to the CI for filtering, automation, and deployment management. | None |
| Checksum | Used to detect differences in the artifact. If not provided, it will be calculated automatically by Deploy. (Property: checksum) | None | |
| Placeholders | Replace Placeholders | Select this option to scan and replace placeholders in the artifact during the deployment process. | False |
| Pre-Scanned Placeholders | Indicate if placeholders were scanned during artifact packaging. If selected, placeholder scanning is skipped during deployment. | False | |
| Placeholders | Review and manage placeholders in the artifact. You can add new placeholders manually or filter by name. | None | |
| Exclude File Names Regex | Specify a regular expression to exclude specific files from placeholder scanning. | None | |
| File Encodings | Define file encodings for placeholder processing: | None | |
- Key: Regex pattern for matching file names (e.g., .+\.properties for .properties files). | |||
- Value: File encoding to apply (e.g., ISO-8859-1). |
Similarly, you can configure the aws.s3.File and aws.s3.Archive CIs in Deploy to manage individual files and compressed archives, for uploading to Amazon S3.
Create a bucket (aws.s3.BucketSpec) CI in Digital.ai Deploy
- In Deploy, go to desired Application.
- Hover over a package, click
, and select> New > AWS > S3 > BucketSpec.
- Configure the
aws.s3.BucketSpecCI:- ID: Displays the full folder structure.
- Name: Specify the name of the folder.
- Type: The type of CI. In this case, it is set to
aws.s3.BucketSpec.
| Category | Property | Description | Default Value |
|---|---|---|---|
| Common | AWS S3 Bucket Name | The name of the S3 bucket. | None |
| Region | AWS region to use. | None | |
| Policy | The policy attached to the bucket. | None | |
| Deployment | Tags | Key-value pairs to categorize and organize the bucket and its resources. | None |
| Deployment Group Number | Specifies a group number for organizing deployments. If the group orchestrator is enabled, all containers within the same group number are deployed at the same time. | None | |
| Deployment SubGroup Number | Defines a subgroup within a deployment group. Containers with the same subgroup number are deployed at the same time if the subgroup orchestrator is enabled. | None | |
| Deployment SubSubGroup Number | Specifies a sub-subgroup for even finer granularity within a deployment group. Containers with the same sub-subgroup number are deployed together if the sub-subgroup orchestrator is enabled. | None | |
| Logging | Logging | Enables logging for the bucket to capture detailed access logs. | false |
| Target Bucket | Specifies the bucket where access logs are stored. | None | |
| Target Prefix | Defines the key prefix for log objects stored in the target bucket. | logs/ | |
| Output | Endpoint | The region-specific website endpoint URL of the bucket. | None |
| Website Hosting | Static Website Hosting | Enables the bucket to serve as a static website. | false |
| Index Document | A suffix that is appended to a request that is for a directory on the website endpoint. Required if staticWebsiteHosting is enabled. | None | |
| Error Document | Defines the custom error page to display for 4XX errors when hosting as a static website. Required if staticWebsiteHosting is enabled. | None |
Use AWS with SSO Federated Login Credentials
You can configure login to AWS with SSO (Single Sign On) instead of an AWS AccessKeyID and SecretKey.
- Deploy will communicate with the Active Directory Federation Services (ADFS) server and the AWS STS service to retrieve a temporary access token for performing operations.
- This access token is associated with a particular AWS IAM Role and carries its permissions.
- This token expires in 15 minutes, but a new token is retrieved for each resource that is deployed.
- ADFS will send a SAML 2.0 XML assertion to AWS to tell it what role the incoming user should have and to validate the authentication request.
- Only Microsoft ADFS 3.0 is currently supported.
Configuration requirements
- The AWS STS Service must be enabled in the region in which the AWS resource is being deployed.
- ADFS and AWS must be configured to trust each other according to the following article. Note the following:
- This article is for ADFS 2.0, but there are only minor differences in the ADFS 3.0 UI.
- This article suggests using AD Groups to map to AWS Roles. A different method can be used to map a user login to a role but the resulting SAML assertion produced by ADFS must contain AWS Role ARNs as Attributes.
- When setting up the AD user, they must have the Email address field filled.
When setting up the ADFS identity provider in AWS IAM, the name of the Identity provider in AWS must match the name of the saml-provider in the SAML assertion produced. For example:
arn:aws:iam::123456789012:saml-provider/ADFS30,arn:aws:iam::123456789012:role/ADFS-
In this example, the name is ADFS30 which must match the identity provider name in AWS.
- The ADFS server produces the SAML assertions and this name should be set when setting up the claim rules in ADFS.
- Remember to replace
123456789012above with your AWS account number.
Procedure
- Create an aws.Cloud infrastructure item.
- Ignore the Access Key ID and Secret Access Key used with a normal connection and complete the authentication details in the "SSO Authentication" section.
-
The IDP URL is the URL to the ADFS 3.0 login page. For example:
https://<ADFS host name according to its SSL certificate>/adfs/ls/IdpInitiatedSignOn.aspx. -
ADFS is normally set up with an SSL certificate that specifies the hostname the ADFS server will have.
-
IDP Verify SSL: Check this option to verify the SSL certificate of the ADFS server. Uncheck if the certificate is self-signed.
-
SSO Username: AD login username. Example: bobbo@adfs.local
-
SSO Password: AD login password.
-
AWS Rolename: If the above user maps to more than one AWS role (more than one AWS role ARN in the SAML assertion), this specifies which AWS role to assume according to its role name. If there is only one role, this is field is optional as the plugin will automatically use the first one found in the SAML assertion.
For example: If the ARN of the AWS role is
arn:aws:iam::123456789012:role/ADFS-Dev, the Role name isADFS-Dev.
To check the configuration:
- Right click the aws.Cloud infrastructure item.
- Click Check Connection.
- Provide a region code to test with. This region must have the AWS STS service enabled in it. For example:
us-east-1. - Execute the task. If a failure occurs, examine the execution logs.
You have now successfully configured an AWS connection that uses SSO credentials.
Provide corporate user access to AWS Management through Active Directory Federation Services
To set up access to AWS using ADFS, configure the AWS infrastructure using SSO authentication.
