Manage Tasks
This topic explains how to create, configure, and manage AgilitySync Tasks using the Digital.ai Agility UI. Tasks automate workflows, integrate with external systems, and extend Agility functionality.
For an introduction to tasks and their capabilities, see AgilitySync Tasks. For detailed command documentation, see Task Command Reference.
Access Tasks
Navigate to Settings > Tasks to access the Tasks module.
The Tasks List page displays all available tasks with options to manage them and run them directly from the list page.
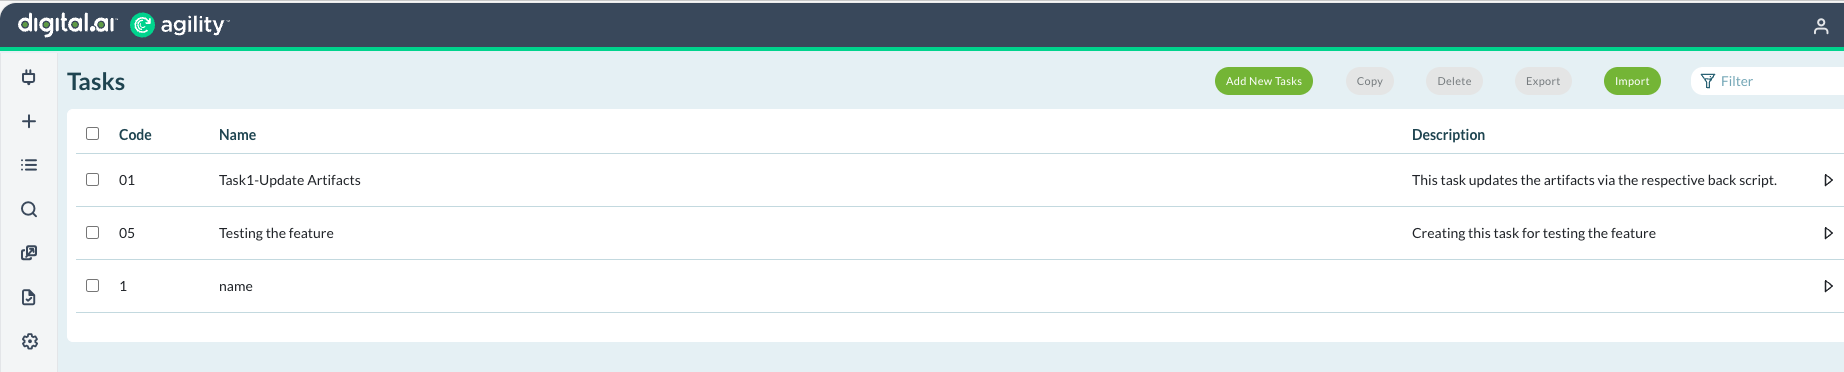
Manage Tasks
Copy a Task
To duplicate an existing task:
- In the Tasks list, select the checkbox next to the task you want to copy.
- Click Copy.
- In the Copy Task dialog, enter:
- New Task Code: Unique identifier for the copied task
- New Task Name: Descriptive name for the copied task
- Click Copy.
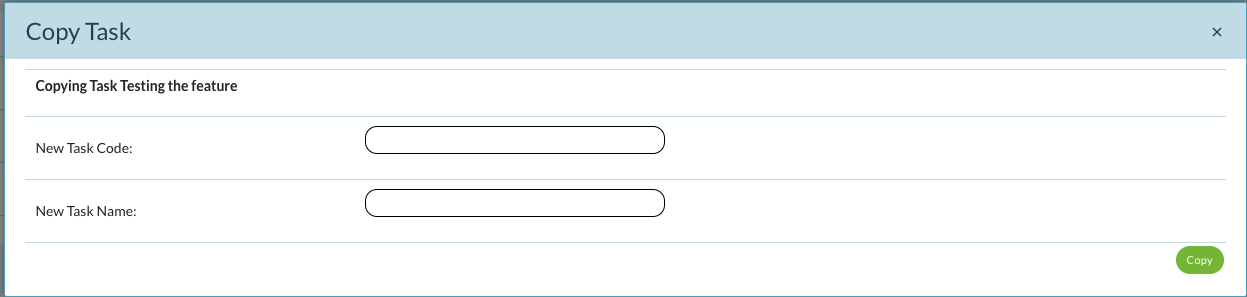
Result: A new task is created with the same configuration as the original.
Delete a Task
To remove a task:
- In the Tasks list, select the checkbox next to the task you want to delete.
- Click Delete.
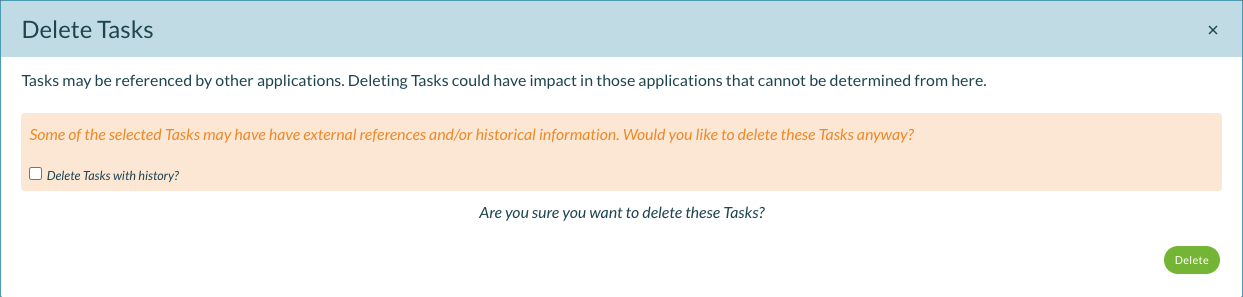
- In the Delete Tasks dialog, review the warnings:
- Tasks may be referenced by other applications
- Selected tasks may have external references or historical information
- (Optional) Check Delete Tasks with history to remove all historical task execution data along with the task configuration.
- Click Delete to confirm.
Result: The task is permanently removed from the system. If "Delete Tasks with history" was checked, all execution history is also deleted.
Deleting tasks with history removes all historical execution data and cannot be undone. External applications referencing these tasks may be affected.
Export a Task
To export a task configuration:
- In the Tasks list, select the checkbox next to the task you want to export.
- Click Export.
- In the Export Tasks dialog:
- Select the Output Format: JSON or XML
- Choose whether to Include All Referenced Tasks
- Click Export.
- When the Information dialog appears showing "Export Successful", click here in the "Click here to download your file" message.

Result: The task configuration file downloads to your local system and may open in a new browser tab displaying the JSON or XML content. The file is saved in the selected format (e.g., Testingthefeature_Administrator_1768821900.json).
Import a Task
To upload a task from a backup file:
- In the Tasks list, click Import.
- In the Import a Backup File dialog, drag and drop or browse to select a JSON or XML file.
- Choose to either replace an existing task or create a new task.
- Click Import.
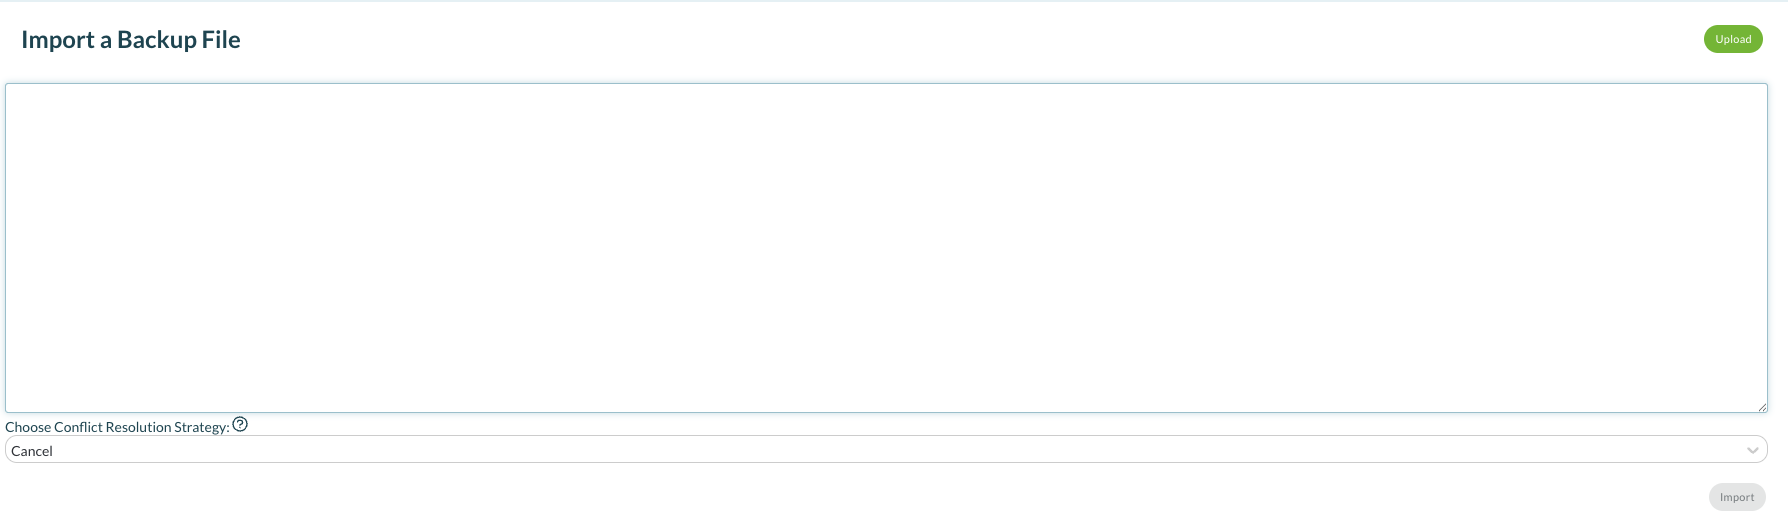
Result: The task is added to or updated in your task list.
Add a New Task
To create a new task:
- Navigate to Settings > Tasks.
- Click Add New Task.
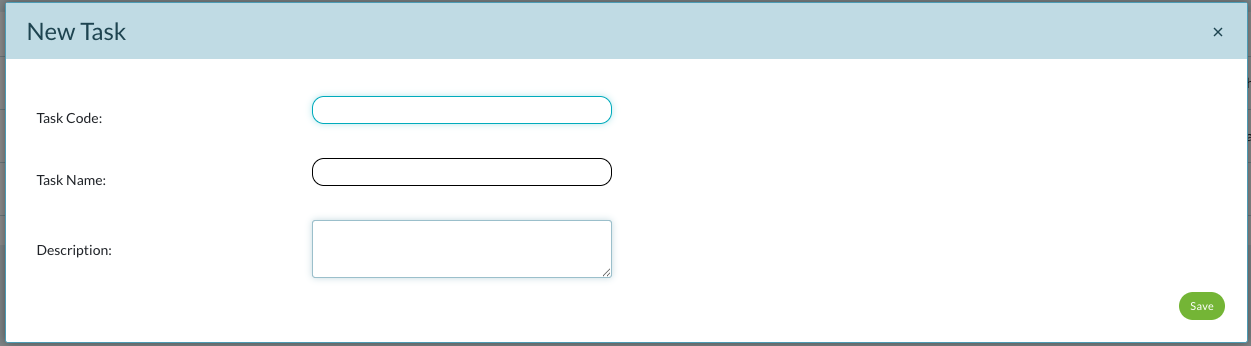
- In the New Task dialog, enter:
- Task Code: Unique identifier (e.g., 01)
- Task Name: Descriptive name (e.g., Task: Update Artifacts)
- Description: Brief explanation of the task's purpose
- Click Save.
Result: The Task Editor page opens for the newly created task.
Use the Task Editor
The Task Editor provides a complete interface for configuring and managing tasks.
Task Editor Tabs
The Task Editor includes four tabs:
- Details: Configure task properties and behavior
- Commands: Build task workflow by adding and configuring commands
- Clipboard: Temporary storage for commands during editing
- Vars: View variables, parameters, and globals used in the task
Use the Clipboard
The Clipboard provides temporary storage for commands, preserving all configured inputs and values for reuse in your task workflows.
Copy Commands to the Clipboard
To copy a command to the Clipboard:
- In the Task Editor Commands tab, right-click a command in your workflow and select Copy, or drag the command to the Clipboard tab.
- The command appears in the Clipboard with a timestamp.
Result: The command is stored in the Clipboard with all its configured inputs, parameter values, and settings preserved.
Use Commands from the Clipboard
To reuse a command stored in the Clipboard:
- Click the Clipboard tab to view stored commands.
- Drag a command from the Clipboard.
- Drop it into your task workflow in the Commands tab.
Result: The command is added to your workflow with all previously configured inputs and values intact.
Clear the Clipboard
To remove all commands from the Clipboard:
- Click the Clipboard tab.
- Click Clear All.
Result: All commands are removed from the Clipboard.
Use cases:
- Reuse commands with complex configurations across your workflow
- Copy commands between different tasks while preserving all settings
- Store frequently-used command configurations for quick access
Configure Concurrent Instances
Controls how many instances of the task can run in parallel:
- In the Task Editor Details tab, locate Concurrent Instances.
- Enter the maximum number of parallel task instances allowed.
Default: 1 (task runs sequentially)
Configure Number to Queue
Defines how many task runs can be queued:
- In the Task Editor Details tab, locate Number to Queue.
- Enter the maximum number of queued task executions.
Use case: Prevents task queue overflow when many users or systems trigger the task simultaneously.
Debug a Task
The Debug section displays the last run details and provides controls for task execution:
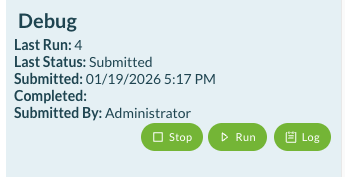
- In the Task Editor Details tab, locate the Debug section.
- Review run information:
- Last Run: Run number
- Last Status: Current status (Submitted, Completed, Failed)
- Submitted: Timestamp when the task was submitted
- Completed: Timestamp when the task finished (if applicable)
- Submitted By: User who triggered the task
- Use control buttons:
- Stop: Terminate a running task
- Run: Execute the task immediately
- Log: View the task activity logs for the last run
Run a Task
Run a Task Immediately
To execute a task now:
- In the Task Editor, click Run in the Debug section.
- If the task has configured parameters, enter the required values in the Run Task dialog.
- Click Run.
Result: The task executes immediately and the Debug section updates with run details.
Schedule a Task
To schedule task execution:
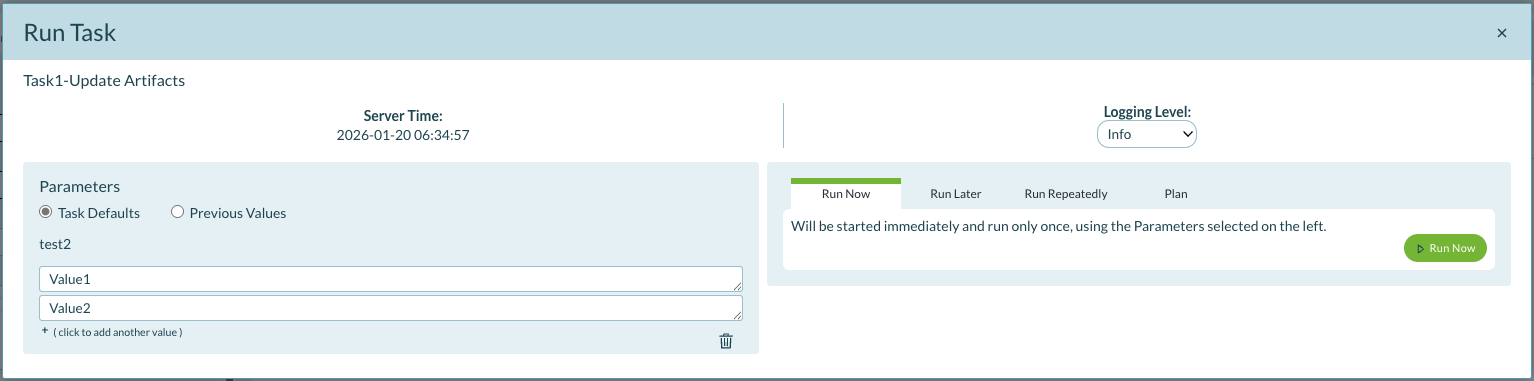
- In the Task Editor, click Run in the Debug section.
- Select a scheduling option:
- Run Now: Execute immediately
- Run Later: Schedule for a specific date and time
- Run Repeatedly: Schedule recurring execution
- Plan: Create a complex execution schedule
- Configure the schedule parameters based on your selection.
- Click Schedule or Save.
Result: The task execution is scheduled according to your configuration.
If parameters are configured, you must provide the required values before running the task.
View Task Logs
View the Change Log
To see the history of changes made to the task:
- In the Task Editor, locate the Logs section.
- Click Change to open the Change Log.
Result: The Change Log displays all modifications to the task configuration.
View the Last Run Log
To see the activity log of the most recent task execution:
- In the Task Editor, locate the Logs section.
- Click Last Run Log to open the execution log.
Result: The Last Run Log displays detailed information about commands executed, variables set, and output generated during the last task run.
Configure Task Parameters
Parameters allow you to prompt for values during task execution.
Add a Parameter
To create a new parameter:
- In the Task Editor, scroll to the Parameters section.
- Click Add New.
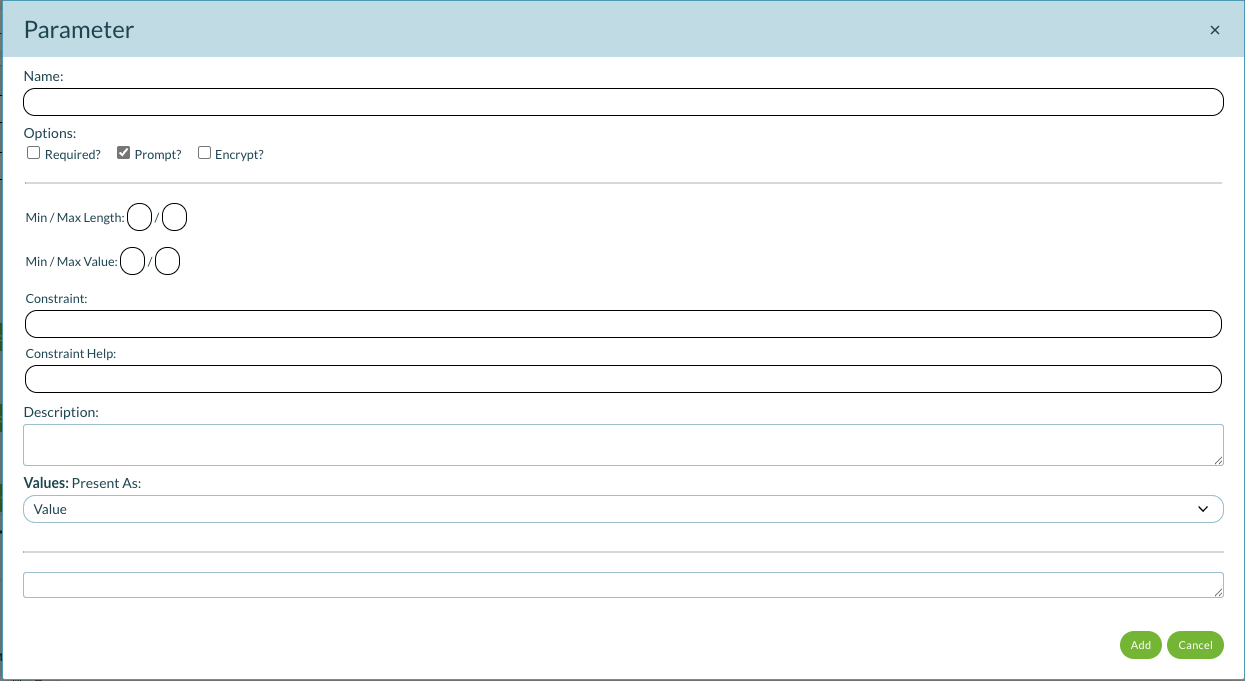
- In the Parameter dialog, configure:
- Name: Parameter identifier
- Options:
- Required: User must provide a value
- Prompt: Display a prompt for the value
- Encrypt: Store value securely
- Min/Max Length: Character limits for text input
- Min/Max Value: Numeric limits for number input
- Constraint: Regular expression pattern for validation
- Constraint Hint: Help text explaining the constraint
- Description: Explanation of the parameter's purpose
- Values: Present As: Dropdown selector for predefined values
- Click Add to save the parameter.
Result: The parameter appears in the Parameters section and will prompt for input during task execution.
Manage Parameters
In the Parameters section, you can:
- View parameter details: Click the info icon (ⓘ) next to a parameter name
- Delete a parameter: Click the X icon next to the parameter name
- Reorder parameters: Drag parameters to change their display order
Configure Task Scheduling
The Scheduling section displays and manages task execution schedules.
View Schedules
The Scheduling section shows two types of schedules:
- Action Plans: One-time scheduled executions
- Schedules: Recurring execution schedules (e.g., "Some Months, Selected Hours, Selected Minutes")
Create or Modify Schedules
To add or modify schedules:
- In the Task Editor, navigate to the Debug section.
- Click Run.
- Select Run Later, Run Repeatedly, or Plan from the options.
- Configure your schedule using the available fields.
- Click Schedule or Save.
Result: The schedule appears in the Scheduling section with options to refresh (🔄) or delete (🗑️).
View Task Variables
To view variables used within the task:
- In the Task Editor, click the Vars tab.
- The Vars tab displays three sections:
- Variables: Local variables used in the task
- Parameters: User-defined parameters (e.g., test2)
- Globals: System-level global variables available to all tasks
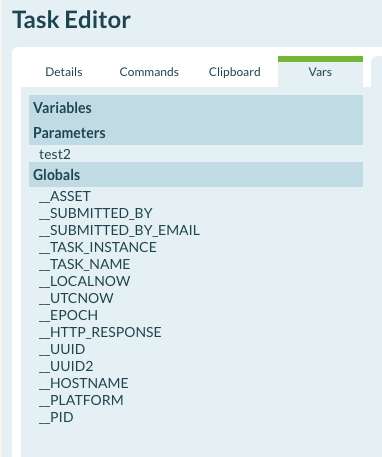
Global variables include:
_ASSET,_SUBMITTED_BY,_SUBMITTED_BY_EMAIL_TASK_INSTANCE,_TASK_NAME_LOCALNOW,_UTCNOW,_EPOCH_HTTP_RESPONSE,_UUID,_UUID2_HOSTNAME,_PLATFORM,_PID
View Task Activity Log
To access detailed task execution history:
- Click the Tasks icon above the Settings icon in the left navigation.
- The Task Activity Log displays all task runs with:
- Instance: Run number (e.g., 1, 2)
- Category: Task category (e.g., General)
- Task Code: Task identifier (e.g., 001)
- Task: Task name
- Status: Execution status (Submitted, Completed)
- Started By: User or system that triggered the task
- CE: Custom execution identifier (if configured)
- PID: Process ID
- Timing: Execution start and end timestamps
- Click the edit icon (✏️) at the end of a row to open the Task Editor for that task.
- Click a specific row to view detailed logs including commands executed, log files, and status information.
Use case: Track task execution history, troubleshoot failures, and audit task activity across the system.
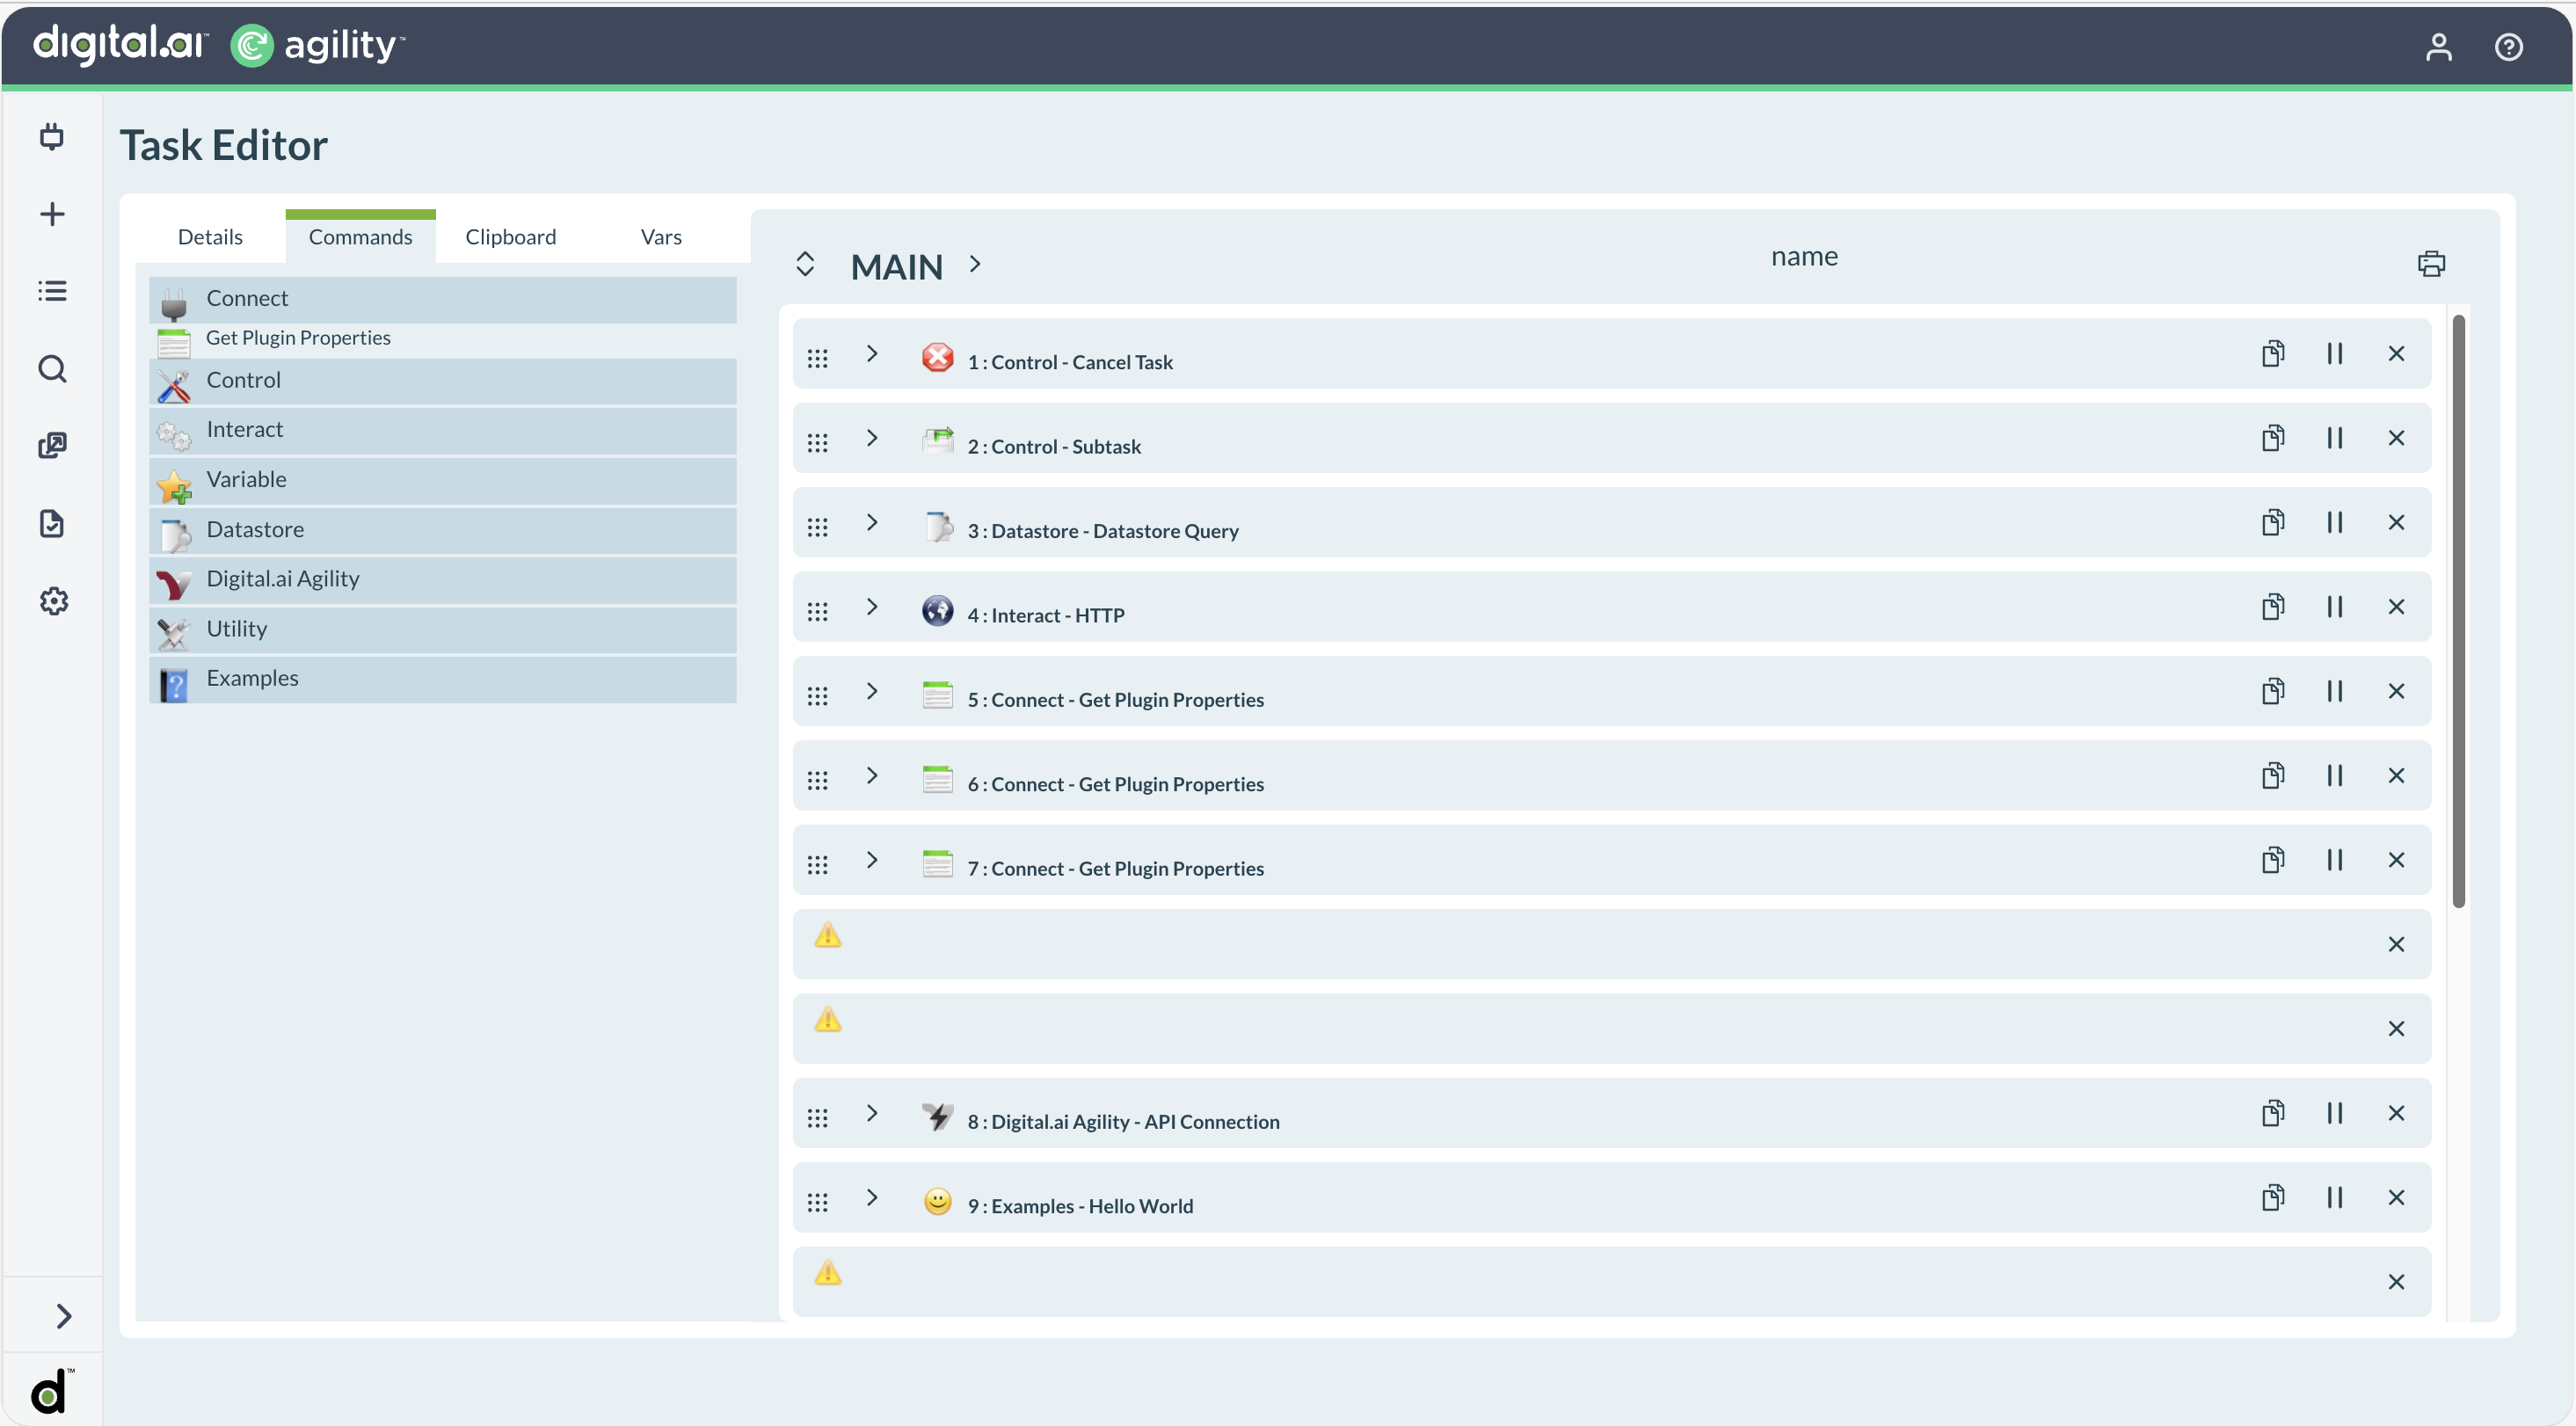
Access Task Commands
To access and view task commands in the Task Editor:
- Click the Settings icon (gear icon) in the left navigation menu.
- Click Tasks in the navigation menu.
- Select an existing task or create a new task to open the Task Editor.
- In the Task Editor, click the Commands tab.
- Click each category (Connect, Control, Interact, Variable, Datastore, Digital.ai Agility, Utility, Examples) to expand and view the available commands.
- Drag and drop commands from the Commands tab into your task workflow to configure them.
For detailed information about each command, see Task Command Reference.