How to Create JIRA Instance with Manual Webhook Configuration
You can now create Jira instance in Agility Sync with manual Webhook configuration.
Manual Webhook Creation is supported only for JIRA integration.
The procedure to create a Jira instance with manual Webhook configuration is given below:
- Log on to Agility Sync.
- On the sidebar, click the Manage Plugins
icon.
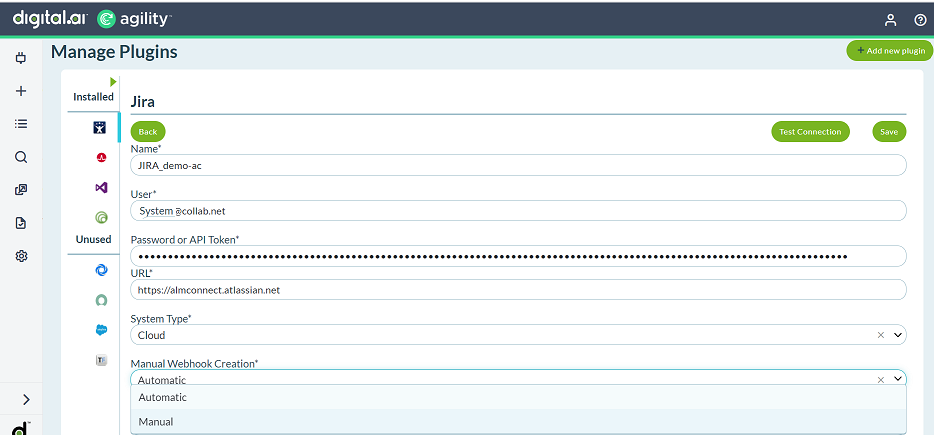
- Click Jira and click New Instance.
- Name (required)—used as the name of the instance; also used as the WebHook Handler Name.
- User name/Password or API token (required)—to be used for authentication with the tool. Some tools such as would only use an API token in lieu of a user name and password.
- URL (required)—the URL for accessing the tool
- System Type(required)—to be used to represent a Cloud or Server.
- Manual Webhook Creation (required)—select Manual, by default the value is automatic.
- Description (optional)—the description of the tool.

- Create a mapping with JIRA and Agility and Activate it.

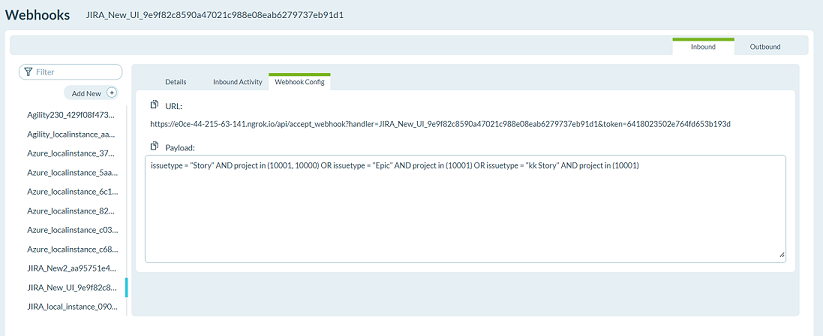
- Click Manage Settings > Webhooks > JIRA webhook > Webhook Config tab.

- Copy the URL and the Payload and provide them to the JIRA Administration team.
For every newly created mapping with new asset or project, payload for JIRA would be updated with new asset and project details in the Manual Webhook section. The new payload must be provided to the JIRA Administration team to update in the JIRA Webhooks section.
Procedure to Create Webhook in JIRA
- Log in to JIRA with Administrator privileges.
- Click JIRA Administration > System > Webhooks.

- Click on Create a Webhook.
- Provide a name for the webhook and paste the copied URL in the URL section.
- Under Events, paste the copied Payload in the given box.
- Select check boxes for - Comment: created; Issue: created, updated, deleted; Issue link: created, deleted
- Click Create and Save.