TeamForge—Jira Cloud Integration
TeamForge Jira Cloud Support
TeamForge supports Jira Cloud.
- Ensure your TeamForge site is publicly hosted.
- Contact Digital.ai Support to get the
RPMURL. - Keep the TeamForge Webhook URL handy using the
create_webhook_event.pyscript.
Install RPM and Configure Site Options in TeamForge
- Use the following command to download and install the RPM package:
wget <RPMURL> - Edit the
site-options.conffile located at/opt/collabnet/teamforge/etc/site-options.confand add the following token:server-01:SERVICES=jira - Provision services.
teamforge provision -y
Install the TeamForge-Jira Associations Add-on in Jira Cloud
-
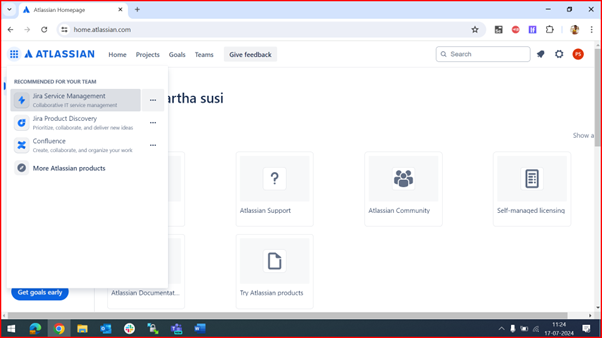
As a privileged Jira admin, log in to Atlassian Homepage and navigate to Home > Jira Service Management.
-
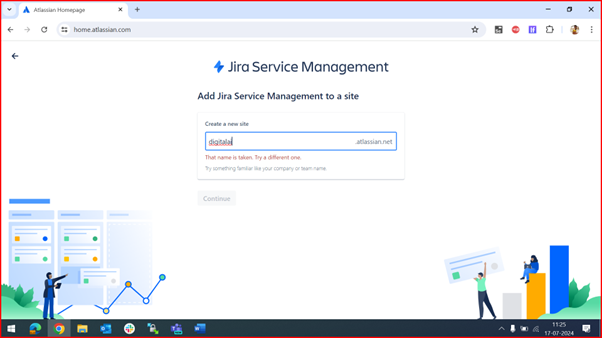
In the Create a new site, enter a site name of your choice to create a site address.

-
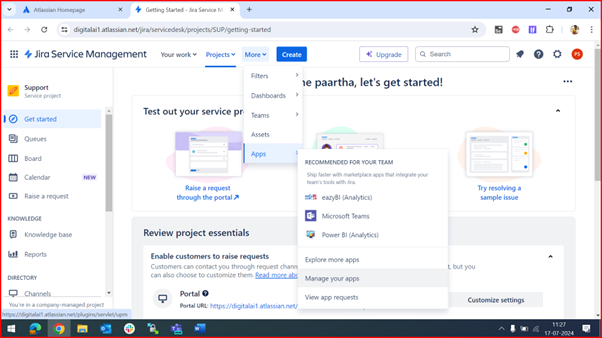
Navigate to Jira Service Management homepage and click More > Apps > Manage your apps.
-
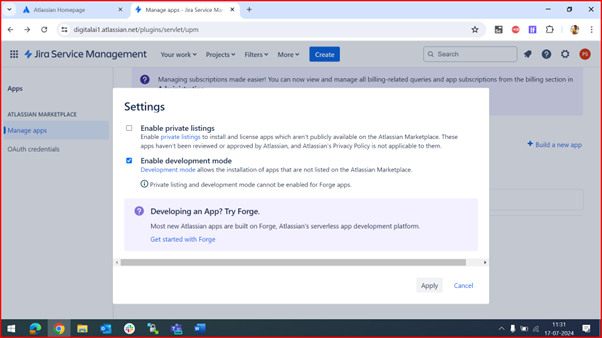
In the User-installed apps area, click Settings and check the Enable development mode checkbox in the Settings pop-up window.
-
In Upload app pop-up window, enter the app descriptor URL in the following format and click Upload:
<hostname>/tf-jira/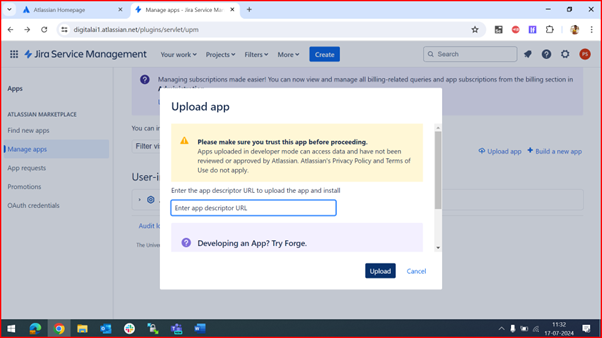
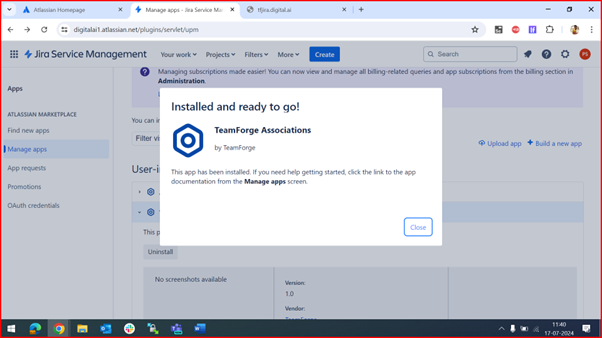
-
Expand TeamForge Associations to view the installed Jira version and other associated details.
Configure the Jira Integration Plugin
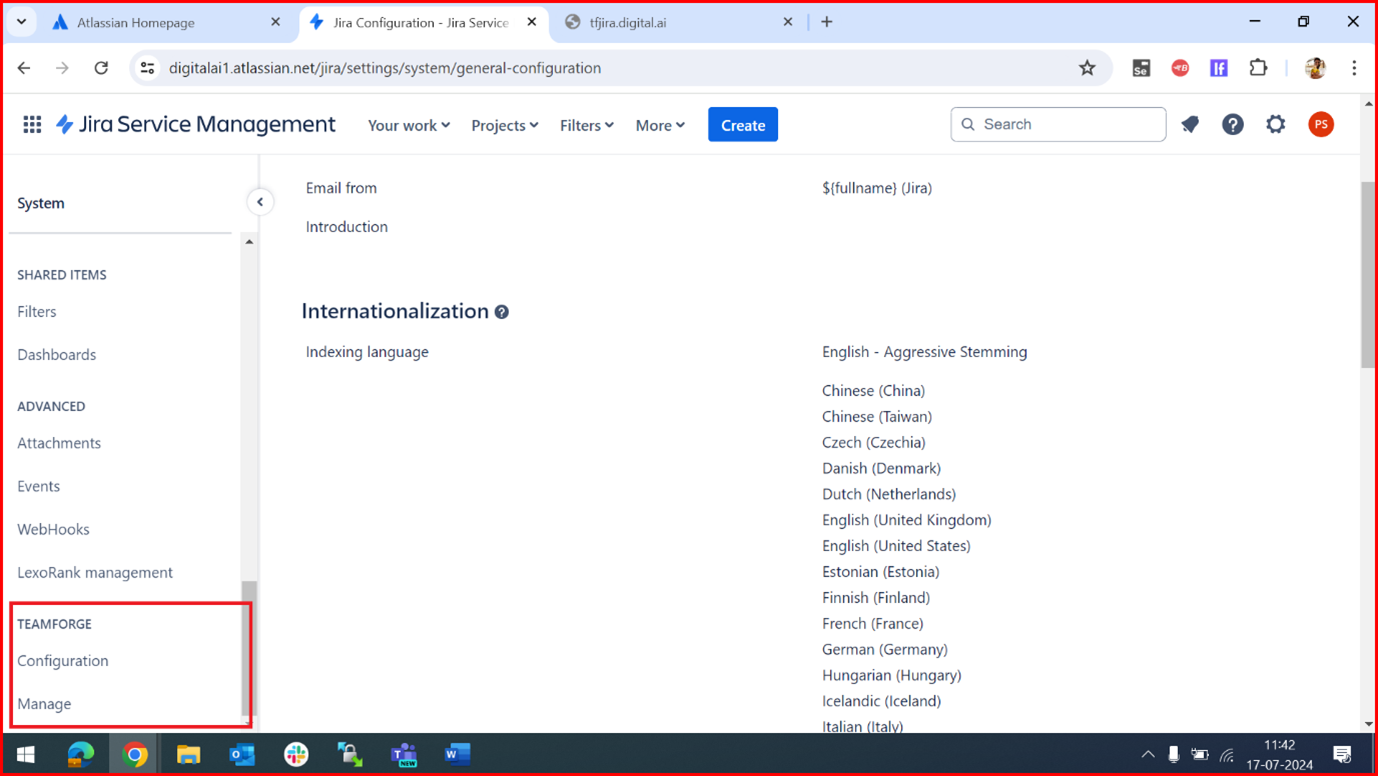
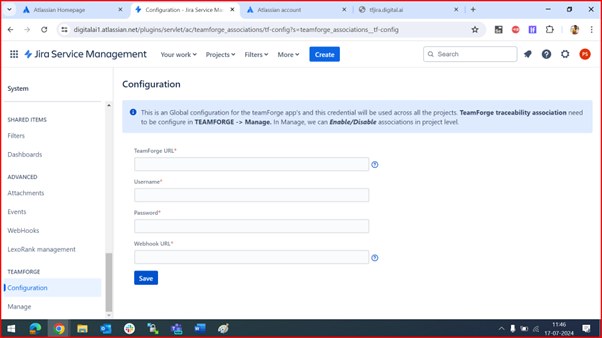
Configure the add-on from the Configuration page to notify TeamForge about the Jira issues.
-
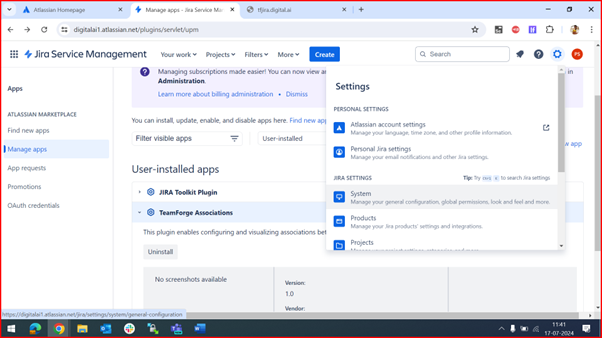
Log in to Jira Service Management and click the Settings (gear) icon located at the top right corner.
-
In the Settings, choose Systems > Configuration.
-
Enter valid TeamForge log in credentials in the Username and Password fields.
noteThe user whose credentials are provided must have API permissions in TeamForge, or the user should be a
Project Admin. -
Enter the Webhook URL in the Webhook URL field.
noteYou can generate the TeamForge Webhook URL using the
create_webhook_event.pyscript. -
Click Save to save the configuration.
Once the configuration is saved, Jira issues can be pushed to the configured Webhook URL.
Map TeamForge with Jira Project
As a Jira site administrator, you can enable TeamForge mapping for one or more Jira projects. This reflects the changes in Jira issues mapped to TeamForge in the production TeamForge event data store.
-
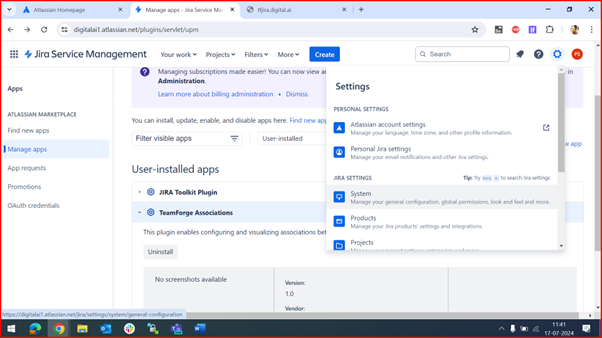
Navigate to Jira Service Management homepage and click the Settings (gear) icon at the top right corner and choose Systems > Manage.
-
In the Association window, select your project from the Available List.
-
Click Save.
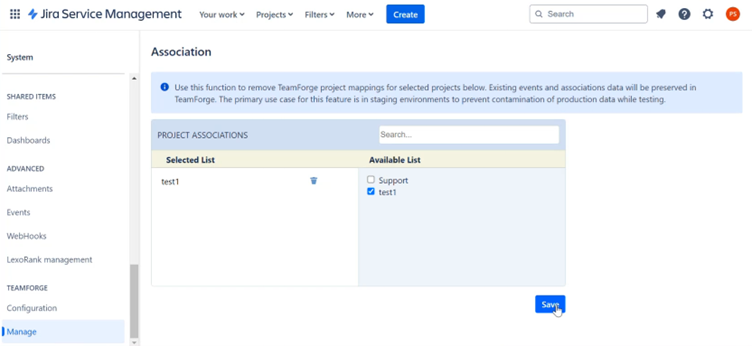
The TeamForge is now mapped in the corresponding Jira project.
Viewing Associations inside Jira
Enable TeamForge for a Jira Project
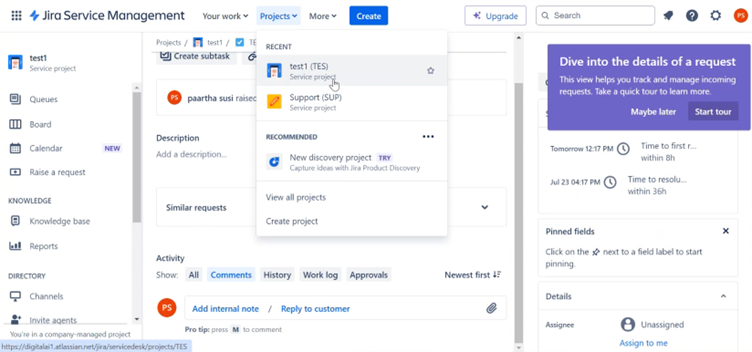
- Navigate to Jira Service Management homepage, click Projects dropdown that lists the created project.
- Click the Settings (gear) icon located at the top right corner, and choose Systems > Manage.
- In the Associated window, select your project from the Available List.
- Click Save.
View TeamForge Associations
-
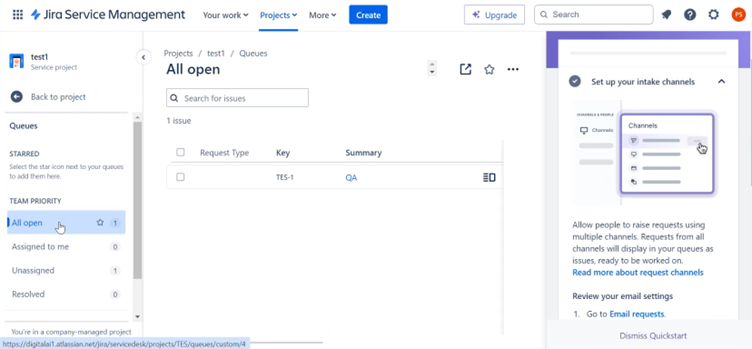
Navigate to Jira Service Management homepage and choose your project from the Projects dropdown list.
-
Click Queues to view the list of issues created in this project.
-
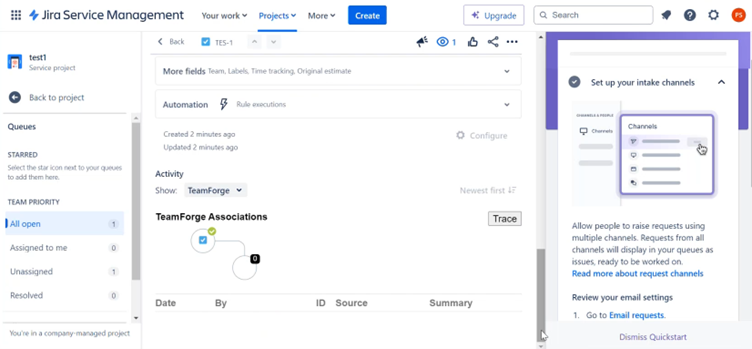
Click a project from the table and scroll to the bottom to view the project associations.
For more information, see Associate Jira Issues to Version Control Commits.