TeamForge—JIRA Integration Using the Webhooks-based Event Broker
Before you begin with the installation and the configuration of the TeamForge—JIRA integration plugin, generate the TeamForge Webhook URL using the create_webhook_event.py script.
JIRA Version Information
The following table provides the supported JIRA product versions and the version of the new TeamForge-JIRA integration plugin.
| Supported JIRA Versions | Compatible Plugin |
|---|---|
| JIRA 9.0.0–9.11.0 | TeamForge-JIRA-adapter-1.1 |
Configure the JIRA Integration Plugin to Notify the TeamForge Webhooks-based Event Broker
This method of integration is based on the new TeamForge-JIRA integration plugin version 1.2 and is recommended for on-premises installation of JIRA. The TeamForge-JIRA integration via TeamForge Webhooks-based Event Broker brings associations and traceability between JIRA, TeamForge, and various tools supported by TeamForge Webhooks-based Event Broker.
Within JIRA, all the SCM related activities for the particular JIRA issue are tracked and displayed under the TeamForge tab on the JIRA issue page.
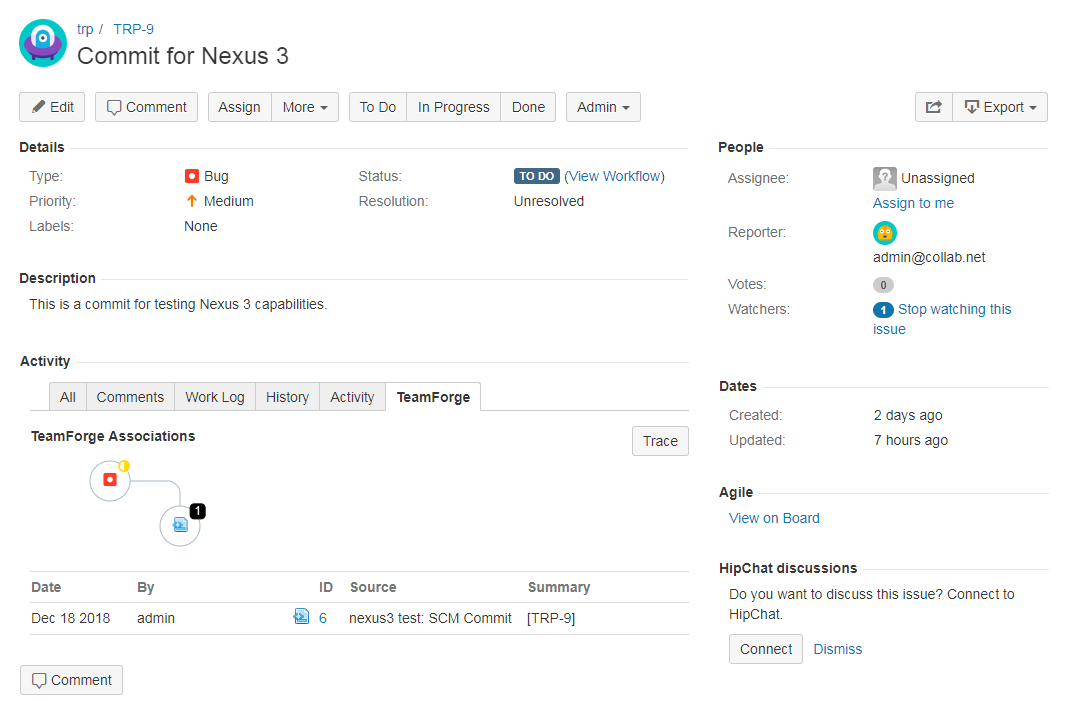
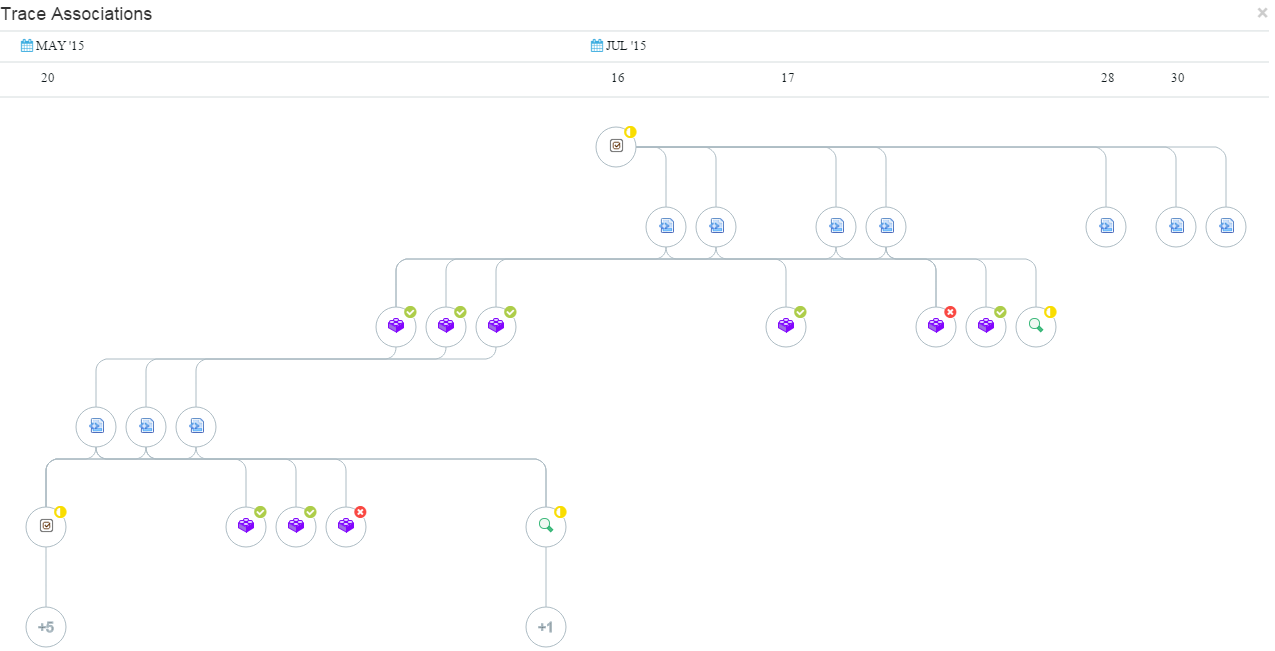
The TeamForge tab provides a summary of associations and also the details of a full listing of associations. This is a listing of immediate associations, activities with direct relationships to the JIRA issue at hand. To explore the chain of associations, click the Trace button. The traceability chain that includes commits, builds, reviews, deploys, and other XDS-based integration is displayed. On the Trace Associations page, clicking any node lights up all the association paths to that node. In addition, a small pop-up appears with details about the node in context. You can use SET AS TARGET button to expand the associations from the selected point. Another function exists to SEE more details about the node, opening a new browser tab.
The TeamForge-JIRA plugin 1.2 is packaged as a JIRA "add-on". Once installed and configured, the add-on supplies issue tracker "work item" metadata to TeamForge. The TeamForge-JIRA plugin 1.2 needs configuration on a per project basis in JIRA, such that JIRA (many) to TeamForge (one) project mappings are established. It is therefore required to configure the TeamForge URL and the TeamForge credentials for each JIRA project. Once this configuration is done, the JIRA integration plugin will create and manage the needed sources.
Install the JIRA Integration Plugin
Use the TeamForge-JIRA plugin 1.2 to notify TeamForge of updates to JIRA issues and to vizualize the associations between JIRA and other tools. The TeamForge-JIRA plugin 1.2 must be installed once on each JIRA server you wish to connect to TeamForge. Install the TeamForge-JIRA plugin 1.2 using the JIRA add-on Manager. Contact the Digital.ai Support to get the TeamForge-JIRA-adapter-1.2.jar file.
Install the TeamForge-JIRA Associations Add-on
-
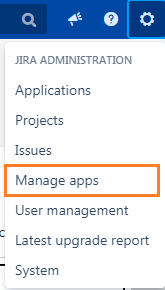
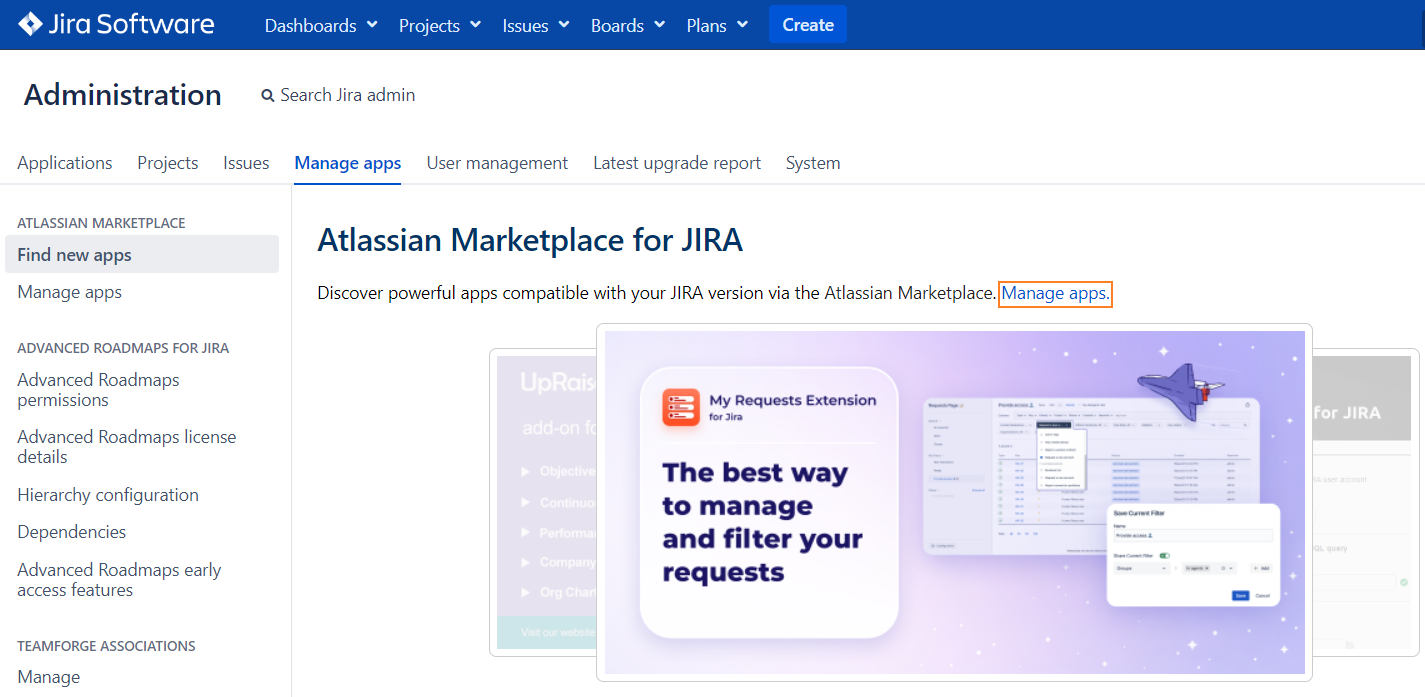
As a privileged JIRA user, navigate to Administration > Manage apps > Find new apps.
-
Click Manage apps link.
-
Click Upload app to upload the
TeamForge-JIRA-adapter-1.2.jarfile.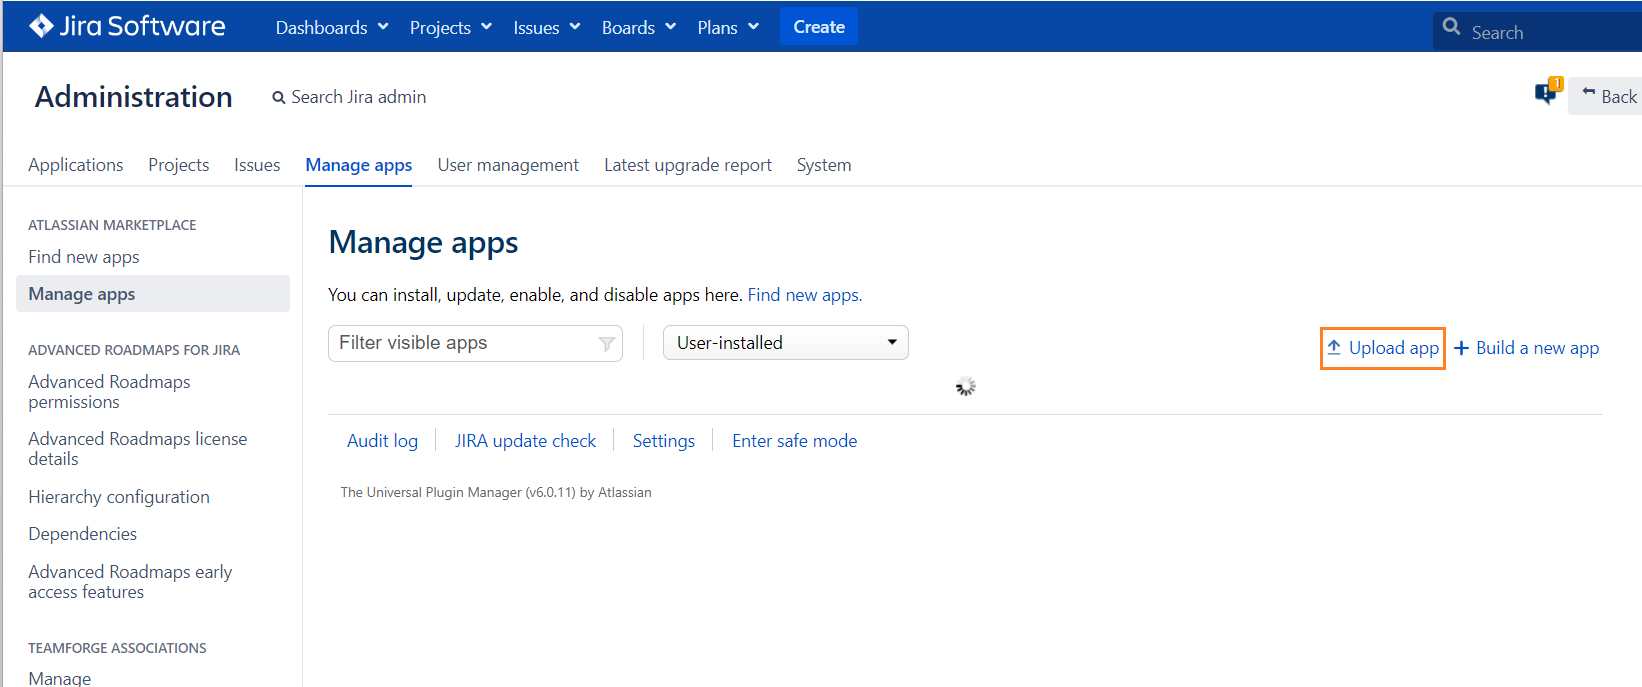

-
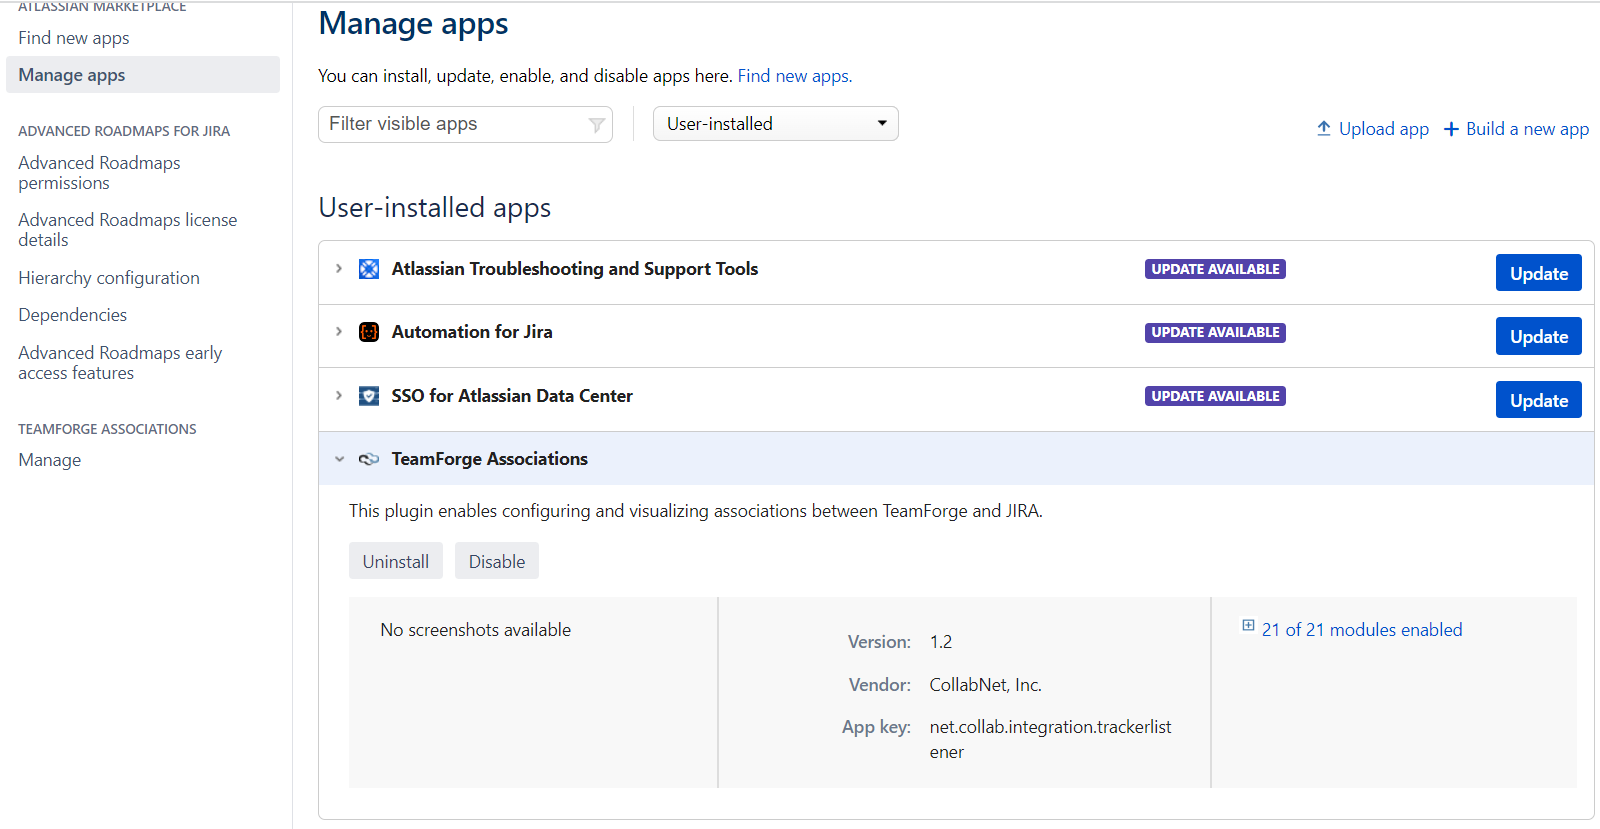
Expand TeamForge Associations to view the installed JIRA version and other associated details.
Upgrade the TeamForge-JIRA Associations Add-on
New versions of the TeamForge-JIRA associations add-on will be visible in the Manage apps section (Administration > Manage apps > Manage apps).
Configure the JIRA Integration Plugin
Configure "TeamForge Associations" to notify TeamForge Webhooks-based Event Broker about JIRA issues.
- Configure the add-on from the Project settings page to notify TeamForge about the JIRA issues.
-
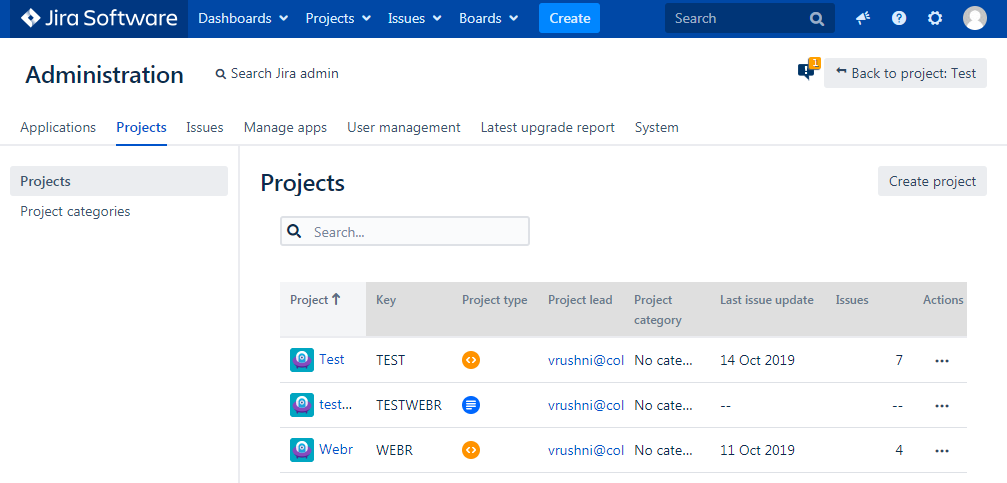
Select Projects from JIRA Administration menu.
-
Select your project from the list of projects on the Administration page.
-
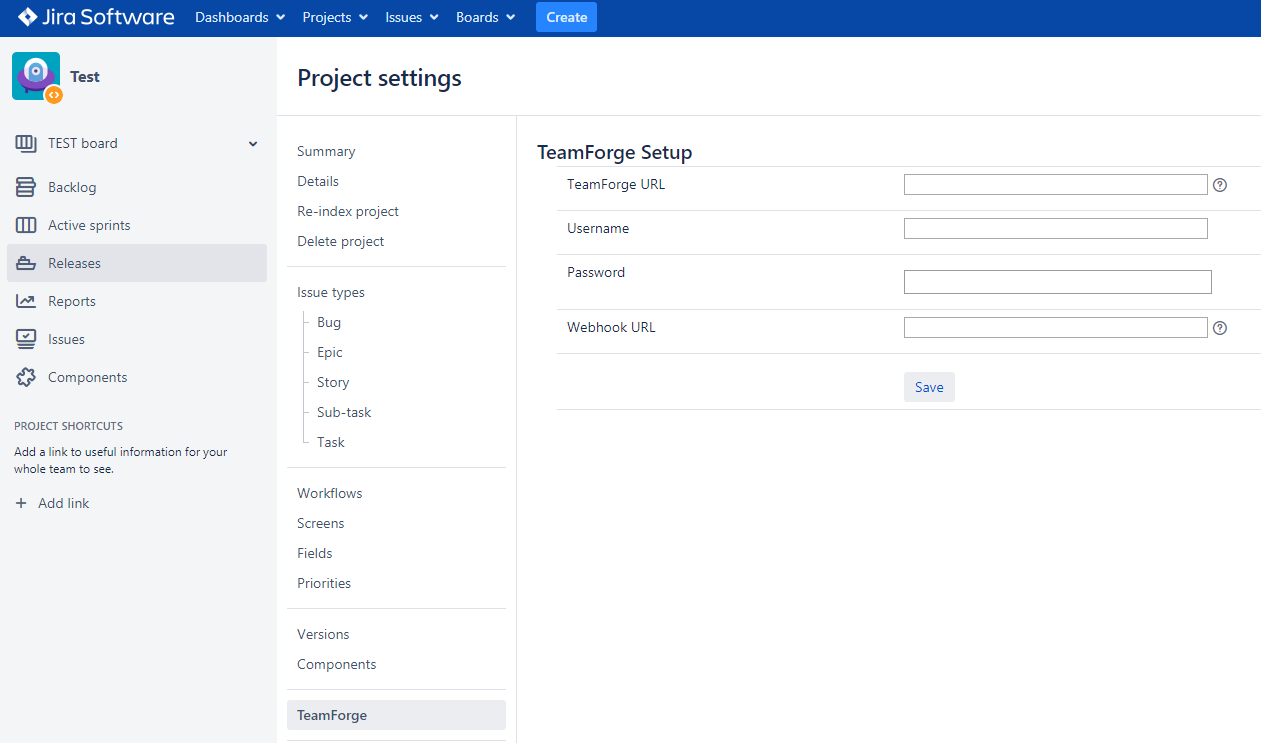
Select TeamForge on the Project settings page.
-
Enter TeamForge URL in the TeamForge URL field.
-
Enter valid TeamForge login credentials in the Username and Password fields.
noteThe user whose credentials are provided must have API permissions in TeamForge, or the user should be a
Project Admin. -
Enter the Webhook URL in the Webhook URL field.
noteYou can generate the TeamForge Webhook URL using the
create_webhook_event.pyscript. -
Click Save to save the configuration.
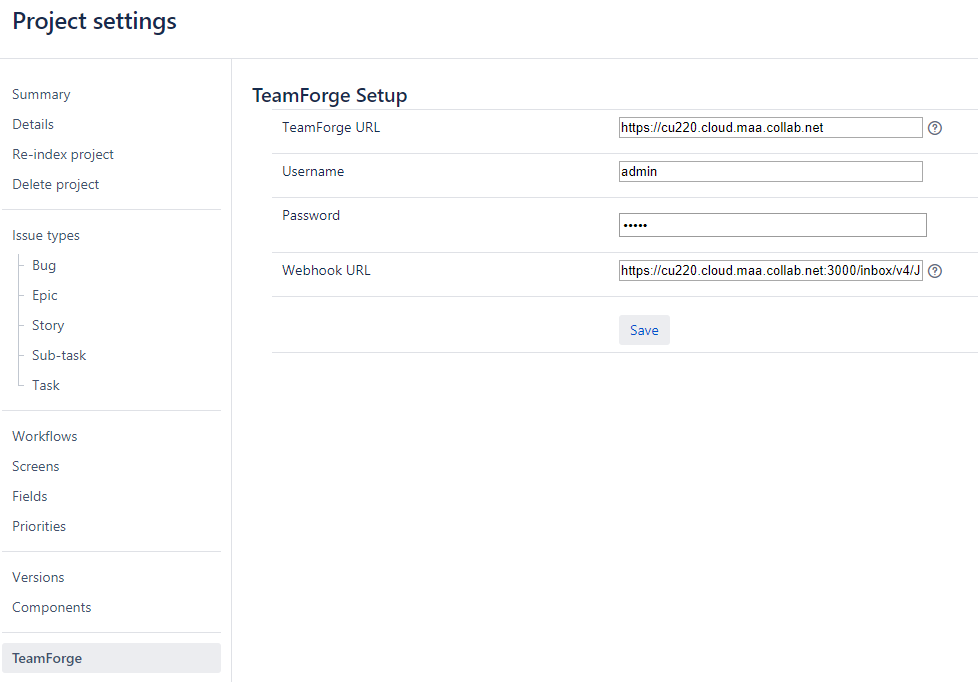
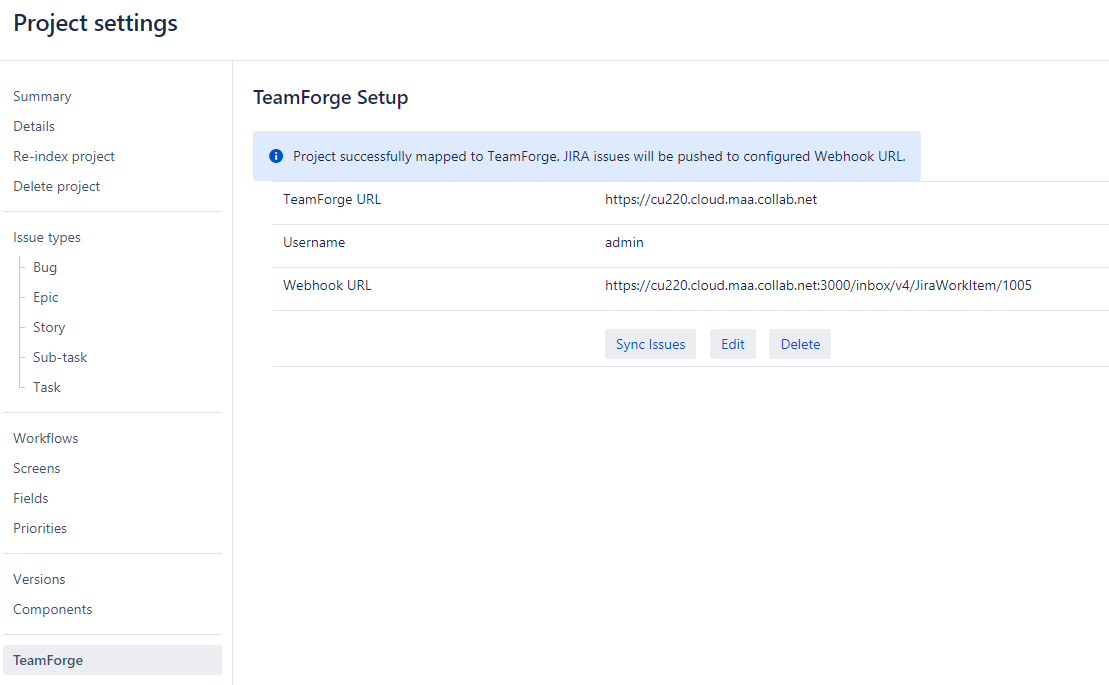
Once the configuration is saved, JIRA issues are pushed to the configured Webhook URL.
-
Sync Existing JIRA Issues into TeamForge
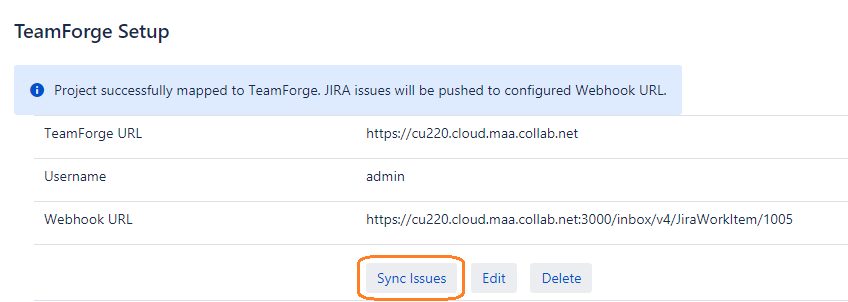
To associate TeamForge objects to existing JIRA issues, click Sync Issues.
This step bootstraps JIRA issue data from the current project into the TeamForge. Note that this process may take several minutes (even hours) to complete, depending on the number of issues in the JIRA project.
You can synchronize the JIRA issues only once for each configuration.
Edit TeamForge-JIRA Mapping Configuration
Click Edit to modify current configuration, if required.
Delete Configured TeamForge Mapping from JIRA Project
Click Delete if you wish to completely dissociate the JIRA project from the configured TeamForge mapping.
Deleting TeamForge mapping abandons all existing association data. The JIRA project can be mapped to another project subsequently, but existing associations are lost. Do this if you were testing the integration using a production JIRA project but now wish to remove any test association data.
Associate JIRA Issues to Version Control Commits
Associations between JIRA® issues and TeamForge-aware version control commits can be created via commit message references. Commits to TeamForge project repositories and external repositories that have been configured in TeamForge are also supported.
Creating Associations
- Using your desired terminal or IDE, instantiate a version control commit to a repository of your choice.
- In the commit message, make reference to JIRA ID(s) to which you wish to associate the commit surrounded by square brackets.
Sample Commit Messages“[DEMO-123] This commit message will result in an association between
JIRA issue DEMO-123 and this commit.”
“[DEMO-123, DEMO-124] Here I’m associating two JIRA issues with project
identifiers DEMO.”
Viewing Associations inside JIRA
-
Navigate to the desired JIRA issue details page.
-
Click the TeamForge tab.
-
A list of immediate associations appears. In other words, these objects are directly associated to the JIRA issue in context.
-
Click Trace to view the first three levels of the traceability chain.
All activities are mapped chronologically.
Use the "+" icon to explore further levels of traceability.

Remove TeamForge Mappings
As a JIRA site administrator, you can disable active TeamForge mappings for one or more or all the JIRA projects (Administration > Manage apps > TeamForge Associations), if you want to prevent a JIRA server that's mirrored into a staging/testing environment from triggering events back to TeamForge (when there are changes to issues in JIRA projects that are mapped to TeamForge) thereby polluting the production TeamForge event data store.
Use this feature to disable all production JIRA-TeamForge mappings in stage environments and then test the TeamForge Associations add-on by creating a new mapping between a staging JIRA server and TeamForge server.
- Log on to the JIRA server as a site administrator.
- Select JIRA Administration > Manage apps.

- Select TeamForge Associations > Manage.
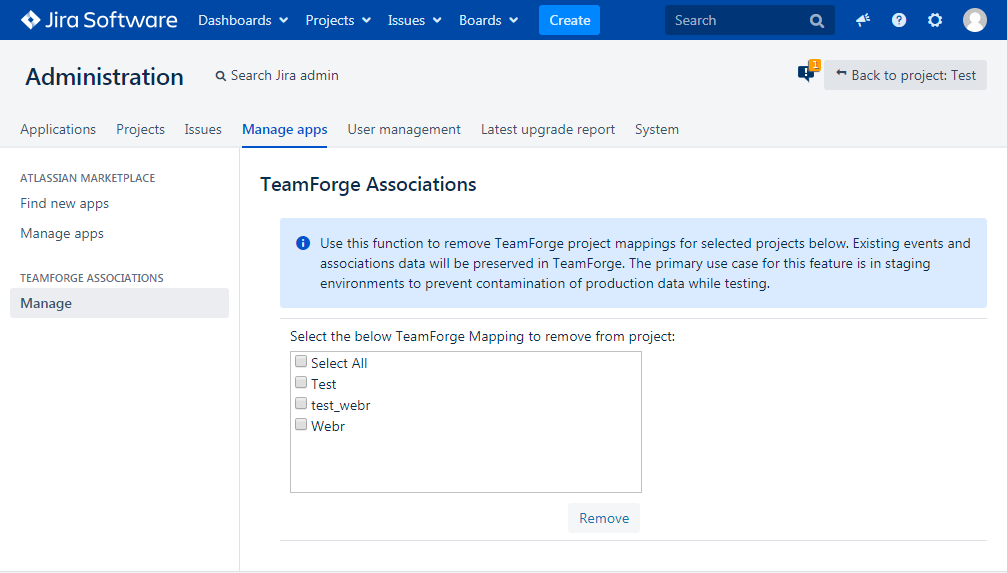
- Select one or more projects from the list to remove the TeamForge-JIRA mapping.
tip
You can select the Select All checkbox to select all the projects.
- Click Remove.
A confirmation message is displayed.
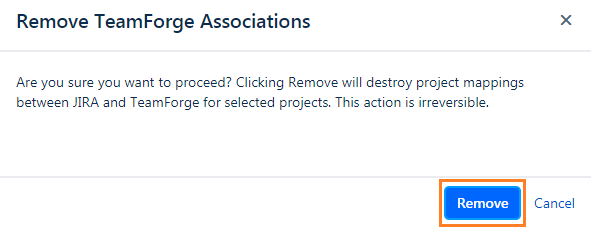
- Click Remove to delete the mapping.