Create a TeamForge Project
What constitutes a project depends on your organization. Some organizations favor a small number of big, centralized projects. Others prefer a larger number of smaller, specialized projects. Your site administrator can help you decide if your work should be part of a larger project or a project of its own.
A project is a workspace where people can use the Digital.ai TeamForge applications to collaborate and to create, store, and share data.
All the work you do with Digital.ai TeamForge is organized into projects. Any registered Digital.ai TeamForge user can create a project, subject to approval by a CollabNet site administrator. After a new project is approved, the project creator can configure project applications, add project members, and create and assign roles to govern each user's individual access permissions and the access permissions of groups of users. A registered CollabNet can also request membership in any CollabNet project. Requests to join projects are submitted to the project's administrators for approval.
How Digital.ai TeamForge projects are organized is up to you and your organization. You might choose to create one large, centralized Digital.ai TeamForge project in which to manage all of your organization's development work. Or you might choose instead to create a number of smaller projects for each team or sub-project.
Any registered user on the site can create a project, subject to approval by a Digital.ai TeamForge site administrator.
You can use a project template to pre-populate new projects with the structure and configuration of an existing project.
When you create a project, it is submitted to the Digital.ai TeamForge administrator for approval. You will receive an email notification when the site administrator approves or rejects your project. When your project is approved, you are assigned the Founder Project Admin role and made a project administrator. You can access the project from My Projects or View All Projects menu option under My Workspace.
-
Access the Projects page through either of the following ways:
- Go to My Workspace > View All Projects
- Go to My Page > Projects.
-
Click Create New Project.
-
On the Create Project page, give the project a name and a brief description.
- The name will appear in project lists and on the project's home page.
- A terse description is recommended. There will be unlimited room to discuss the project's aims and methods in detail on the project pages themselves.
-
Provide a URL name for the project, if you want the URL for the project to be different from the internal project name.
If you do not enter a URL name, the project URL will be the same as the project name.
-
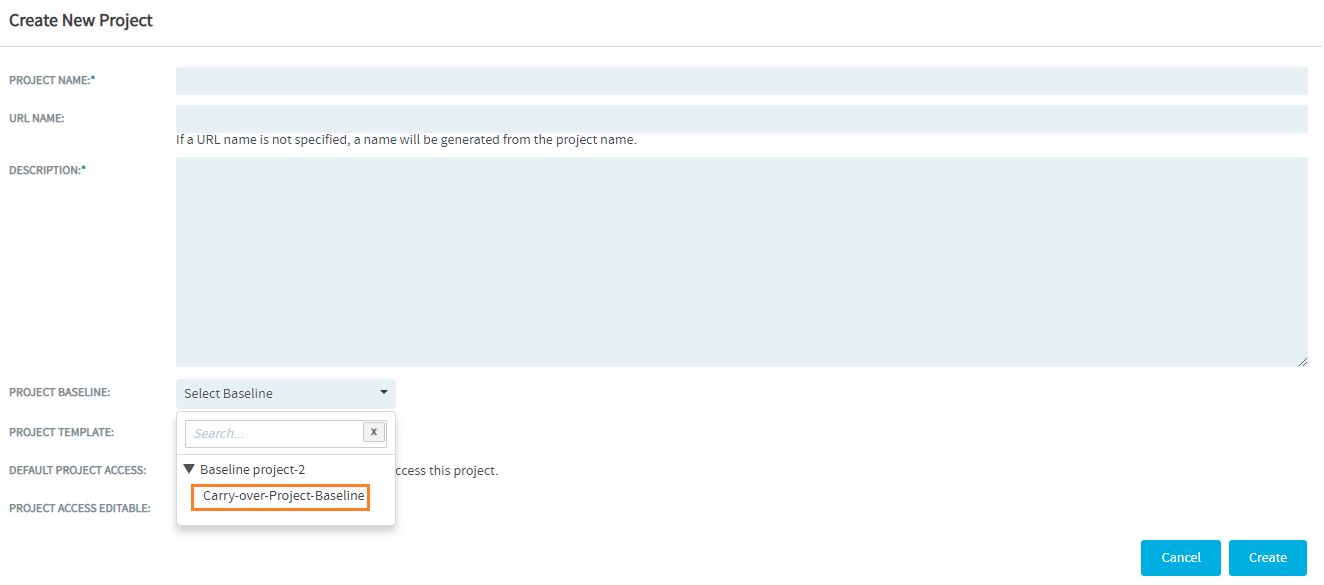
Do this step, if you create a project from a project baseline. Select a project baseline from Project Baseline drop-down list.
To select a project baseline from the Project Baseline drop-down list, click and expand a project from the Project Baseline drop-down list and select the respective project baseline.

Only users with a baseline license can create a project from a project baseline.
Project Baseline drop-down list is visible only to users with the baseline license.
Only approved project baselines are listed in the Project Baseline drop-down list.
Only 50 projects get listed in the Project Baseline drop-down list at a time. If there are more than 50 projects, a +more... link is shown at the end of the Project Baseline drop-down list.
Only the most recent 5 project baselines get listed under the selected project. You can search for a project baseline that is not listed among these 5 most recent project baselines.
The same set of associations (related to Trackers, Documents, and File Releases) from the source project will also be available in the carry over project created using the project baseline, provided that these associations were present when the source project was baselined.
Import Source Code and Binary Repositories from Project Baselines
Source code and Binary repositories, included in a Project Baseline, can be imported into projects that are created from the Project Baseline.
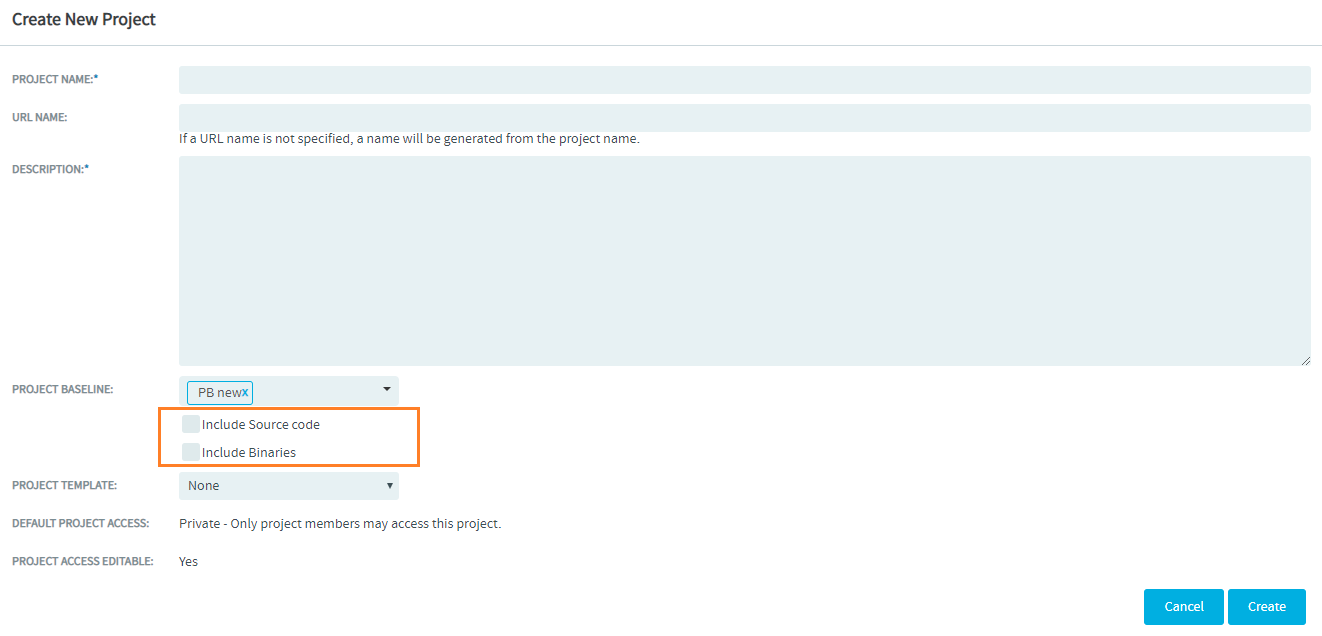
When you create a new project from a Project Baseline that include source code/binary repositories, the Create New Project page has the following options:
-
Include Source code: This option shows up if the Project Baseline includes source code repositories.
-
Include Binaries: This option shows up if the Project Baseline includes binary repositories.

References to External Baselines
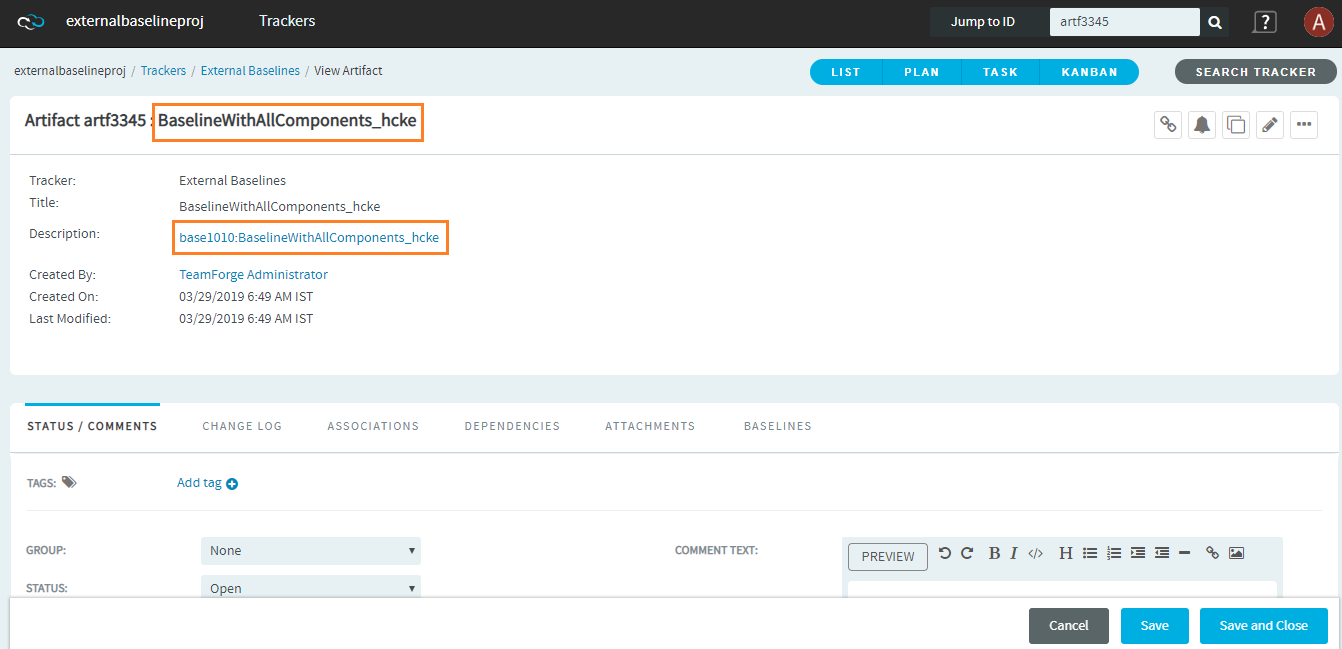
When you create a new project from a project baseline that includes one or more external baseline(s), the new project or the carry-over project will have references to these external baselines. The new project created in this way will have a Tracker called External Baselines. This Tracker in turn will have artifact(s) created in the name of the external baseline(s) referenced from the Project Baseline of the source project.

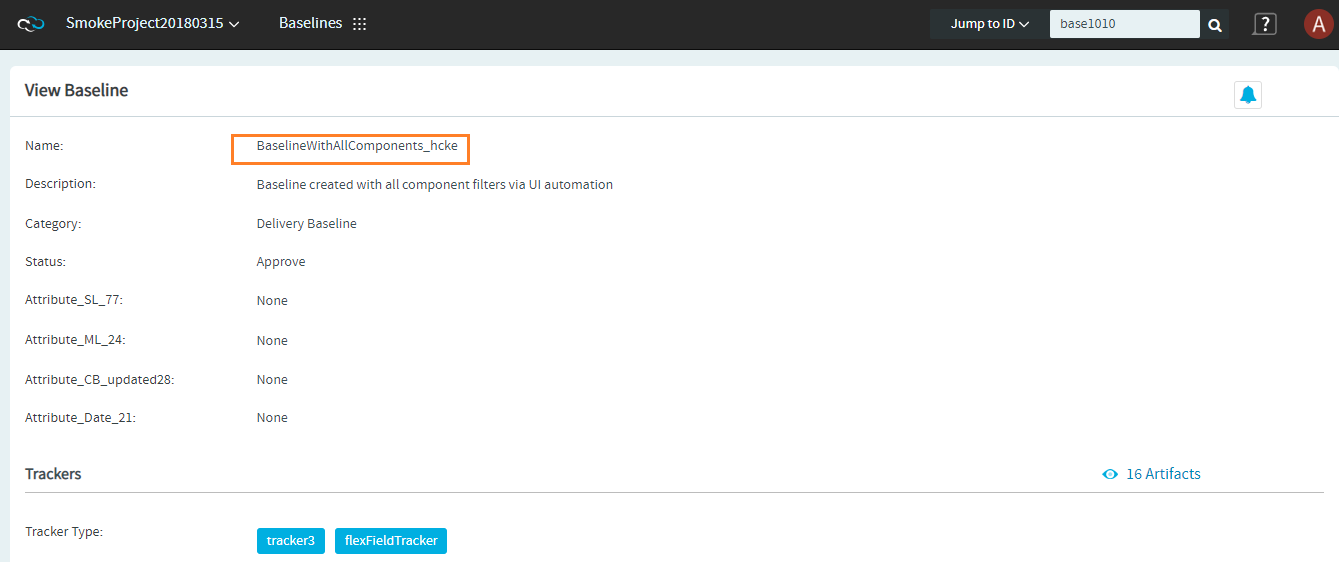
The description of the artifact(s) in the External Baselines Tracker will include a link (in the format "baseline id:baseline name") to the external baseline.

Click the external baseline link in the artifact description to view the baseline from within its native project.
 note
noteFrom TeamForge 19.0 release, you can also create a project from the View Project Baseline page. For more information, see Create a Project from View Project Baseline Page.
noteYou cannot select a project template when you create a project from a project baseline.
-
-
Do this step if you want to use the project template to create a project. If your site administrator has provided project templates (see Create a Project Template), select the appropriate one for your new project.
Project templates give you ready-made artifact types, work flow support, user roles and other start-up content appropriate to the kind of project you are creating.
tipThe DEFAULT PROJECT ACCESS and PROJECT ACCESS EDITABLE options are displayed based on the project settings. If you would like to change these settings, ask your site administrator.
noteYou cannot select a project baseline when you create a project from a project template.
-
Click Create.
The project is submitted to the TeamForge site administrator for approval. You will receive an email notification when the site administrator approves or rejects your project. When your project is approved, you can get to it from your MY PROJECTS tab available under PROJECTS menu in the My Workspace page or from the Projects menu in your navigation bar.