Airflow Plugin
The Airflow integration with Digital.ai Release enables you to interact with Apache Airflow. Apache Airflow organizes tasks into DAGs (Directed Acyclic Graphs), which are collections of tasks with defined dependencies. This integration allows you to programmatically manage and interact with Airflow DAGs and task instances as part of your automated release process. Through this integration, you can:
- Get DAG: Retrieve details of a specific DAG.
- List DAGs: View all available DAGs in the Airflow environment.
- Trigger DAG Run: Start the execution of a specific DAG.
- Get DAG Run: Retrieve metadata and the current status of a DAG run.
- Get Task Instance: Access information about individual task instances within a DAG run.
- List DAG Runs: List all DAG runs for a given DAG.
- Update DAG: Update an existing DAG.
- Modify DAG Run State: Manually change the state of a DAG run.
- Delete DAG Run: Remove specific DAG runs.
Prerequisites
- Digital.ai Release 25.1 or later.
- Apache Airflow 2.10.5.
- REST API access to your Airflow instance.
View DAG ID and DAG Run ID
Before using the Airflow tasks, ensure to have DAG ID and DAG Run ID.
To get DAG ID:
- In the Airflow UI, go to the DAGs view. The DAG ID is displayed in the DAG column.
- Alternatively, you can also view DAG ID when you open a specific DAG.
For more information, see DAG IDs in Airflow documentation
To get DAG Run ID:
-
Open the specific DAG in Airflow UI.
-
Use the Graph or Grid view to see run information.
-
Go to Browse > DAG Runs to view the list of all executed runs. The table shows the DAG ID and corresponding Run Id.
For more information, see DAG Runs in Airflow documentation
Install the Digital.ai Airflow Plugin
Install the Airflow plugin using the Plugin Manager.
Connect Release to Airflow
- Log in to Digital.ai Release.
- Go to Connections from the sidebar.
- In HTTP server connections, click the + icon next to Airflow Server. Airflow server page appears.
- Enter the following:
- Title: Name of the Airflow server definition.
- URL: Airflow base API URL.
- Username: Username used to authenticate Airflow requests.
- Password: Password used to authenticate Airflow requests.
- If your Digital.ai Release server is using a proxy, specify the necessary details.
- Click Test to verify your connection to the Airflow server.
- Click Save.
The following tasks are available for interacting with Airflow.
Get DAG
This task gets the information about a specific DAG.
- In the release or template, click Add task.
- Click All types and select Airflow > Get DAG.
- Open the task added.
- Enter the following details:
- Airflow server: Select the Airflow server connection.
- DAG ID: Enter the ID associated with the DAG run.
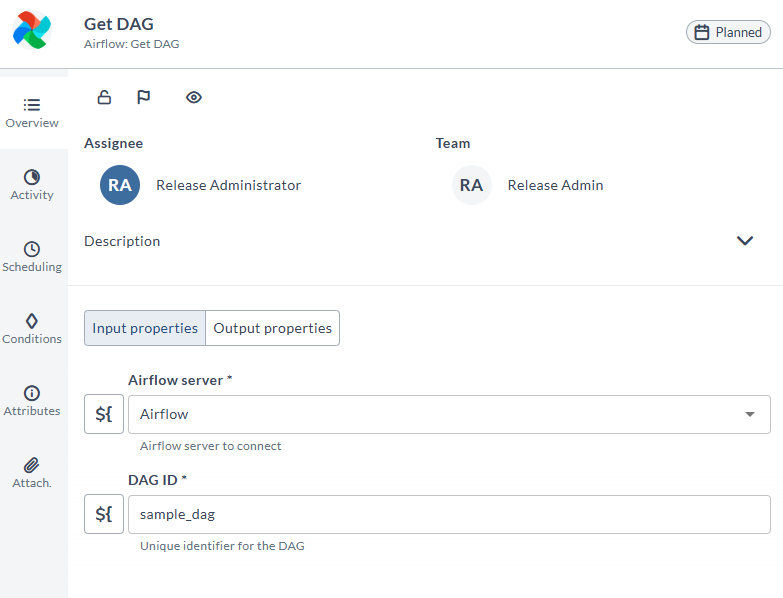
After task execution, the Output Properties displays a DAG summary as key value pairs.
List DAGs
This task fetches the list of DAGs matching the DAG ID pattern and the tags.
- In the release or template, click Add task.
- Click All types and select Airflow > List DAGs.
- Open the task added.
- Enter the following details:
- Airflow server: Select the Airflow server connection.
- DAG ID pattern: Select the DAG ID pattern to match and list DAG IDs matching this pattern.
- Tags: Enter the list of tags to filter the result.
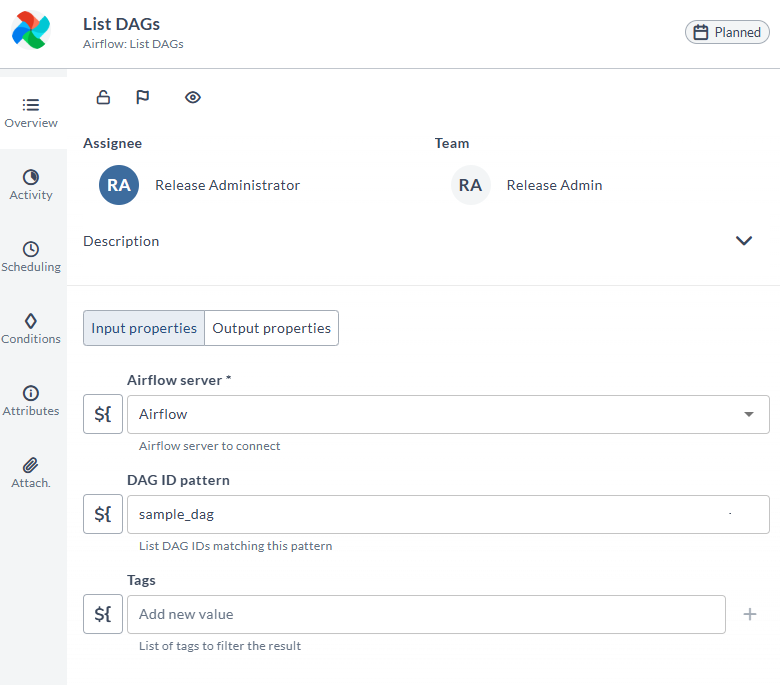
After the task execution, the output properties displays all the DAG list that matches the DAG ID pattern as a key value pairs.
Trigger DAG Run
This task triggers a specified DAG, it retries to get status till DAG gets success or failed state.
To create a trigger DAG run:
-
In the release or template, click Add task.
-
Click All types and select Airflow > Create a Trigger DAG Run.
-
Open the task added.
-
Enter the following details:
- Airflow server: Select the Airflow server connection.
- DAG ID: Enter the ID associated with the DAG run.
- DAG run ID: Specify the DAG Run ID to trigger a run with a specific ID. If left blank, an ID will be generated automatically.
- Wait for successful Run: Enable this option to wait for the DAG to complete successfully before proceeding.
- Retry Wait Time: Set the time in seconds to wait between retries if the task fails.
- Max Retries: Set the maximum number of retries before the task is marked as failed.
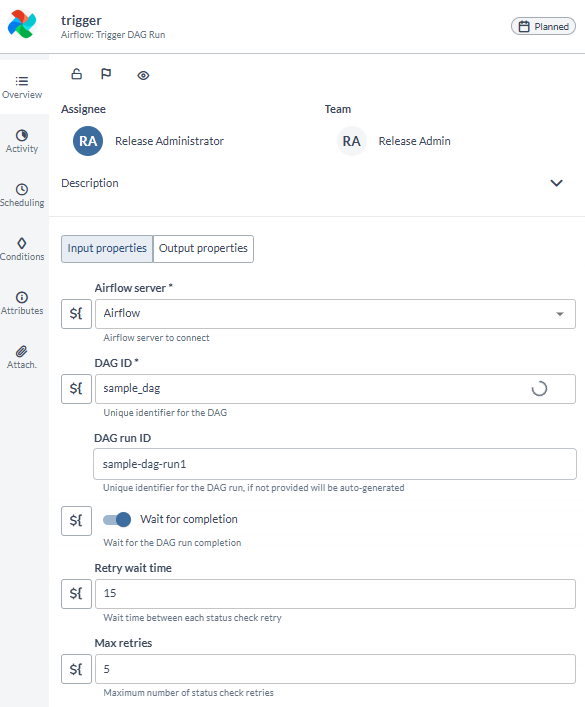
After the task execution, you can view Output Variables:
DAG Run Status: Contains the current status of the DAG run (success or failed).DAG Run ID: Contains the unique ID assigned to this DAG run.
Get DAG Run
This task fetches details of a specific DAG run.
To get DAG run:
- In the release or template, click Add task.
- Click All types and select Airflow > Get DAG Run.
- Open the task added.
- Enter the following details:
- Airflow server: Select the Airflow server connection.
- DAG ID: Enter the ID associated with the DAG run.
- DAG Run ID: Enter the DAG run ID.
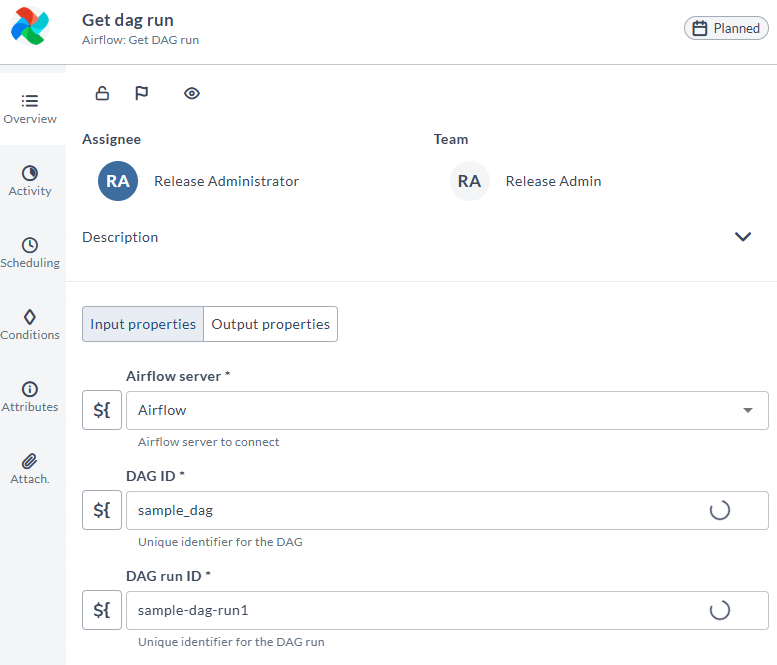
After the task execution, you can view Output Variables:
DAG Run Status: Shows the current execution status of the DAG run.DAG Run Data: Provides detailed information about the DAG run.
Get Task Instance
This task fetches details of a specific DAG task instance.
To get DAG run:
- In the release or template, click Add task.
- Click All types and select Airflow > Get Task Instance.
- Open the task added.
- Enter the following details:
- Airflow server: Select the Airflow server connection.
- DAG ID: Enter the ID associated with the DAG run.
- DAG Run ID: Enter the DAG run ID.
- Task ID: Enter the unique task ID.
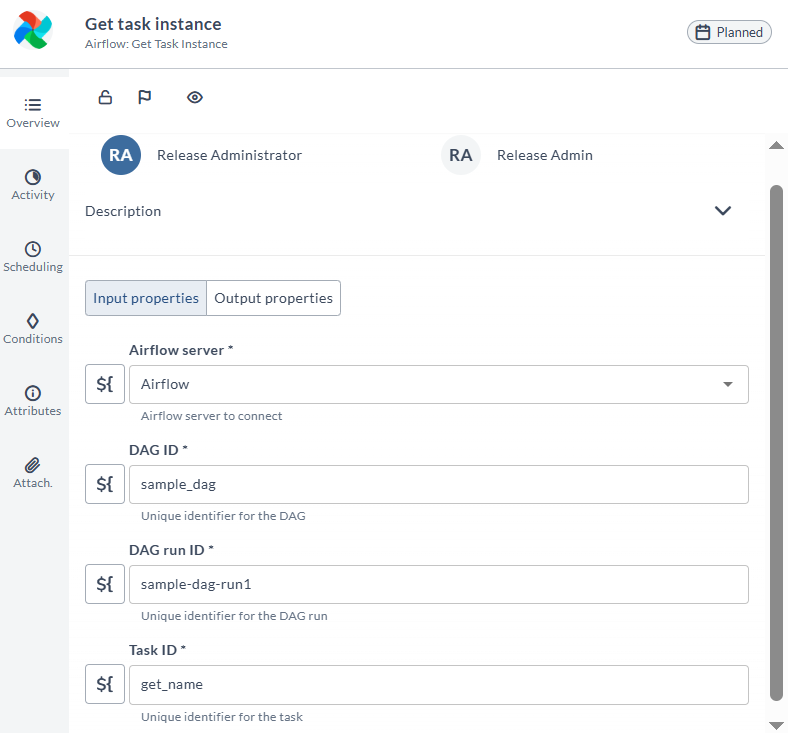
An output variable task instance data captures the available details of a task instance.
List DAG Runs
This task fetches list of runs and its state within a specific DAG.
- In the release or template, click Add task.
- Click All types and select Airflow > List DAG Runs.
- Open the task added.
- Enter the following details:
- Airflow server: Select the Airflow server connection.
- DAG ID: Enter the ID associated with the DAG run.
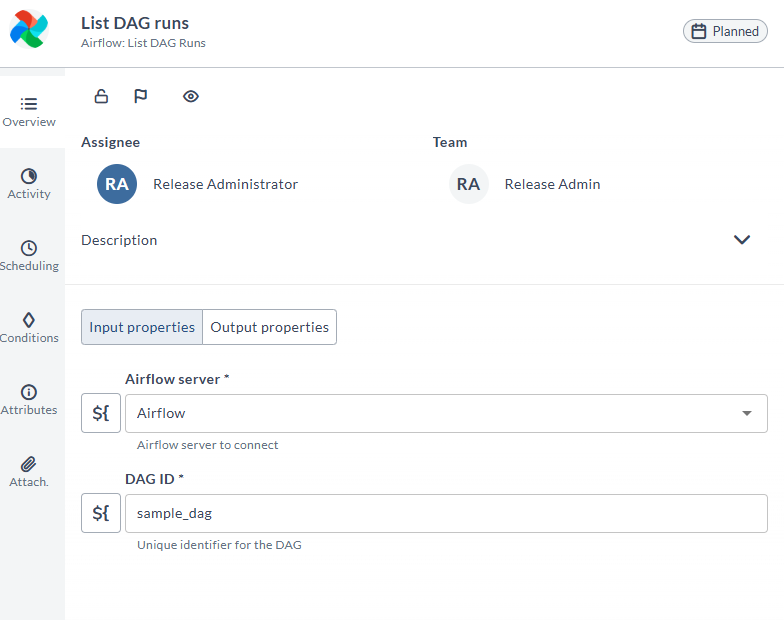
After the task execution, the DAG Runs Data returns a list of all DAG runs with their:
- Run IDs
- Current status
Update DAG
This task updates if the DAG is paused or not.
- In the release or template, click Add task.
- Click All types and select Airflow > Update DAG.
- Open the task added.
- Enter the following details:
- Airflow server: Select the Airflow server connection.
- DAG ID: Enter the ID associated with the DAG run.
- Activate or pause DAG: Enable to mark the active DAG.
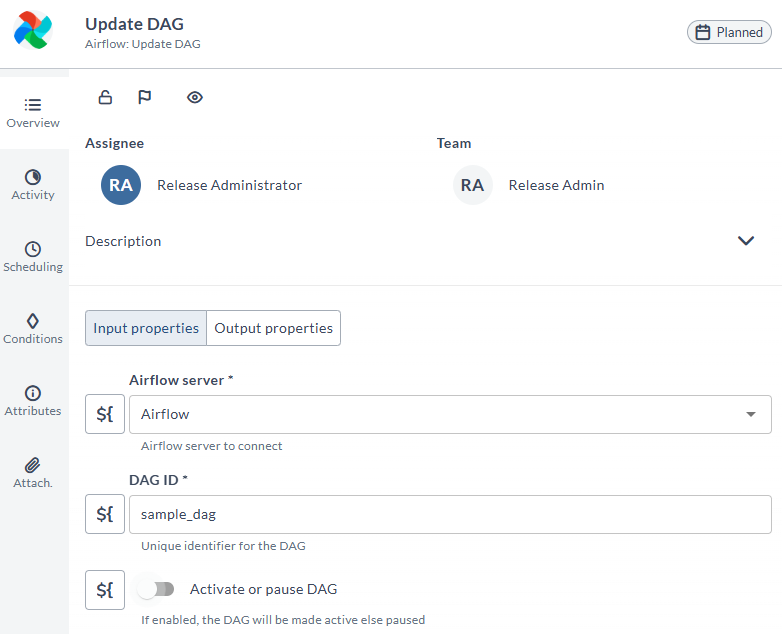
After task execution, the Output Properties displays a DAG summary as key value pairs.
Modify DAG Run State
This task modifies state of a DAG run.
- In the release or template, click Add task.
- Click All types and select Airflow > Modify DAG Run State.
- Open the task added.
- Enter the following details:
- Airflow server: Select the Airflow server connection.
- DAG ID: Enter the ID associated with the DAG run.
- DAG run ID: Enter the DAG run ID.
- State: Select the State to which the DAG run should be updated.
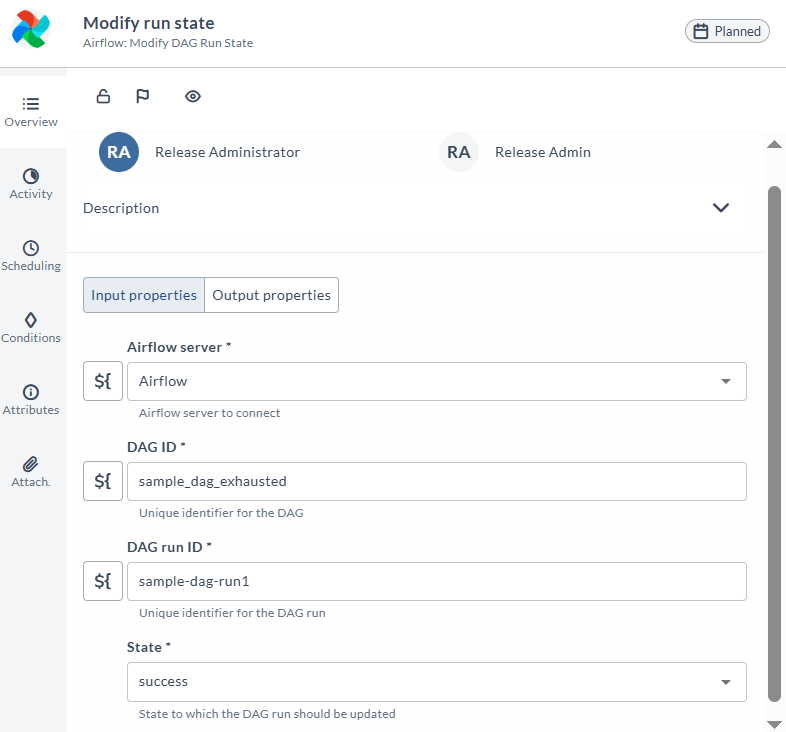
After task execution, the Output Properties display the DAG status after the update."
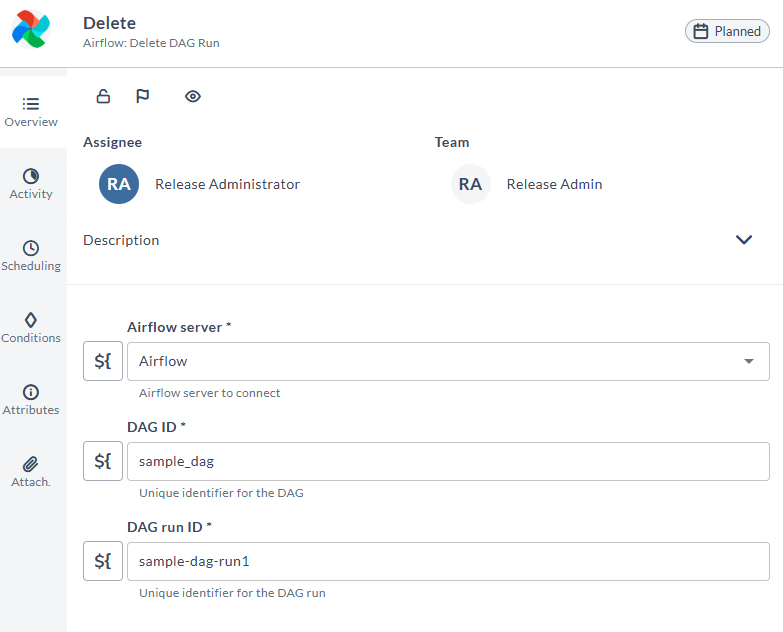
Delete DAG Run
This task deletes a specific DAG run.
- In the release or template, click Add task.
- Click All types and select Airflow > Delete DAG Run.
- Open the task added.
- Airflow server: Select the Airflow server connection.
- DAG ID: Enter the ID associated with the DAG run.
- DAG run ID: Enter the DAG run ID.
