Migrate from Appium Grid to Appium OSS
This document explains how to migrate from Appium Grid to Appium OSS.
Enable Appium Server Configuration
As a prerequisite, you must have Appium Server enabled. In SaaS environments, this is available by default. For on-premise environments, see Install Docker Swarm.
If Appium Server is available, it may not be enabled by default in your environment. Here are the ways to enable it:
Project Level
As a Cloud Administrator:
-
Click Settings → Projects.
-
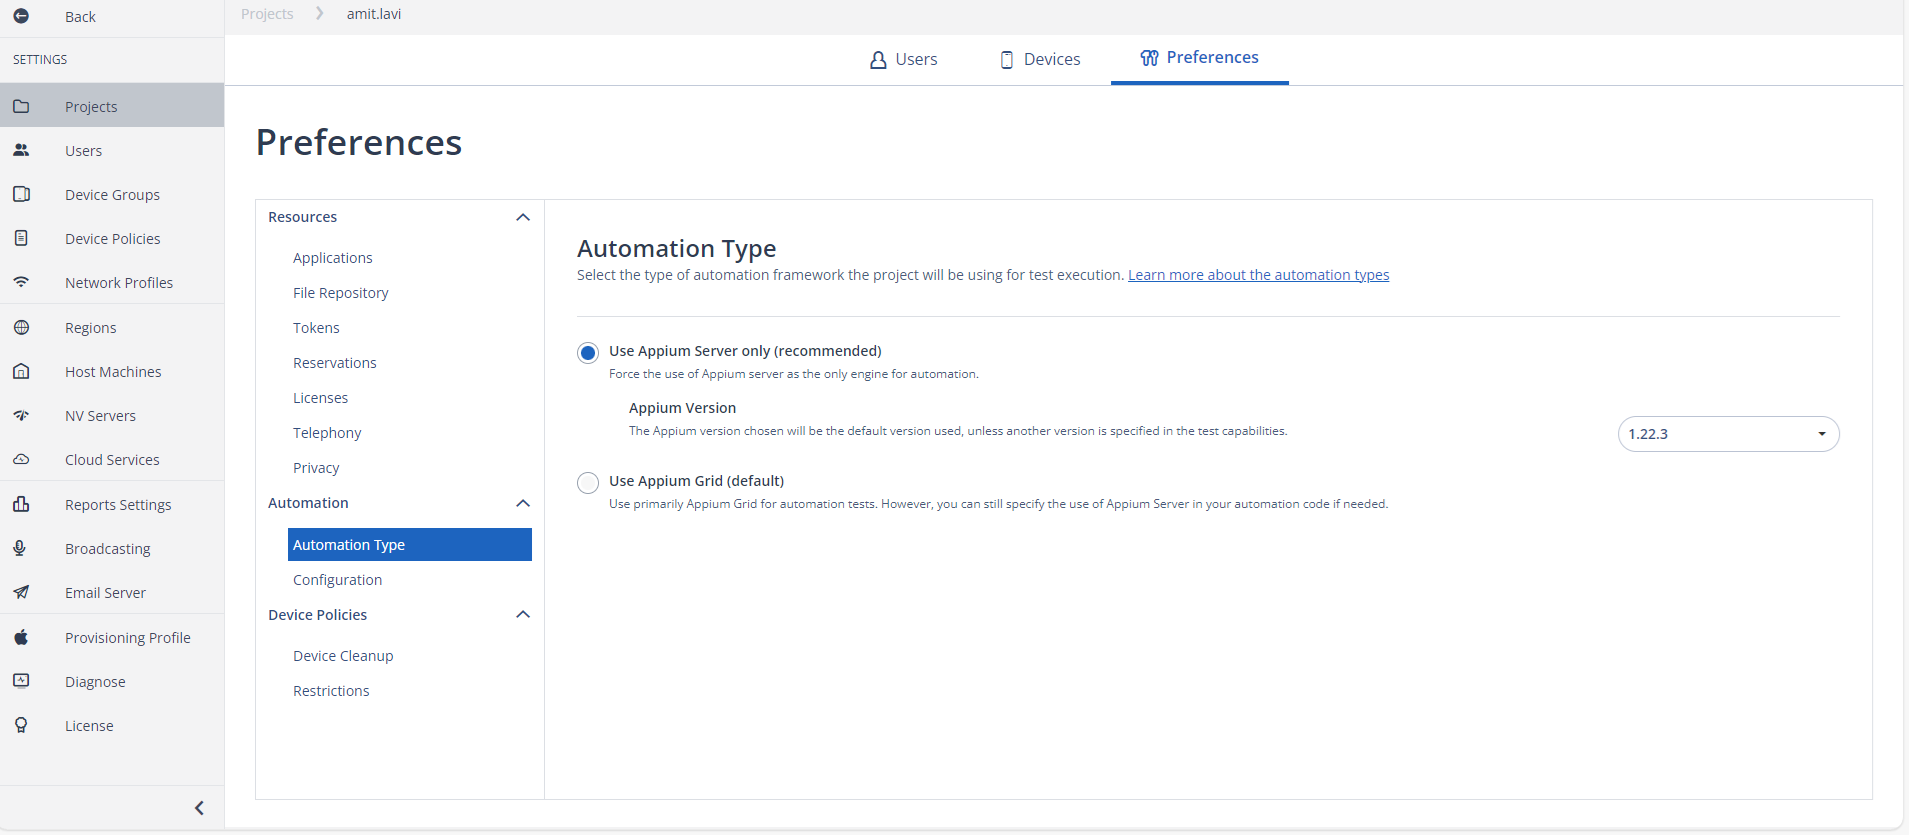
Select the project, then click Manage → Preferences → Automation Type.
-
Select “Use Appium Server only”.
-
Select the desired version from the drop down.
As a Project Administrator:
-
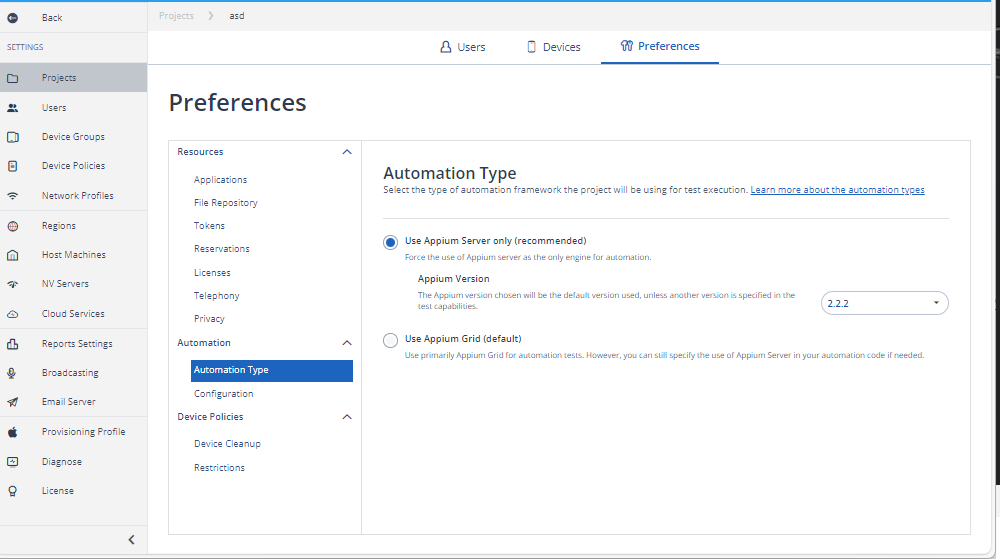
Select the project, then click Settings → Project Automation.
-
Select “Use Appium Server only”.
-
Select the desired version from the drop down.
Script Level
When running Appium Scripts, you have flexibility and can change the Appium Server versions on the fly.
If Appium Server is Already Enabled on a Project
If Appium Server is already enabled on the Project, there are these approaches:
-
The appiumVersion capability is not provided. It automatically picks the version provided in the Project.
-
The appiumVersion capability is provided. This overrides the project Appium Version and uses the new version when running the script.
desiredCapabilities.setCapability("appiumVersion, "2.2.2)
desiredCapabilities.setCapability("automationName", "XCUITest")
desiredCapabilities.setCapability("platformName", "iOS")
Appium Server is not Enabled on a Project
The appiumVersion capability is required.
desiredCapabilities.setCapability("appiumVersion, "2.2.2)
desiredCapabilities.setCapability("automationName", "XCUITest")
desiredCapabilities.setCapability("platformName", "iOS")
Native Migration
Tests written in Appium Grid need to be reviewed for the locators used in the Appium scripts. There might be a need to update the locators due to differences between Appium Grid and Appium Server OSS Object Spy. These stem from elements implemented in Appium Grid that are not available in Appium Server.
iOS
This table compares iOS elements in Appium Grid and Appium Server.
| Appium Grid Element Identifiers | Appium Server Equivalents |
|---|---|
| id | label, name |
| text, placeholder | value |
| hidden, onScreen, top | visible, enabled |
| XCElementType | type |
| knownSuperClass | class |
Android
This table compares Android elements in Appium Grid and Appium Server.
| Appium Grid Element Identifiers | Appium Server Equivalents | Comment |
|---|---|---|
| id | resource-id | |
| hidden, onScreen, top | visible, enabled | |
| x, y, width, height | bounds | OSS uses the “bounds” element in place of separate elements for coordinates and dimensions. You can still obtain these through the bounds element.<br/><br/>int x = username.getLocation().getX();<br/><br/>int y = username.getLocation().getY();<br/><br/><br/><br/>int width = username.getSize().getWidth();<br/><br/>int height = username.getSize().getHeight();<br/><br/> |
| knownSuperClass | class |
Web Migration
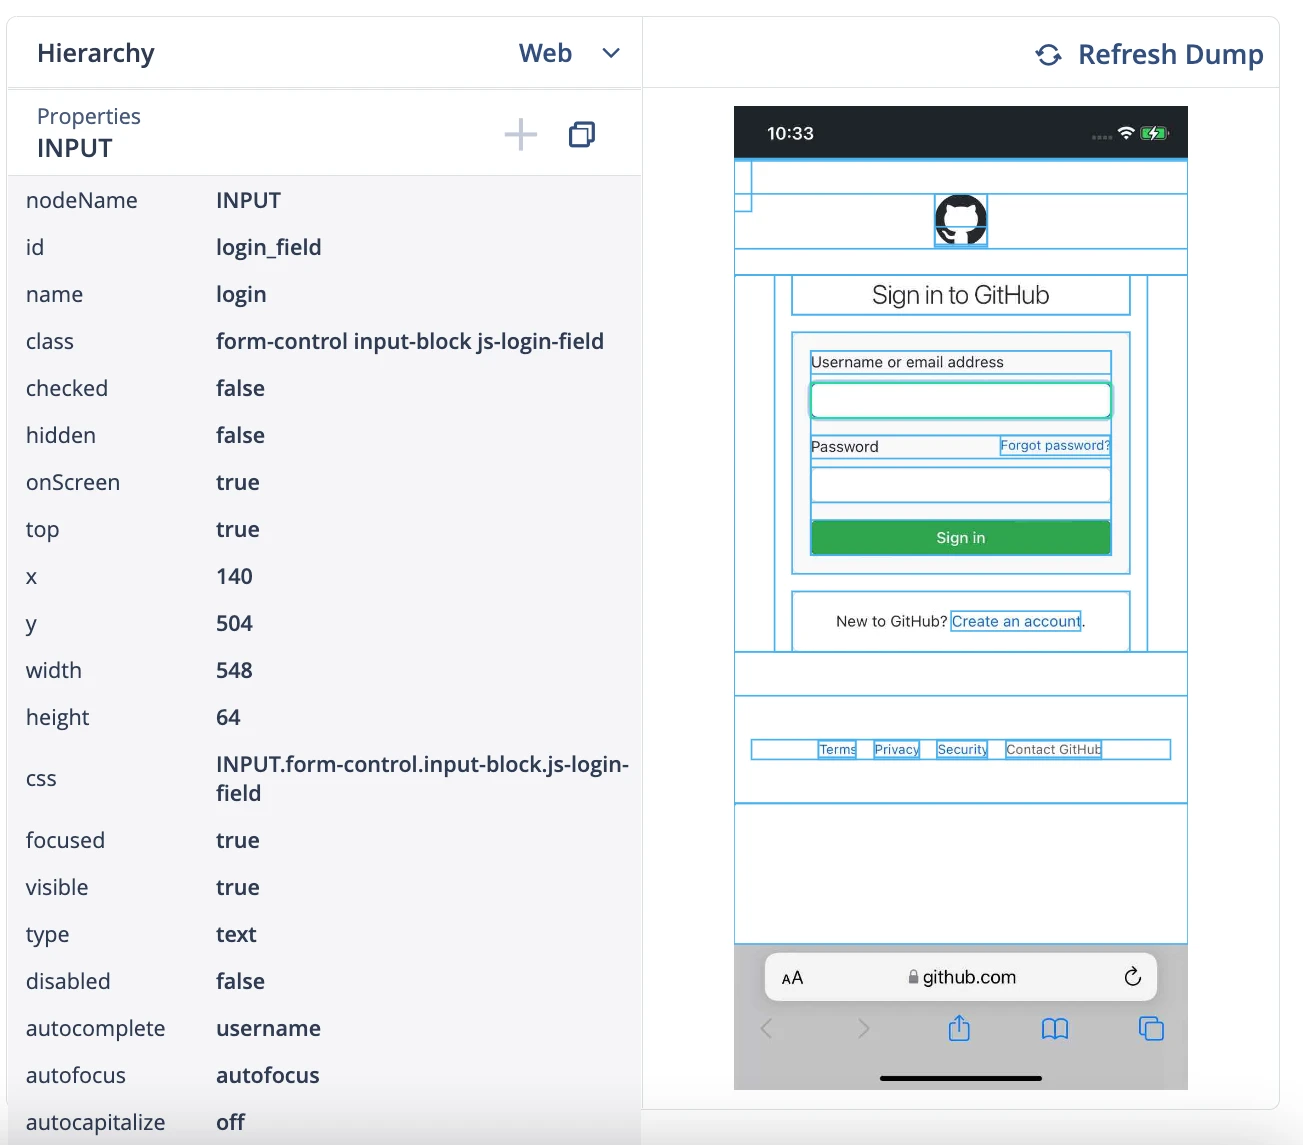
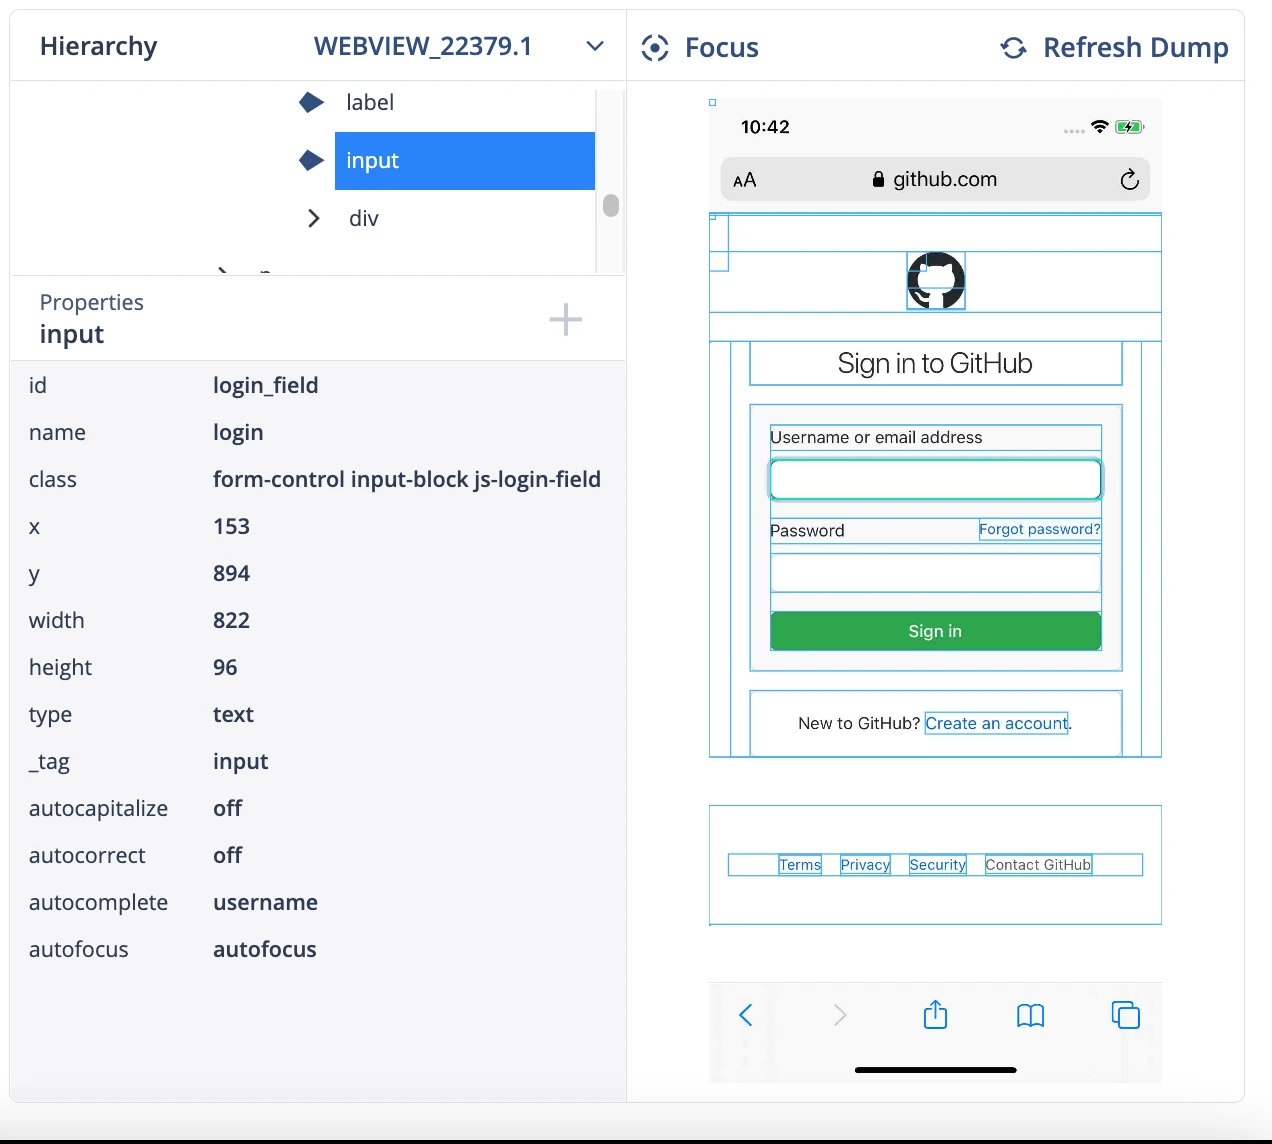
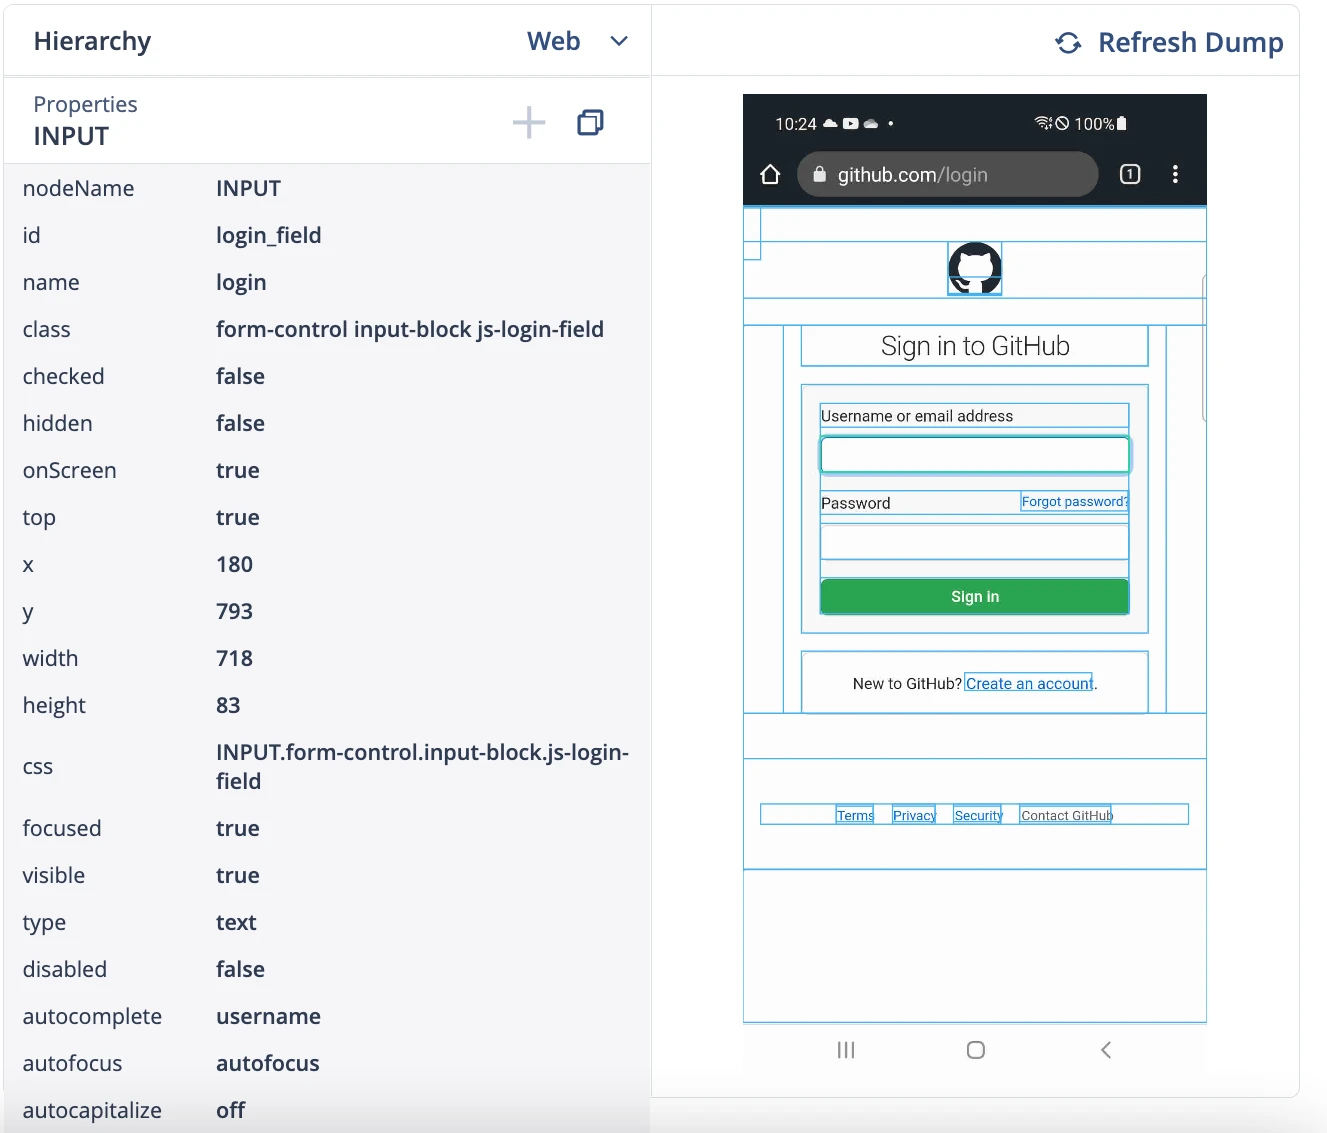
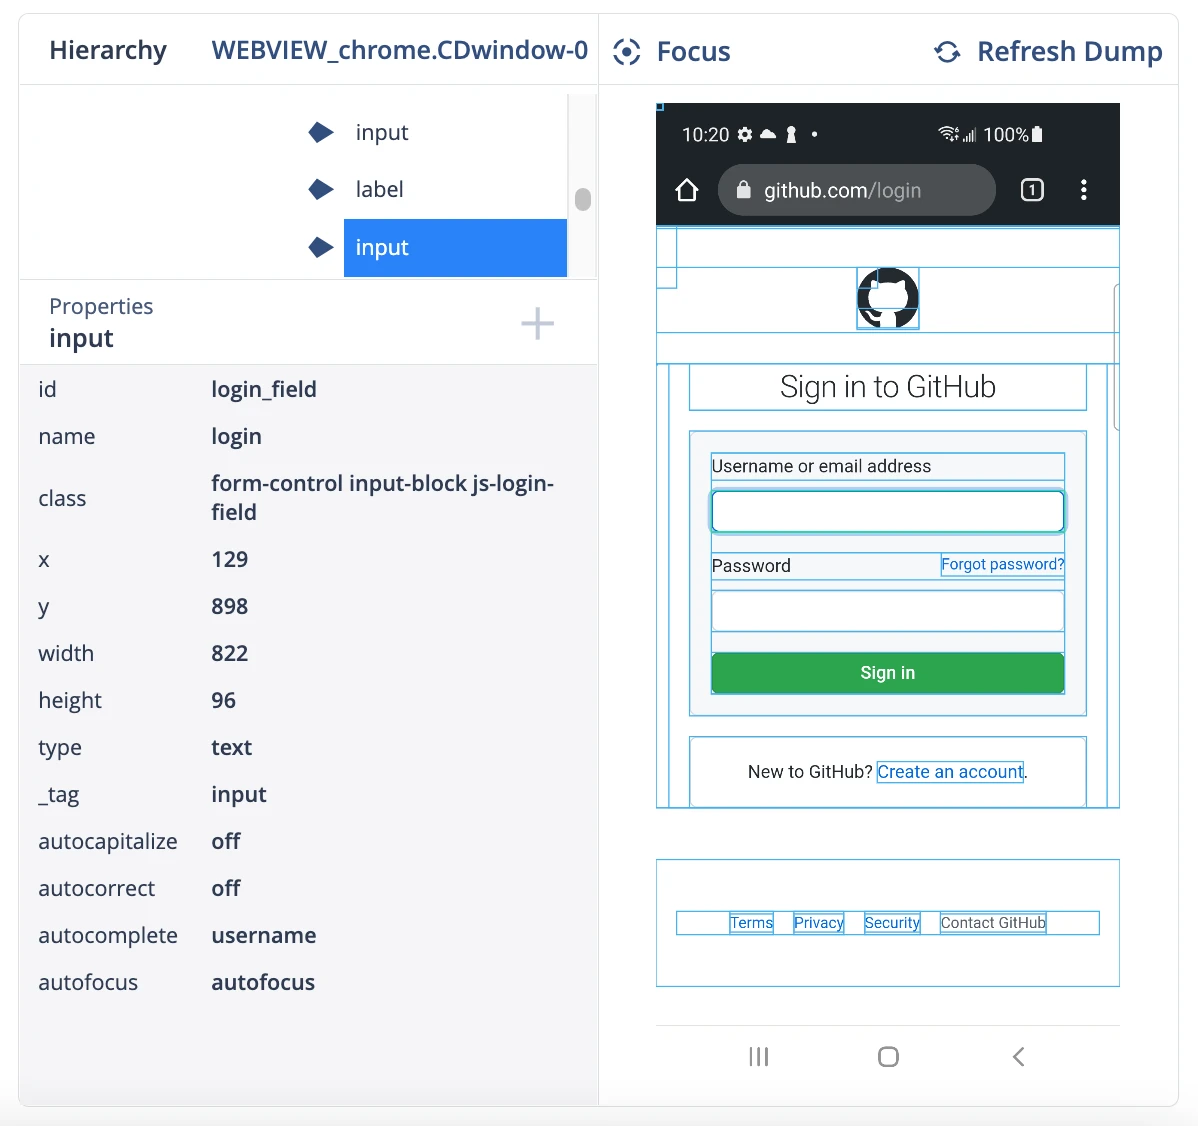
Any existing Web Scripts written on Mobile Devices for Chrome (Android) and Safari (iOS) should require minimal or no changes. The locators in Appium Grid on a Web Dump match with what Appium Desktop or Chrome DevTools would show. We simply redisplay the HTML page.
There is a need to consider the case where the Web Tests were written in Appium Grid. In such case you may run into some properties being different similar to Native Migration (onScreen / top being present in Appium Grid but not Appium Server). Otherwise, if the Web Tests were written with tools like Chrome Web Tools, or converted from Selenium Scripts, they should run with minimal changes.
Here is a comparison of Web Dumps in the respective platform:
iOS
Appium Grid
Appium Server
Android
Appium Grid
Appium Server
JQuery
If the tests use JQuery code and you try to run JQuery tests, consider that JQuery tests can require large amounts of memory when running a test, which can potentially end the sessions abruptly.
To adjust the memory used:
-
Click Settings → Projects.
-
Select the project.
-
Click Manage → Preferences → Configuration.
-
Set Max Memory Usage as desired. The default is 256 MB per session, and the maximum value is 1024 MB, Best practice to start small, like 512 MB.
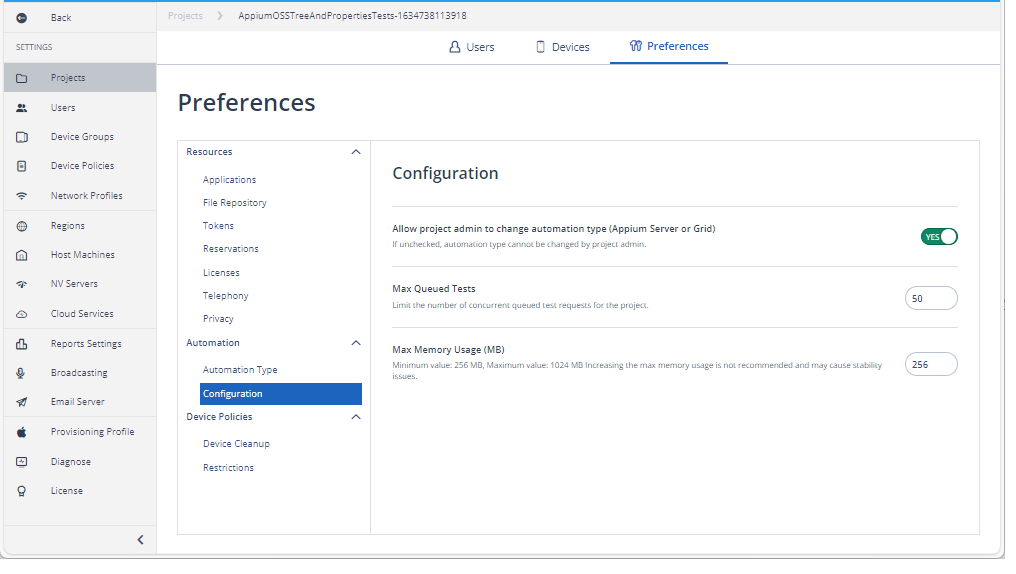
When you update this property, you ask each session to consume that amount of memory. If you have 10 Mobile Devices connected and run all 10 tests in parallel, it consumes 10 times the Grid Memory specified, which can potentially cause load issues on the Device Host Machines (Mac Minis where the physical iOS and Android Devices are connected to). See System Requirements for more information.
Session Initialization
A common complaint for Appium Server is that the initialization time for sessions takes longer than expected or compared to Appium Grid. This leads to confusion and misconception of the tests running slower.
Each time a session is initialized (a Mobile Device is opened for Automation, or used for Execution), the devices need to have a certain application(s) installed when running with Appium Server.
If the application(s) are not installed, the session installs the Application first, then proceeds with the test itself. This process it automatic and happens as soon as a device session is being initialized. This is to allow the use of devices for Development and Debugging purposes.
This table compares typical session initialization times with and without the application(s) already installed.
| OS | Without Application(s) | With Application(s) |
|---|---|---|
| iOS | ~ 90 seconds | ~ 15 seconds |
| Android | ~ 36 seconds | ~ 22 seconds |
These numbers can slightly vary depending on factors like device model OS version.
By simply making sure these Applications are available on the devices, you reduce each session initialization time. The numbers quickly add up if you are running hundreds of tests.
Whitelisting to Improve the Initialization Time
Use Whitelisting to improve initialization time. This reduces initialization time by letting you keep the application on the device. Even if a project is configured with a Cleanup process, Whitelisted applications are not removed.
Only a Cloud Administrator can set Whitelists
-
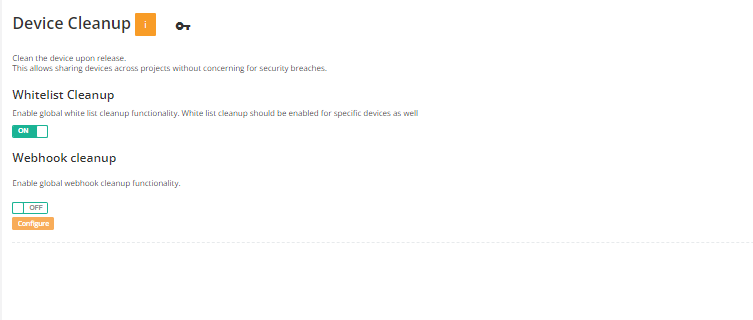
Click Settings → Device Policies.
-
Make sure “Whitelist Cleanup” is enabled.
-
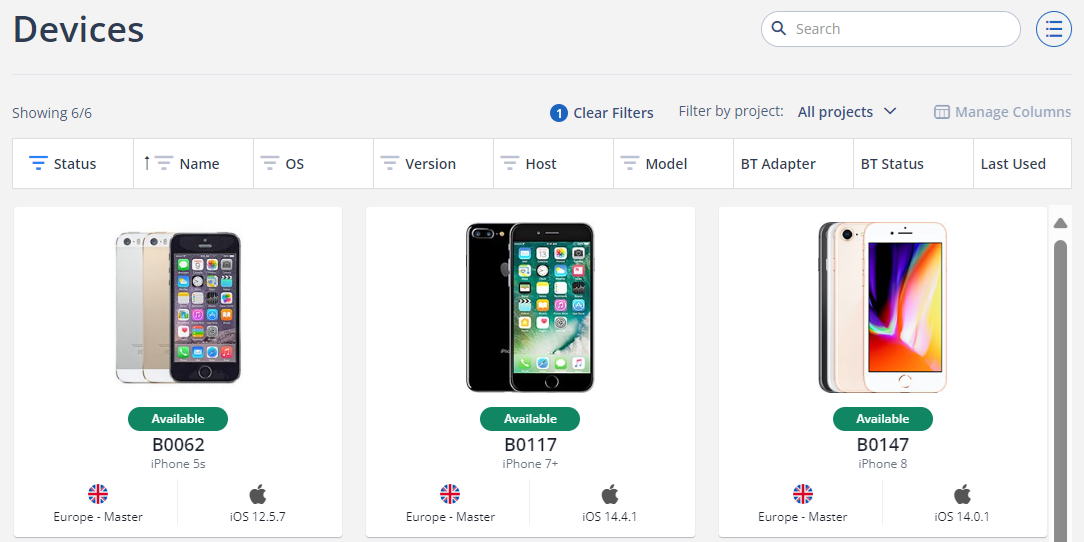
Navigate to Devices**.**
-
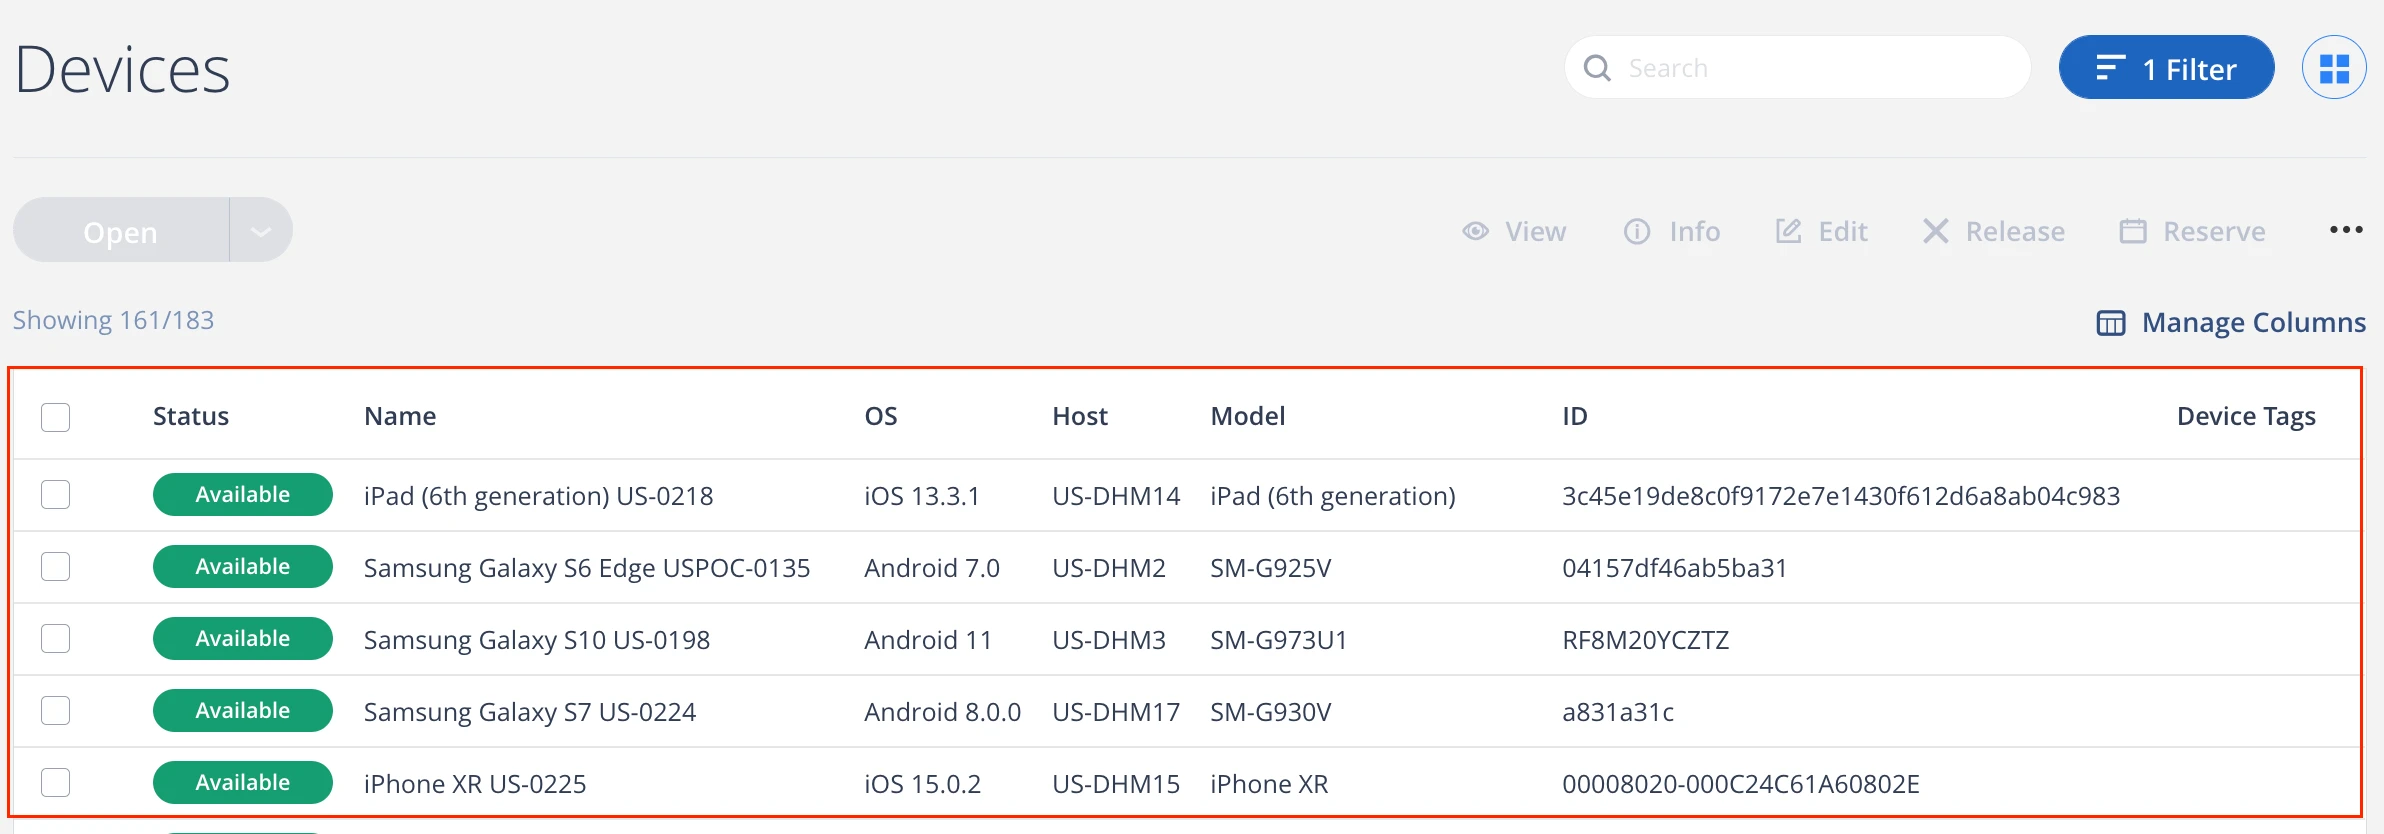
Change to List View.
-
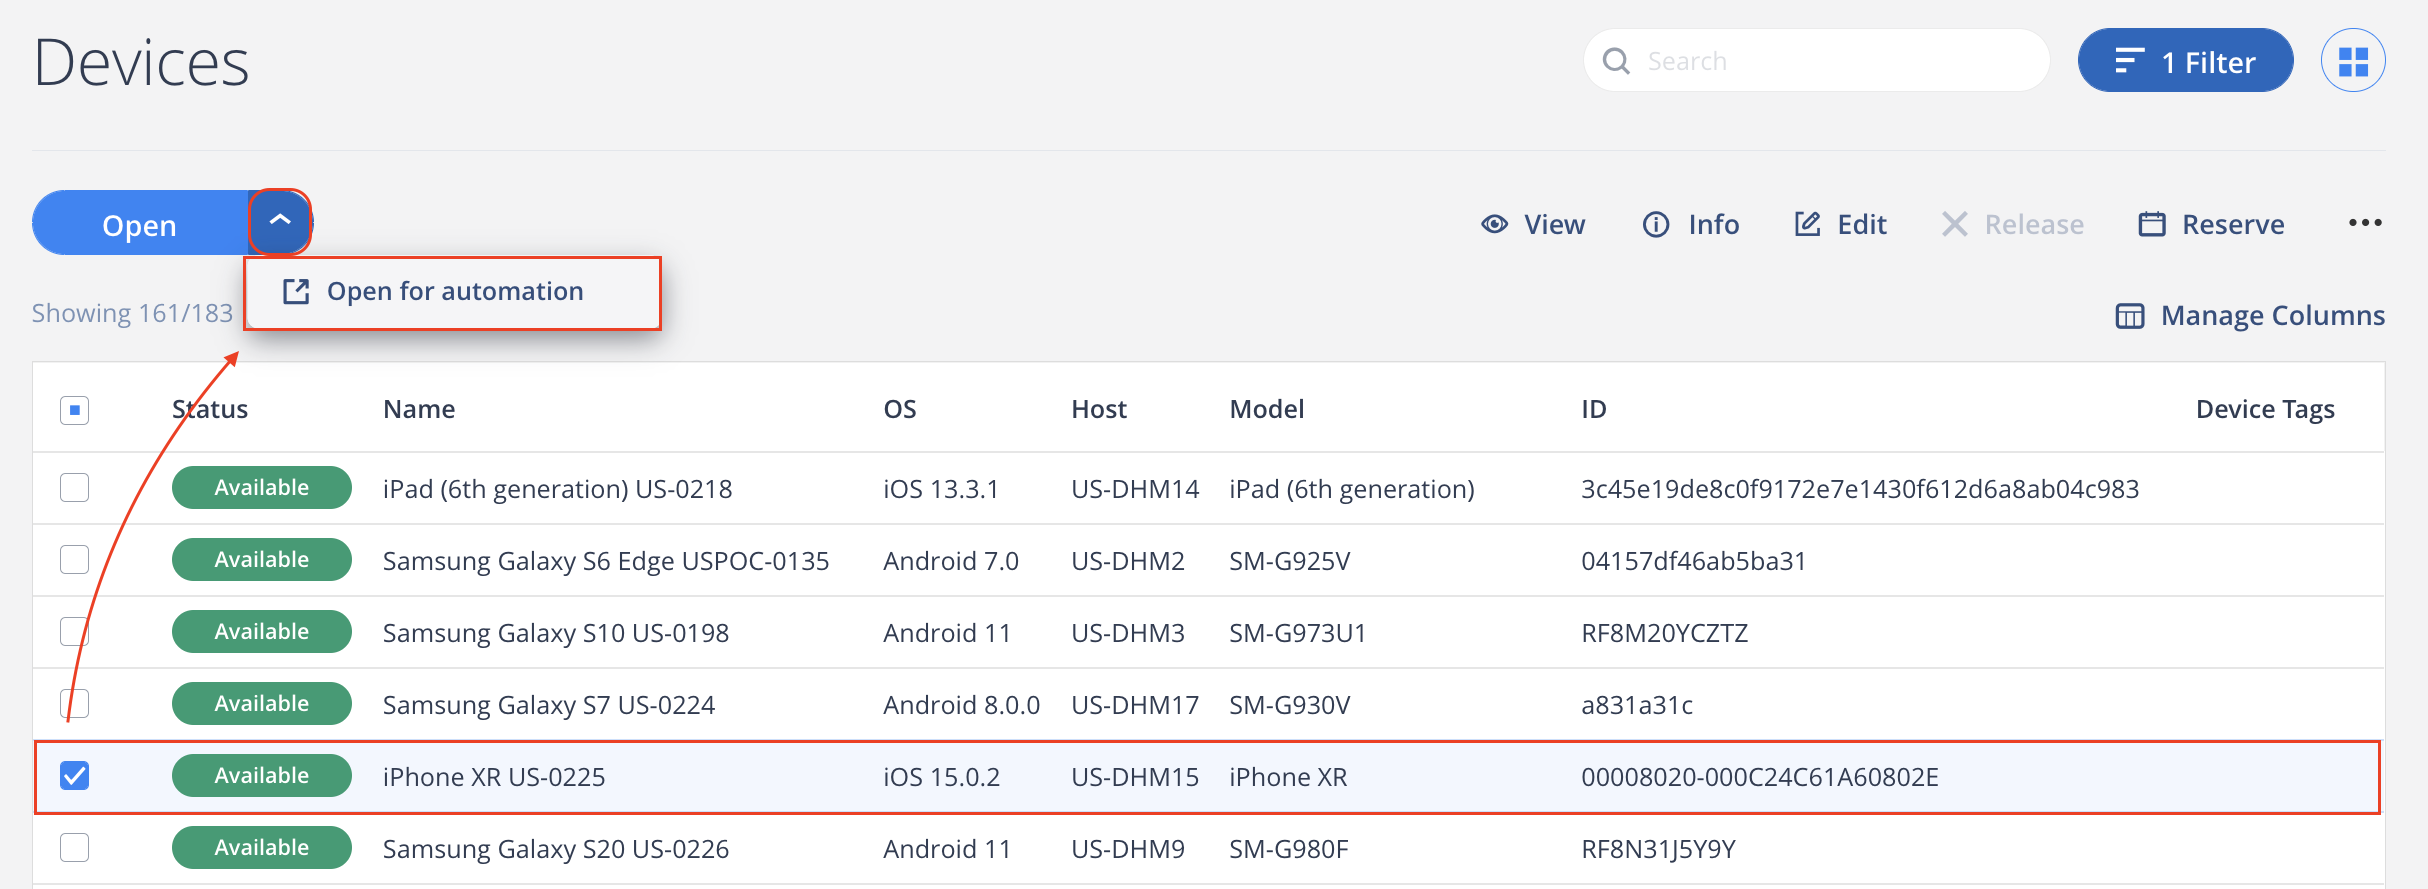
Select the desired devices, then click Open > Open for Automation.
-
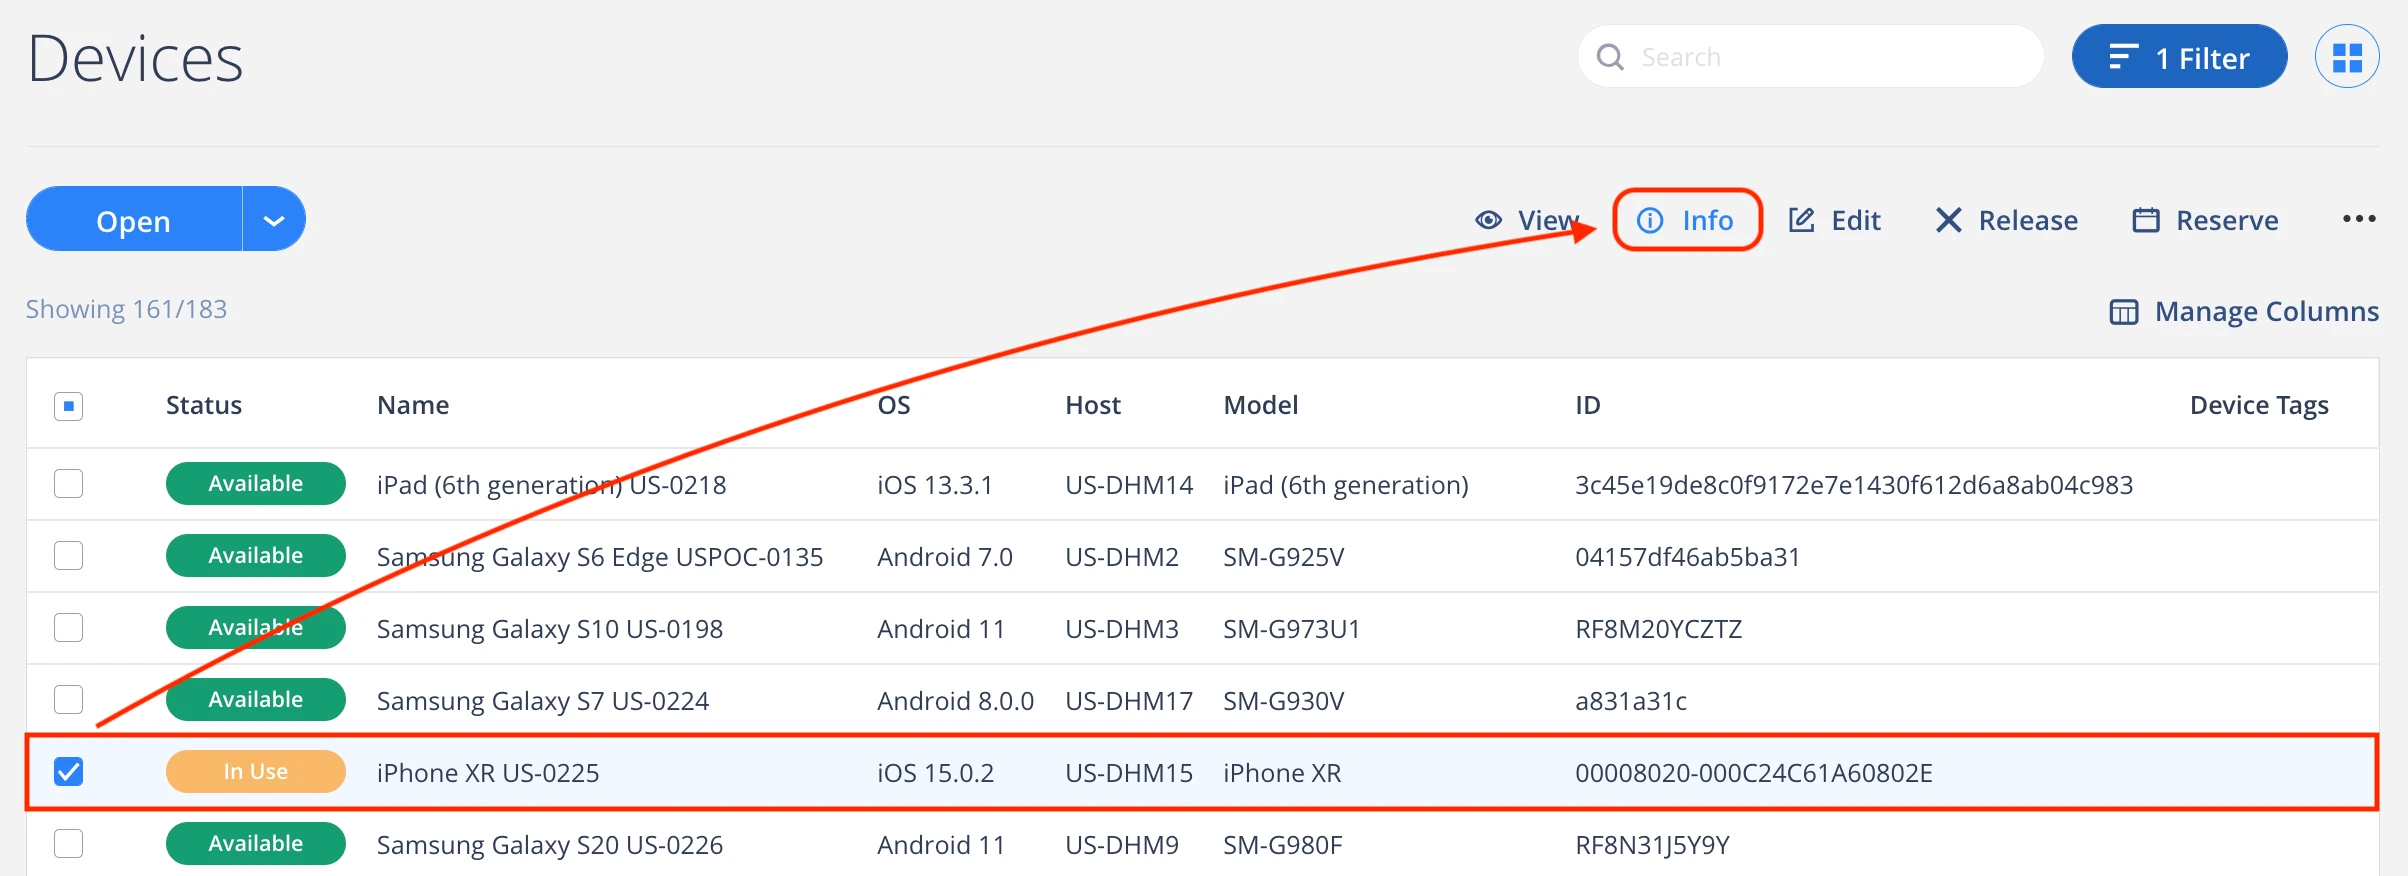
Once the device is open, go back to the Devices List View, and Perform the following on each device.
-
Select the device → then click Info.
-
Under Whitelist cleanup make sure that Whitelist Cleanup is enabled.
-
Click New Snapshot. This captures the current installed Applications, Including our recently installed Application for the Appium Server session initialization.
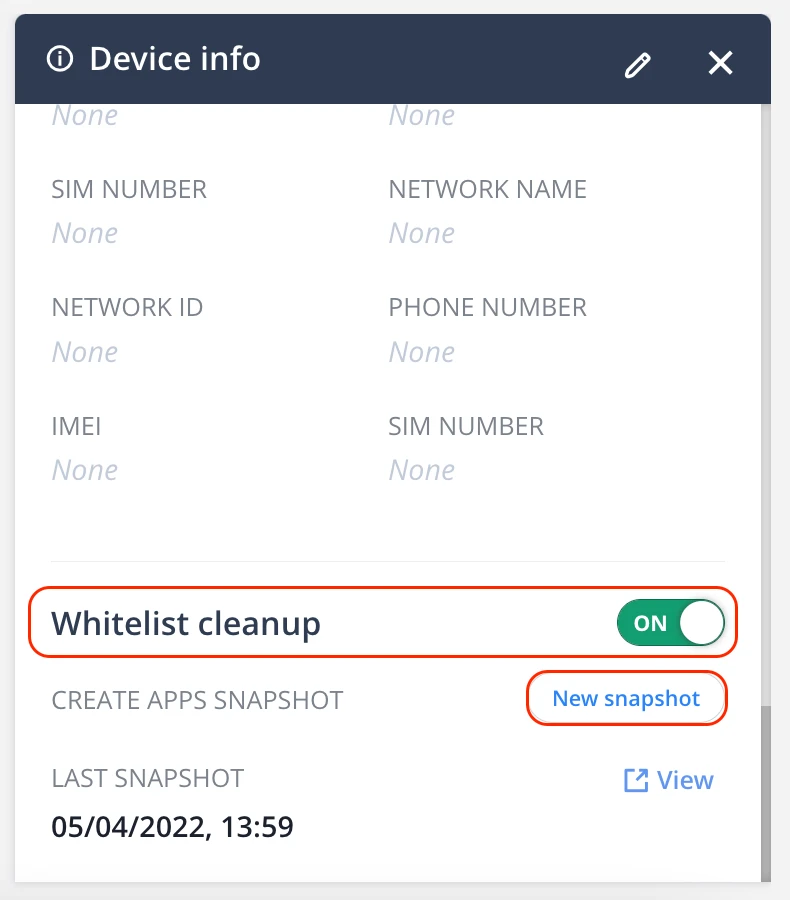
-
-
Click View, then make sure you see the required application(s) based on the device’s OS.
-
iOS -
WebDriverAgentRunner (com.facebook.WebDriverAgentRunner.xctrunner) -
Android
io.appium.uiautomator2.server
io.appium.uiautomator2.server.test
-

Context Switching
In Appium Grid or Appium Server, running Mobile Web tests (Safari for iOS, Chrome for Android) requires context switching. That means, in order to interact with Web Elements through script, you need to tell the script it is working in a Web context. However, the method of switching to Web contexts vary slightly for Appium Grid vs Appium Server.
In Appium Grid, the Web Context is always the same. This is how this is done (Code example is Java, but same logic applies to all other programming languages. The Appium Driver always has a “context” function):
driver.context(“WEBVIEW_1”);
In Appium Server, the Web Context always changes on each session. The naming convention starts with “WEBVIEW_” but the number varies. Use this code to switch to a Web Context in Appium Server:
Set<String> contexts = driver.getContextHandles();
for (String context : contexts) {
  if (context.contains(“WEB”)) {
    driver.context(context);
    break;
  }
}