Manage Email Settings
Remove Users from Monitoring Objects
As a site or project administrator, if one or more users are no longer project members, you can remove them from monitoring selected TeamForge objects they once subscribed for monitoring.
However, you cannot remove a user from the monitoring list if the user is monitoring applications such as trackers, documents, tasks, and so on instead of individual TeamForge objects.
By default, this feature is disabled. To enable this feature, set the USER_MONITORING_REMOVE_ENABLED token to true in the site-options.conf file.
Every user removal operation is being logged in the database for audit purposes.
-
Go to the item, from which you want to remove users from monitoring.
-
Select users to remove from monitoring list.
-
If you want to remove one or more users from monitoring one of the items, select the item, then click Monitor > Users Monitoring Selected.
The Users Monitoring This Item window appears.
-
If you want to remove one or more users from monitoring more than one item, select all the items, then click Monitor > Users Monitoring This Folder.
-
In the case of team monitoring, click Monitor > Users Monitoring This Team.
-
In the following window, select one or more check boxes corresponding to the users you want to remove from monitoring.
-
Click Remove. The
Are you sure you want to remove the selected user(s) from monitoring?message appears. -
Click OK.
The selected users are removed from monitoring the selected object. An e-mail notification is sent to all active users that are removed from monitoring selected objects.
Limit the Size of Message Attachments
To avoid overtaxing your mail server or your storage volume, you may want to set a ceiling on the size of the attachments that users can send to a forum via email.
When a user sends an attachment that is larger than the limit, the message is rejected and the user gets an email from the Site Administrator explaining that the attachment exceeded the limit.
Before imposing a file attachment size limit, it's a good idea to point your users to better ways of collaborating around large files. Consider suggesting source code repositories, backup systems, or other appropriate solutions.
-
Open the
site-options.conffile, the master configuration file that controls your TeamForge site.vi /opt/collabnet/teamforge/etc/site-options.conf -
Set the value of the DISCUSSION_MAX_ATTACHMENT_SIZE token.
For example, if your users are given to using Microsoft Word documents on the site, you might set
DISCUSSION_MAX_ATTACHMENT_SIZEto 10 MB, and increase the value by two or three MB at a time if users need more headroom. -
Review the changes, then save the
site-options.conffile.
Limit the Size of Document Attachments
When many users store very large documents on your site, you may sometimes notice a slowdown in your site's performance. You can reduce the impact of such a use pattern by telling TeamForge not to attach documents larger than a certain size.
It's also a good idea to let your users know that the Documents tool in TeamForge is not designed primarily as a storage device. As a best practice, upload documents to make them available for collaboration, not for backup or long-term storage.
- Open the
site-options.conffile, the master configuration file that controls your TeamForge site.vi /opt/collabnet/teamforge/etc/site-options.conf - Add the DOCUMENT_MAX_FILE_UPLOAD_SIZE parameter and give it a value equal to the maximum size (in megabytes) of documents to be uploaded.
- Review the changes, then save the
site-options.conffile.
Relay Emails Through SMTP Gateway with Authentication
You can set up TeamForge to relay emails through an SMTP gateway (such as Amazon AES) that uses authentication. By default, James sends emails directly. However, you may prefer relaying emails through an enterprise relay server. Configuring the JAMES_GATEWAY_* tokens let you do that.
By default, TeamForge uses the user's email address (as registred in TeamForge user profile) as the sender address (From). Therefore, it is important that the mail relay does not impose any restrictions on the email sender address and accepts all emails to be relayed.
To relay emails through an SMTP gateway:
- Set the following site-options.conf tokens.
vi /opt/collabnet/teamforge/etc/site-options.confJAMES_GATEWAY_HOST=
JAMES_GATEWAY_PORT=
JAMES_GATEWAY_USERNAME=
JAMES_GATEWAY_PASSWORD= - Save the
site-options.conffile. -
Provision services.
teamforge provision
DomainKeys Identified Mail (DKIM)
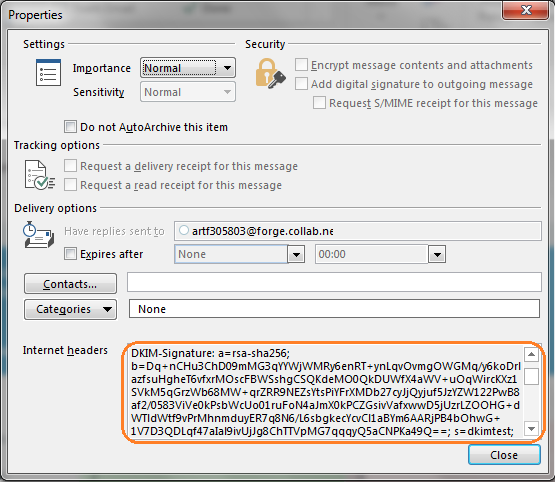
A DKIM signature is being added to the headers of all outgoing TeamForge emails to authenticate all outbound emails against email spoofing.
DKIM is enabled by default. Once enabled, the DKIM signature is included in all the outgoing TeamForge emails. However, you can disable DKIM using the JAMES_DKIM_VERIFICATION token. In general, you must set up the following four newly added tokens on your TeamForge site (site-options.conf).
- JAMES_DKIM_VERIFICATION
- JAMES_DKIM_SELECTOR
- JAMES_DKIM_SIGNINGDOMAIN
- JAMES_DKIM_KEY_TYPE
For more information, see TeamForge site-options.conf Tokens.
