Create and Manage Projects
Create a New Project
TeamForge administrators can create new projects without having to submit them for approval.
When a TeamForge administrator creates a new project, he or she is not made a member of the project, and the Founder Project Admin role is not created. To designate a project administrator, you must add the user to the project, then create and assign a project administrator role manually.
-
Go to My Workspace > Admin.
-
In the list of TeamForge projects, click Create Project.
-
On the Create Project page, provide a name for the project. This is the name that will appear in all project lists and on the project home page.
-
Enter a URL name for the project, if appropriate. This is the name that will appear in the project's URL.
-
Write a description of the project.
-
Do this step, if you create a project using a project baseline.
Only users having baseline license can create a project from a project baseline.
Project Baseline drop-down list is visible only to users having baseline license.
Only approved project baselines are listed in the Project Baseline drop-down list.
Only 50 projects get listed in the Project Baseline drop-down list at a time. If there are more than 50 projects, a +more... link is shown at the end of the Project Baseline drop-down list.
Only the most recent 5 project baselines get listed under the selected project in the Project Baseline drop-down list. You can search for a project baseline that is not listed among these 5 most recent project baselines.
The same set of associations (related to Trackers, Documents, and File Releases) from the source project will be available in the carry over project created using the project baseline, provided that these associations were present when the source project was baselined.
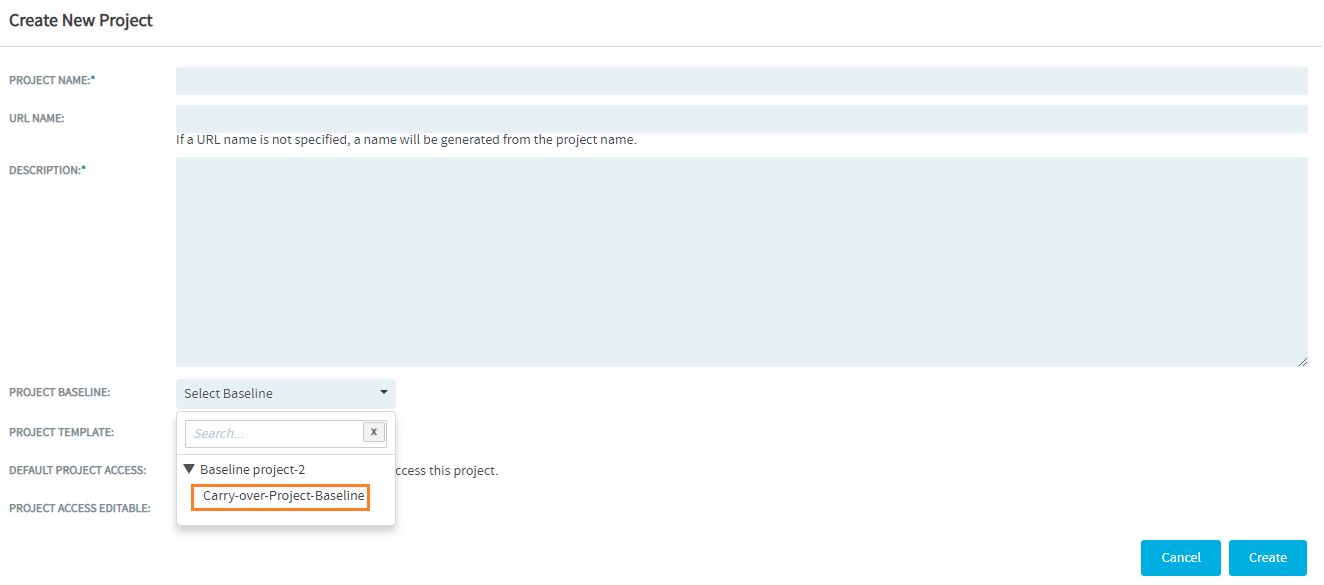
Select a project baseline from Project Baseline drop-down list.
To select a project baseline from the Project Baseline drop-down list, click and expand a project from the Project Baseline drop-down list and select the respective project baseline.

Import Source Code and Binary Repositories from Project Baselines
Source code and Binary repositories, included in a Project Baseline, can be imported into projects that are created from the Project Baseline.
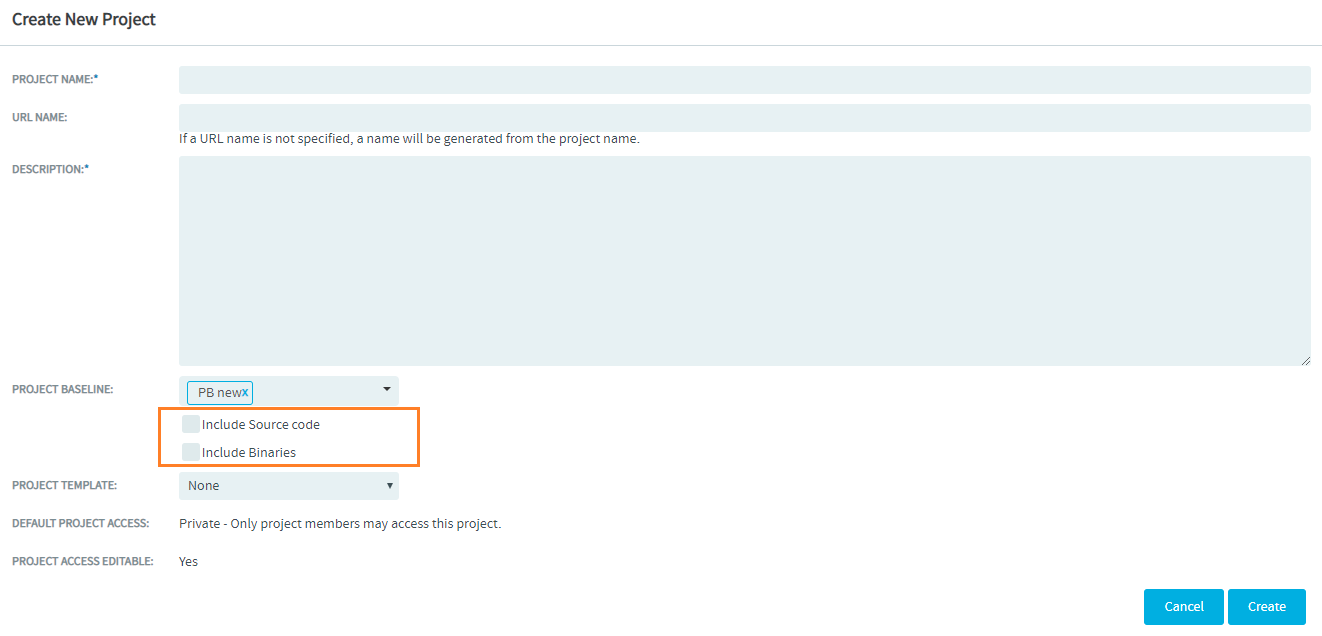
When you create a new project from a Project Baseline that include source code/binary repositories, the Create New Project page has the following options:
-
Include Source code: This option shows up if the Project Baseline includes source code repositories.
-
Include Binaries: This option shows up if the Project Baseline includes binary repositories.

References to External Baselines
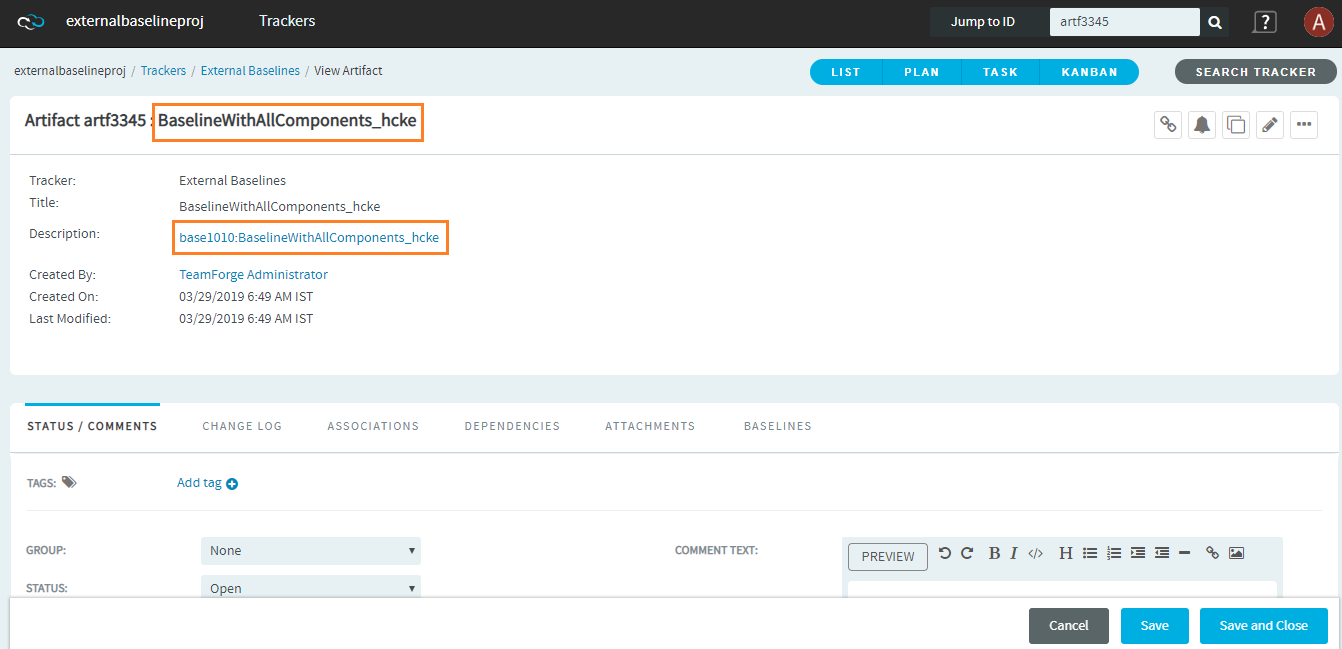
When you create a new project from a project baseline that includes one or more external baseline(s), the new project or the carry-over project will have references to these external baselines. The new project created in this way will have a Tracker called External Baselines. This Tracker in turn will have artifact(s) created in the name of the external baseline(s) referenced from the Project Baseline of the source project.

The description of the artifact(s) in the External Baselines Tracker will include a link (in the format "baseline id:baseline name") to the external baseline.

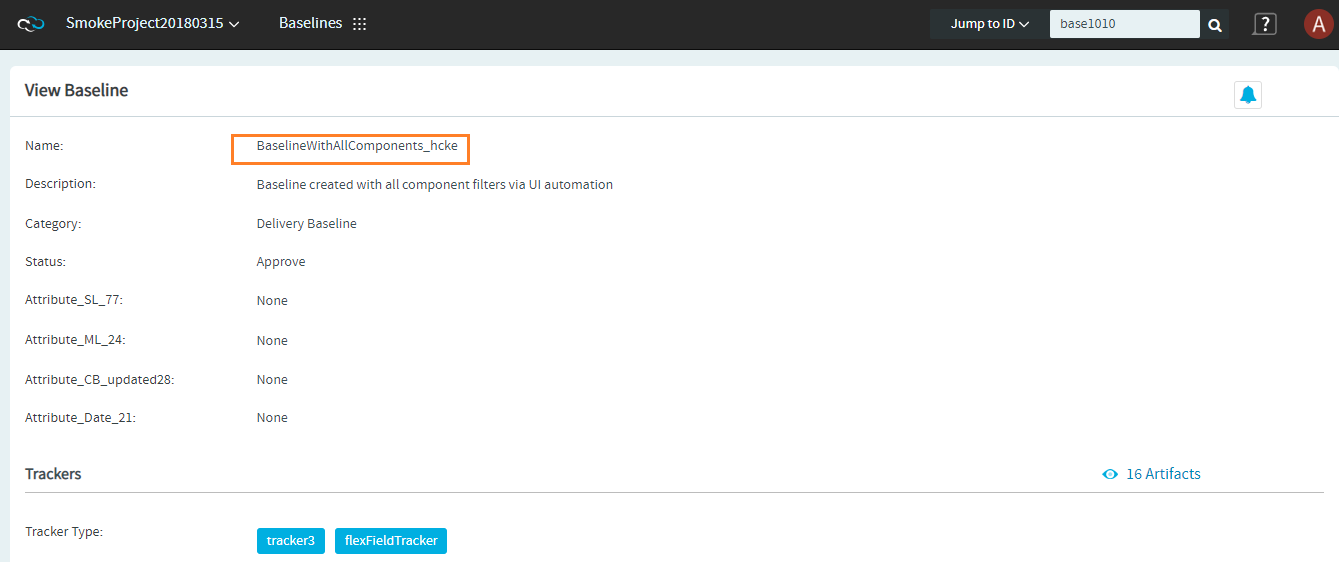
Click the external baseline link in the artifact description to view the baseline from within its native project.

-
Once you select a project baseline, the Project Template field will be disabled.
From TeamForge 19.0 release, you can also create a project from the View Project Baseline page. For more information, see Create a Project from View Project Baseline Page.
-
Select a project template. A project template is used to pre-populate new projects with the structure and configuration of an existing project. If you do not want to use a project template, choose None.
noteOnce you select a project template, the Project Baseline field will be disabled.
noteIf you create a project from a template that contains an integrated application, you may have to provide some information specific to the integrated application. For example, for Project Tracker you must set a new artifact prefix that is different from the prefix in the template.
-
Click Create.
The project is created.
Approve a New Project
Any registered TeamForge user can request a new project. A new project is activated only after a site administrator approves it.
Before approving a new project, you have the option to review the project details.
-
Go to My Workspace > Admin.
-
Click the PENDING PROJECTS tab.
-
Select the projects you want to approve from the pending projects list.
-
Click Approve to approve the project and move it to the All Projects page with status Active.
-
Click Reject to reject the project and remove it from the list.
The project requester receives an email notification when the project is approved or rejected. If you entered a comment, that also appears in the email notification.
Rename a Project
As the focus of a project shifts, its name or description can become obsolete. A site administrator can update the name or description to help keep the project current.
- Go to My Workspace > Admin.
- In the TeamForge project list, click the project you want to edit.
- Click PROJECT ADMIN from the Project Home menu.
- On the Project Admin Menu, click Project Settings and make the changes you need.
- Click Save.
Delete a Project
If you no longer need a project or any of the data in it, you should delete it.
Delete a project only if you are sure that you no longer need any of the data within it. Move any items that you want to save.
- Deleting a project deletes all of the data within it, with the exception of source code data, which is maintained separately from the rest of the site's content.
- You can delete a parent project only when its members, user groups and roles are not in use in any other project.
- When you delete a parent project, the direct subprojects are moved one level up; that is, under the immediate parent of the deleted project.
- If the deleted project has no parent, its subprojects become root-level projects.
-
Go to My Workspace > Admin.
-
From the TeamForge project list, choose the project that you want to delete and click Delete.
The project is deleted.
Lock or Unlock a Project
To ensure that no changes occur in a project while you are collating or migrating project data, lock the project. You must have project administration permissions or be a site administrator to lock or unlock a project.
-
To lock or unlock a project in TeamForge, go to Project Settings and lock/unlock the project.
noteA locked project does not allow any member (including project administrators and site administrators) to make any changes to the project. Besides that, a locked project can not be set as the parent project for any other project and tasks like adding, editing or deleting integrated applications are also not allowed.
-
Click PROJECT ADMIN from the Project Home menu.
The project is locked or unlocked as desired.
The lock icon
appears on all the project pages while the project is locked.
noteIf a locked project has an integrated application, for example, project tracker, all the project tracker pages are also non-editable while the project is locked. The user who has access permissions for the integrated application can only view the pages.