Live Deployments in Release
Live Deployments revolutionizes how you monitor and manage deployments across your entire ecosystem. This feature brings unified visibility to all your deployments—whether they originate from Release tasks or external tools like Digital.ai Deploy, Argo CD, and Flux CD.
Key benefits:
- Real-time deployment tracking across multiple platforms
- Unified dashboard for both cloud-native and traditional deployments
- Seamless integration with external deployment tools
- Native support for Release orchestration
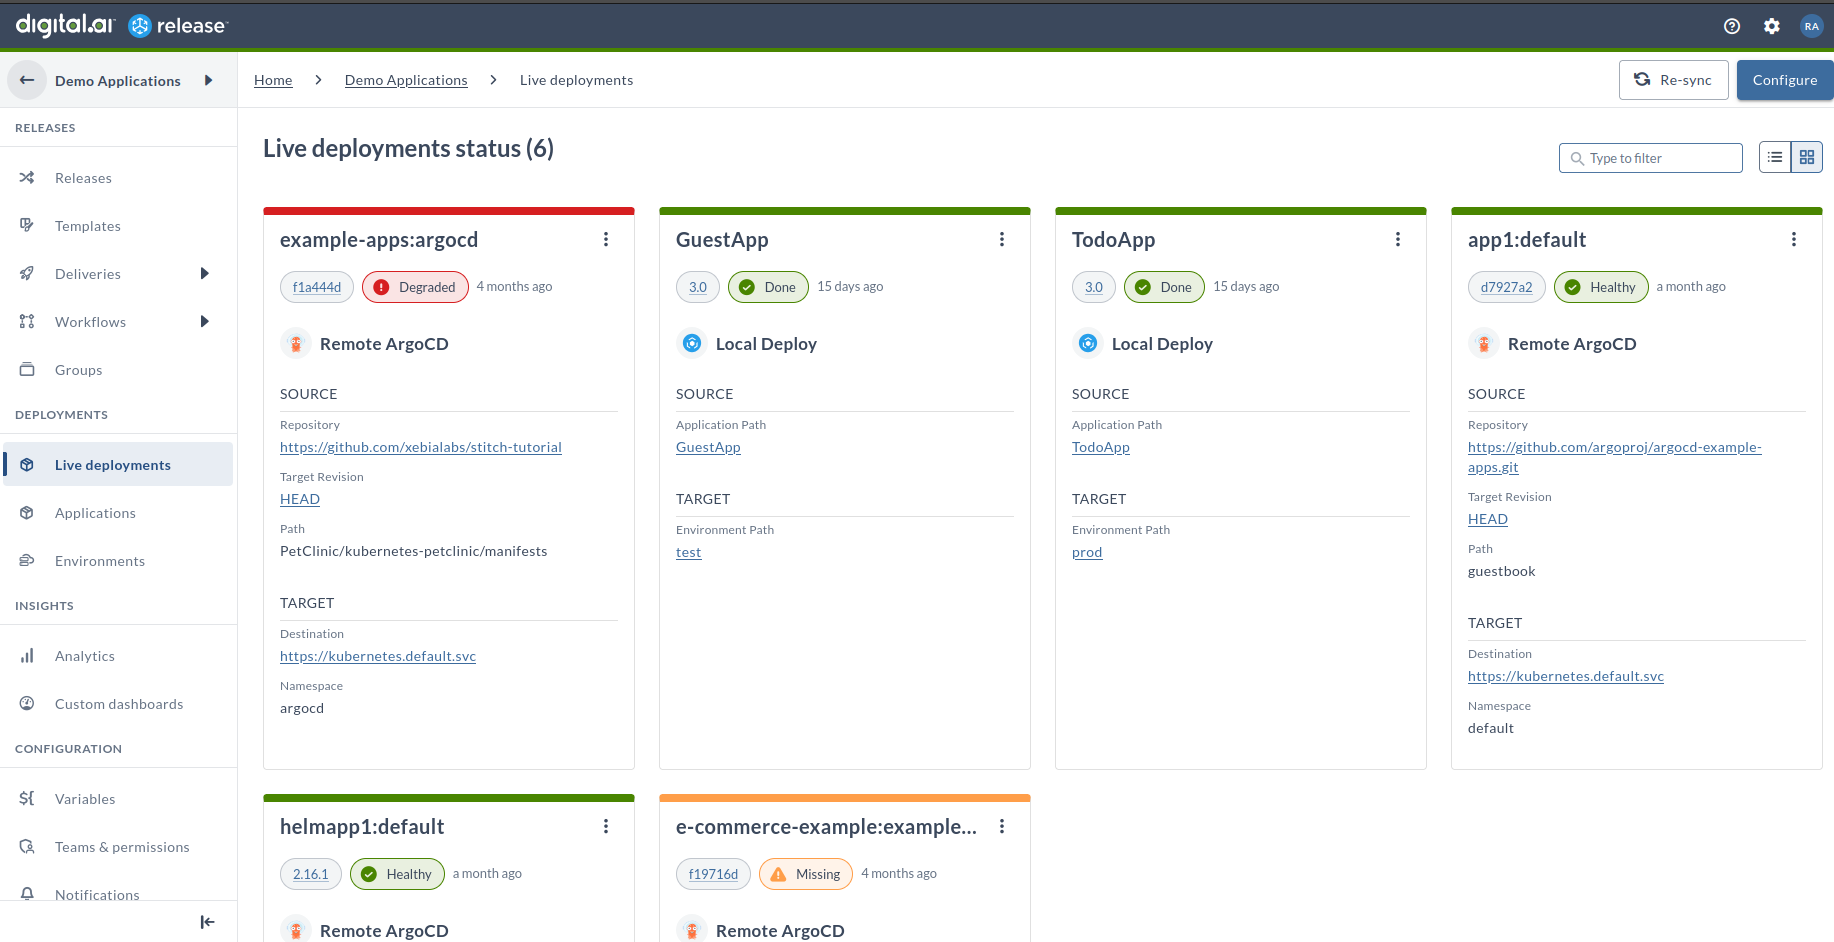
With Live Deployments, you can:
- Monitor deployment status across all environments in real-time
- Track deployment events from Digital.ai Deploy, Argo CD, and Flux CD
- Integrate external deployments into your release process using Webhook Event Triggers and Webhook: Wait for Deployment Event tasks
Prerequisites and Setup Requirements
Before you begin using Live Deployments, ensure your environment meets the following requirements for each component:
Digital.ai Release Requirements
- Digital.ai Release 24.3 or later, with Release runner
- Container plugins for Deploy, Argo CD, and Flux CD (included by default)
- Network connectivity between Release and all deployment servers
- Access to the Digital.ai Release web interface
Digital.ai Deploy Requirements
- Deploy 24.3 or later, running and accessible
- Valid Deploy server URL
- Credentials with sufficient permissions for Deploy server
- Target environments configured in Deploy
Argo CD Requirements
- Argo CD server running and accessible
- Administrator access to the Argo CD server
- Valid Argo CD server URL
- Permissions configured for Release integration (see Configuring Argo CD Permissions for Live Deployments for step-by-step setup)
- Ability to configure webhook events using the config map generated during Live Deployments setup
- Kubernetes cluster access configured for Argo CD
- For webhook setup details, see Argo CD Notification Services—Webhook
Flux CD Requirements
- Flux CD running and accessible
- Administrator access to the Flux CD server
- Flux CLI installed and configured
- Access to the GitOps repository
- Ability to configure webhook receivers using the config map generated during Live Deployments setup
- For webhook setup details, see Flux CD - Setup Webhook Receivers
Understanding Live Deployments in Release
The Live Deployments feature in Release offers a comprehensive way to manage and monitor your deployments. Before diving into the setup and configuration, it's important to understand the two main approaches available:
-
Onboard new deployments—This option is ideal when starting fresh. It guides you through setting up new deployments directly in Digital.ai Deploy or Argo CD using intuitive step-by-step workflows. Choose this if you're setting up a new deployment pipeline.
-
Connect to existing deployments—This approach lets you integrate existing application deployments from Digital.ai Deploy or ArgoCD into Release. This is perfect when you already have working deployments that you want to monitor and manage through Release.
Required Setup and Preparations
Before proceeding with either approach, ensure you have completed the following preparations:
Common Requirements
- Access to Digital.ai Release web interface
- Access to the Release Runner instance
- Proper network connectivity between Release and deployment servers
For Digital.ai Deploy
- Valid Deploy server URL
- Deploy server credentials with appropriate permissions
- Target environments configured in Deploy
For Argo CD
- Valid Argo CD server URL
- Administrative access to Argo CD server
- Kubernetes cluster access configured
- Permissions to modify webhook configurations
- Access to configure applications and projects
For Flux CD
- Flux CLI installed and configured
- Access to Kubernetes clusters
- Permissions to create webhook receivers
- GitOps repository access
- Ability to modify Flux system configurations
Setting Up Connections in Release
Before you can track deployments, you need to establish secure connections between Release and your deployment servers. Follow the steps below for your specific deployment tool.
Connecting to Digital.ai Deploy
-
In Release, navigate to Connections > Digital.Ai Deploy Server.
-
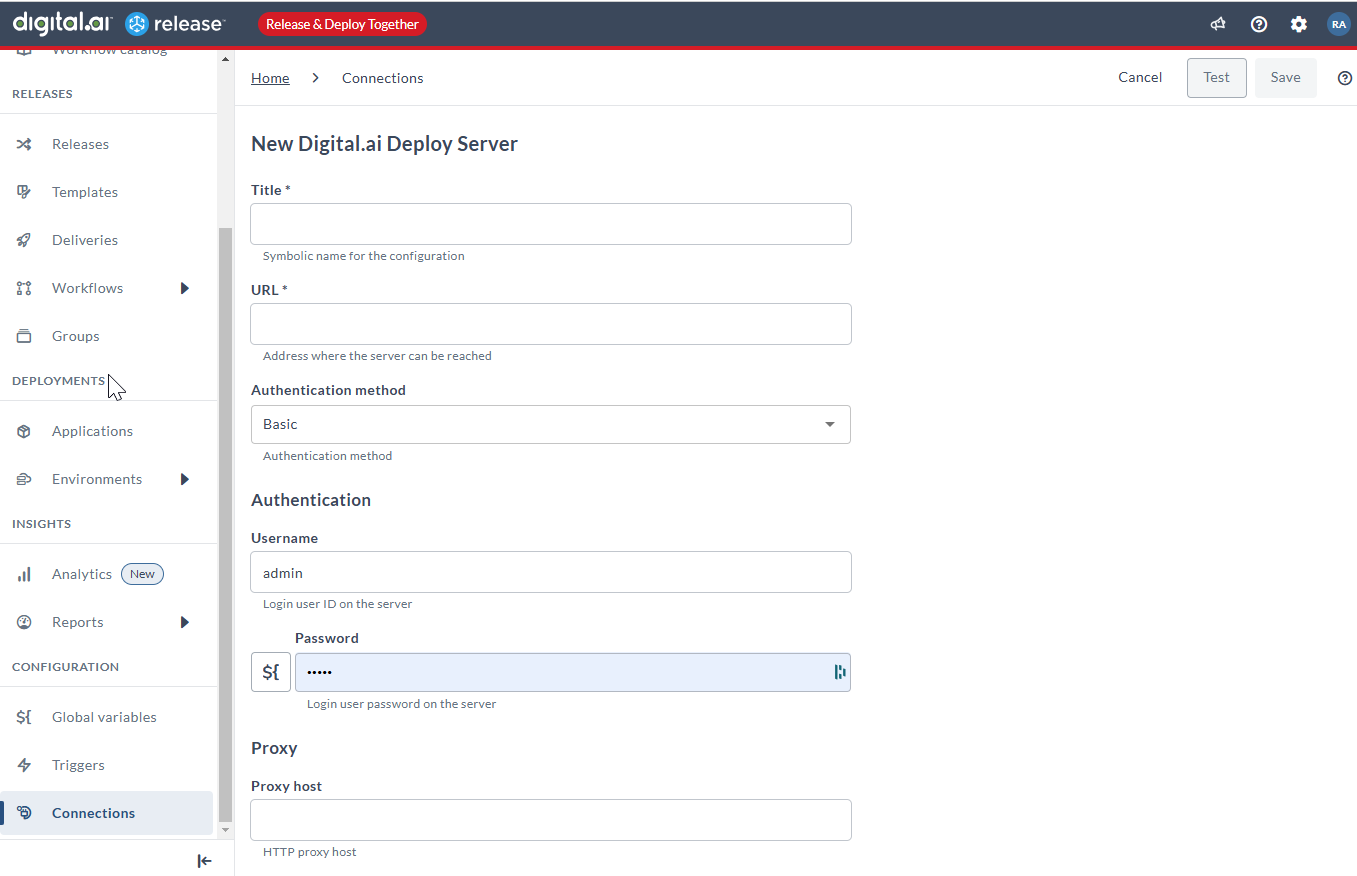
On the New Digital.ai Deploy Server settings page, type the required details to create a connection between the Digital.ai Release and Digital.ai Deploy servers.
-
Click Test to verify the connection.
-
Click Save if the test is successful.
Connecting to Argo CD
-
Navigate to Connections > ArgoCD: Server.
-
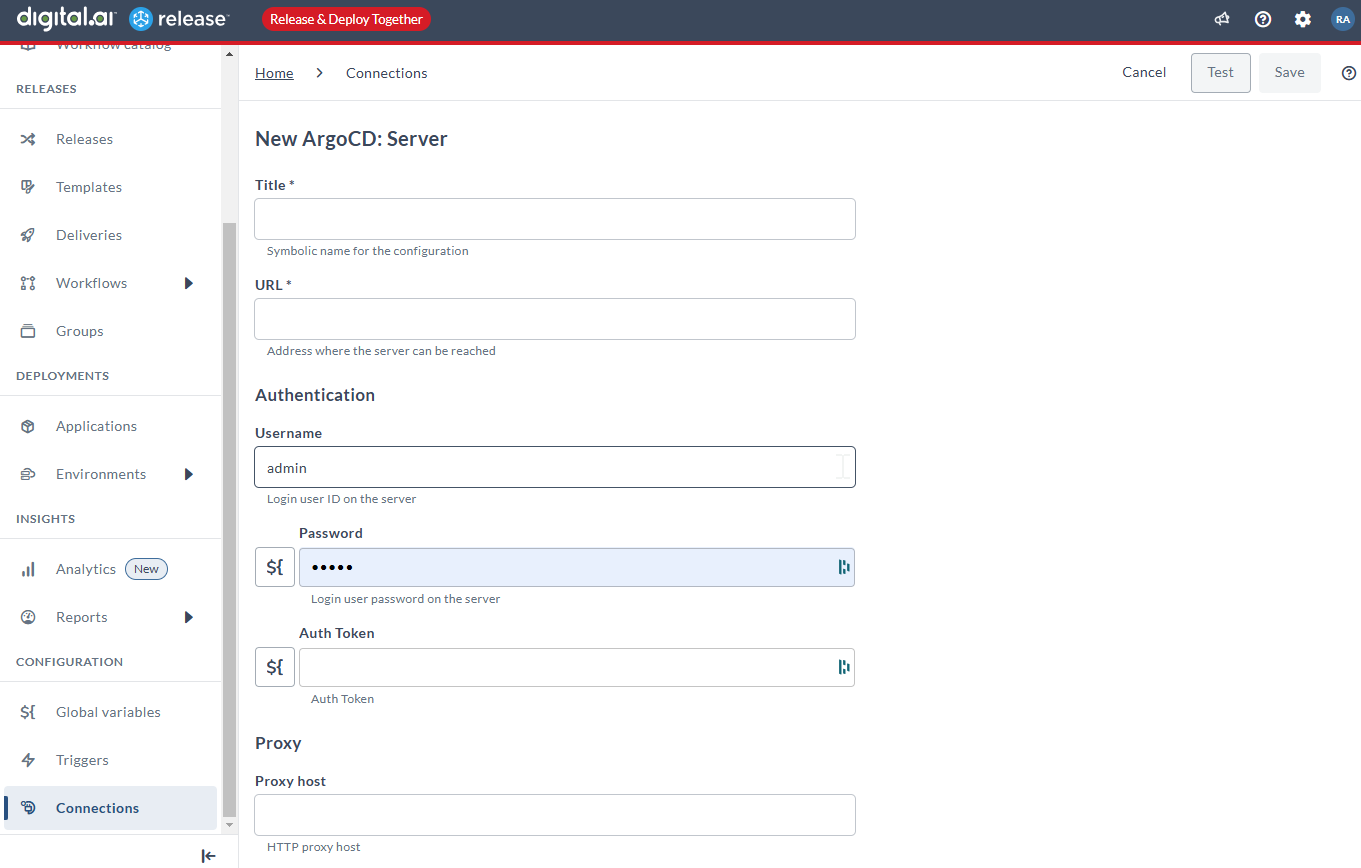
On the New ArgoCD: Server settings page, type the required details to create a connection between the Digital.ai Release and Argo CD servers.
-
Click Test to verify the connection.
-
Click Save if the test is successful.
Connecting to Flux CD
-
Navigate to Connections > FluxCD API Server (Container).
-
On the New FluxCD API Server (Container) settings page, type the required details to create a connection between the Digital.ai Release and Flux CD servers.

-
Click Test to verify the connection.
-
Click Save if the test is successful.
Working with the Live Deployments Dashboard
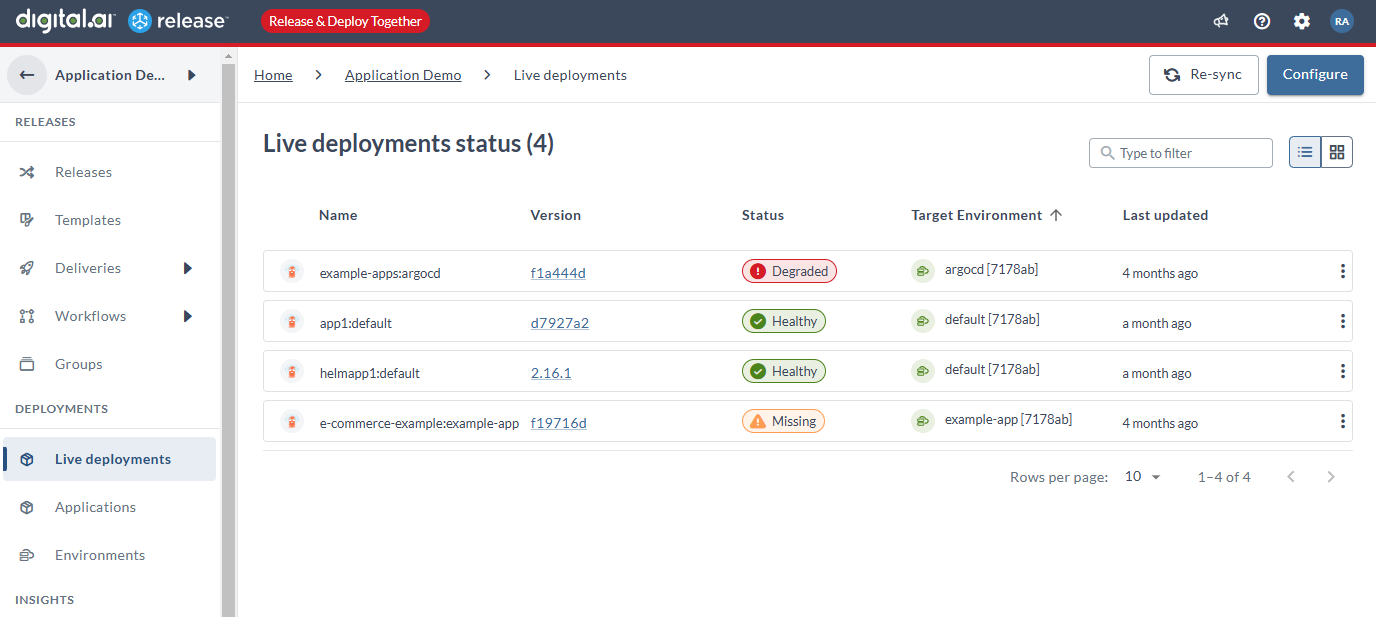
The Live Deployments dashboard serves as your central command center for monitoring deployments. To accommodate different viewing preferences and use cases, it offers two distinct views:
Live Deployments Dashboard—List View
Live Deployments Dashboard—Tile View
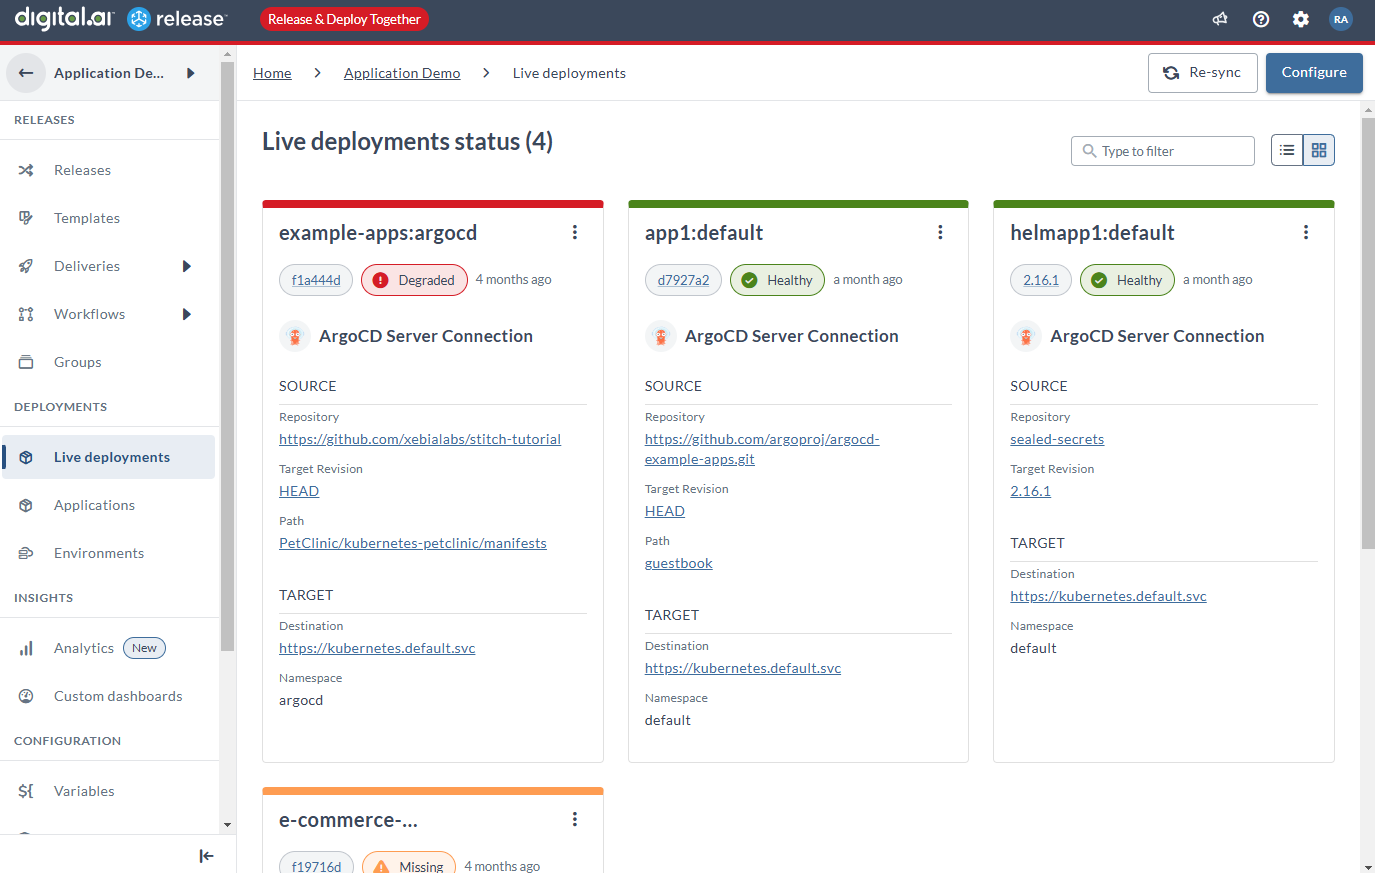
The Live Deployments dashboard shows the following information for every deployed application:
- Name of the application
- Version of the deployed application
- Status of the deployed application
- The environment to which the application was deployed
- Duration since the application was last updated
Action Menu to Manage Deployed Applications
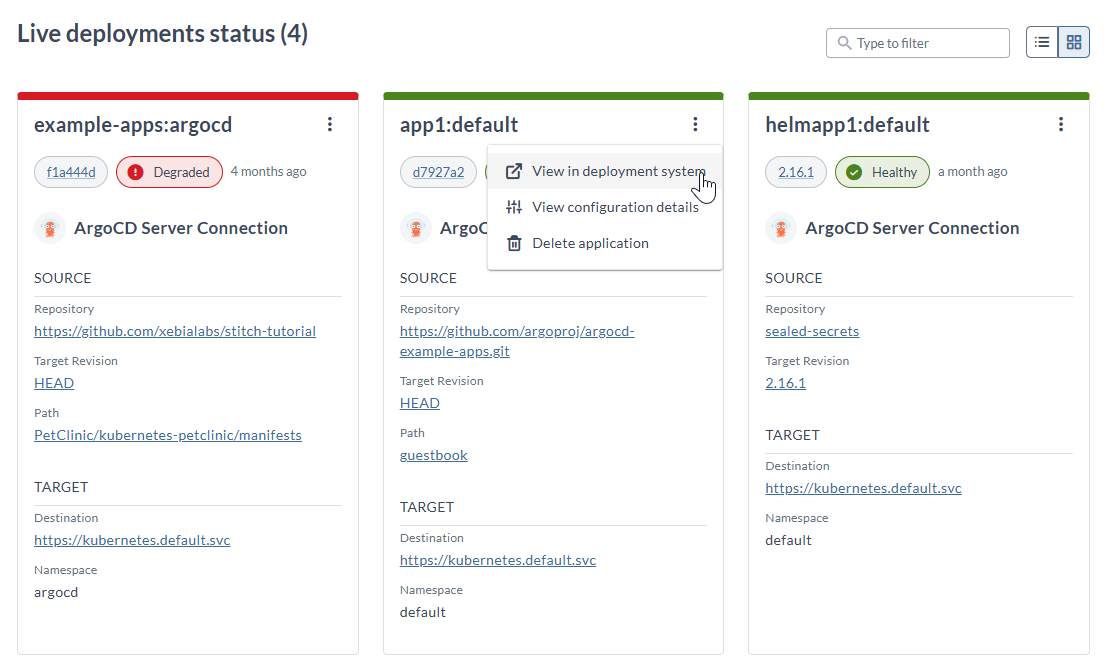
You can do the following for every deployed application in the Live Deployments dashboard.
-
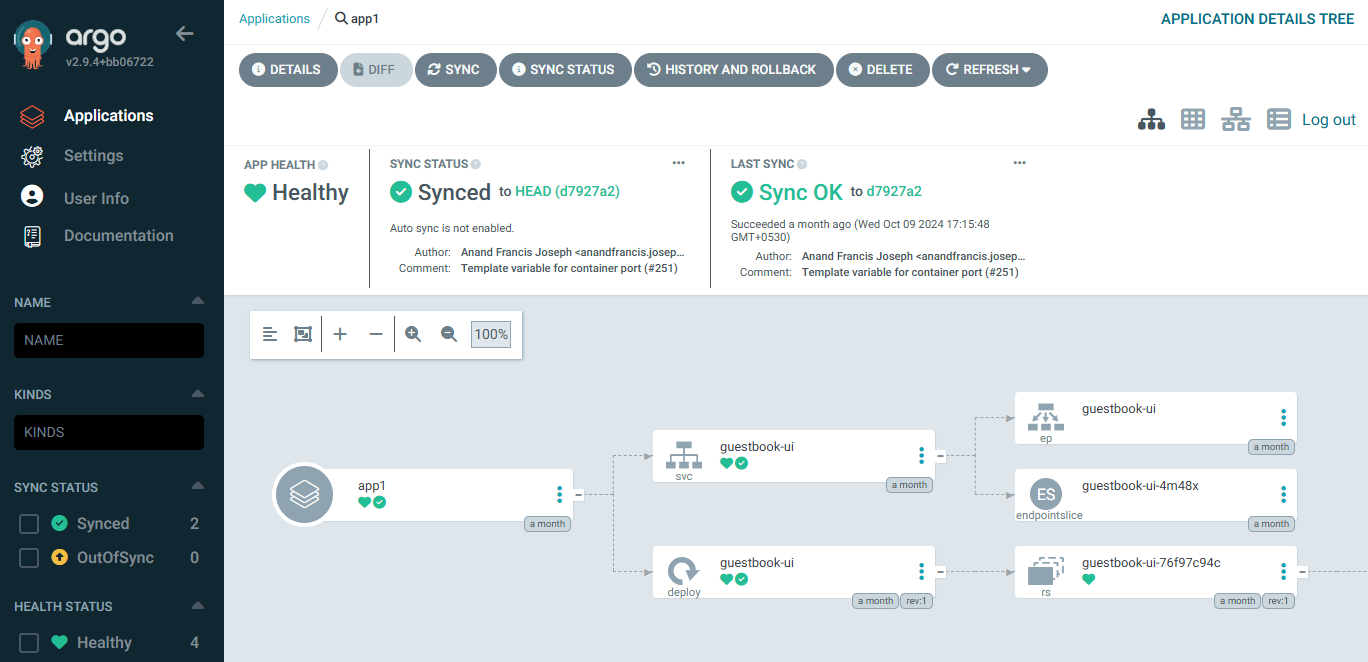
View in deployment system—lets you open the application in the external deployment provider. Here's an example application in Argo CD.
-
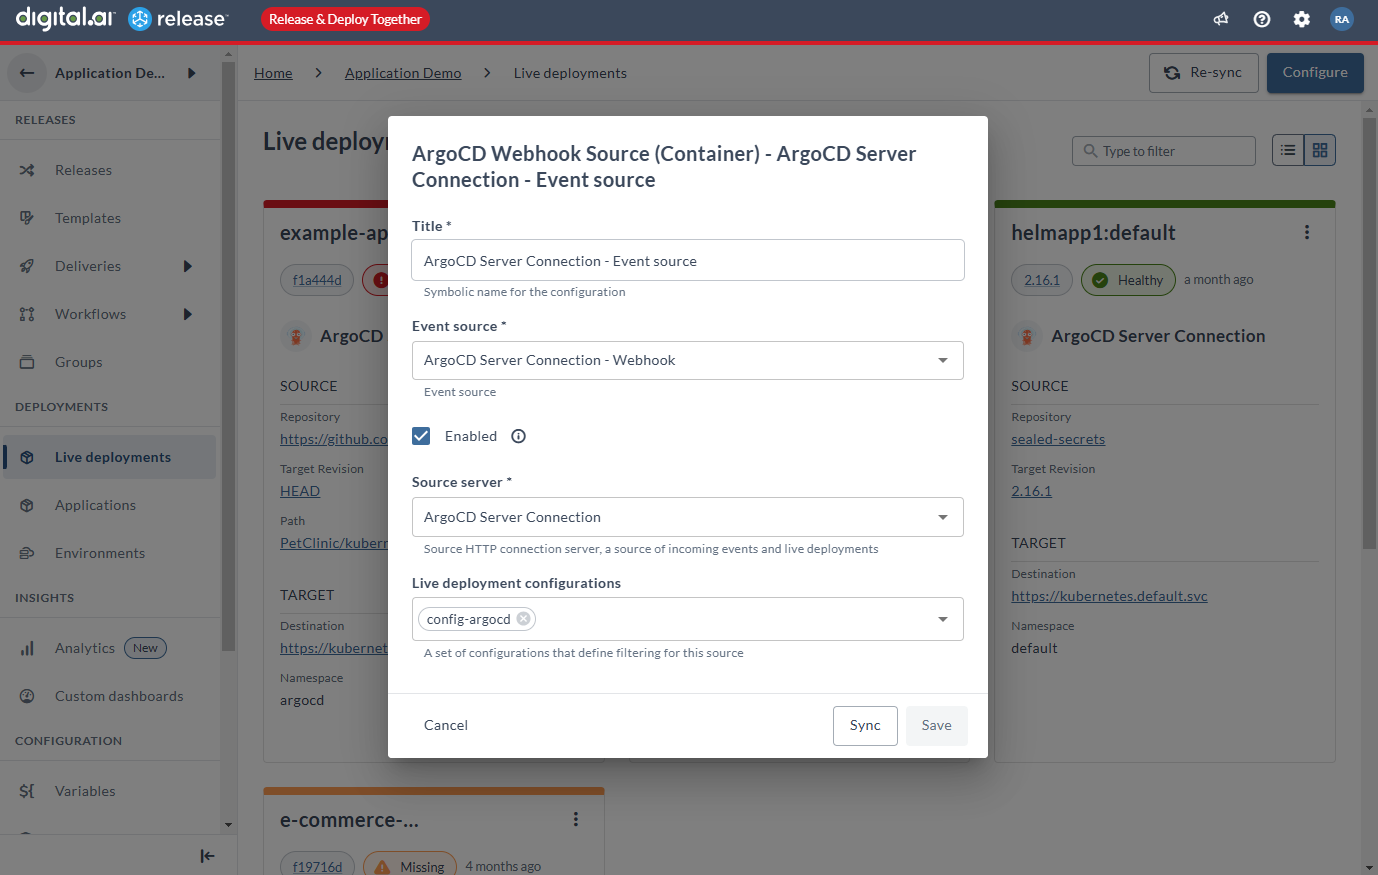
View Configuration details—lets you view the application configuration details.
-
Delete application—lets you undeploy an application. For more information, see Delete Applications.
Filter Applications
You can filter applications by name to find the application you want in a long list of applications in the dashboard.
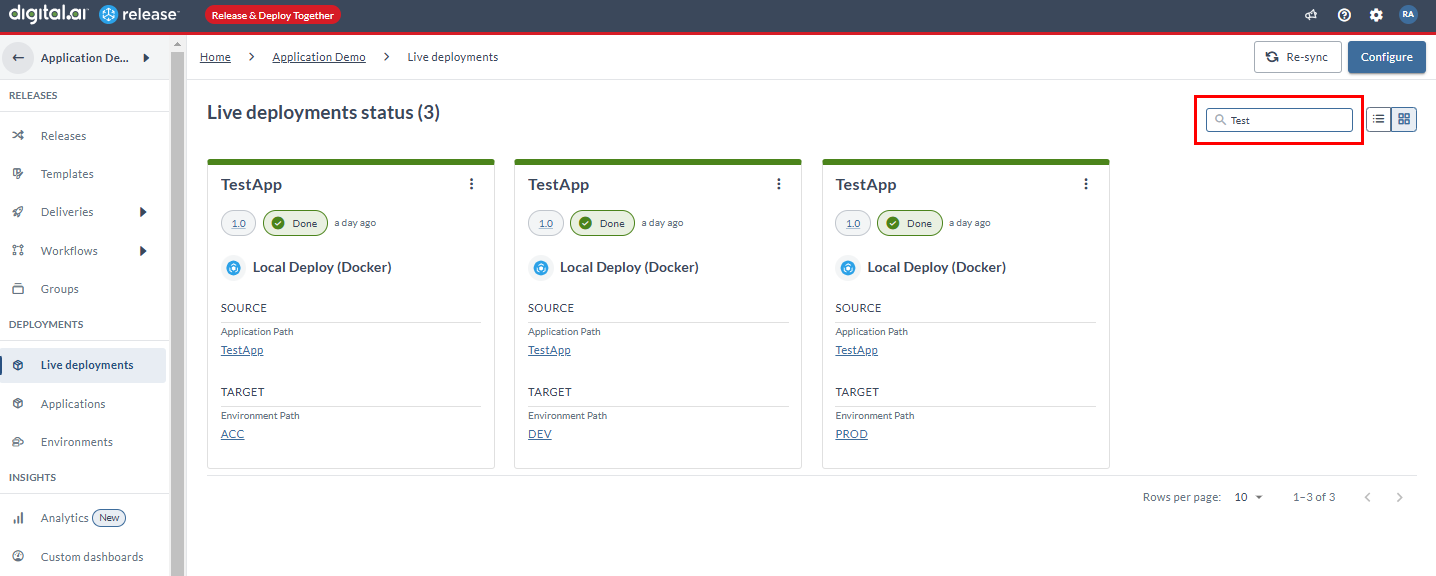
Resync Deployed Applications
Click Resync in the Live Deployments dashboard to manually refresh the current state of applications in Release.
For example, when you do not want to see cached deployments in the dashboard or if something went wrong, you can click Resync to refetch the current state of all the deployed applications.
📄️ Live Deployments in Release
Live Deployments revolutionizes how you monitor and manage deployments across your entire ecosystem. This feature brings unified visibility to all your deployments—whether they originate from Release tasks or external tools like Digital.ai Deploy, Argo CD, and Flux CD.
📄️ Configure Permissions in Argo CD
Step-by-step guide to configuring permissions for Argo CD integration with Digital.ai Release live deployments, including RBAC, service accounts, and best practices.
📄️ Connect to Argo CD Server
Here's how you set up live deployments for an existing Argo CD server. Use this procedure to expose deployments that are already taking place on the ArgoCD server in Digital.ai Release. To set up a new project in ArgoCD, see Onboard New Deployments.
📄️ Connect to Flux CD Server
Here's how you set up live deployments for an existing Flux CD server. This integration enables you to track live updates to your applications from Git repositories in the Live Deployments dashboard as they are deployed through Flux CD. Use this procedure to expose deployments that are already taking place on the Flux CD server in Digital.ai Release. To set up a new project in Flux CD, see Onboard New Deployments.
📄️ Connect to Deploy Server
Here's how you set up live deployments for an existing Digital.ai Deploy server. Use this procedure to expose deployments that are already taking place on the Digital.ai Deploy server in Digital.ai Release. To set up a new project in Deploy, see Onboard New Deployments.
📄️ Delete / Undeploy Applications
You can delete deployed applications from the Live Deployments dashboard and the target system.
📄️ Edit or Delete a Live Deployment Configuration
To edit or delete a live deployment configuration:
📄️ Add New Deployments
You can have multiple configurations for the same server. This is useful when reusing a connection between folders, or when listening to multiple unrelated applications and the regex configuration becomes unwieldy.
📄️ Onboard New Deployments
You can set up new deployments or projects in external deployment providers such as Digital.ai Deploy or Argo CD by using the step-by-step pre-defined automated workflows.
📄️ Upgrade with Live Deployments
There are certain upgrade considerations if you have Application Pipelines created in Release 24.1 (or earlier) and are now upgrading to Release 24.3. Here's what happens on upgrade of a site from Release 24.1 (or earlier) with Application Pipelines to Release 24.3.