SeeTestAutomation - Creating Your First Test On an Android Device
Please note that this tool is classified as a Legacy tool. We recommend transitioning to our updated solutions to maintain optimal performance and security in your workflows. For more information on this matter, please reach out to technical support .
In this session, we will create a test script for an Android device using the studio's automated recording capability. To illustrate this, we use a sample instrumented application named "eri-Bank" which can be downloaded from this Link.
Recording a Test Script
To start recording a script for a mobile device:
Step 1: Perform the following prerequisites:
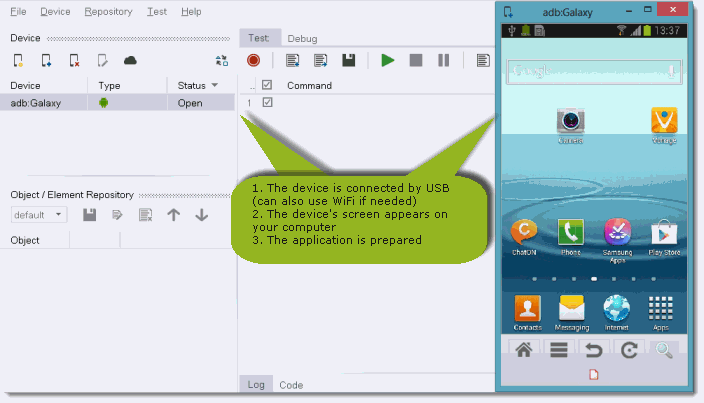
- Connect your mobile device to your computer via USB. (For detailed instructions on establishing device connectivity, refer to "Connect Device").
- Open your device in SeeTest Automation (Refer to Connect Device)
- Verify that the application is instrumented and installed on the mobile device. (Refer to "Native Application Instrumentation for Android").
**
**
Step 2: In the studio window, go to the Test tab and click the Record button.
Step 3: In the dialog box now displayed, choose the device to be recorded from and choose the name of the tested application (for Native Recording).
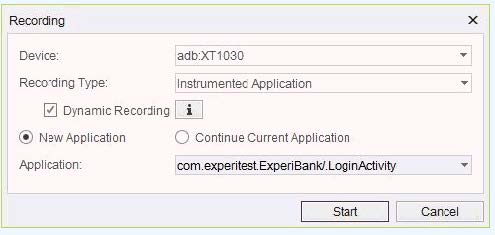
Note: Test scripts can be recorded in a number of modes. Generally, we recommend using Dynamic Recording which is activated by selecting this checkbox in the Recording dialog box. However, a number of other Recording options are available which can be utilized, based on your needs, when recording a test script .
Step 4: Click Start. As the studio prepares the Android application for testing, a progress bar will be displayed.
The application will open on the device and you can begin to record steps of the scenario you want to automate. As you do so, be sure to only perform these steps in the reflection, and not on the device.
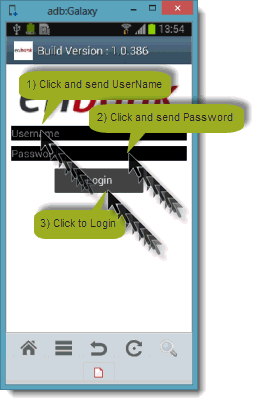
Step 5: In the current example scenario, we shall record a script using the "eriBank" application which logs into the user's bank account and sequentially performs a number of actions. As the studio is now in the recording mode, begin to slowly and deliberately perform the following operations in the reflection of the application displayed on your computer:
-
In the studio Click the Username text box and enter "company" (without quotes) as the username.
-
Click the Password text box and enter "company" (again, without quotes) as the password.
-
Click the Login button.
-
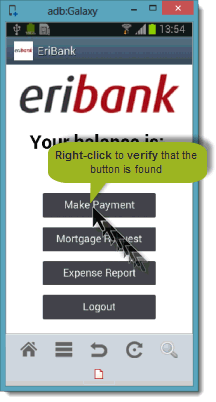
Right-click the Make Payment button in its center -- doing so will record a command verify that the button is found on the current screen of the device.
-
Click the Logout button.
Step 6: Having completed the above operations, click the "Stop Recording" button.
At this point, a progress will display as the studio analyzes your recorded data. When this analysis has been concluded, the test script will be displayed in the script area.
Note: The script you have just recorded can be edited later on. For full details on how to edit scripts, see the Edit Test Commands and Edit Test Objects sections in this guide.
Playing Back the Test Script
To play back the recorded script:
- Click the Play button.
As the script is played, the Log portion of the studio window displays the execution. Any steps which were not successfully executed will be marked in red.
Generating an Execution Report
To generate a report for the execution of a script:
Step 1: Before playing the script, go to the Tools menu and activate the 'Launch Report' option by selecting its checkbox.
Step 2: Click the Play button.
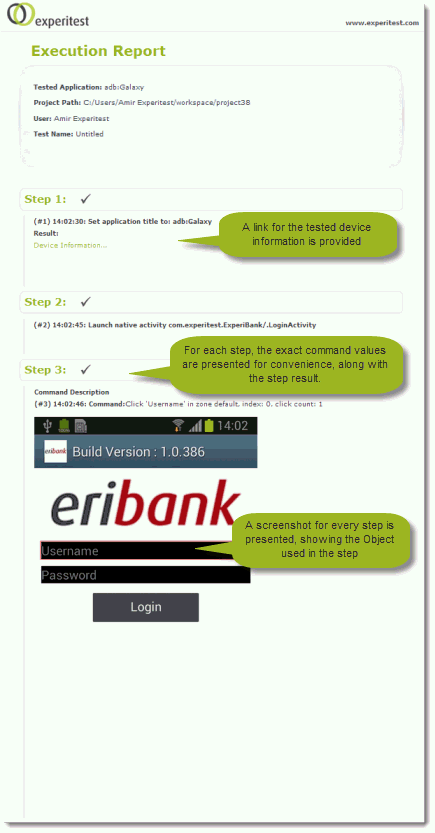
Once the test has been executed, an Execution Report is displayed as an HTML file in your browser. This report indicates step whether it was executed successfully or not, including a screenshot of the device during command execution.
**
**
Externally Running Test Scripts
The test scripts you create with the studio can be run on UFT.
Step 1: Click the "Code" tab.
Step 2: From the drop-down menu, select the type of code you want to run.
Step 3: Select the displayed code and copy it to your clipboard.
Step 4: Paste the code into the desired framework and run it from the framework.
For full details, refer to Export Code.