Import External Git Repositories into TeamForge from the Code Browser UI
The new repository import feature lets you import an external, public Git repository into TeamForge using the Code Browser UI.
This functionality was already available outside the UI, with CLI-based import (see How can I import an existing Git repository into Gerrit?).
To import an external Git repository into TeamForge:
-
Select Source Code from the Project Home menu.
-
In the list of the project repositories, click Add.
-
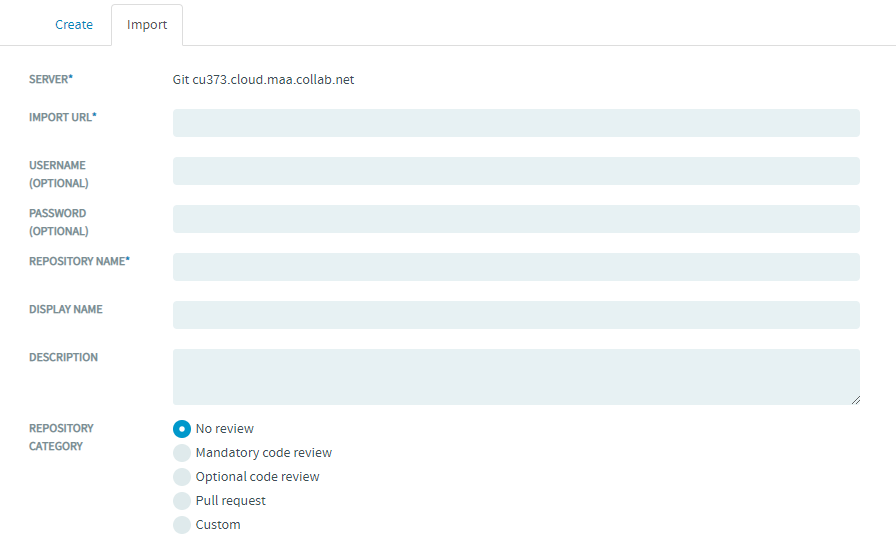
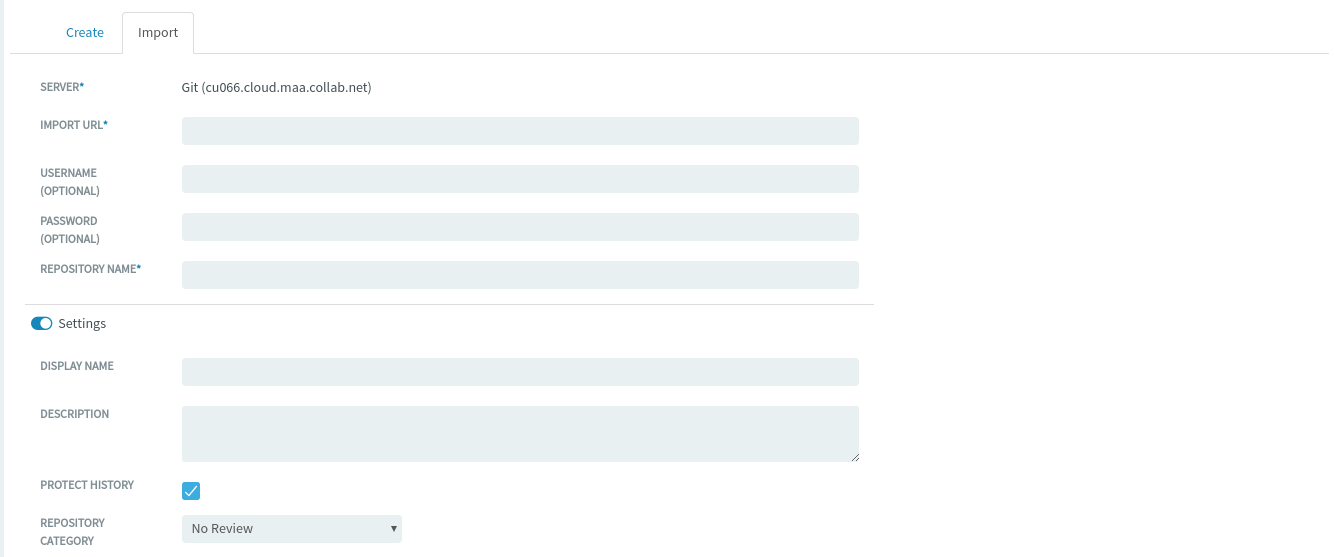
Select the Import tab.

Configure Advanced Repository Settings During Repository Creation/Import
The repository Import tab lets you import repositories by simply giving the repo a name and selecting the destination server. However, a Settings toggle button ia also available, which if selected, shows you all the advanced repository settings—thereby letting you configure the advanced repository settings at the time of repository import itself.This toggle button is not selected by default.

-
Type the external public Git repository;s URL in the IMPORT URL field.
For example, if you want to import a repository named "testwebhook" from GitHub, simply type,
https://github.com/mkamaraj/testwebhook. -
Type the username and password (to access the Git repository on the server where it resides). These are optional fields.
-
Type a name, display name, and description for the repository. If you plan to use an SCM server that requires approval for new repositories, use the Description field to provide your reason for asking to create this repository.
-
Choose a code review policy from the REPOSITORY CATEGORY drop-down list. For more information on Gerrit code review policies, see Control Your Code Review Policy.
-
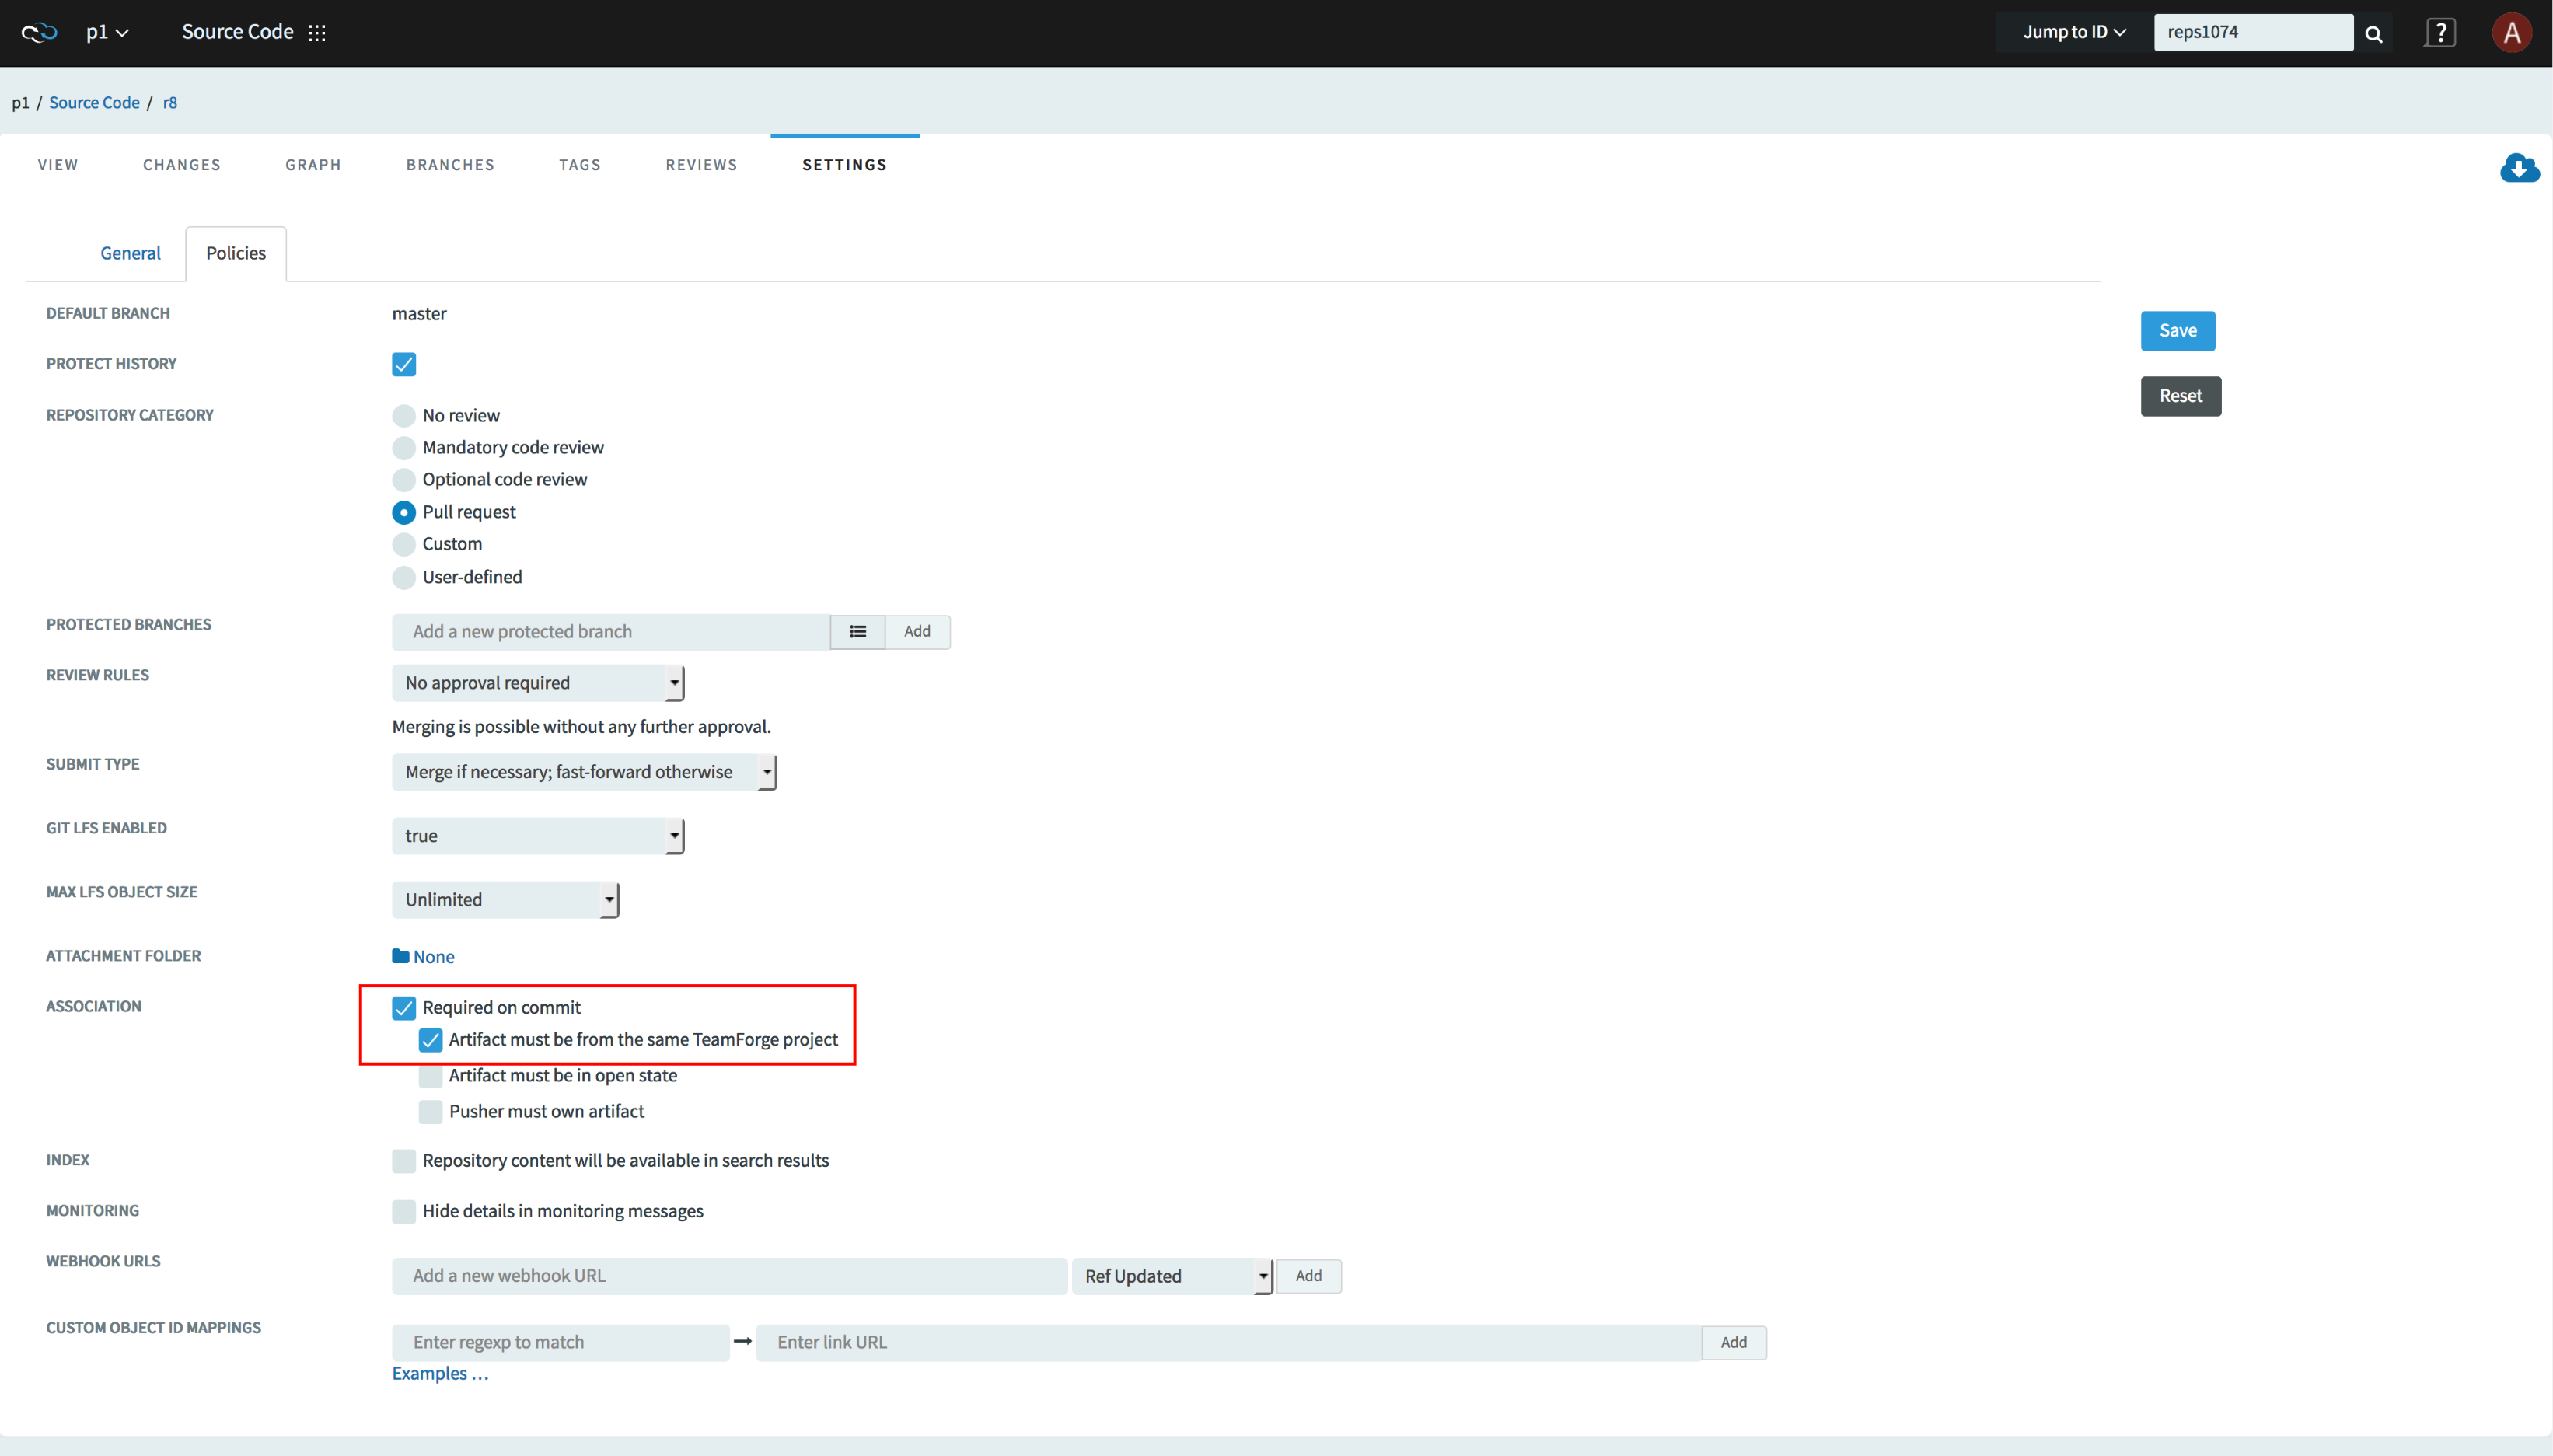
The PROTECT HISTORY check box is selected by default. You can disable it, if required. For more information, see History Protection.
-
Choose values from the GIT LFS ENABLED and MAX LFS OBJECT SIZE drop-down lists. For more information, see Set up LFS.
-
If you want each code commit to be associated with an artifact, select the Required on commit check box next to the Association field.
noteOne of the commit governance rules mandates that the artifact and the commit must be on the same TeamForge project.

-
For security reasons, you may want to restrict email notifications to the essential information. If so, select Hide Details in Monitoring Messages.
-
To index the repository and to make the repository searchable, select the Repository content will be available in search results check box.
-
Click Import Repository.
An email notification is sent to you, after successful import. Once the repository is imported, it gets added to the list of repositories.