OPA Integration
Open Policy Agent (OPA) is a freely available engine that enables you to write policies in the form of code and incorporate them into your application or process. The Release OPA Integration enables Release to work with Open Policy Agent server to manage policies and to evaluate inputs based on policy language known as REGO, which allows you to write policies for various services utilizing the same language.
You must set up a connection to the OPA server before adding OPA tasks. For more information, see Set up Connection to OPA Server.
In the release flow editor, OPA tasks have a blue border.
OPA provides the following features:
- Create, Update, Delete, and Get an OPA policy
- Evaluate an input against an OPA policy
Prerequisites
For OPA integration, you need the following:
- OPA server running and accessible via HTTP(s)
- Access credentials to the GitHub storage repo which stores the policies
Set up Connection to OPA Server
- From the navigation pane, under Configuration, click Connections.
- Under HTTP Server connections, next to OPA: Server, click
.
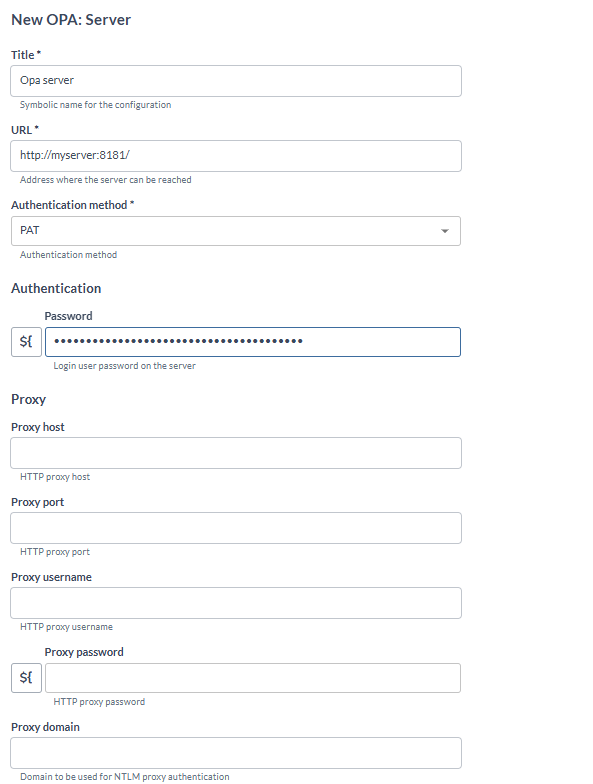
- In the Title field, enter a name for the configuration.
- In the URL field, enter the address of the server.
- If required, enter authentication details and proxy details.
- To test the connection, click Test.
- To save the configuration, click Save.
Add Create Policy Task
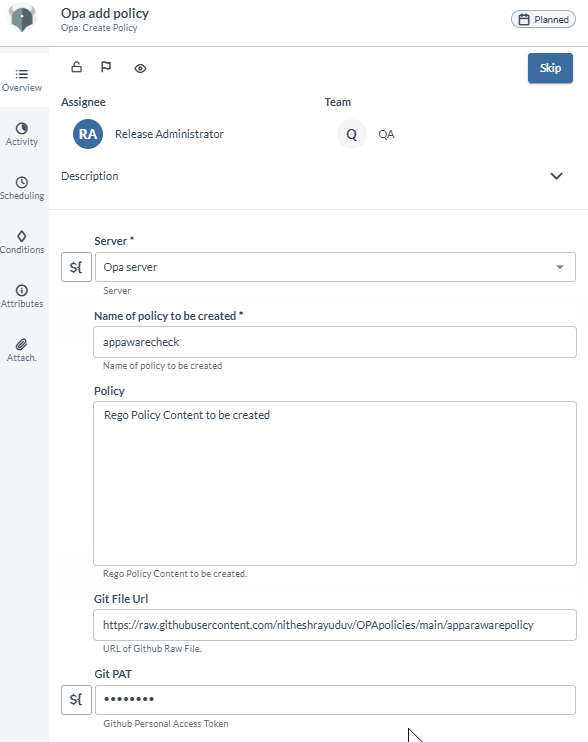
The Create Policy task creates a policy in the OPA server.
- In the release flow tab of a Release template, add a task of type OPA > Create Policy.
- Click the added task to open it.
- In the Server field, select the configured OPA server.
- In the Name of policy to be created field, add the policy name.
- For policy that is a string, paste the policy in the Policy field.
- To fetch the policy as a code from the GitHub repository, add the URL of GitHub raw file in the Git File Url field, and the GitHub PAT in the Git PAT field.
Add Update Policy Task
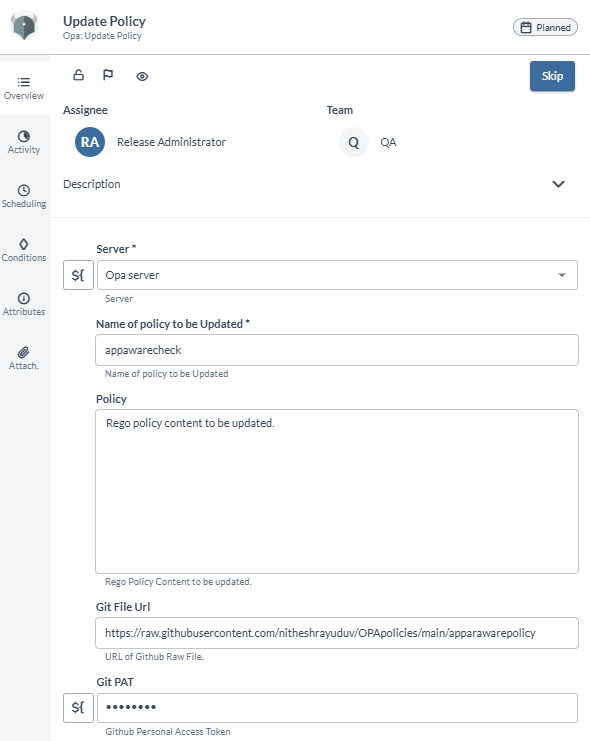
The Update Policy task updates a policy in the OPA server.
- In the release flow tab of a Release template, add a task of type OPA > Update Policy.
- Click the added task to open it.
- In the Server field, select the configured OPA server.
- In the Name of policy to be Updated field, add the policy name.
- For Policy as a String, paste the policy in the Policy field. Or to fetch Policy as a Code from GitHub Repository, add the URL of GitHub raw file in the Git File Url field, and the GitHub PAT in Git PAT field.
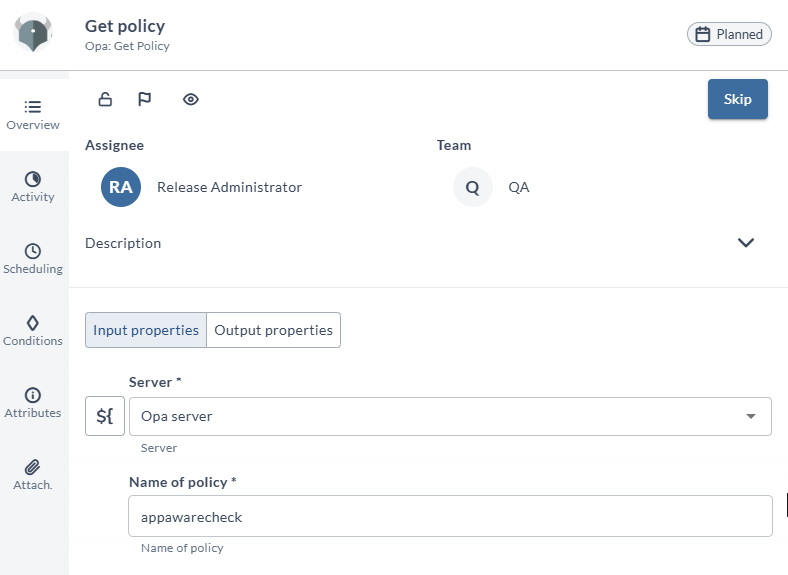
Add Get Policy Task
The Get Policy task gets a policy from the OPA server.
- In the release flow tab of a Release template, add a task of type OPA > Get Policy.
- Click the added task to open it.
- In the Server field, select the configured OPA server.
- In the Name of policy field, add the policy name.
- The policy will be stored in the output Policy field.
Add Delete Policy Task
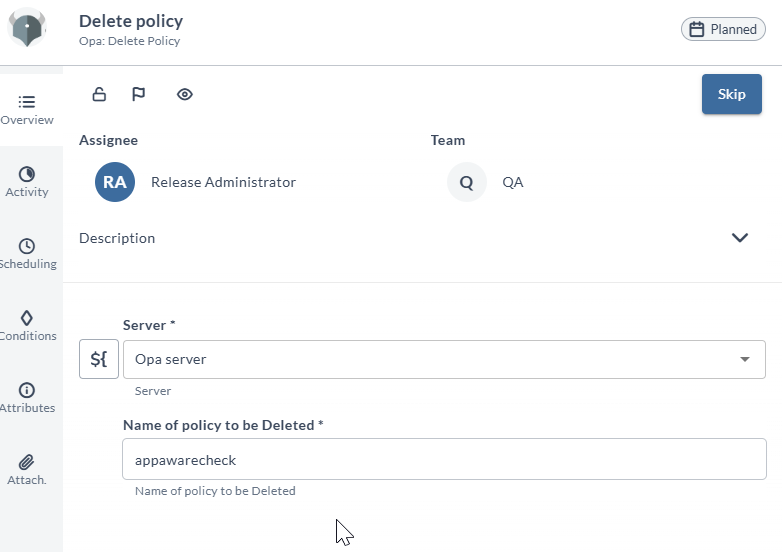
The Delete Policy task deletes a policy from the OPA server.
- In the release flow tab of a Release template, add a task of type OPA > Delete Policy.
- Click the added task to open it.
- In the Server field, select the configured OPA server.
- In the Name of policy field, add the policy name.
Add Evaluate Policy Task
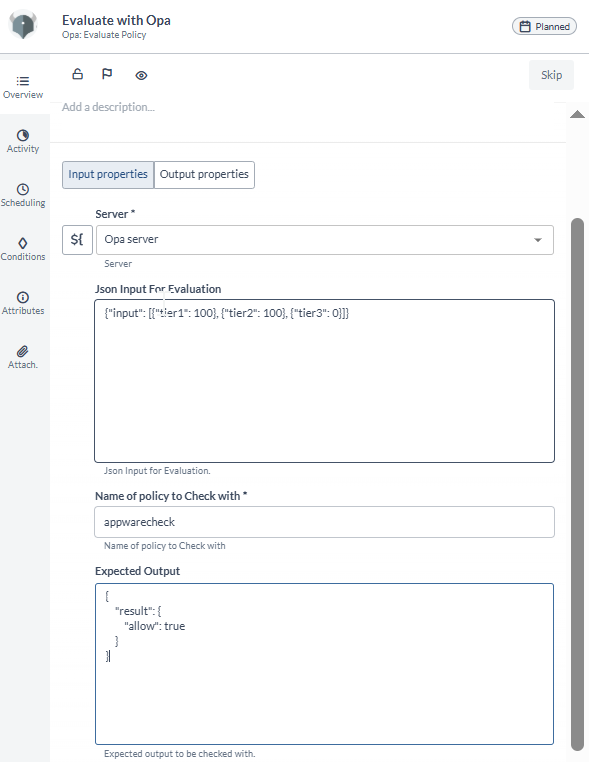
The Evaluate Policy task evaluates an input against a policy in the OPA server.
- In the release flow tab of a Release template, add a task of type OPA > Evaluate Policy.
- Click the added task to open it.
- In the Server field, select the configured OPA server.
- In the Json Input For Evaluation field, add the input which will be evaluated against the policy.
- In the Name of policy to Check with field.
- In the Expected Output field, the expected output will be checked with the actual policy check result.
Add Parse GitHub Actions Log Task
Note: This task works only with Application Security Log.
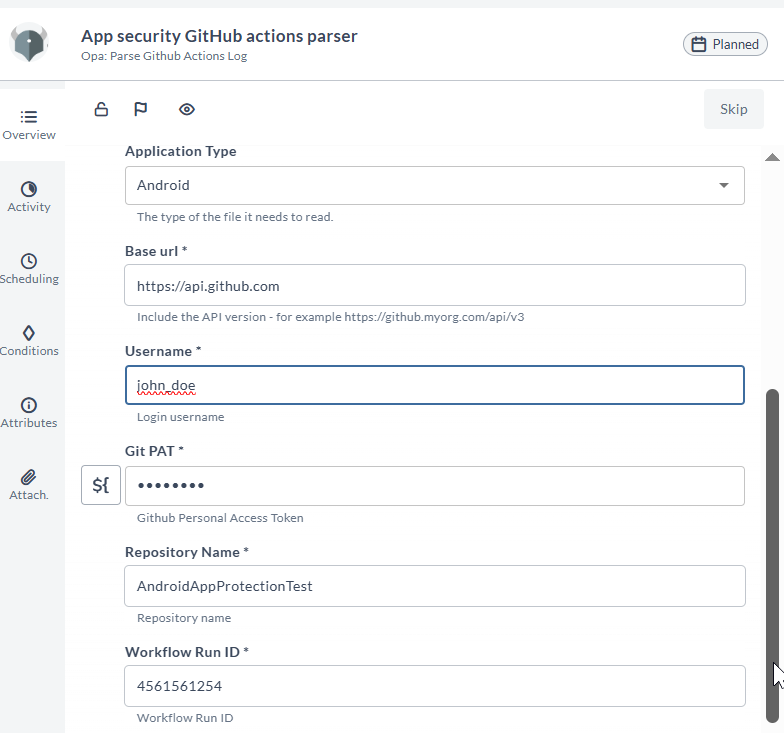
- In the release flow tab of a Release template, add a task of type OPA > Parse GitHub Actions Log.
- Click the added task to open it.
- In the Server field, select the configured OPA server.
- In the Application Type field, select Android or Ios.
- In the Base url field, enter the GitHub api, for example
https://api.github.com. - In the Username field, enter the GitHub username.
- In the Git PAT field, enter the GitHub PAT.
- In the Repository Name field, enter the GitHub repository name.
- In the Workflow Run ID field, enter the GitHub Actions workflow ID.
- In the Json Input output properties field, the output will be assigned to the variable assigned in this field.
Note: The output variable can be used for further evaluation as an input.
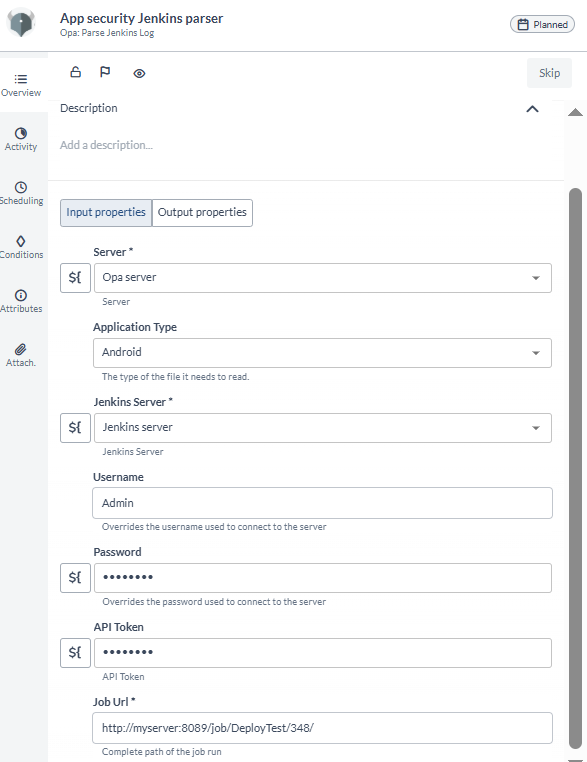
Add Parse Jenkins Log Task
Note: This task works only with Application Security Log.
- In the release flow tab of a Release template, add a task of type OPA > Parse Jenkins Actions Log.
- Click the added task to open it.
- In the Server field, select the configured OPA server.
- In the Application Type field, select Android or Ios.
- In the Jenkins Server field, select the configured Jenkins server.
- In the Username field, enter the Jenkins username.
- In the Password field, enter the Jenkins password, or else use the Token field.
- In the API Token field, enter the Jenkins token, or else use the Password.
- In the Job Url field, enter the Jenkins job URL.
- In the Json Input output properties field, the output will be assigned to the variable assigned in this field.
Note: The output variable can be used for further evaluation as an input.
