Sonatype Nexus IQ Plugin
The Sonatype Nexus IQ plugin is a Digital.ai Release plugin that enables the evaluation of binaries within the Nexus IQ server.
Prerequisites
Before you set up the Sonatype Nexus IQ plugin, ensure you have:
- A Nexus IQ Server installation
- The Sonatype Nexus IQ CLI JAR file
- A Connection to the Nexus IQ Server
To install the plugin, place the latest Sonatype Nexus IQ plugin JAR file under the plugins directory in Digital.ai Release and restart the server.
Download link: Nexus IQ CLI JAR
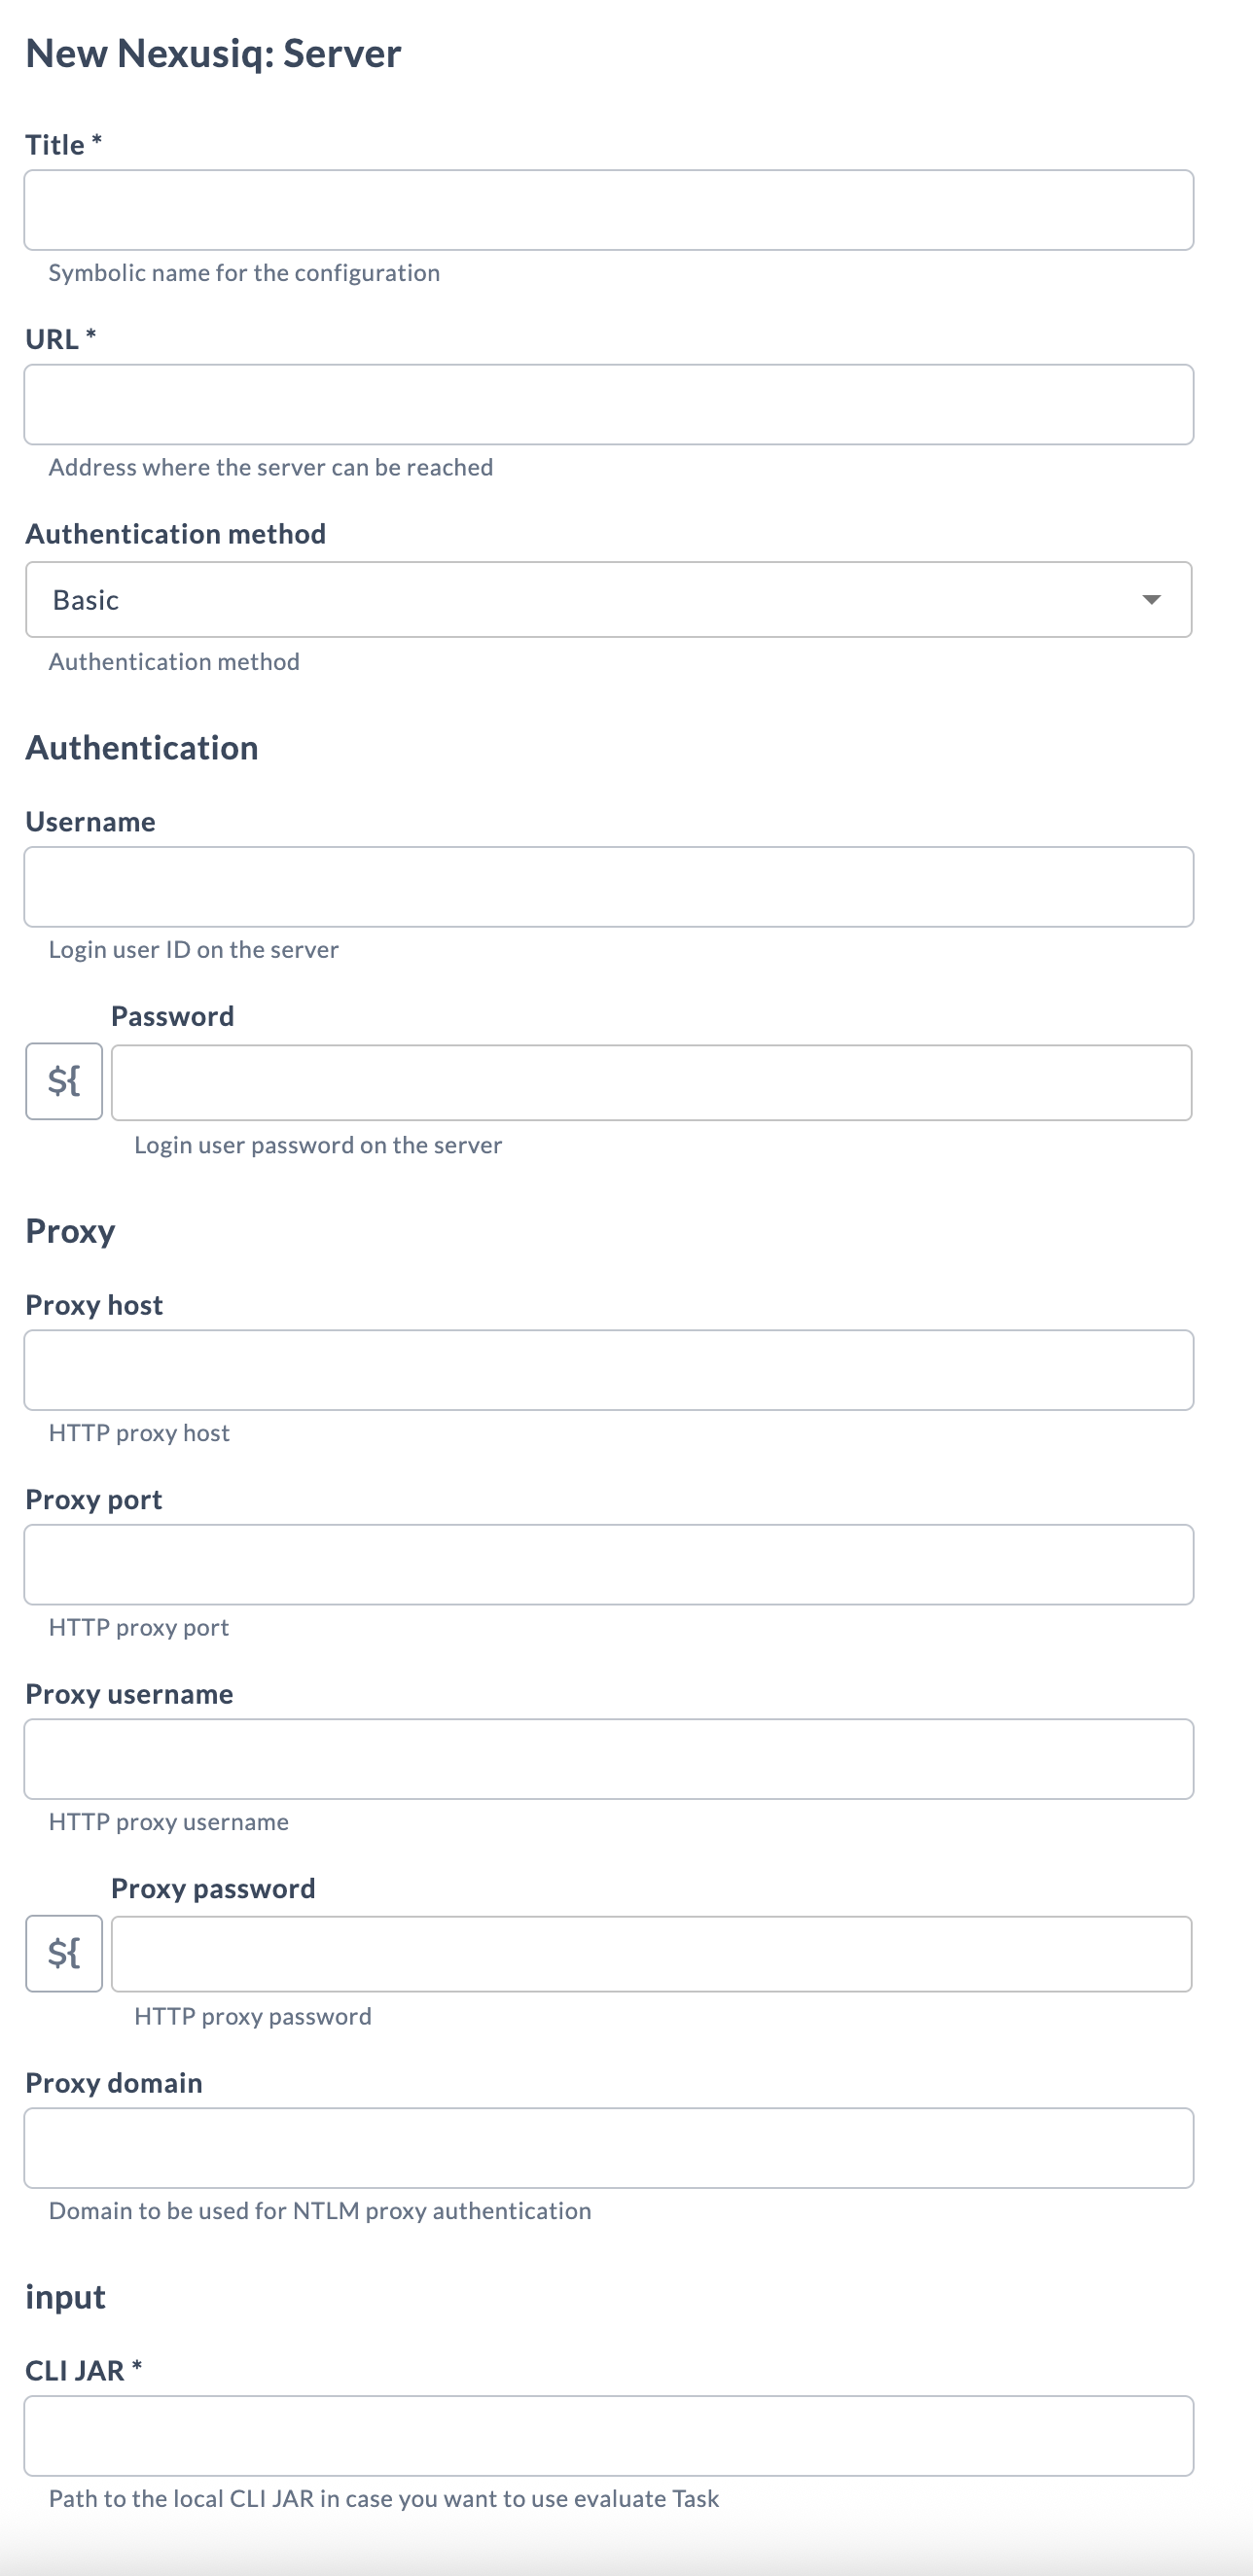
Set Up a Connection to the Nexus IQ Server
To set up a connection to the Nexus IQ server:
- From the navigation pane, select Configuration > Connections.
- Under HTTP Server Connections, next to Nexusiq: Server, click
 .
. - Configure the connection with the following fields:
- Title: Enter a symbolic name for the configuration.
- URL: Enter the address where the Nexus IQ server can be reached.
- Authentication method: Select the authentication method (default is Basic).
- Username: Enter the login user ID on the server.
- Password: Enter the login user password on the server.
- Proxy host: (Optional) Enter the HTTP proxy host.
- Proxy port: (Optional) Enter the HTTP proxy port.
- Proxy username: (Optional) Enter the HTTP proxy username.
- Proxy password: (Optional) Enter the HTTP proxy password.
- Proxy domain: (Optional) Enter the domain to be used for NTLM proxy authentication.
- CLI JAR: Enter the path to the local CLI JAR file.
- Click Test to verify the connection.
- Click Save to save the configuration.
Available Tasks
The Sonatype Nexus IQ plugin includes the following tasks:
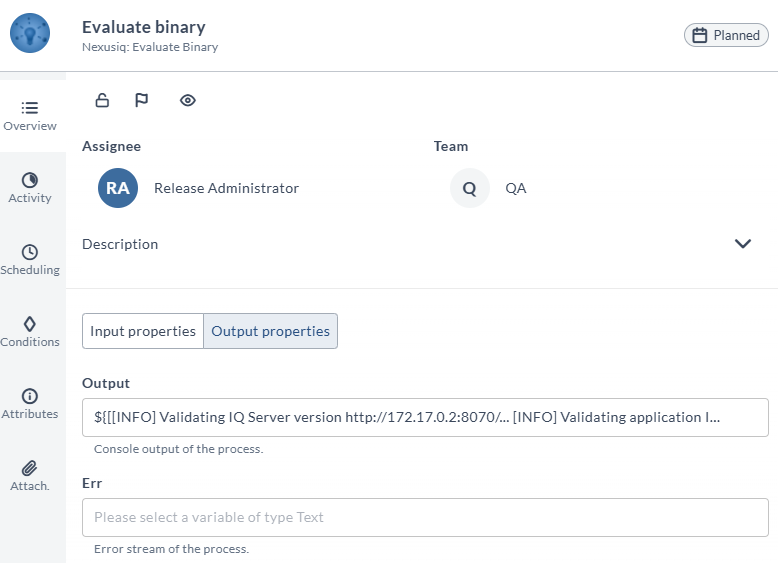
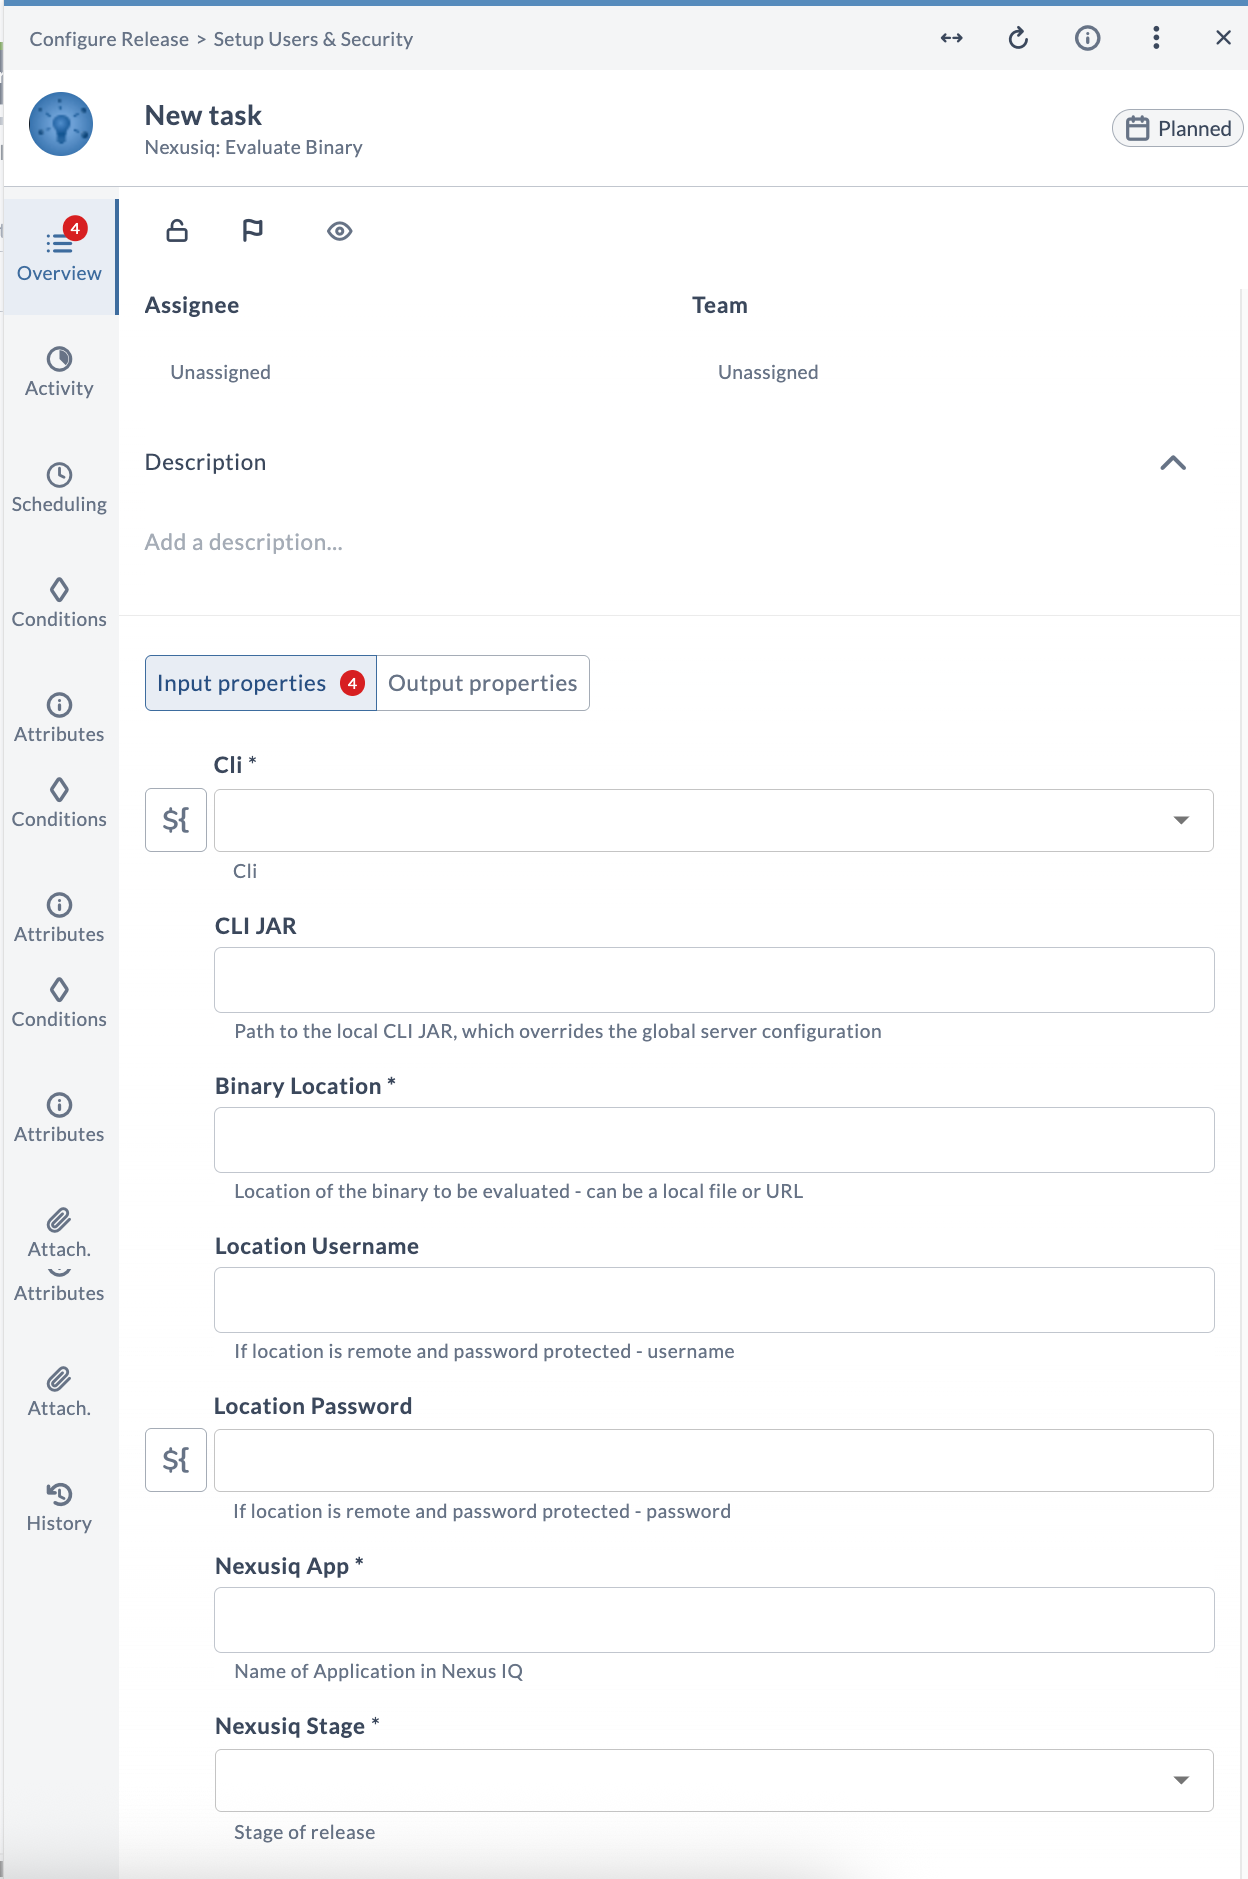
Evaluate Binary
Use the Evaluate Binary task to evaluate a binary in the Nexus IQ server.
To add an Evaluate Binary task:
- In your release template, add a task of type Nexusiq: Evaluate Binary.
- Configure the task with the options described in the following table.
- Save the task.
Input Properties
| Option | Description |
|---|---|
| CLI * | Nexus IQ server connection. Select from the dropdown or create a new connection if you don't have one |
| CLI JAR | Path to the local CLI JAR, which overrides the global server configuration |
| Binary Location * | Location of the binary to evaluate (local file or URL) |
| Location Username | Username for remote password-protected locations |
| Location Password | Password for remote password-protected locations |
| Nexusiq App * | Application name in Nexus IQ (Public ID) |
| Nexusiq Stage * | Stage of the release to execute the binary evaluation |
Output Properties
| Property | Description |
|---|---|
| Output | Console output of the process |
| Err | Error stream of the process |
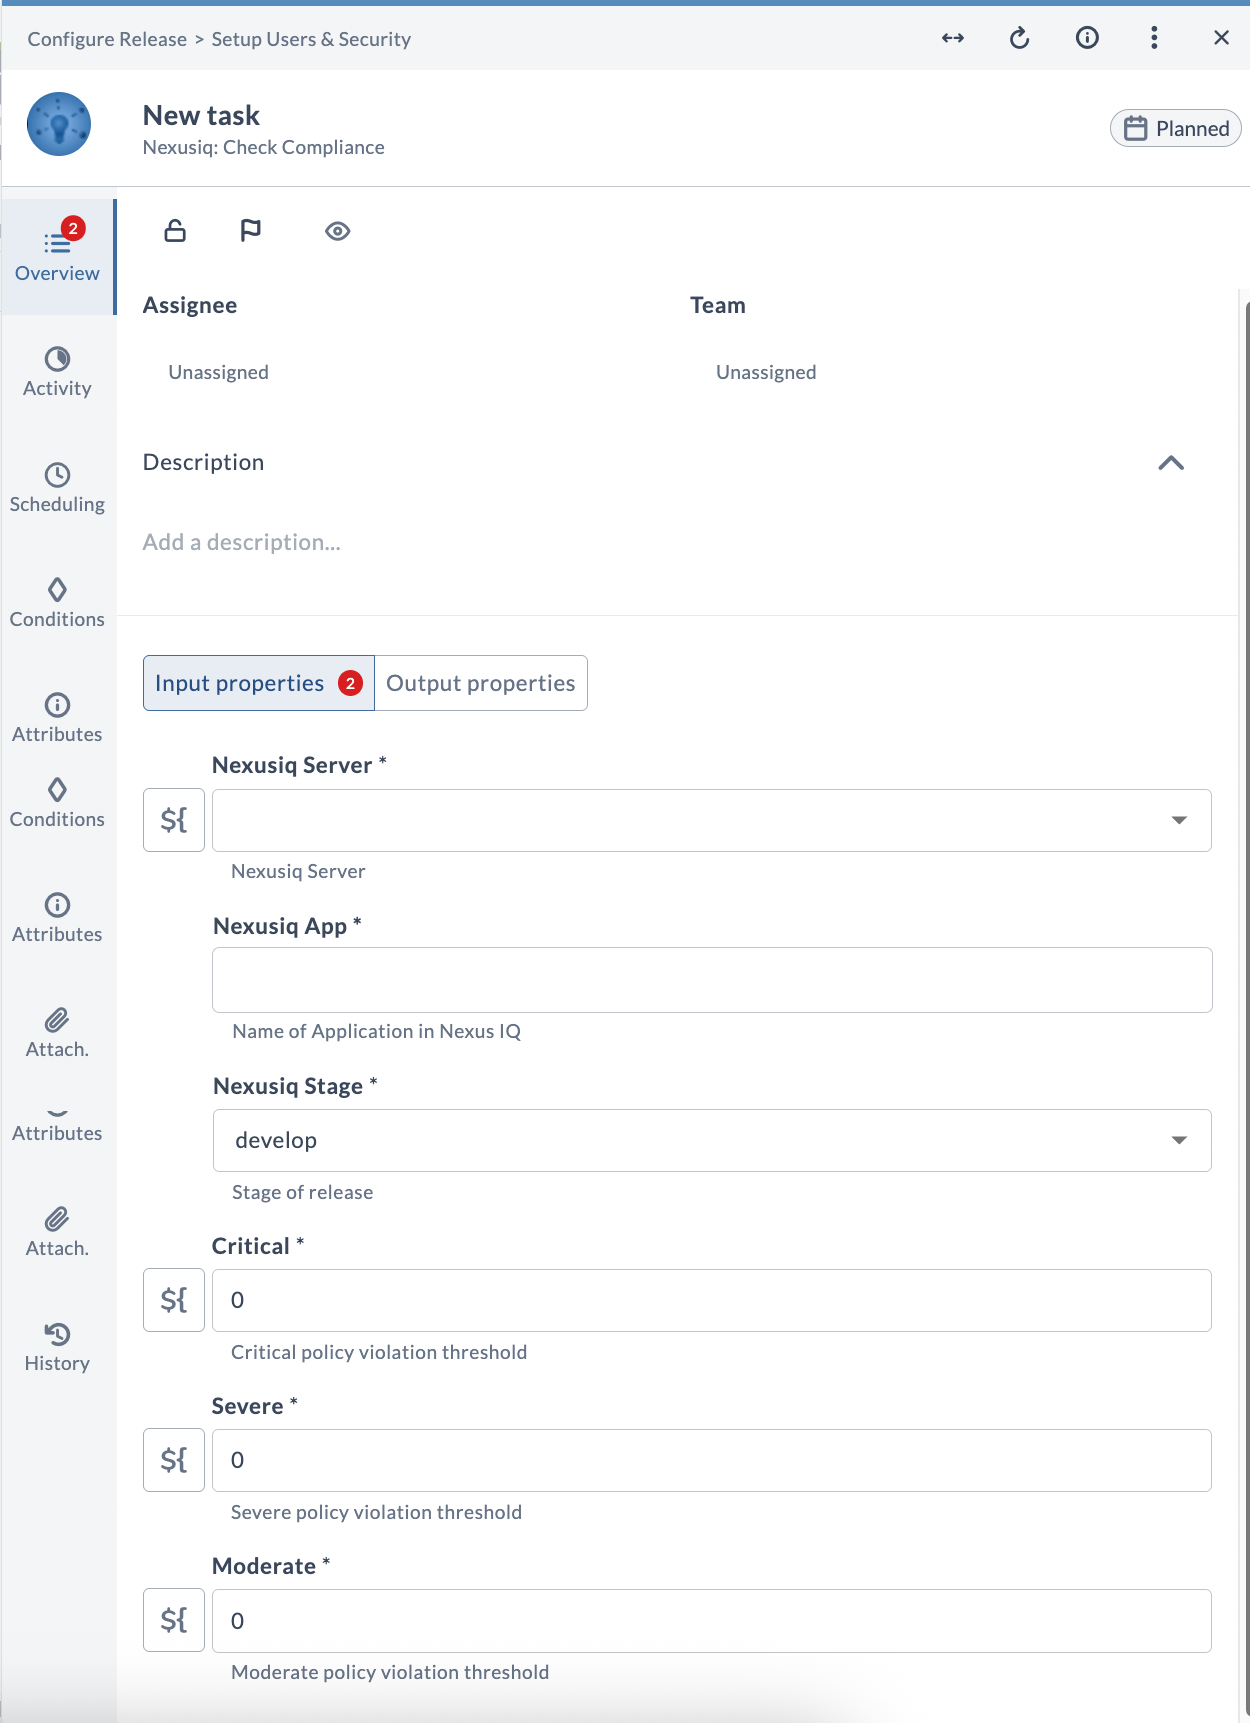
Check Compliance
Use the Check Compliance task to verify the compliance status of evaluated binaries.
To add a Check Compliance task:
- In your release template, add a task of type Nexusiq: Check Compliance.
- Configure the task with the options described in the following table.
- Save the task.
Input Properties
| Option | Description |
|---|---|
| Nexusiq Server * | Nexus IQ server connection |
| Nexusiq App * | Application name in Nexus IQ (Public ID) |
| Nexusiq Stage * | Stage of the release to check compliance for |
| Critical * | Critical policy violation threshold |
| Severe * | Severe policy violation threshold |
| Moderate * | Moderate policy violation threshold |
Output Properties
| Property | Description |
|---|---|
| Evaluation Date | Check compliance evaluation date |
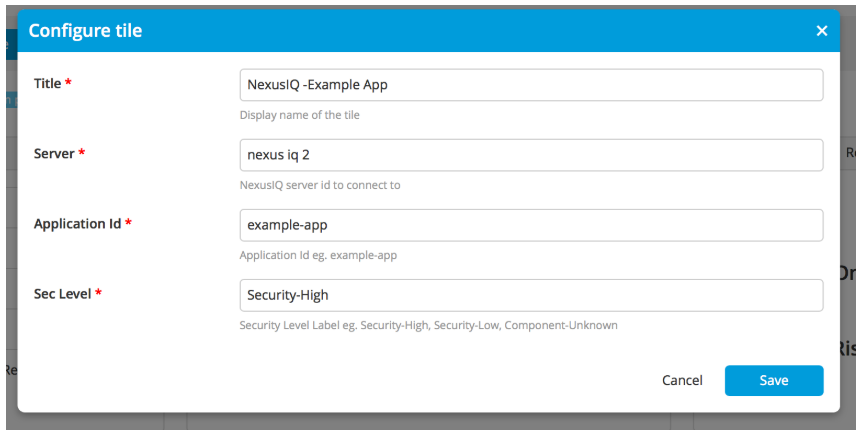
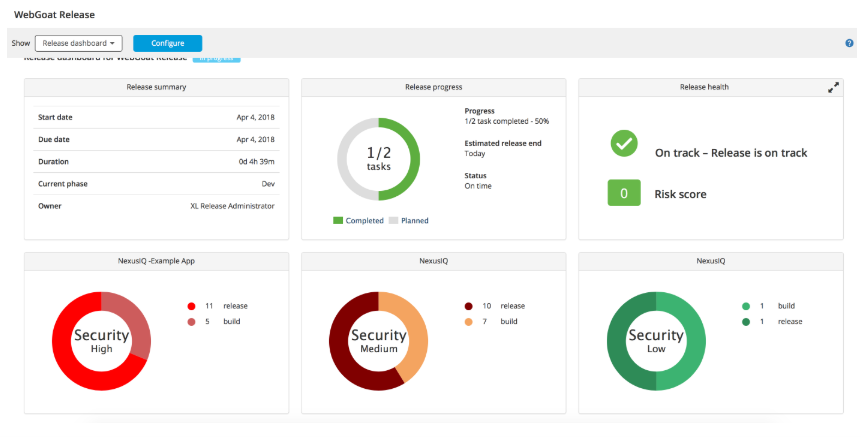
Tile and Dashboard configuration
To configure the Nexus IQ dashboard on a release:
- Open a completed release and select Release Dashboard from the Show dropdown list.
- Click Configure Dashboard.
- Click Add Tiles and select the NexusIQ tile.
- Click Configure on the NexusIQ tile.
- In the Tile Configuration window, select the following:
- Nexus IQ server
- Application ID
- Security level label
- Click Save.
The dashboard now displays Nexus IQ evaluation details.
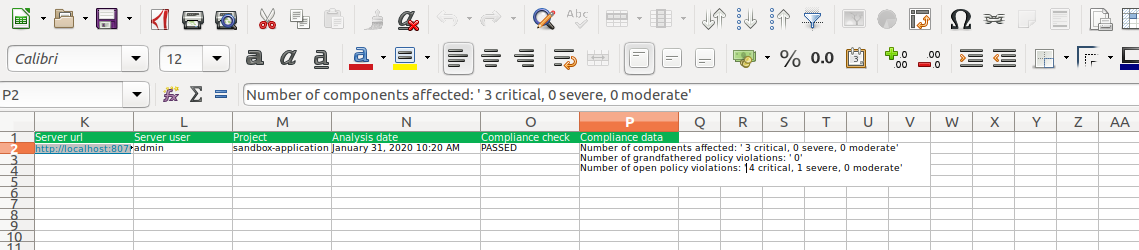
Report Creation
To create an audit report:
- From the navigation pane, select Reports > Audit report.
- Click Generate new report.
- Select the Time period.
- Click Preview results.
- Click Generate report.
- Download and extract the generated report.
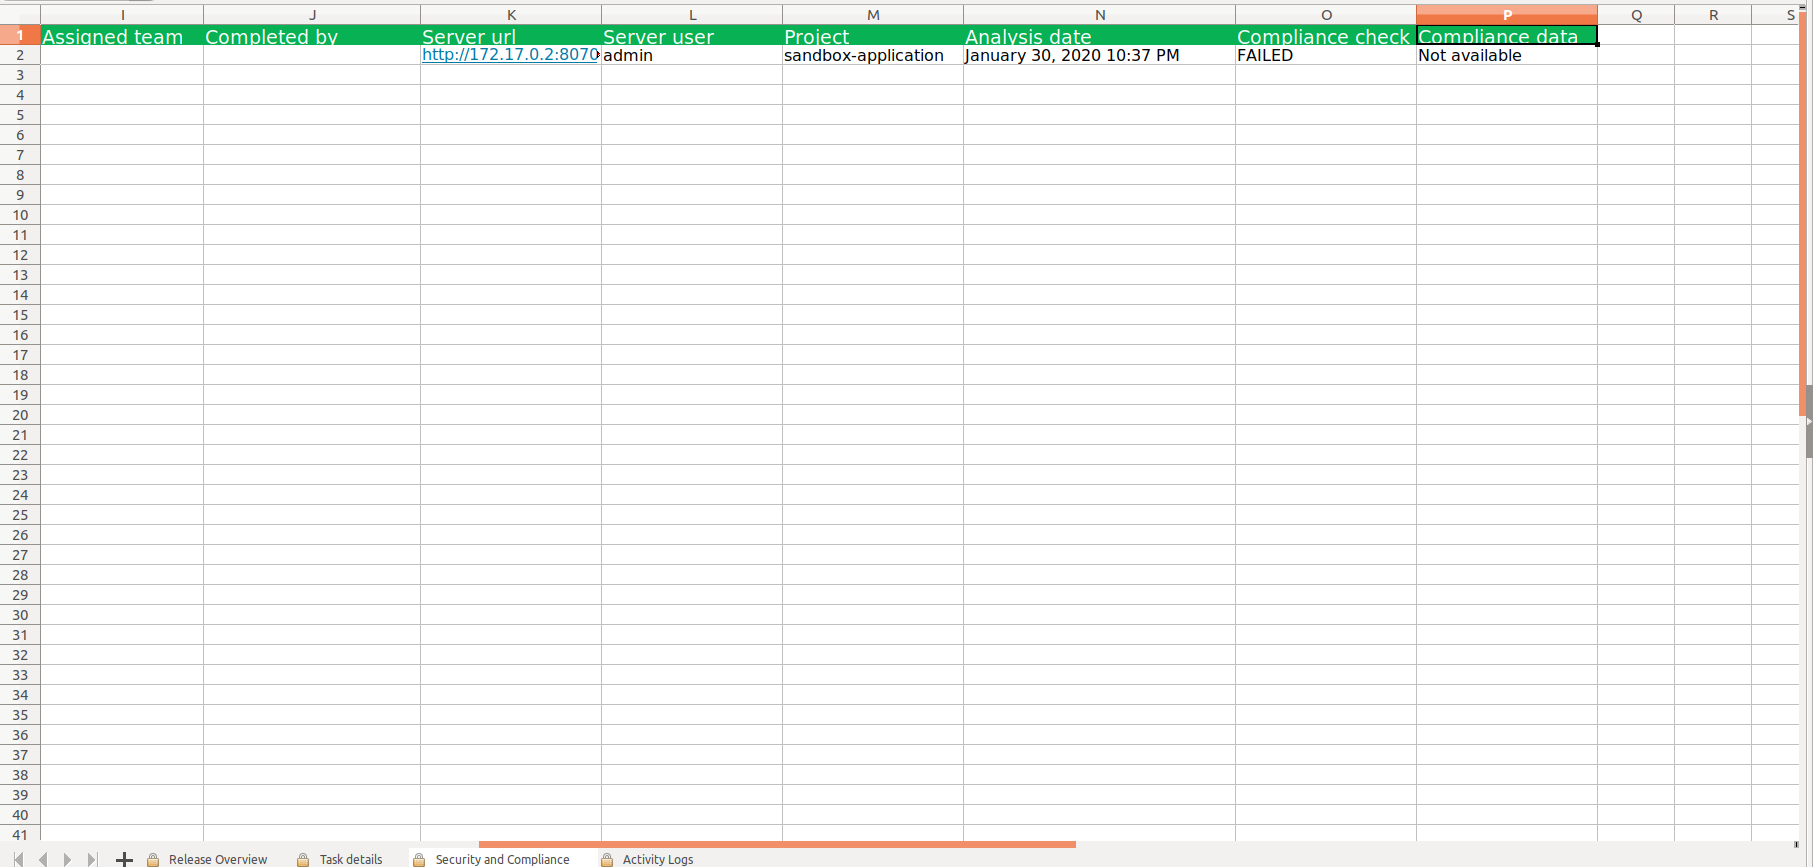
On Success:
The extracted folder contains an overall report and individual release reports. For plugins with Chain of Custody (CoC) information, the Security and Compliance tab appears in the individual release reports.

On Failure:
Failed task reports show the Compliance check as failed.