Fortify SSC Plugin
This topic covers the Fortify SSC Plugin for Release.
The Release Fortify SSC enables Release to work with reports and metrics from a Fortify Software Security Center(SSC) server.
You must set up a connection to Fortify SSC server before adding Fortify tasks or tiles. For information, see Set up a Fortify SSC server.
In the release flow editor, Fortify SSC tasks have a red border.
Features
- Create a Fortify Check Compliance task.
- Add a Fortify SSC version summary tile to a release dashboard.
- Add a Fortify SSC application compliance tile to a release dashboard.
Requirements
The Fortify SSC plugin requires the following:
- Fortify SSC server running and accessible via HTTP(s).
- An application and version must be created. A FPR artifact uploaded and processed in the version.
Set up a connection to a Fortify SSC server
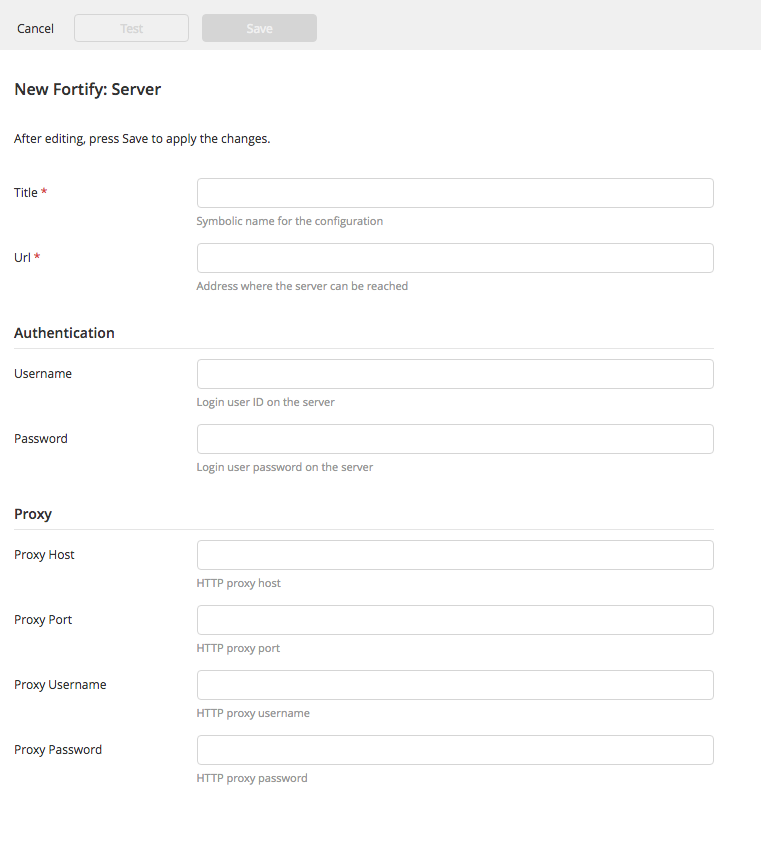
To set up a connection to a Fortify SSC server:
-
From the navigation pane, under Configuration, click Connections.
-
Under HTTP Server connections, next to Fortify SSC: Server, click
.
-
In the Title field, enter a name for the configuration.
-
In the URL field, enter the address of the server.
-
If required, enter authentication details and proxy details.
-
To test the connection, click Test.
-
To save the configuration, click Save.

Add a Fortify Check Compliance task
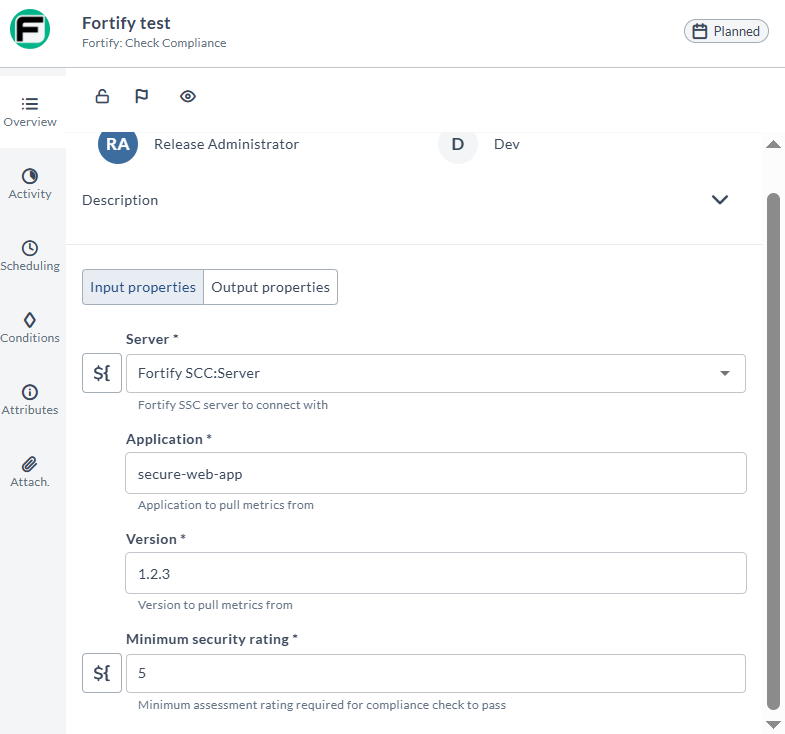
The Fortify Check Compliance task creates a gate in the release flow, that fails if the Minimum Security Rating is not reached in the specified application and version.
To add a Fortify Check Compliance task:
-
In the release flow tab of a Release template, add a task of type Fortify > Check Compliance.
-
Click the added task to open it.
-
In the Server field, select the configured Fortify server.
noteFor information, see Set up a Fortify SSC server.
-
In the Application field, enter the name of the application for which you want to check compliance.
-
In the Version field, specify the version of the application to pull security metrics from.
-
In the Minimum Security Rating field, add the minimum rating that is required for the project to pass compliance. The Minimum Security Rating defaults to 5.

Add a Fortify SSC version summary tile to a release dashboard
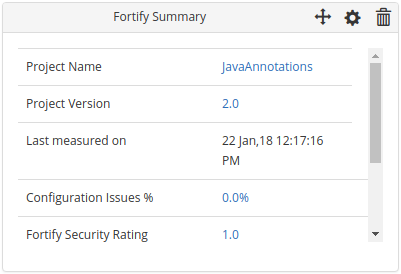
The Fortify Summary tile type creates a dashboard tile that displays metrics on the selected project and version.
To add a Fortify SSC version summary tile to a release dashboard:
-
In the left navigation bar, click Dashboards.
-
Select the dashboard where you want to add the new tile.
noteIf you have not created a dashboard yet, you can do so by clicking the Add dashboard button in the top right of the screen.
-
In the top right of the screen, click Configure dashboard.
-
In the top right of the screen, click Add tiles.
-
Hover over Fortify SSC version summary, and click Add.
-
On the dashboard, hover over the new Fortify SSC version summary tile, and click
.
-
In the Title field, enter a name for the tile.
-
In the Server field, enter the name of the Fortify SSC server you want to connect with.
-
In the Project name field, enter the project that you want to display metrics on.
-
In the Application field, enter the application that you want to display metrics on.
-
In the Version field, enter the version that you want to display metrics on.
-
Click Save.

Add a Fortify SSC application compliance tile to a release dashboard
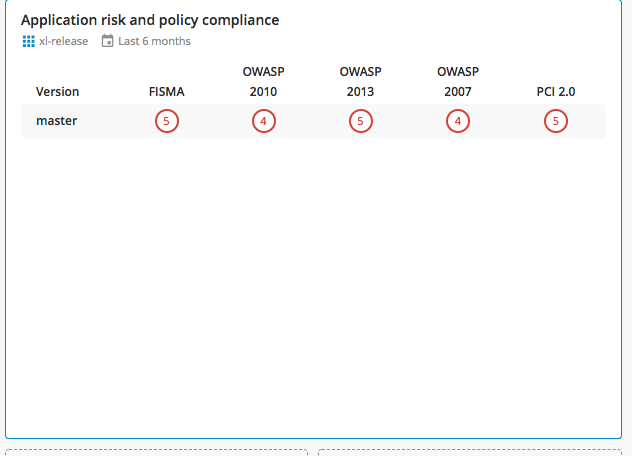
The Fortify Check Compliance task type creates a gate in the release flow, that fails if the Minimum Security Rating is not reached in the specified project name and version.
To add a Fortify SSC application compliance tile to a release dashboard:
- In the left navigation bar, click Dashboards.
- Select the dashboard where you want to add the new tile.
If you have not created a dashboard yet, you can do so by clicking the Add dashboard button in the top right of the screen.
-
In the top right of the screen, click Configure dashboard.
-
In the top right of the screen, click Add tiles.
-
Hover over Fortify SSC application compliance, and click Add.
-
On the dashboard, hover over the new Fortify SSC application compliance tile, and click
.
-
In the Title field, enter a name for the tile.
-
In the Server field, enter the name of the Fortify SSC server that you want to connect with.
-
In the Time period field, select the period of time to display data on.
-
In the Application field, enter the application to display metrics on.
-
In the Security standards field, select the security standards to display.
-
In the Versions field, enter the versions to display metrics on.
noteVersion filters follow semantic versioning. A custom regex can also be used, provided that it is python compatible.
-
Click Save.
