Getting Started With Digital.ai Release
Digital.ai Release is an end-to-end pipeline orchestrator for DevOps and continuous delivery. It provides visibility across the entire software release pipeline and assists in automating and orchestrating release operations.
Downloading Digital.ai Release
Trial version : If you register for a free trial of Digital.ai Release, you will receive a license key by email.
Licensed version: If you register for a licensed version of Digital.ai Release, you can download the license file via the Deploy/Release Software Distribution site. For more information, see Release licensing.
Installing Digital.ai Release
Before proceeding with the installation of Release, it is recommended to review the system requirements.
Types of Installations
Digital.ai provides the following types of installations:
- Java Virtual Machine (JVM) Based Installation—where Digital.ai Release runs on a Java Virtual Machine (JVM).
- Kubernetes Operator Based Installation—where Digital.ai Release can be deployed on different platforms using a Kubernetes Operator.
JVM Based Installation
Install the Digital.ai Release software:
- For trial installation, see Trial install.
- For basic installation, see Basic install.
- To install and configure Release in a production-ready environment, see Production environment install.
Kubernetes Based Installation
Kubernetes Operator allows you to deploy containerized applications on various Kubernetes platforms. In Digital.ai, as we move towards containerized solutions, we highly recommend installing Release solution using Kubernetes Operator. For more information about Kubernetes-based release solution , see Install or Upgrade on Kubernetes.
Key Concepts
Here are some of the key concepts for Release:
-
Releases: A release represents a number of activities in a certain time period. Release is used to plan, track, and execute releases automatically. For more information, see Release life cycle.
-
Phases: A release is divided into phases, which represents logical stages in the process that must happen in succession. For example, a release can include Development, QA, and Deployment phases. In Release, a phase is a grouping of tasks, that must be completed to perform the release. For more information, see Working with phases.
-
Tasks: A task is an activity in a release, and are of two types: manual tasks, in which a human must do something; and automated tasks that the Release flow engine performs. For more information, see Working with tasks.
-
Release flow: When a release is started, the release flow engine determines what task is next in line and executes it, if it is an automated task. Otherwise, sends a message to the person responsible for it, if it is a manual task. For more information, see Using the release flow editor.
-
Release owner: A release owner is the person who is responsible for a release. If something goes wrong, the release owner will be notified. For example, if an automated task throws an error or someone working on a task indicates that there is an issue.
-
Template: A template is a blueprint for a release. You can use a template to save time when putting together releases that are similar. For more information, see Create a release template.
-
Teams: Each release or release template defines a set of teams. For example, you can define a Development team, a QA team, an OPS team, and a Release Management team for a release. For more information, see Configure release teams and permissions.
Logging in to Digital.ai Release
- Enter your username and password.
- Click Log in.
This system is for authorized users only. All the failed logins are logged and reported as security incidents.
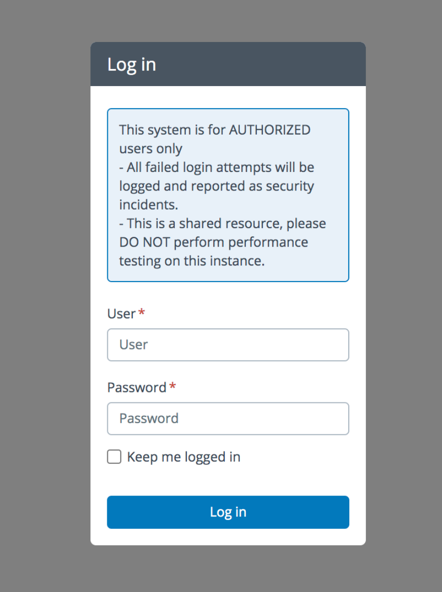
If you want to remember your username and password on the machine, select the Keep me logged in checkbox.
Exploring Digital.ai Release
Get started by exploring the Release user interface:
- From the navigation pane, click Tasks.
- To follow a guided tour of the main features of Release, click the Welcome! Click me to get started task.
If you do not want new users to receive this task, delete the Welcome to Release template from the Samples & Tutorials folder.
Modeling Release Pipelines
This section describes how to configure and run a basic release pipeline.
Creating Templates
In Digital.ai Release, a release pipeline is modeled as a template. To release your software, a release must be created based on the template. This ensures that each release follows a consistent procedure. To create a template:
- From the navigation pane, under Global Configuration group, click Templates.
- Click New template.
- In the Template name field, enter
Test template. - Click Create.
Adding Phases and Tasks
In a template, phases are represented as columns, and tasks are represented as boxes within each column. In a running release, phases are executed from left to right, and tasks are executed from top to bottom.
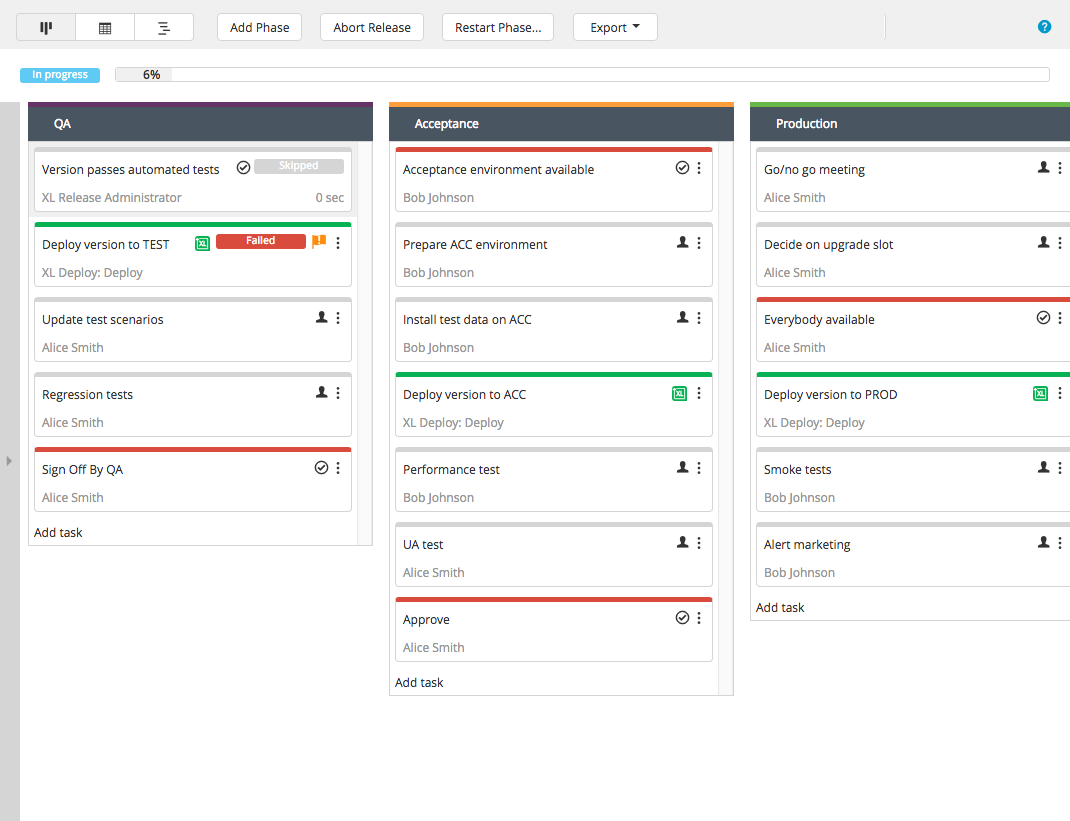
Add a new phase and populate it with tasks:
- Click Add Phase.
- In the phase header, click New Phase, and enter a name for the phase.
- Hover-over the right side of the phase header, click
, and select a color from the dropdown.
- In the phases body, click Add task.
- In the Task title field, enter a name for the task.
This tutorial uses a manual task type. For more information on task types, see Types of tasks in Release.Task types can be changed at any point before a release starts. For more information, see Change a task type.
- Repeat steps 4 and 5 to add more tasks until you have 4 tasks that span more than one phase.
Understanding Release Editor View States
Four views states are available in the Release editor. This section will help you to get familiar with them.
Flow View
The Flow view shows the phases and tasks in a release. Use this view to add, move, edit, and delete items.

To open the Flow view, from top of the Release flow editor, click on .
Table View
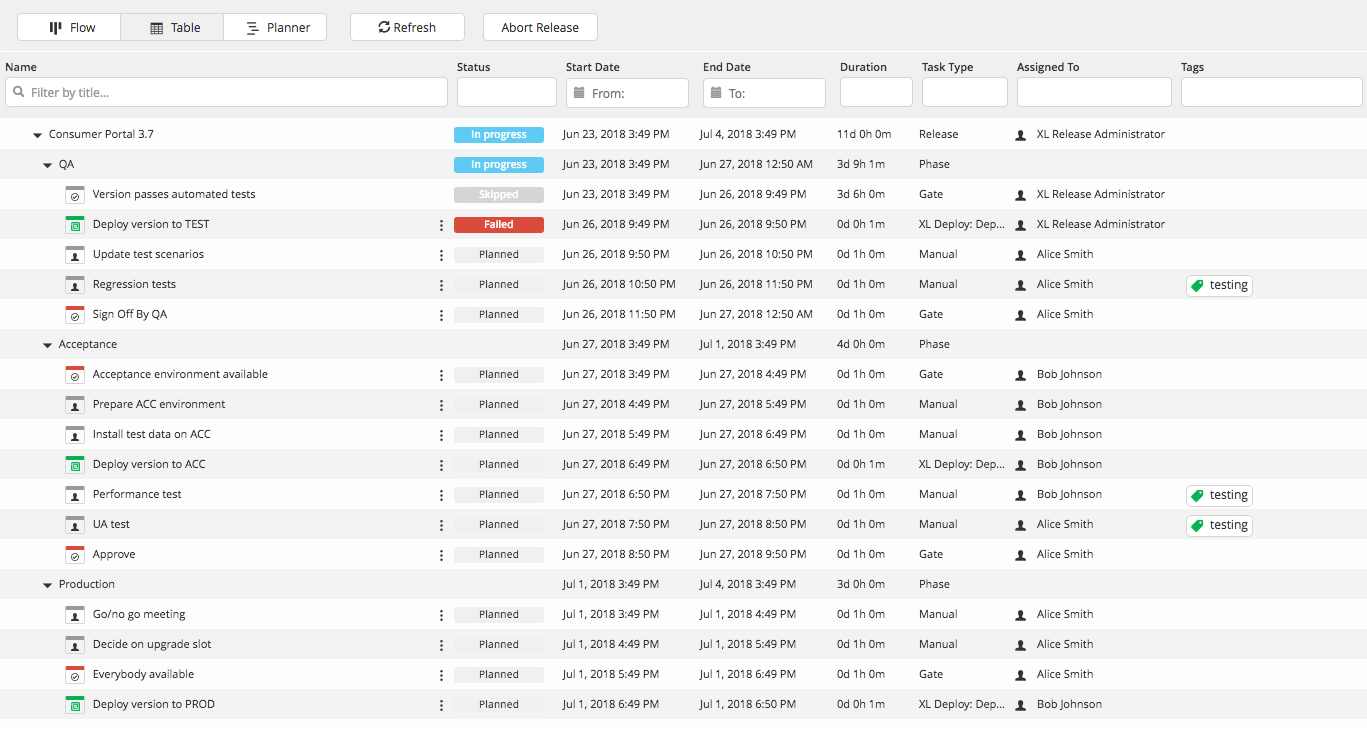
The Release table view provides an alternative view of a template or release that is optimized for working with tasks. For more information, see Using the table view.
To open the Table view, click .
Planner View
The Release planner view is an interactive Gantt chart that is used to view and edit the timing of the phases and tasks in a release or template. For more information, see Using the release planner.
To open the Planner view, click .

Releasefile View
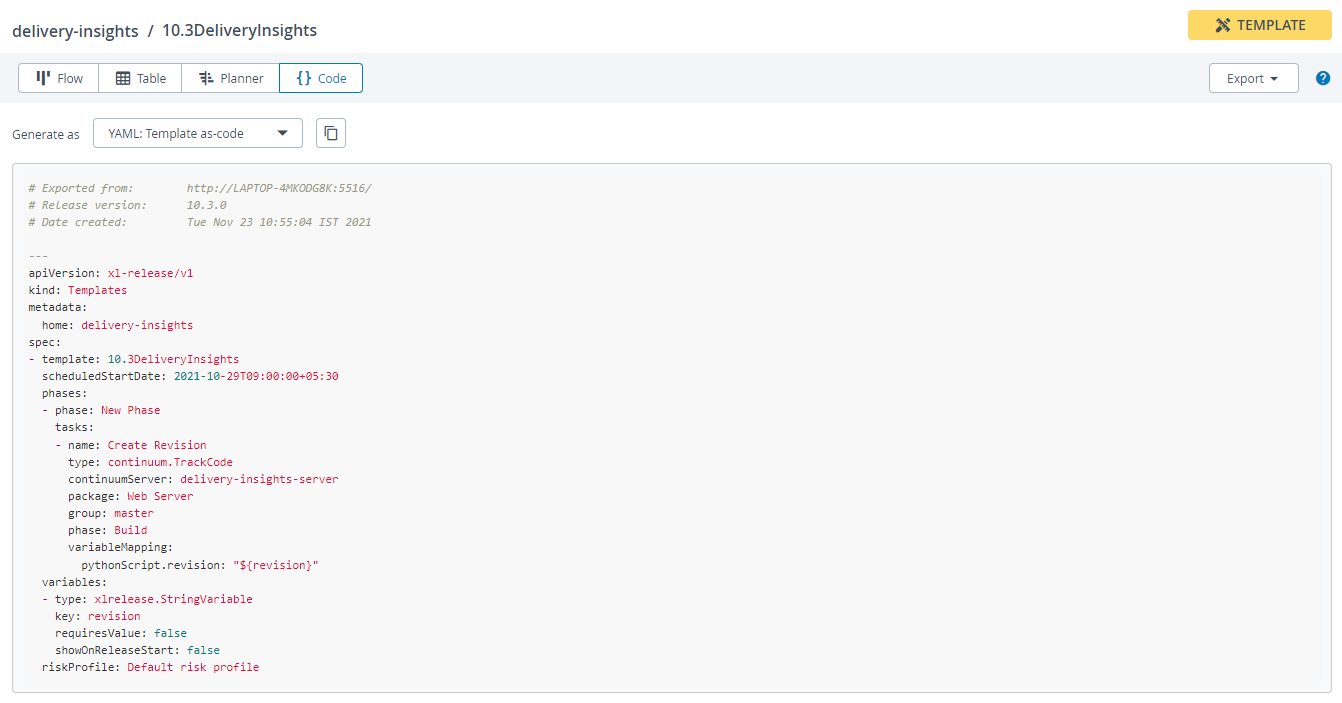
This view is available only for templates. The Releasefile view provides the current template in a releasefile format, it can also be exported from here. For more information, see Using the Releasefile view.
To open the Releasefile view, click .
Performing a Dry Run
This procedure is a continuation from Add phases and tasks. To perform a dry run of a release:
- Click New release.
- In the Release name field, enter a release name.
- Click Create to create the release. The release is now in the Planned state.
- Click Start Release.
- Confirm that you are ready to start by clicking Start.
- Click the first task in the first phase.
- From the pop-up window, click Complete.
- Click OK.
- Select Release dashboard from the left navigation pane. This dashboard provides an overview and data on a release. For more information, see Using the release dashboard.
- Select Release flow from the left navigation bar.
- Click the next task.
- Skip the task by clicking Skip. When you skip a task, you must enter a comment to proceed with the release.
- Enter a comment and click OK.
- Click the next task.
- Click Fail. When you fail a task, you must enter a comment to proceed with the release.
- Click OK. A failed task puts the release into a Failed state. You can resume the release by either restarting or skipping the failed task.
- Skip the failed task, by clicking the task, and then clicking Skip.
- Continue to complete all tasks until the release is completed.
Setting up Security
In Digital.ai Release, there are two types of users:
- Internal users: This type of user is managed by Digital.ai Release and can be added and removed by a Release Administrator.
- External users: This type of user is maintained in an LDAP repository such as Active Directory.
Creating Internal User Accounts
- From the top-right corner, click Settings > Users and Permissions. The users page is displayed.
- Click New user.
- In the Username field, enter a username.
- In the Email field, enter an email address.
- In the Password field, enter a password.
Take note of these credentials, you will need them later in this tutorial.
- Click Save.
Creating Roles
Release uses a role-based security system. You assign each user a role, and then assign global permissions to the role.
- From the top-right corner, click Settings > Users and Permissions.
- From the navigation pane, under Users and Permissions group, click Roles.
- Click New role.
- In the Role name field, enter
Administrators. - In the Principals field, enter the user account name that you created in Create an internal user account section.
- Click Save.
For more information on how to configure roles, see Configure roles.
Assigning Permissions to Roles
Perform the following steps to assign global permissions:
- From the top-right corner, click Settings > Users and Permissions.
- From the navigation pane, under Users and Permissions group, click Permissions.
- Under the Roles column beside the Admin action, enter
Administrators.
On this screen, actions represent permissions.
- Repeat the above step for the Edit security, Create template, Create release, and View reports actions.
- Add
Administratorsto the Role column. - Click Save.
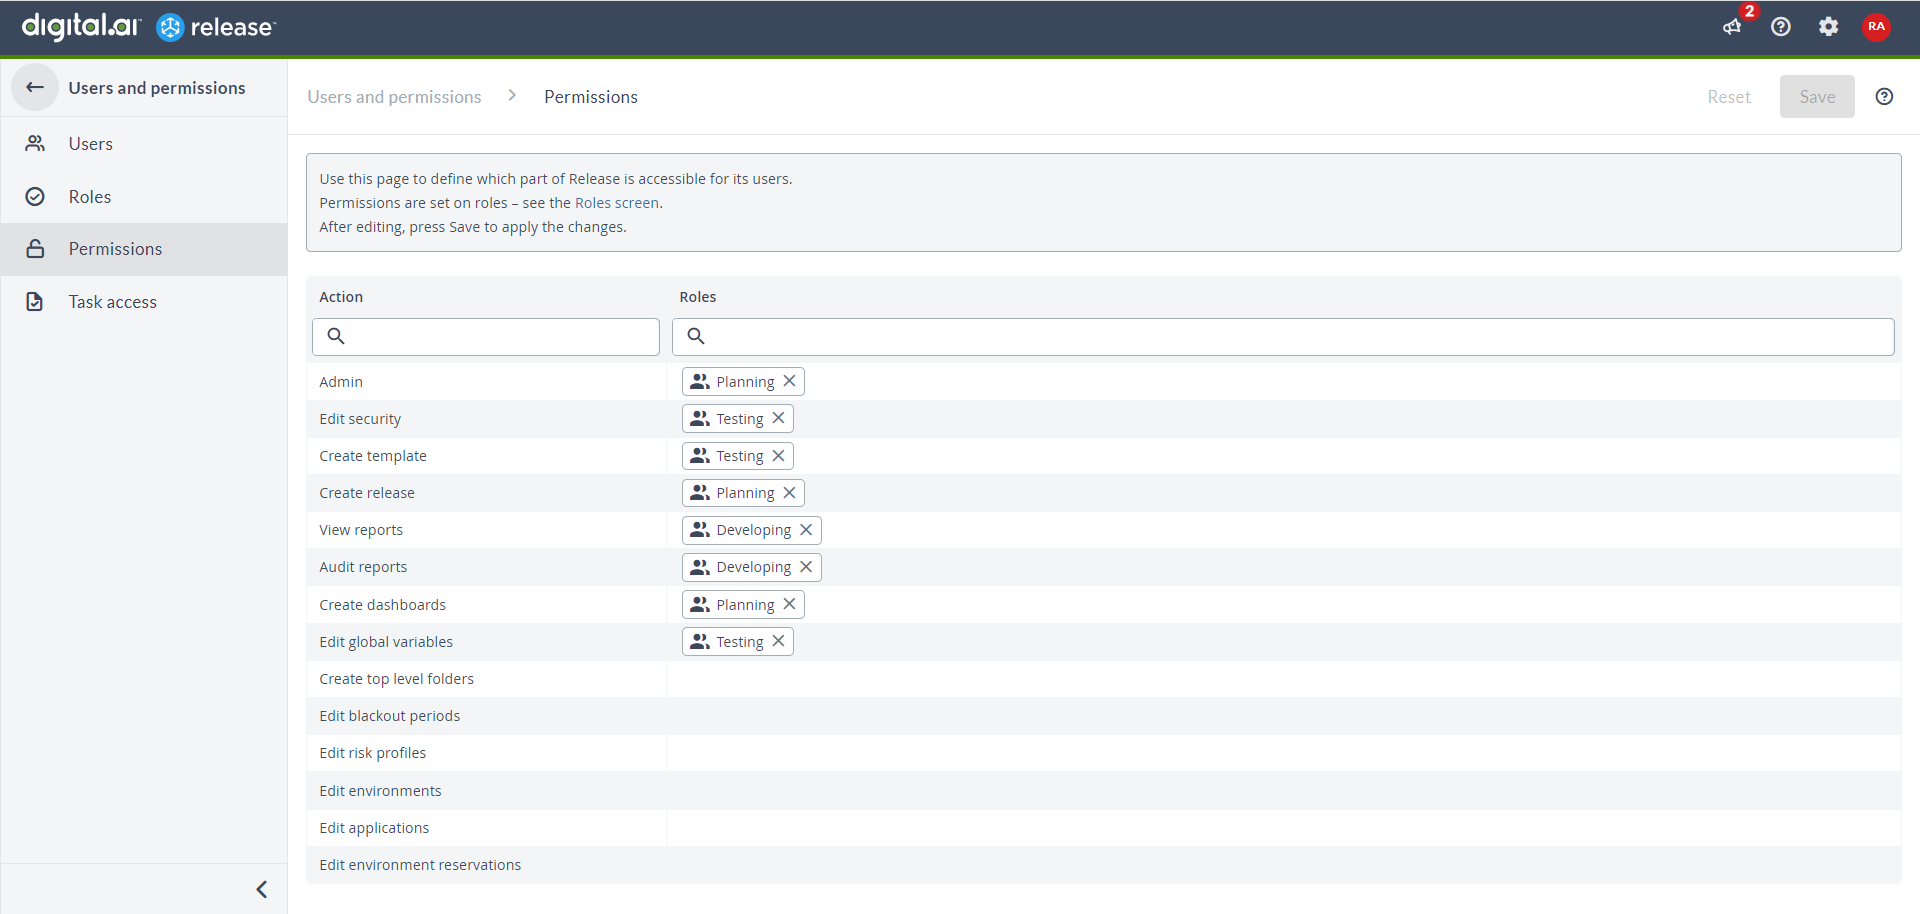
Check that the role has been assigned permissions:
- From the top-right corner, click
.
- Click Log out.
- Log in using the username and password that you created in the Creating an internal user account section.
- From the navigation pane, click User management.
- Click Permissions.
- Check that the actions and permissions are assigned as described in the above image.
For more information on global privileges, see Configure permissions.
Configuring Team on your Templates
In addition to global security, each template and release has its own permissions that you can assign to teams. A team is made up of roles and/or individual users.
To add a team to a template:
-
From the navigation pane, click Templates under Configuration group.
-
Click Test template, which is the template you created in Model a release pipeline.
-
From the navigation pane, select Teams & Permissions. By default, there are two teams on a template: the Release Admin, and the Template Owner team.
-
In the Teams section, in the Release Admin row, add
Administratorsunder the Users column. -
In the Template Owner row, add
Administratorsunder the Users column.A release template has two permissions types, template-level - which relates to a template and, Release-level - which relates to a release.
-
In the Template permissions section, assign the actions and teams as follows:
- Template permissions
- Template Owner: Create Release, View Template, Edit Template, Edit security
- Release Admin: View Template
- Release permissions
- Template Owner: None
- Release Admin: View Release, Edit Release, Edit Security, Start Release, Abort Release, Edit Task, Reassign Task
For more information on:
- Template-level permissions, see Template security.
- Release-level permissions, see Configure release teams and permissions.
Check out Reports
Digital.ai Release has a variety of built-in reports that helps you analyze your level of release automation and identify bottlenecks in your release processes.
To view reports:
- From the navigation pane, under Reports group, click Dashboards.
Next steps
After you have gone through some of the basics of Digital.ai Release, you can:
- Configure an SMTP server so that Digital.ai Release can send email notifications to users.
- Connect to your Deploy server so you can execute deployments as part of your release pipelines.
- Get external users from your LDAP solution.
- Create global variables that can be used in all templates and releases.
- Calendar view, which provides an overview of all the planned and running releases.