Workflow to Setup ArgoCD Application with Initial Deployment
Before You Begin
This tutorial involves working with a variety of tools and technologies such as Digital.ai Release, Argo CD, Release Runners, Kubernetes, GitHub, and so on. You can perform this task by simply following the instructions. However, being familiar with these tools and technologies can help you considerably when you try this out in your test environment.
What's the objective?
The objective is to illustrate how to use the Setup ArgoCD Application with Initial Deployment workflow in Digital.ai Release to deploy an application in Argo CD that runs in a Kubernetes cluster.
Though the Digital.ai Release supports GitHub, GitLab, and BitBucket repositories, this tutorial is built with the GitHub repository for illustrative purposes.
What do you need?
You must have the following:
- Argo CD
- A computer that runs Windows, macOS, or Linux to install and run the kubectl and other CLIs
- A Kubernetes cluster where Argo CD will be installed, and its connection established via Connections page.
- kubectl
What do you have?
A default folder called Digital.ai-official is now available in Release. It contains the downloadable workflows and templates that are published by Digital.ai in the shared content folder repository. Additionally, you can also create custom workflows like you create your templates for Releases. For more information, see Create Workflows.
Here's a detailed step-by-step.
Step 1 - Set up your Kubernetes Cluster
Note: The instructions to set up the cluster are indicative of the process. You may have to keep abreast of the latest developments with regards to the cloud platform you work with and set up the cluster to suit your requirements.
The process of setting up a Kubernetes cluster and the tools required for the same varies from one platform to the other. However, there are certain things that you must think through before setting up a Kubernetes cluster in general.
You can install Argo CD on the following Kubernetes platforms.
- Plain Multi-node Kubernetes Cluster On-premise
- Amazon EKS
- Azure AKS
- Google GKE
- OpenShift
Step 2 - Connect to your Kubernetes Server
Go to the Connections page to configure your Kubernetes server.
Step 3 - Navigate to Workflow Screen
- Open the folder in which the templates are imported.
- In the left navigation pane, click Application pipelines > Application management > Create application. The Choose Application Creation Workflow screen opens as a service catalog with the list of workflows.
- Hover over Setup ArgoCD Application with Initial Deployment workflow and click Run workflow.
Step 4 - Run the Setup ArgoCD Application with Initial Deployment Workflow
- Open the folder in which the templates are imported.
- In the left navigation pane, click Application pipelines > Application management > Create application. The Choose Application Creation Workflow screen opens as a service catalog with the list of workflows.
- Hover over Setup ArgoCD Application with Initial Deployment workflow and click Run workflow.
Step 5 - Application Input
- In the ArgoCD API server field, select an Argo CD server where the application will be deployed. Alternatively, you can also create a new connection by clicking Create new ArgoCD API Server.
- In the Git Repo field, enter the URL of the Git repository from which the application configuration will be fetched.
- In the Path field, enter the path of the directory where the Kubernetes manifest file is located.
- In the Branch field, enter the Git branch.
- In the Cluster url field, enter the URL of the Kubernetes cluster.
- Click Next.
Step 6 - Check if Application Exists
This step checks if the application with given input given in the previous step already exists on the Argo CD server. If it exists, the release will fail, and you will not be taken to the next step.
Step 7 - Namespace Input
- In the Kubernetes API server field, select a Kubernetes server where the Argo CD is installed. Alternatively, you can also create a new connection by clicking Create new Kubernetes API Server.
- In the Namespace field, enter a value. This is the namespace where the application will be deployed.
- Click Next.
Step 8 - Check if Namespace Exists
This step checks if the namespace already exists. If it exists, the next step gets skipped automatically.
Step 9 - Create namespace
If the namespace does not exist in the previous step, then this step will create a namespace.
Step 10 - Application Information Input
- In the Application name field, enter any name of the application.
- In the Project name field, enter a project name that is available in the Projects page under the Settings section of the Argo CD server.
- In the Environment tag field, enter a tag for the target environment.
- In the Managed by field, enter the value as Release.
Step 11 - Create Argo CD Application
This step deploys the Argo CD application with given information about application name, project, git repo, path and branch.
Step 12 - Get Application Status
This step checks if the application is successfully deployed and displays the current status of the application in Argo CD.
- Click Next.
- Click Finish.
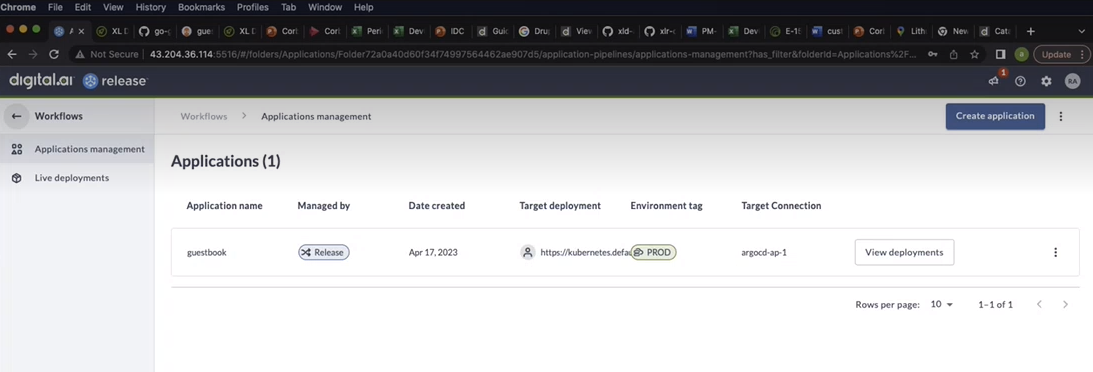
You are directed to the Applications management screen to see the Application deployed.

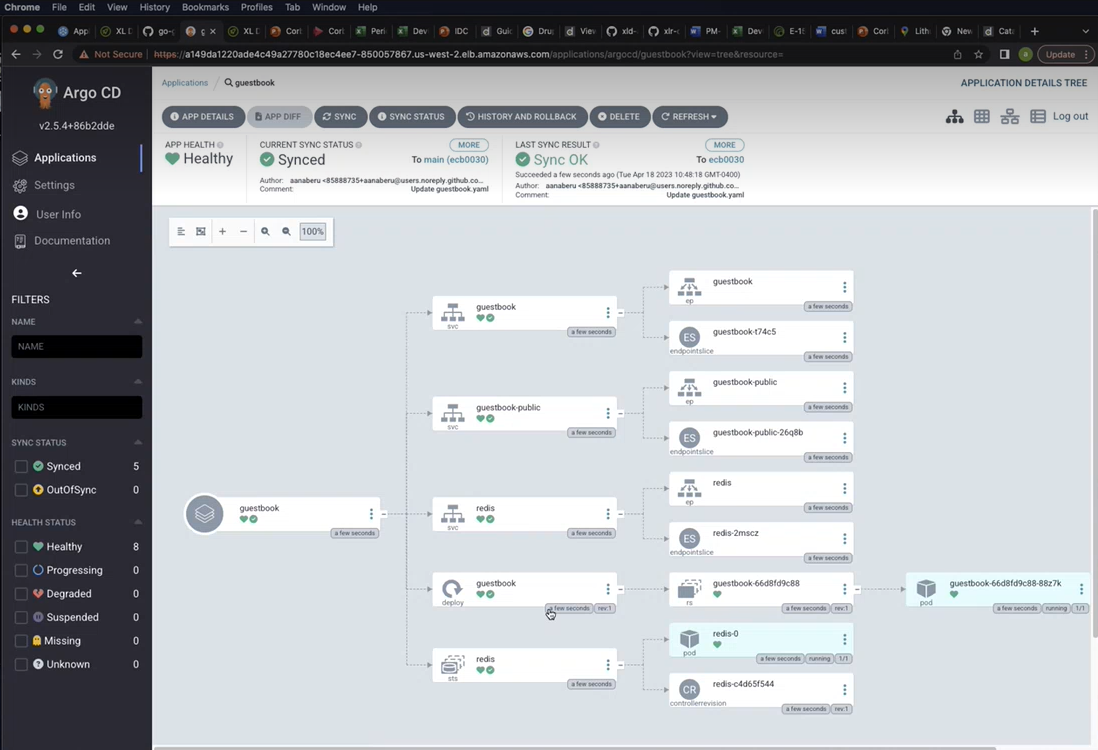
This is the view of the Application deployed in Argo CD.

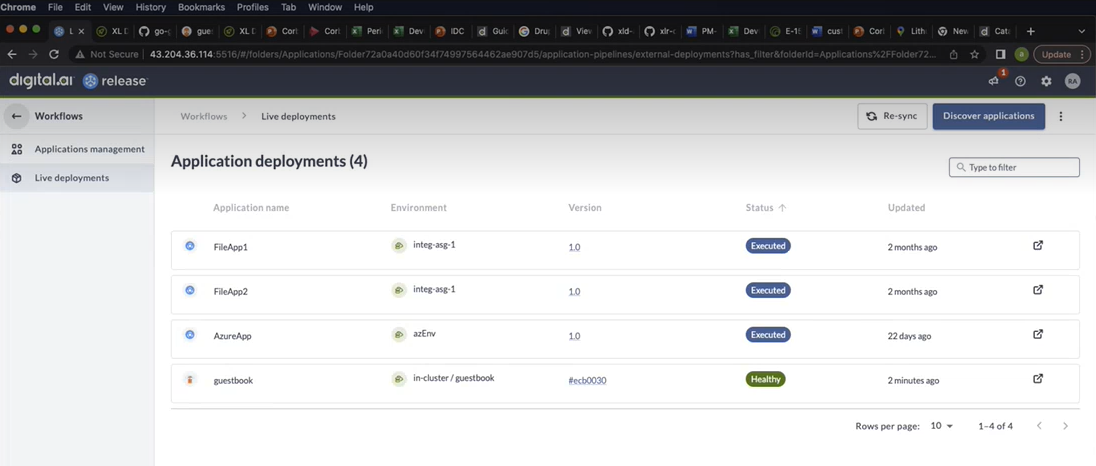
In the Live deployments screen, you can view the live status of the deployed applications.
