AS - Connecting An iOS Emulator
Please note that this tool is classified as a Legacy tool. We recommend transitioning to our updated solutions to maintain optimal performance and security in your workflows. For more information on this matter, please reach out to technical support .
In addition to working with physical devices, you can also work on simulators to create and run tests.
Prerequisites
A Mac machine with XCode 8+ is required.
Preliminary Setup
Before working with simulators in the studio, the desired simulators must be installed through XCode.
To add a new simulator:
- Open XCode.
- In the Window menu click Devices.
- Click on the + sign at the bottom of the list and then Add Simulator.
- Choose a name for your simulator and the iOS version, then click Create.
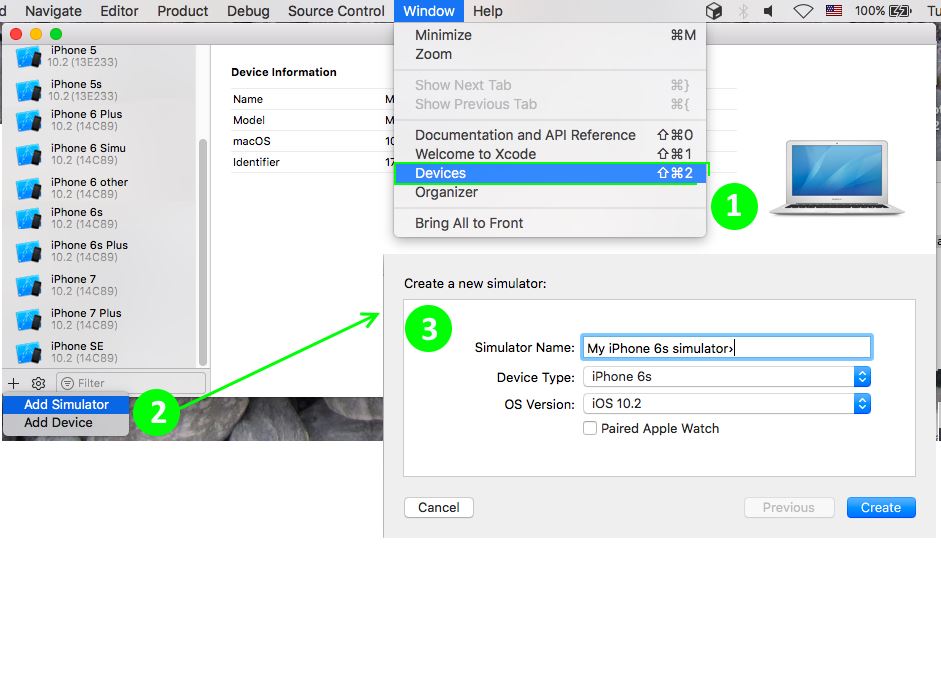
To add a new iOS version:
- From the Create a new simulator dialog, click on the OS Version box.
- Click the arrow next to the versions to download.
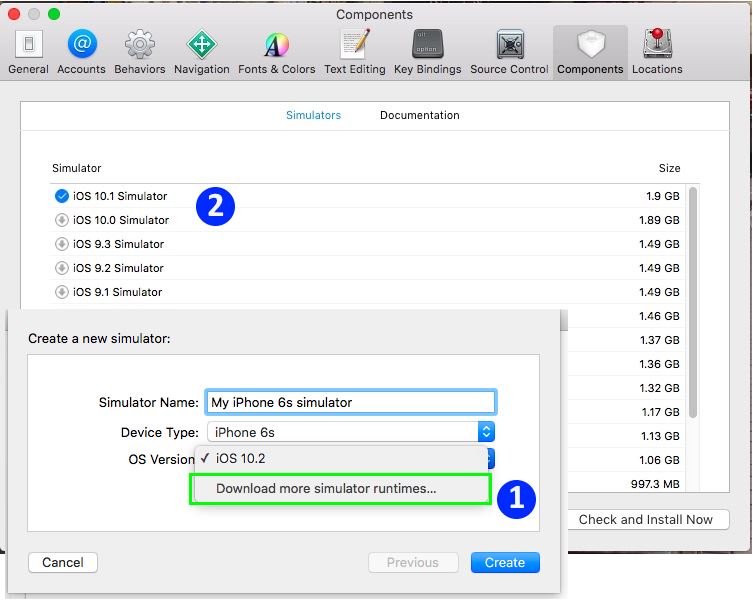
Currently, only iOS 10+ is supported by the studio. If there are simulators with lower versions installed, they will not appear in the Studio.
Add simulator in the Studio
- Open the Add Device dialog and select iOS device
- Select the checkbox 'Show Simulators'
- The supported simulators will be listed in the Simulator box (marked in the following image)
- Select a simulator from the list
- Click OK
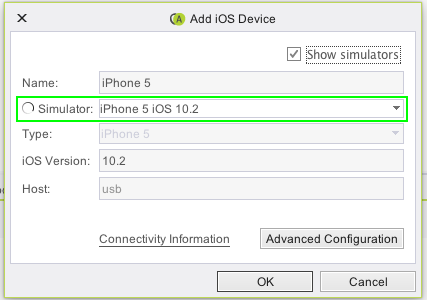
The simulator will be booted immediately. The first time a simulator is booted, boot might take up to 10 minutes, because it needs to be set up. Next boots should take about 1 minute, depending on your Mac's specifications.
Current simulator limitations
- Only a single simulator can be on 'Device manager' at a time. The Add Device dialog won't allow adding more simulators if there already is a simulator added.
- To use a different simulator, the current simulator must be deleted first from the Device Manager.
Delete simulator
Deleting a simulator from the Device Manager will shut it down. A progress bar will be displayed while the shutdown is in progress.
Simulator Applications
Building applications
iOS simulators running on your Mac run on a different architecture than physical devices. This means regular application files won't work on simulators.
To build your applications for simulators:
-
Open the application project in XCode.
-
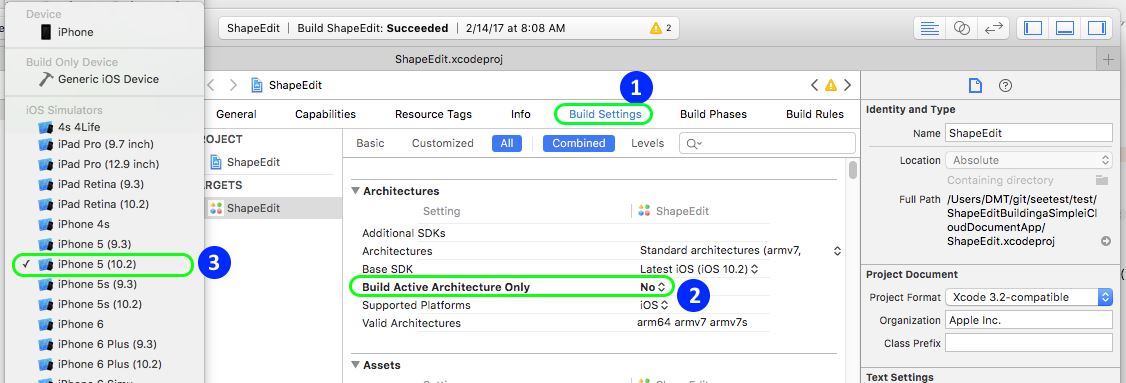
Click the root file.
-
Select a build Target.
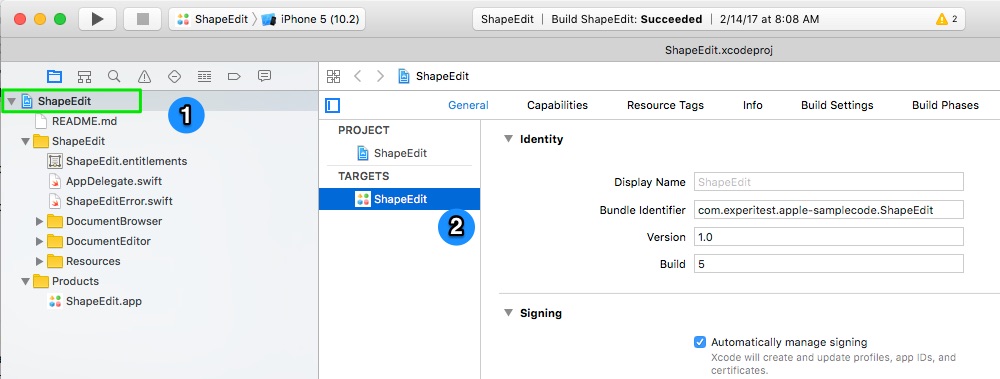
-
Click Build Settings.
-
Under Architectures, select No in Build Active Architectures Only.
-
Select a simulator from the devices list.
-
Click Product → Build.
-
Take the output file (.app) from the Products folder.
-
Right-click the application under Products and click Show in Finder.
This .app file can be used for installation on simulators in the studio.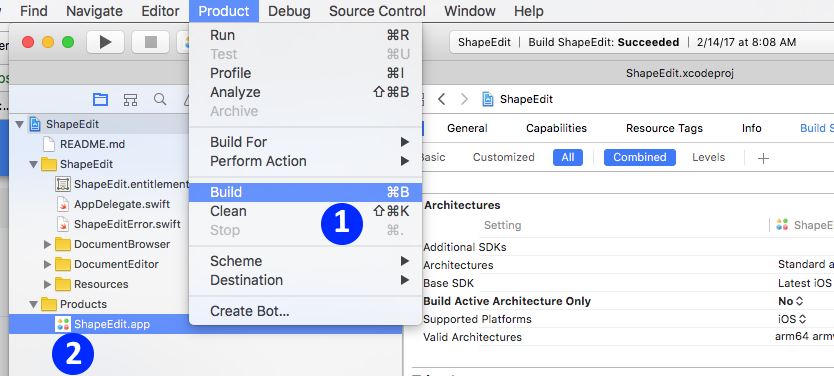
Import Application to Studio
Click Import from the application manager and select the .app application file.
Instrumentation is not supported. Web testing on Safari is not supported.