Acceptance Tests
Acceptance tests define acceptance criteria and verify that completed work items function as specified.
In Digital.ai Agility, the terms tests and acceptance tests are used interchangeably. Tests that become part of the regression suite are called Regression Tests.
Overview
An Acceptance Test (also simply called a "test") is a system asset (typically created during the Product Planning phase) that defines acceptance criteria and behavior of a completed workitem.
Tests can be added to any of the following items: backlog items, defects, portfolio items, test sets, backlog item templates, and defect templates.
Tests can be tracked in any of the following ways:
- by Status to view the current status of the test
- by Time (or remaining effort estimates) directly against the tests themselves or against tasks
- by Results from test execution so a history of all test runs is built
In Agile methodologies, a user story or backlog item is not considered complete until it has passed all acceptance tests. The product owner captures acceptance criteria for a backlog item at different times. Generally, acceptance criteria should be captured as soon as it is known. When creating backlog items, the product owner may create tests to provide more context for the team as it estimates the backlog item. During sprint planning, the product owner usually discovers and articulates additional acceptance criteria for the backlog item, so additional tests should be added. Finally, as the team implements the backlog item, it may encounter areas of ambiguity that should be clarified with the product owner and potentially recorded as tests.
Once a backlog item is completed and delivered, it should be evaluated to determine which (if any) tests should be added to the Regression Test inventory for use in future regression testing activities. Use the Generate Regression Test action to create a new Regression Test from any of the Acceptance Tests for the backlog item.
Some teams prefer to capture the work required to perform a test within the test instead of creating a separate task. This reduces the number of tasks and tests required for each backlog item, while still recording how much time the team expects a test to require.
Using tests solely for capturing acceptance can also be a good approach. Teams can then create tasks for the type of testing they are doing. A single acceptance test could have multiple testing tasks. A common example is a task for automating an acceptance test and a task for doing exploratory testing around the acceptance test.
Access Acceptance Tests
You can access acceptance tests in two ways:
- Click on a story title or ID anywhere in the system to open the Details page
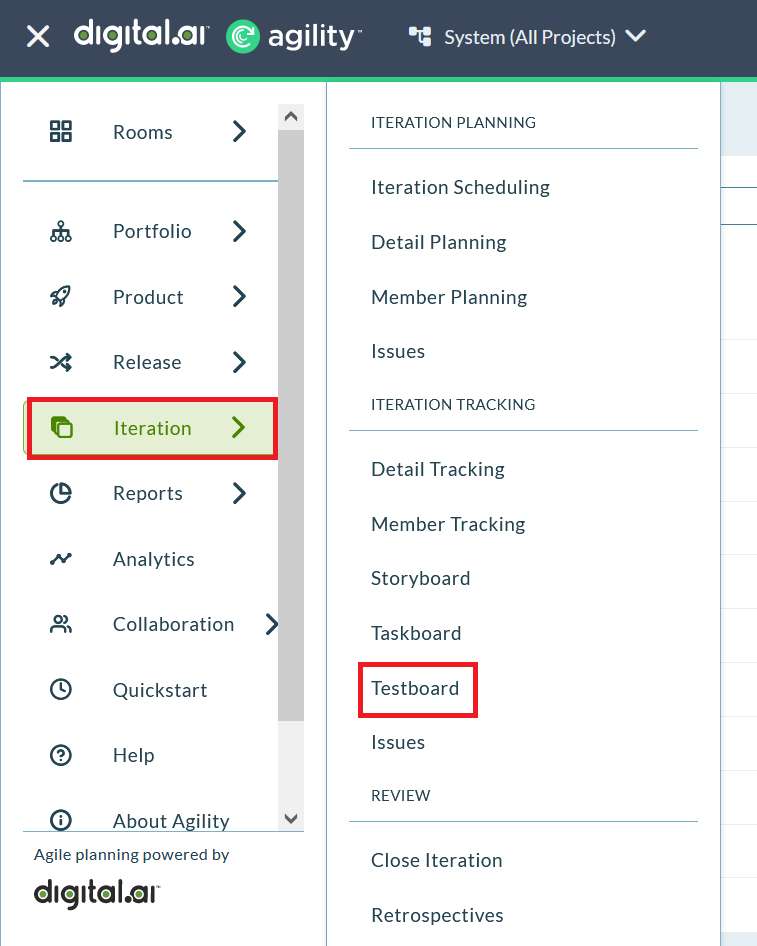
- Click the hamburger menu
 > Sprint (or Iteration) > Testboard
Create Acceptance Tests
Acceptance Tests define the acceptance criteria for the completed item. You can add a test to any of the following items: backlog items, defects, portfolio items, test sets, backlog item templates, and defect templates.
- If the Add Test option is grayed out, check your project role to ensure that your access level allows you to create or edit tests
- Test details can include categories, specific test steps and expected results, and test status
Option 1: In a Grid
- Locate the item to which you want to add the test.
- Select Add Test from the Edit drop-down menu.
- Fill in the test information and click Save.
Option 2: From the Asset Details Page
- Anywhere within the system, click on the title or ID of an asset.
- When the asset details page opens, select Add Test from the Edit drop-down tab.
- Fill in the test information and click Save.
Option 3: In the Relationships Section
- Anywhere within the system, click on the title or ID of an asset.
- When the asset details page opens, click on the Details tab, and click the Show Relationships button at the bottom of the page.
- Click the Add button to the right of Tests and enter the required information.
- Fill in the test information and click Save.
View Acceptance Test Details
The Acceptance Test Details page allows you to view and update all details pertaining to an acceptance test. Here, you can manage all the attributes of acceptance tests and their associated links and attachments.
To view test details:
- Anywhere within the system, click on a story title or ID.
- In the Show Relationships section, go to Tests, and click on the title or ID of the test for which you want to view or update details.
Manage Acceptance Test Details
From the Acceptance Test Details page you can perform the following high-level functions using the tabs at the top right of the grid:
| If you want to... | Do this... |
|---|---|
| View test details | Click the Details tab. |
| View the change history for a test | Click the History tab. |
| Edit test details | Click the Edit tab to open the Acceptance Test Edit window where you can update all test attributes. You can also open this drop-down menu to perform more granular functions (Copy, Sign Me Up, Generate Regression Test, Quick Close, Close, Delete, and Watch Test). |
View or Manage Relationships��
From the Show Relationships section at the bottom of the Task Details page, you can add and update links and attachments for the selected test.
| If you want to... | Do this... |
|---|---|
| Add a new link to remote documentation | Go to Links and click Add. |
| Add a new file attachment | Go to Attachments and click Add. |
Edit Acceptance Test Details
To edit a test:
- Anywhere within the system, click on a backlog item title or ID.
- On the Story Details page, click on the Tests link at the top of the page, scroll to the Tests grid, and then click the Edit button next to the test you want to change.
- Modify the test details as needed, and then click Save.
Manage Acceptance Tests
Change Status
- Anywhere within the system, click on a story title or ID.
- On the Story Details page, click on the Tests link at the top of the page, scroll to the Tests grid, and click the Edit button next to the test you want to change.
- Select a status from the Status drop-down list and click Save.
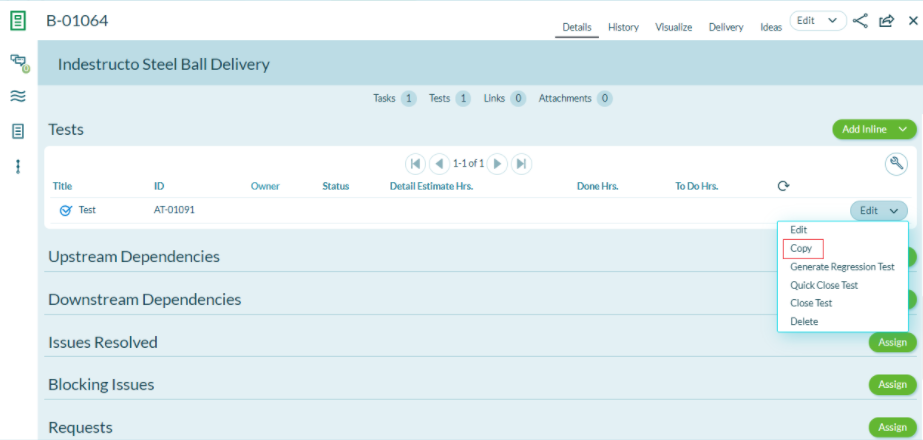
Copy Test
To make a duplicate copy of an existing acceptance test:
- Anywhere in the system, click on a test title or ID.
- On the test details page, select Copy from the Edit menu. A duplicate copy is created, and you can now edit as necessary.
Close Test
Closing a test after it has been completed and approved removes it from the default tracking pages and indicates that the work is complete.
- Anywhere within the system, click on a backlog item title or ID.
- On the Story Details page, click on the Tests link at the top of the page, scroll to the Tests grid, and select Quick Close Test or Close Test from the Edit menu next to the test you want to close.
Delete Test
- Anywhere within the system, click on a backlog item title or ID.
- On the Story Details page, click on the Tests link at the top of the page, and select Delete from the Edit menu next to the test you want to delete.
Track Acceptance Tests
- To track the status of a test that you own, click the hamburger menu > Rooms > My Room > My Dashboard
- To track the status of tests owned by other team members, click the hamburger menu > Sprint > Testboard
Report on Acceptance Tests
The following reports show testing and quality data:
- Defect Priority Trend Report
- Defect Resolution Trend Report
- Defect Status Trend Report
- Issue Trend Report
- Quicklist Reports
- Test Runs Report
- Test Trend Report
FAQ
Can I use a template to populate the description field in failed tests?
Question: It would be very helpful if we could use a template in the description field for all failed tests so our testers can reduce the amount of copying and pasting. Is this possible?
Answer: No. Digital.ai Agility does not have the capability to add templates to failed tests.
Alternative approach: For acceptance tests, you can create a template using an existing story or backlog item that contains the tests you want to copy, and then assign one test (or even multiple tests) to multiple stories. You can create an overall test template with this info in it, and then add the tests to the backlog items.