Clone a Tracker Artifact
You can now clone an artifact from one tracker to another within the project or across projects. For system defined mandatory fields, artifact data are copied from the source tracker to the target tracker as long as the fields are available on both the source and target trackers. Values for any conflicting fields are set to "None" otherwise.
-
Click My Workspace and select a project.
-
Select Project Home > Trackers and select the tracker that contains the artifact to be cloned.
-
Open the tracker you want to clone. The View Artifact page appears.
-
Click Clone (
).

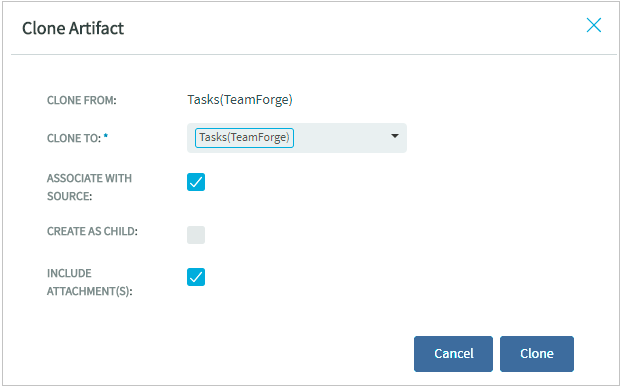
The Clone Artifact dialog box appears.
-
Select the Associate With Source Artifact check box (selected by default) to create an association with the source artifact.
-
Select the Include Attachments check box to include attachments from the source artifact.
-
Select the Create as child check box to make the artifact being cloned as the child of the source or the original artifact from which it is being cloned.
-
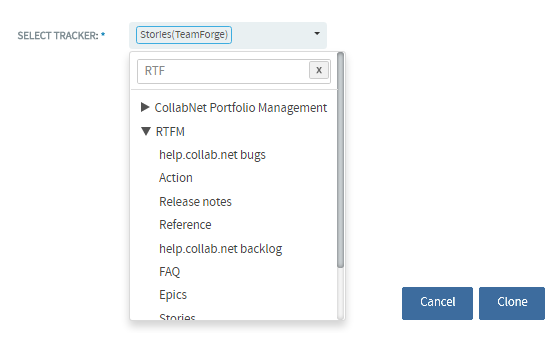
Click Select Tracker drop-down list and select the target tracker. You can either select a tracker from within the project in context or search and select a tracker from a different project. Use the Search Projects text box to find the project that has the target tracker and select the tracker.
Selecting a project from within the same project
Selecting a cross project tracker where you want to clone the artifact

-
Click Clone. The View Artifact page appears. For system defined mandatory fields, artifact data are copied from the source tracker to the target trackers as long as the fields are available on both the source and target trackers. Values for any conflicting fields are set to "None" otherwise.
-
Update the fields, if required, and click Save or Save and Close. The artifact is cloned and saved in the target tracker.